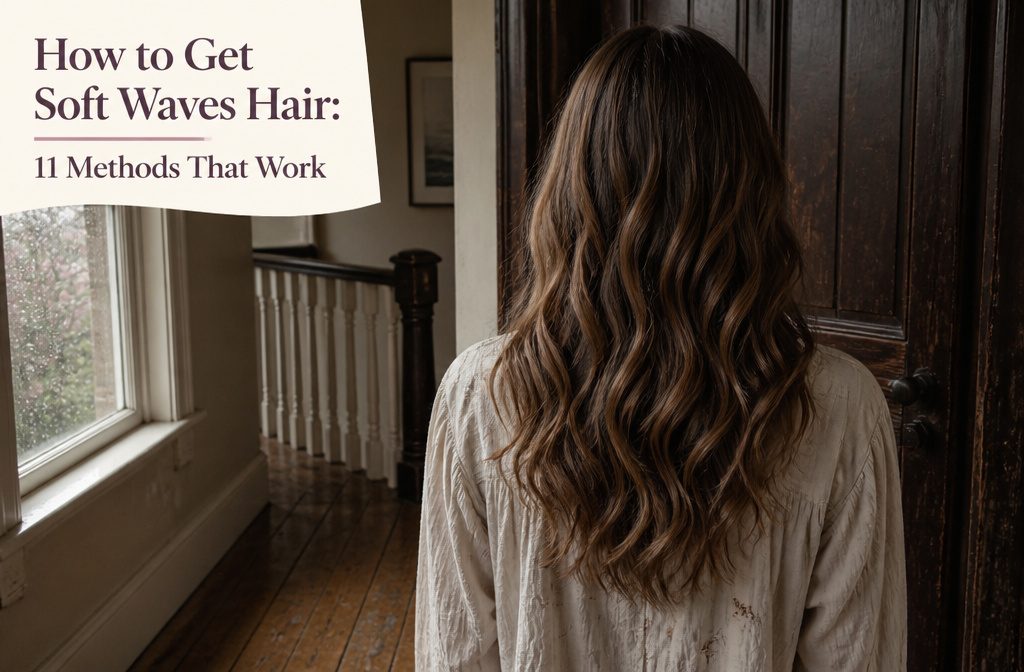
Soft waves hair is hair styled into loose, gentle bends rather than tight curls or spirals.
The difference between a wave that holds and one that falls flat by lunch comes down to how you set it: clipping each curl against your scalp while it cools locks the shape in, but brushing too early, while the hair is still warm, leaves you with nothing by afternoon.
Barrel size follows length, so a 1-inch iron suits short hair, a 1.25-inch wand fits medium lengths, and long hair needs a 1.5-inch wand to keep the wave soft instead of stretched flat.
Why I Start With Damp Hair the Night Before
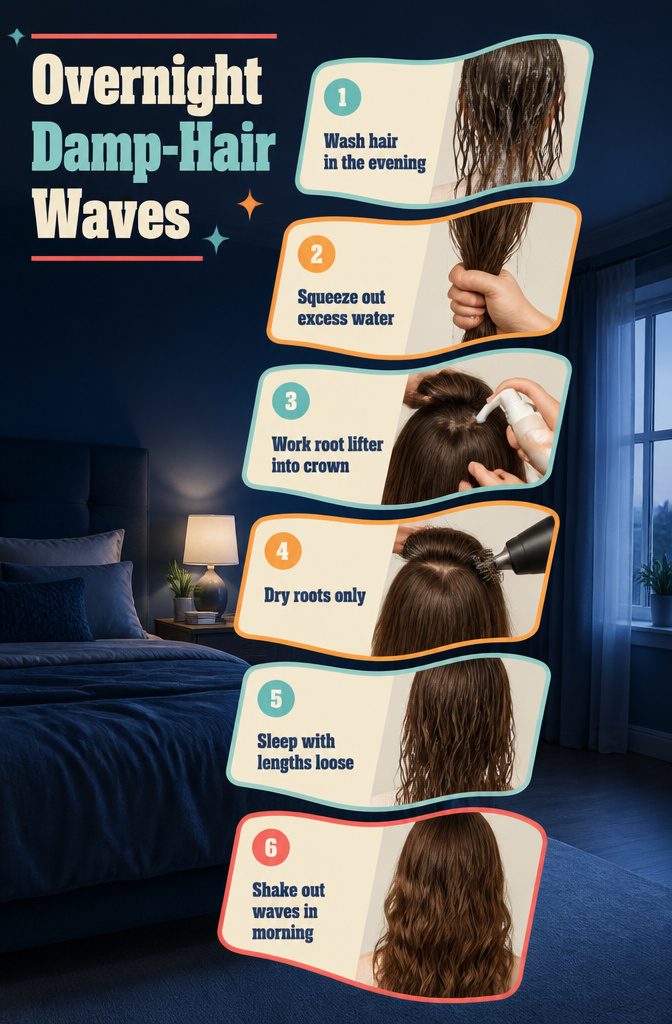
Hair that dries on its own overnight sets into its natural bend, and that bend is most of what soft waves need.
Wash in the evening, squeeze out the excess water, and work root lifter into the crown, where flat hair shows first.
Then dry only the roots, lifting each section up and away from the scalp with the dryer, and stop once the base is dry. The lengths stay damp.
From there, I’d leave the rest alone and go to bed with your hair loose.
A tight elastic leaves a dent that no amount of finger-combing hides. By morning the roots hold their lift and the lengths have a loose bend, so a shake and a few fingers through it finish the job in minutes.
Traditional Curling Iron
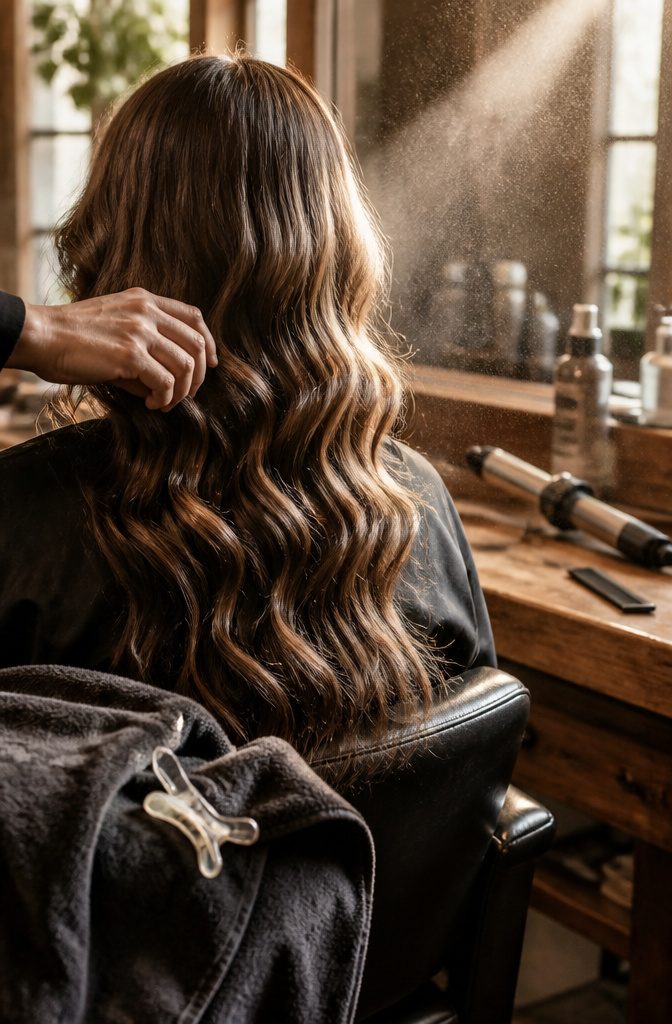
A traditional clamp iron beats a wand for soft waves because it keeps each section under your control.
Take 2–3 inches of hair at a time, since the more hair in each piece, the looser the wave. Start at the front, curl the first piece away from your face, then work toward the back.
Hold each section for 3–4 seconds, because you want a bend, not a curl. While the hair is wrapped, I slide the iron up and down about 1/4 inch so no hard line forms where the heat stops.
Leave the last few inches of the ends straight, shake the waves out with your fingers, and finish with texture spray and a light hairspray.
Flat Iron
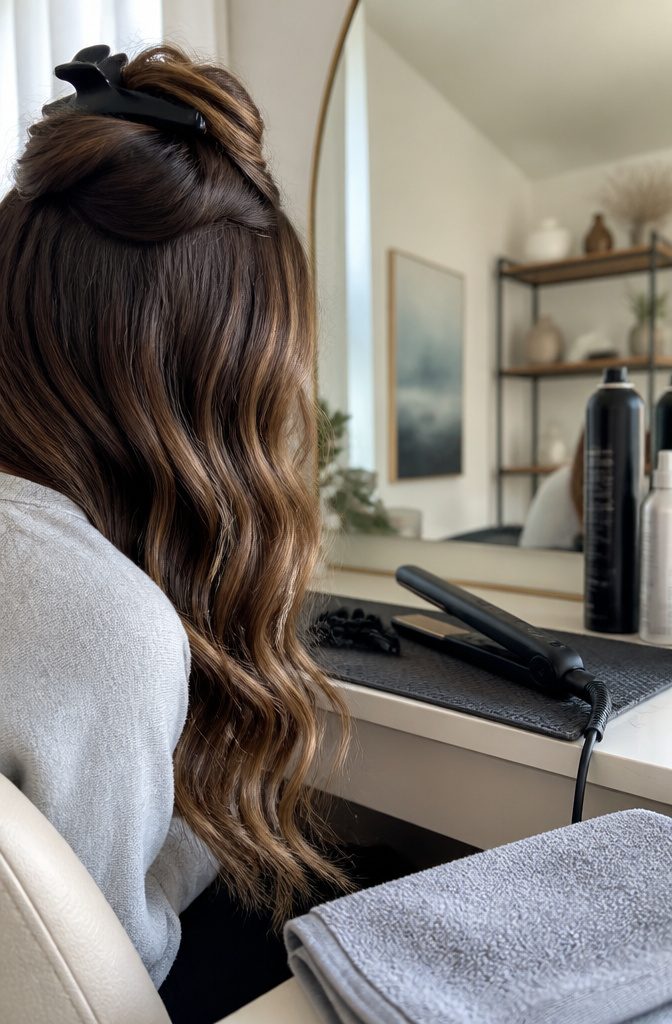
A flat iron gives sleeker, less messy waves than a curling iron, and it works on clean hair or on second- and third-day hair. Clip up the top half and start with the bottom layer.
Clamp a section about halfway down, turn the iron outward, and drag it toward the ends. On the next section, turn the iron inward, then keep alternating through the rest of your hair so neighboring waves don’t clump together.
I like this method because it only needs a straightener you probably already own. If the waves fall flat, tease them lightly, then mist with a dry texture spray and finish with a light-hold hairspray.
Braids
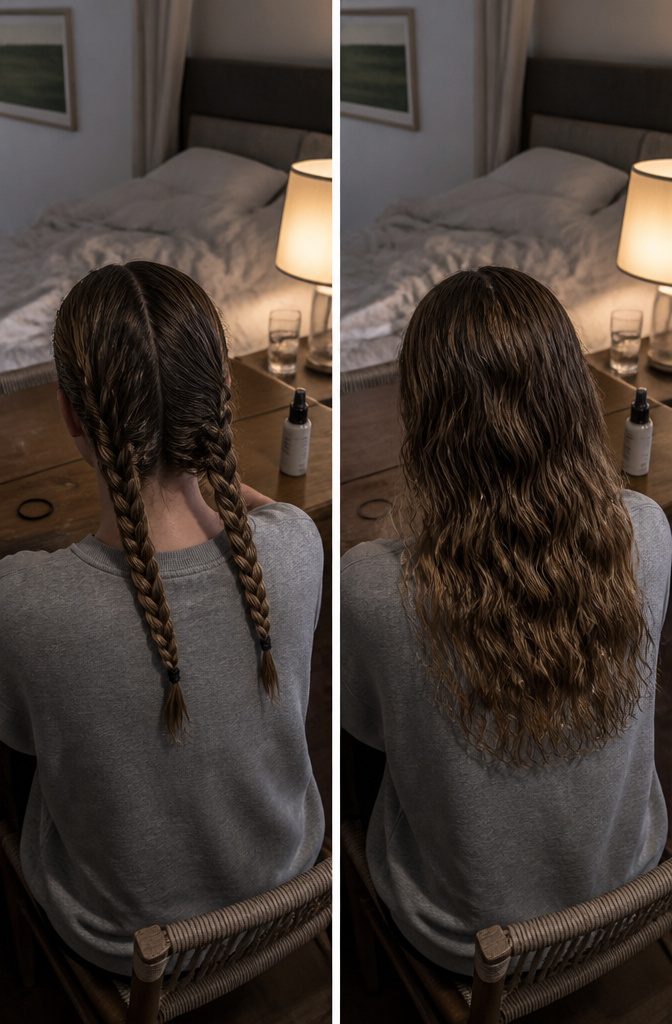
Braid type decides where the wave begins.
A French braid starts the bend near your hairline, while regular braids push the waves lower down and leave the top flatter. For a soft, lived-in finish, I prefer regular braids.
Wet braids give the most definition.
Work a little mousse through damp hair, braid it, and sleep on it, since wet braids can take several hours to air-dry. For looser, more natural waves, braid dry hair and mist the braids with hairspray.
Two braids suit thin hair, and four suit thicker hair. Once the hair is dry, undo the braids, finger comb the waves apart, and finish with a lightweight hairspray.
Bun
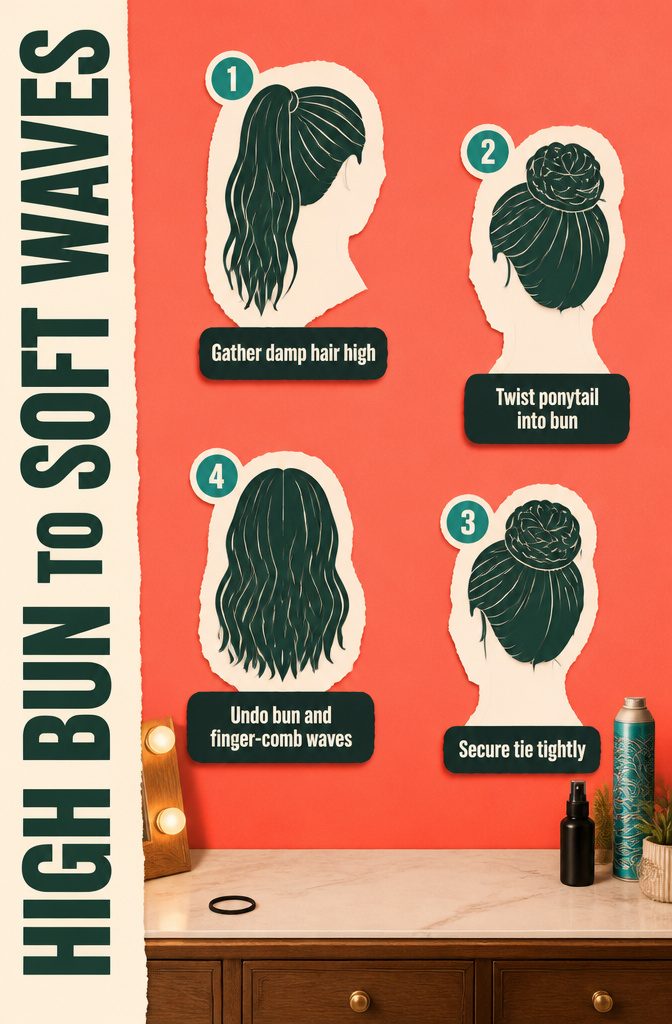
Wet hair twisted into a high bun dries into soft waves, but only if you have the length for it. On shorter hair, I’d expect one annoying bump rather than waves.
Pull damp hair into a high ponytail, hold it in place with your hand, and twist the loose hair into a ballerina bun. Secure it with a hair tie pulled as tight as it will go.
In the morning, undo the bun and finger-comb the waves.
A spritz of texturizing spray and dry shampoo, such as Bumble and Bumble Surf Spray and Batiste, gives a tousled finish. If a few sections still look flat, run a curling wand through them.
Second-Day Curls
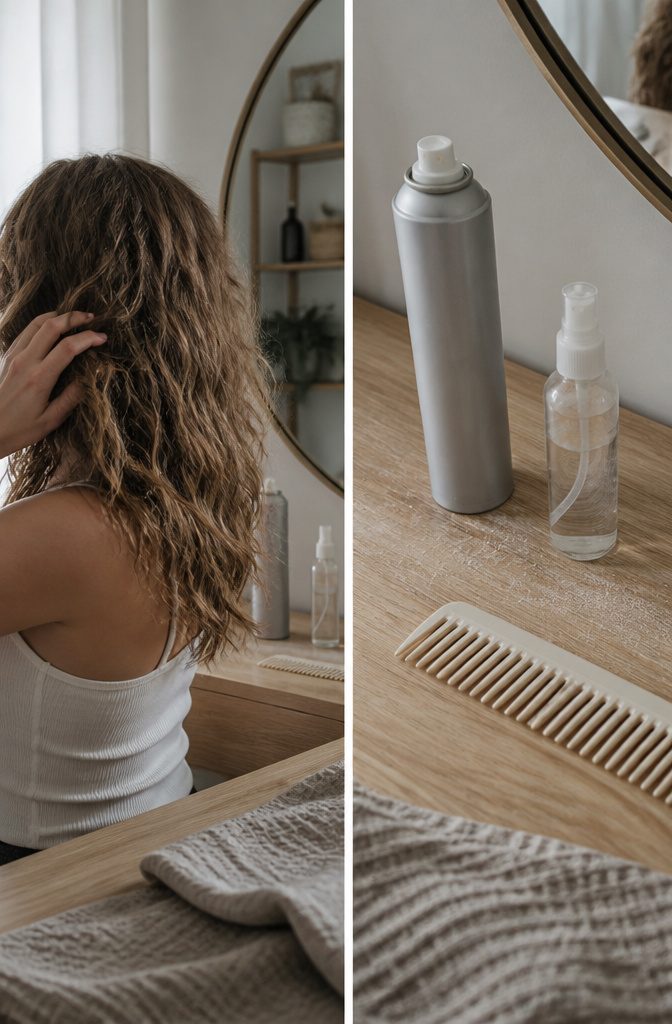
Tighter curls from the day before turn into soft waves if you leave them alone overnight.
In the morning, wet your hands and finger-comb through the hair to loosen the shape and work out tangles. Even if it looks unruly at first, second-day hair is easy to tame.
Dry shampoo comes next, and it matters most if your hair runs oily; Batiste is a common pick. Texture spray follows, and Kenra’s is the one I’d reach for.
If you need a comb, a wide-tooth one loses less hair than a brush. Strands that fell flat overnight get a quick re-curl, just those pieces and not the whole head.
Pearl Wand
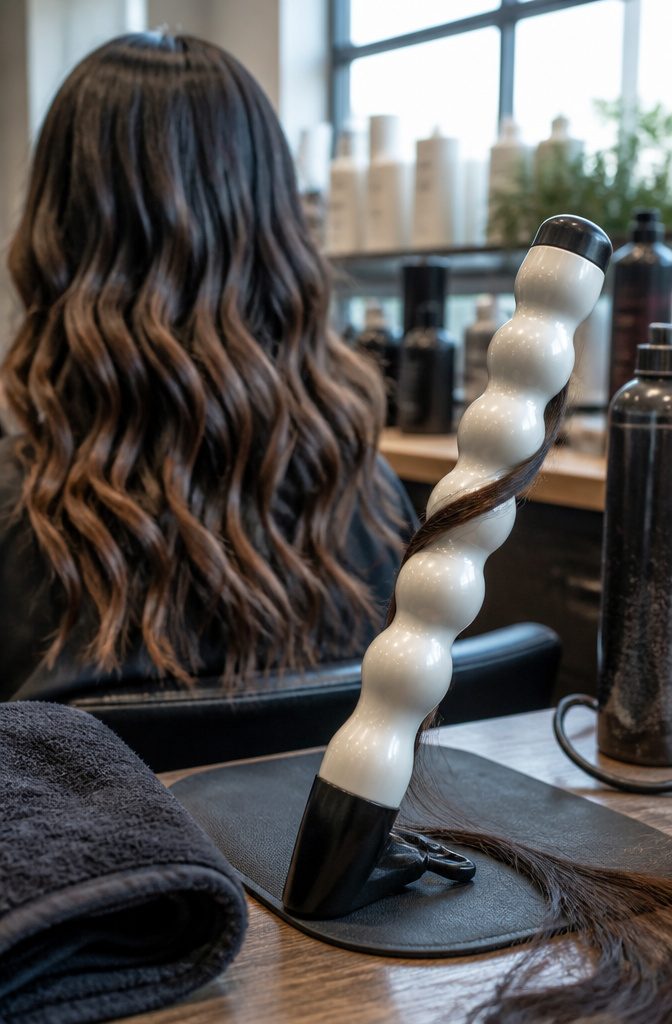
A regular wand pulls every section into the same tidy spiral. The pearl wand has a row of rounded divets, so hair slips into the grooves unevenly: some strands sit deep, others ride the ridges.
That irregularity gives a natural wave instead of a set curl, and it’s why I pick it over a smooth barrel for soft waves hair.
Wrap the hair outward around the wand, the same motion you’d use with any curling wand. For a more undone finish, leave a few inches straight at the bottom.
Close with a texture spray or a light hairspray. IGK Beach Club Texture Spray and Sebastian Shaper Zero Gravity Hairspray both suit this, and the NuMe Pearl Wand is where I’d start.
Hair Extensions
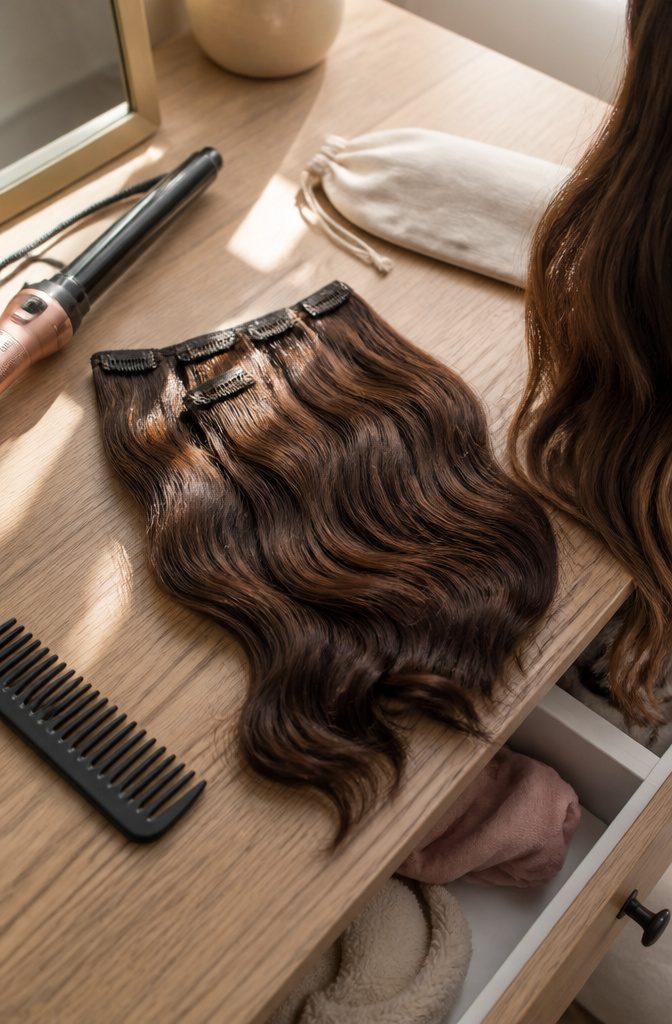
Clip-in extensions fix the hit-or-miss nature of soft waves, because you only have to get the curl right once.
Start with clean extensions and curl them with your wand. The waves should still be intact on the second, third and fourth wear, so a good set pays off repeatedly.
On the day you want them, clip them in and run a few curls through your own hair to blend the two textures. That blending step is about all the styling left.
I’d keep product light.
Don’t drench the extensions in hairspray or other product, since buildup shows up fast and leads to tangles. Between wears, store the set somewhere safe so the waves stay ready.
Old Hollywood Waves
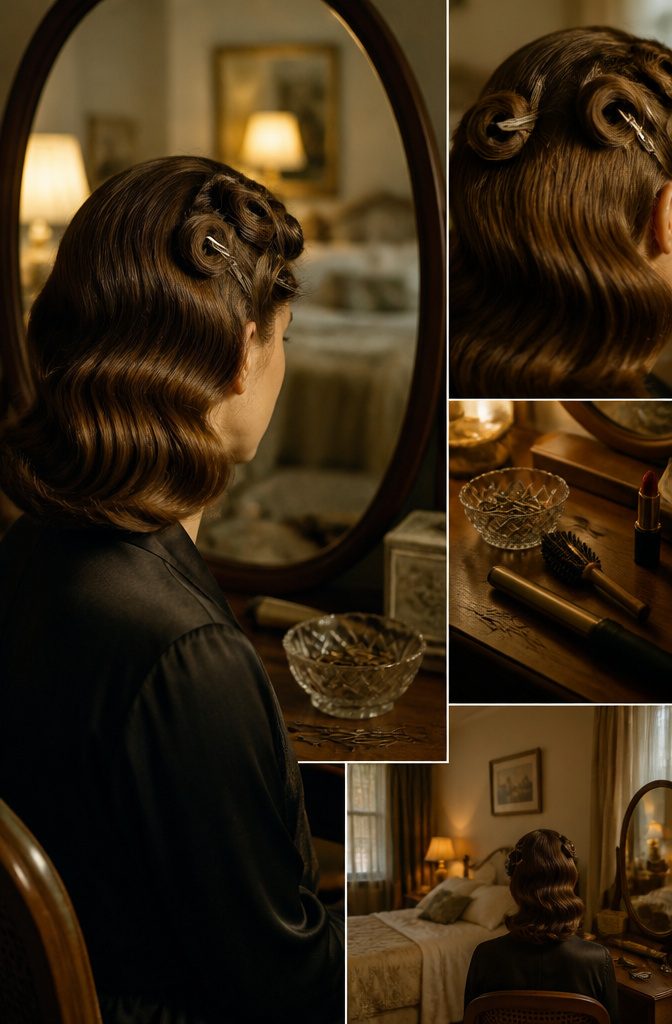
The glamour of Rita Hayworth, Lana Turner and Veronica Lake comes from a setting step that most quick-curl routines skip.
Start by wrapping two-inch sections of hair in alternating directions around a one-and-a-half-inch curling rod like the Conair You Curl Styling Wand. With every curl, roll the hair up to the scalp and clip it in place for 20 minutes to set the waves.
— Allure
That clipped wait is the whole difference between a loose bend and a retro wave. Expect to spend 20 minutes with each curl pinned against your scalp, so this is a weekend or evening-out style, not a weekday one.
Let everything cool completely, then run a boar-bristle brush through gently. The curls blend into one smooth, polished wave, and red lipstick finishes the look.
Messy Waves With Oil and a Diffuser
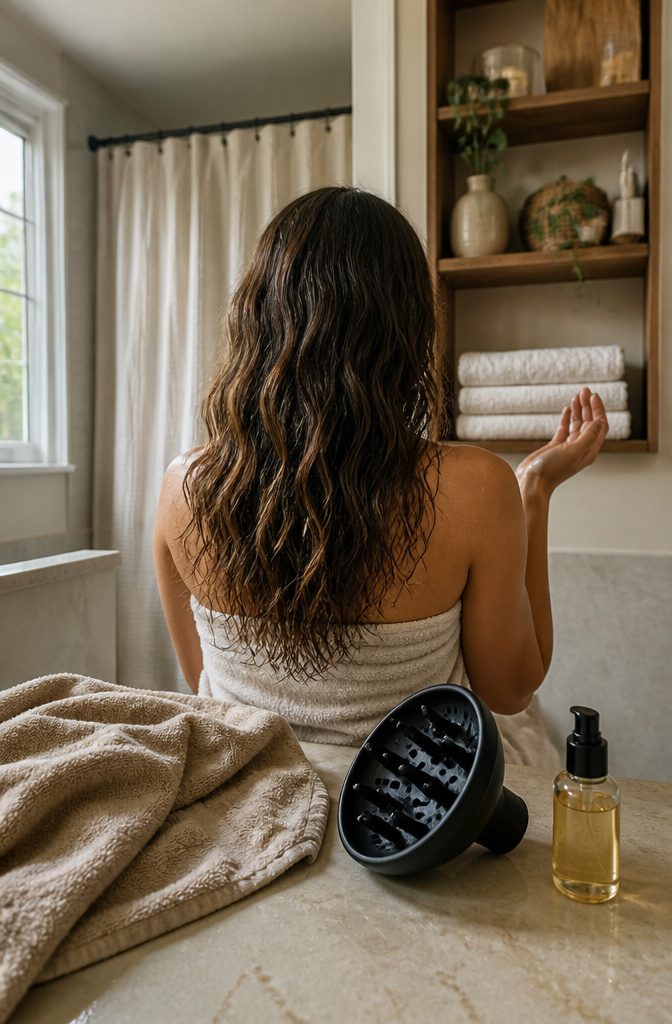
Hair that is damp but not dripping is the starting point.
Celebrity hairstylist Michael Silva worked a generous amount of Kenra Platinum Revive Oil through with his hands rather than a brush, which keeps the finish loose and a little undone.
Dry it with a diffuser, then add a second round of oil.
Madam C.J. Walker Beauty Culture Scent & Shine Coconut Oil was his choice for that step. I’d treat it as the part that matters, because the finishing oil is what keeps soft waves hair touchable instead of crunchy.
Crimps
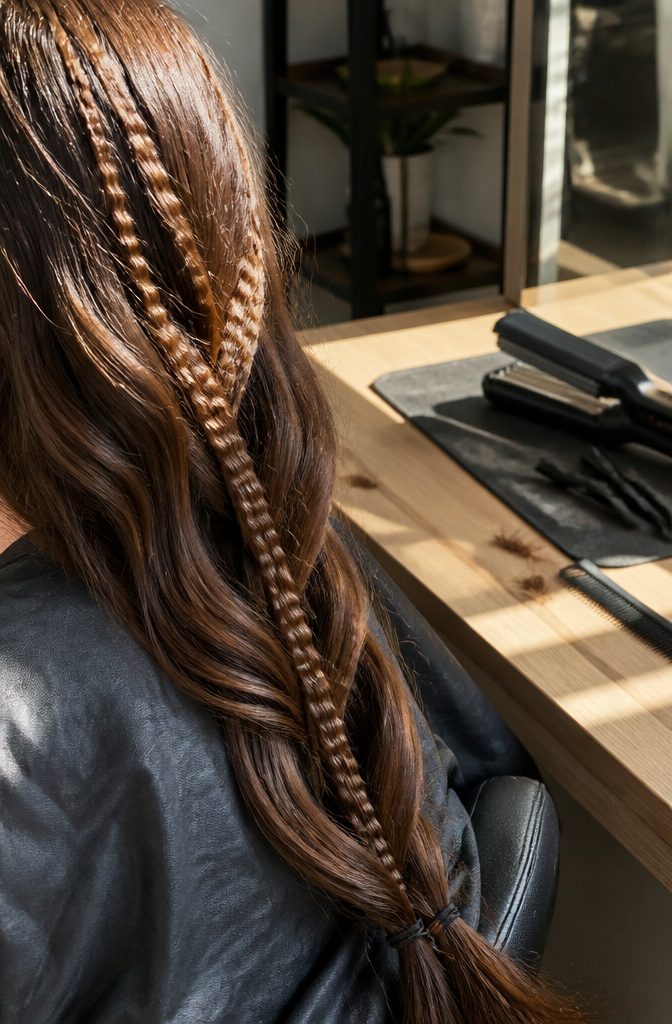
Crimping works as an accent, not a full-head technique.
Take a few strands at the hairline, or a few pieces elsewhere, and crimp them from roots to ends. Then work them into a ponytail, updo or braid, where the zigzag texture stands out against the smoother hair around it.
I’d keep it to a handful of thin pieces. A fully crimped head reads as a throwback, and it works against soft waves hair, which depends on gentle, loose bends.
Crimpers are back in style, so the one in your bathroom cabinet is worth digging out, but a light hand keeps the look current. Pieces at the hairline frame the face best.
Wavy Ends
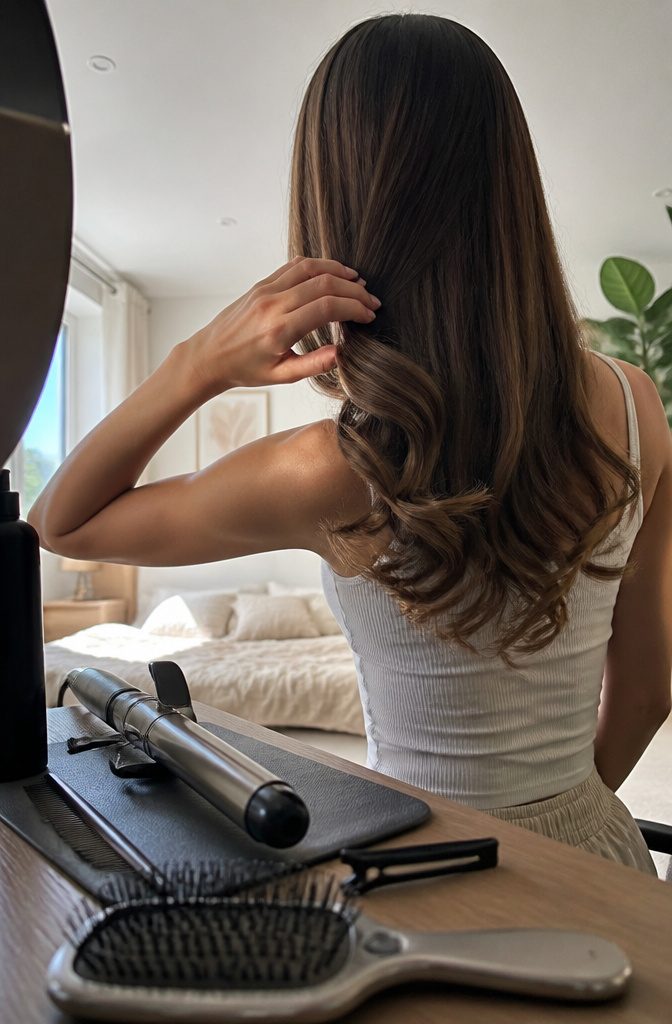
Curling only the ends of large sections is the quickest route to a voluminous blowout look.
Take sections about 2 inches wide, clamp the ends in a 1-inch curling iron, and roll up just 3 to 4 inches before releasing. Alternate directions with each curl so the waves don’t stack into matching ringlets.
The tousling is what turns this from a curled set into soft waves hair.
Tip your head back and rake your fingers through the ends to loosen them, then finish with hair spray and a little light teasing at the crown.
I’d pick this over curling full lengths on a rushed morning, since only a few inches of each section ever touch the iron.
Barrel Size by Hair Length
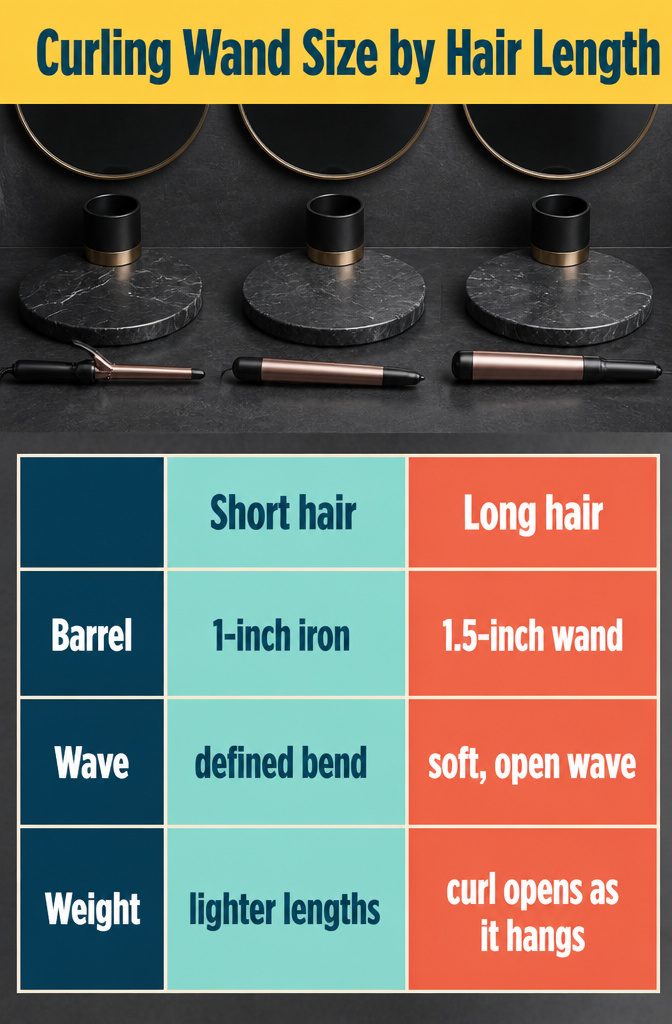
Barrel size follows length, and the pairing I’d use is a 1-inch iron for short hair, a 1.25-inch wand for medium hair, and a 1.5-inch wand for long hair.
- Short hair, 1-inch iron: a slim barrel gives short lengths enough bend to read as a wave instead of a flip.
- Medium hair, 1.25-inch wand: this makes a loose, rounded wave without tight ringlets at the ends.
- Long hair, 1.5-inch wand: weight pulls a curl open as it hangs, so the wider barrel leaves the wave soft instead of stretched flat.
- Buying just one tool? A 1.25-inch is the most versatile, especially if you cut your hair every few years.
- Fine or thin hair can still use a 1-inch wand for beachy waves, switching direction with each curl.
Alternating Direction or All the Same
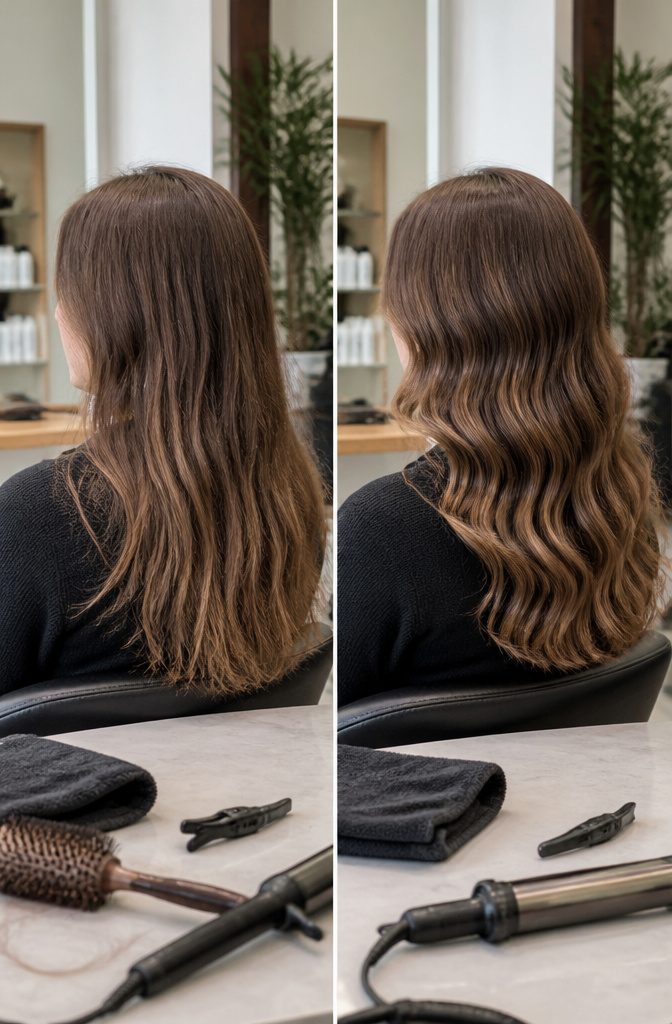
Alternating the direction of each curl keeps the waves from stacking into one repeating pattern or clumping together. That means wrapping 2-inch sections around a 1.5-inch rod, one way, then the other.
Wrapping every 1-inch section the same way around a 1-inch rod gives a different finish: a uniform S-shape. I lean toward this for soft waves that look polished, especially when you wrap toward the face for a framing effect.
Alternating wins when you want a looser, less patterned look. Choose before the first curl, because switching midway shows.
Setting and Loosening the Style
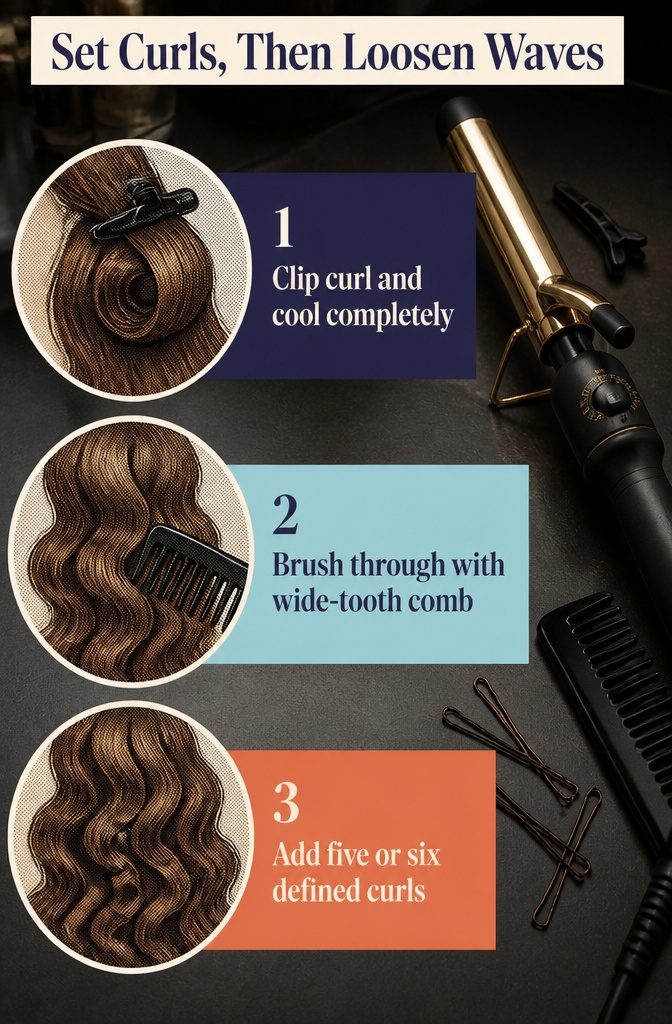
Once the curl is in, clip it to your head and let it cool completely before you touch it.
The curl sets as it cools, so brushing too early—when the hair is still warm—gives you nothing to work with by afternoon.
Once everything has cooled, brush through with a wide-tooth comb or paddle brush to soften the waves and blend them together.
If you want a few more defined pieces on top, go back in with the iron and curl five or six small sections after you’ve brushed everything out.
These tighter curls sit among the looser waves and pull the whole style together. One owner working with second-day curls mentions finger-combing with damp hands first, then adding dry shampoo and recurlng any flat pieces.
If your hair tends to fall flat by midday, resist the urge to brush immediately after curling. Let the waves sit for an hour or more before you loosen them, and they’ll hold longer.
Volume at the Roots
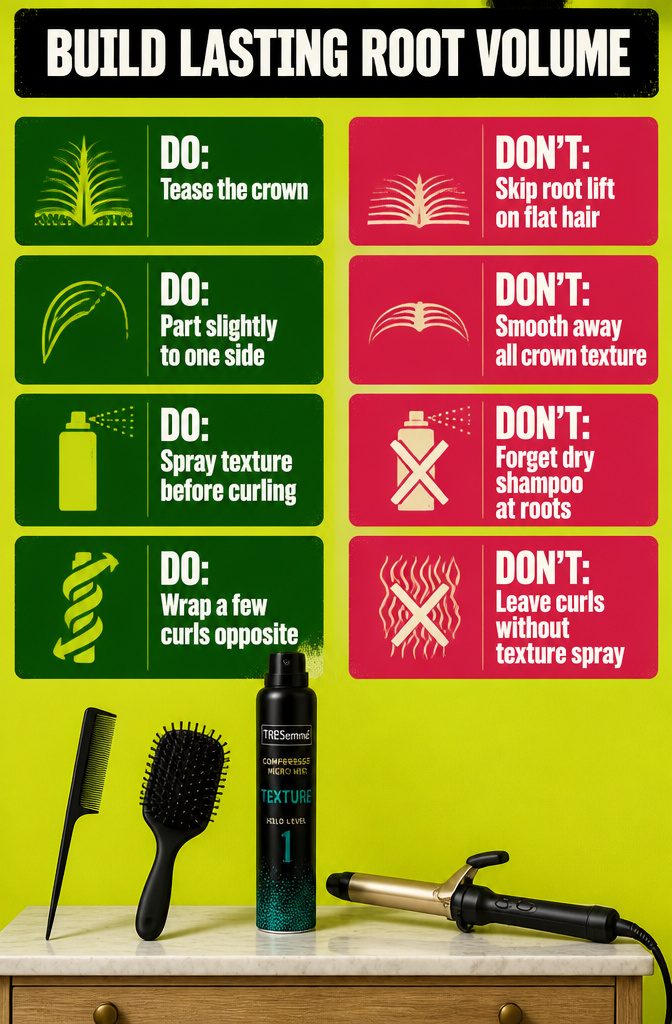
Flat roots undo good waves faster than a loose curl does, so I build lift in four places:
- Tease the crown with a teasing comb, covering wherever you’d apply root lifter. Part slightly to one side and smooth the top with a brush. More teasing means messier, more beachy waves.
- Spray texturizing spray all over before you curl. Tresemme’s Compressed Micro Mist in Texture Hold Level 1 adds texture, volume and hold at once.
- Add a few wraps in the opposite direction around the iron for extra volume.
- For hair that sits flat, work dry shampoo into the roots before curling. Afterward, tease the curls lightly and finish with a dry texture spray.
Tools and Products
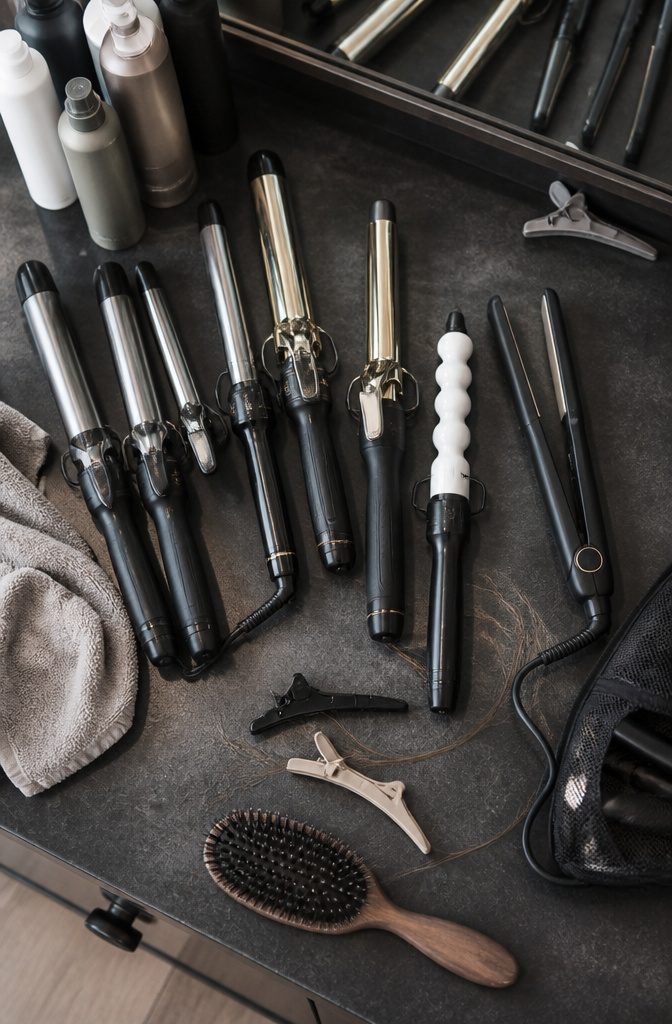
The wand or iron you reach for and the products you layer in depend on which method you’re after.
Hot tools:
- 1-inch curling iron for short hair, 1.25-inch for medium-length hair, and 1.5-inch for long hair (Hot Tools Curling Wand, Babyliss 1.25-inch curling iron, T3 Micro 1.25-inch curling iron, T3 1.5-inch wand)
- Pearl wand (NuMe Pearl Wand) for natural-looking texture that slips into the divots rather than forming perfect spirals
- 1-inch flat iron (Bio Ionic 1-inch Curling Iron) for smoothing hair while adding a soft wave
- Duckbill clips or jaw clips to section hair while you work
Products:
- Mousse for root volume (Aquage Uplifting Foam) or worked through before blow-drying
- Volumizing spray (Alterna Caviar Volume Spray) for lift throughout
- Texturizing spray (IGK Beach Club Texture Spray, Drybar Triple Sec 3-in-1 Texturizer) to finish and add body
- Hairspray in two holds: flexible while styling (Amika Fluxus Touchable Hairspray, Drybar Money Maker Flexible Hold Hairspray, Kenra Light Hair Spray, Tresemme Compressed Micro Mist Hair Spray Level 1) and firm to lock it in (Kenra Volume 25 hairspray, Tresemme Compressed Micro Mist Hair Spray Extend Hold Level 4, Sebastian Shaper Zero Gravity Hairspray, Tigi Bedhead Masterpiece Shine Hairspray)
- Boar-bristle brush for blow-drying volume into the roots
Frequently Asked Questions
How do you get soft waves in hair?
Curl 2–3 inch sections with a clamp iron or wand, holding each for just 3–4 seconds so you get a bend rather than a tight curl.
Leave the last few inches of the ends straight, then shake the waves out with your fingers. If you’d rather skip heat, dry the roots, let the lengths air-dry overnight, and finger-comb in the morning.
What is the difference between soft curls and waves?
Waves are loose, gentle bends, while curls are tighter and more defined spirals.
Larger sections and a short hold on the iron give waves, and the more hair in each piece, the looser the result. Tighter curls from the day before also relax into soft waves if you leave them alone overnight.
How do you know what size curling iron to use?
Match the barrel to your length: a 1-inch iron for short hair, a 1.25-inch for medium hair, and a 1.5-inch for long hair.
Long hair pulls a curl open as it hangs, so it needs the wider barrel to stay soft. If you only want to buy one tool, a 1.25-inch is the most versatile.
What temperature do you set your curling iron on?
There’s no single setting that suits every head of hair, but one reader’s rule of thumb is to run the iron a few clicks below its maximum. Start there rather than at full heat, and adjust to your own hair.





