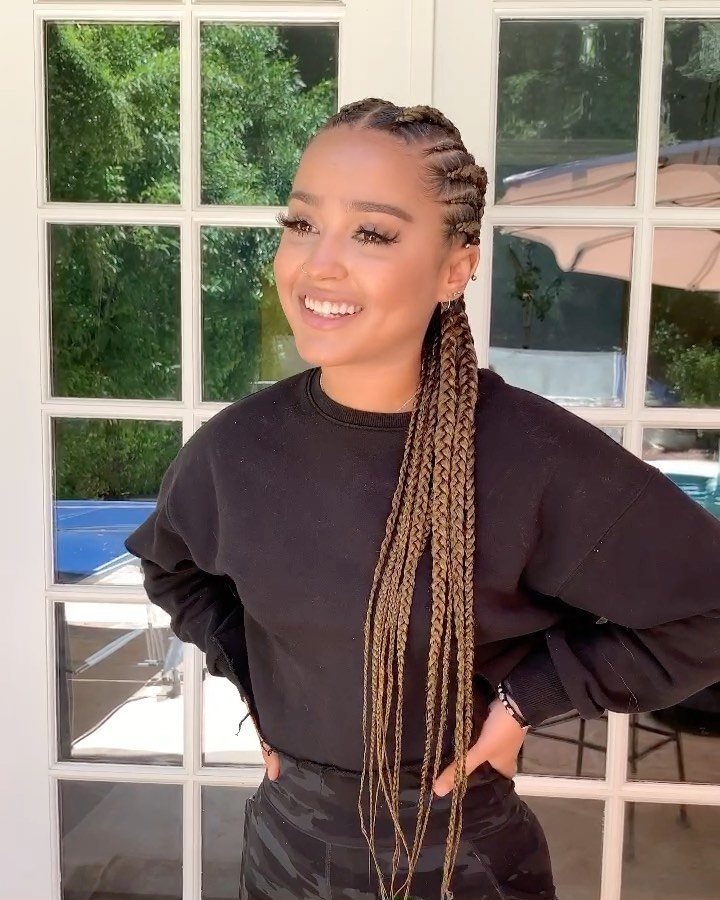
Feed-in braids start flat at the scalp because the extension hair is added gradually instead of knotted at the root, which keeps tension even and protects edges better than styles that load all the weight at the base.
Installation runs 3–5 hours for a ponytail or bob and stretches to a full day if you want micro rows, stitch braids or freestyle curves that need individual mapping.
The choice comes down to how much pull your hairline can handle and whether you want the braids to show as a design feature or disappear under length: straight-back rows sit close enough to work under wigs or a topknot, while curved stitching and heart shapes need visible parts to read clearly.
1. Straight-Back Braids
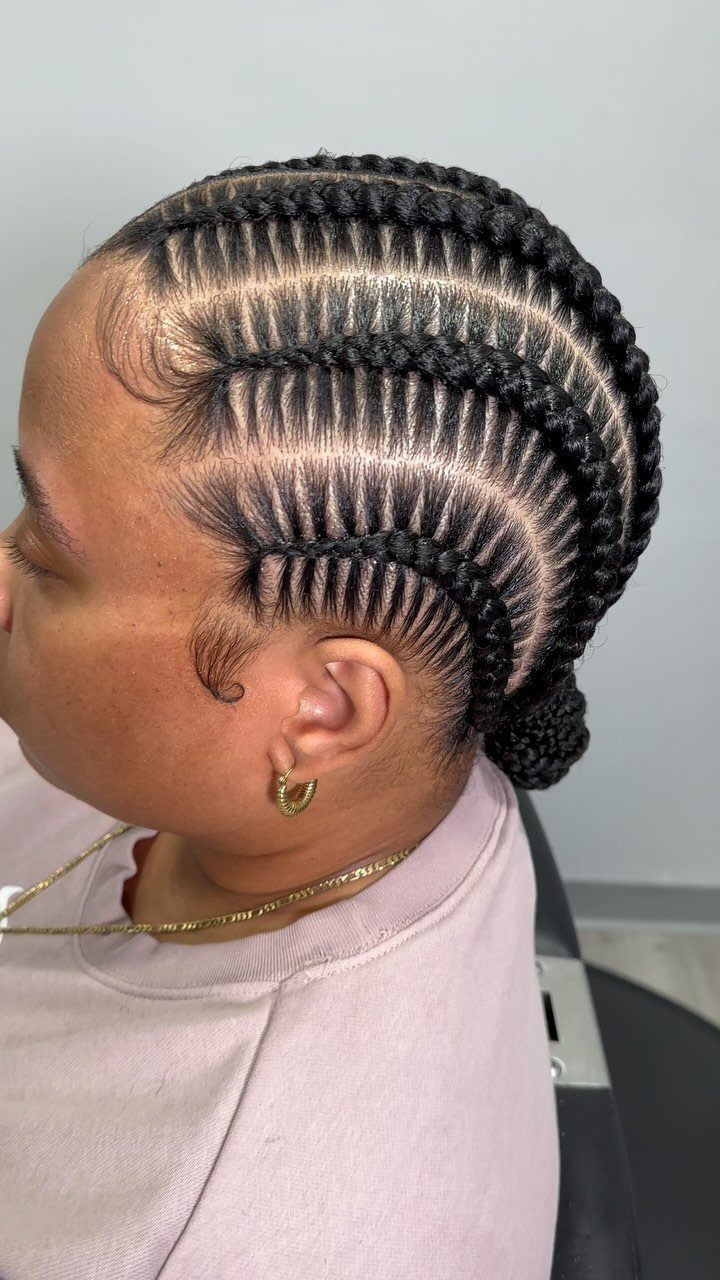
The rows run straight back from the hairline with no curves, each one parallel to the next. Hair is gathered at the nape into a low bun or left loose.
This version keeps tension even and sits close enough to work under wigs or wraps.
If you’re doing this at home, the straight parts are easier to section than curves, but you still need a steady hand so the feed-in hair blends smoothly as you move down each row.
2. Braided Ponytail
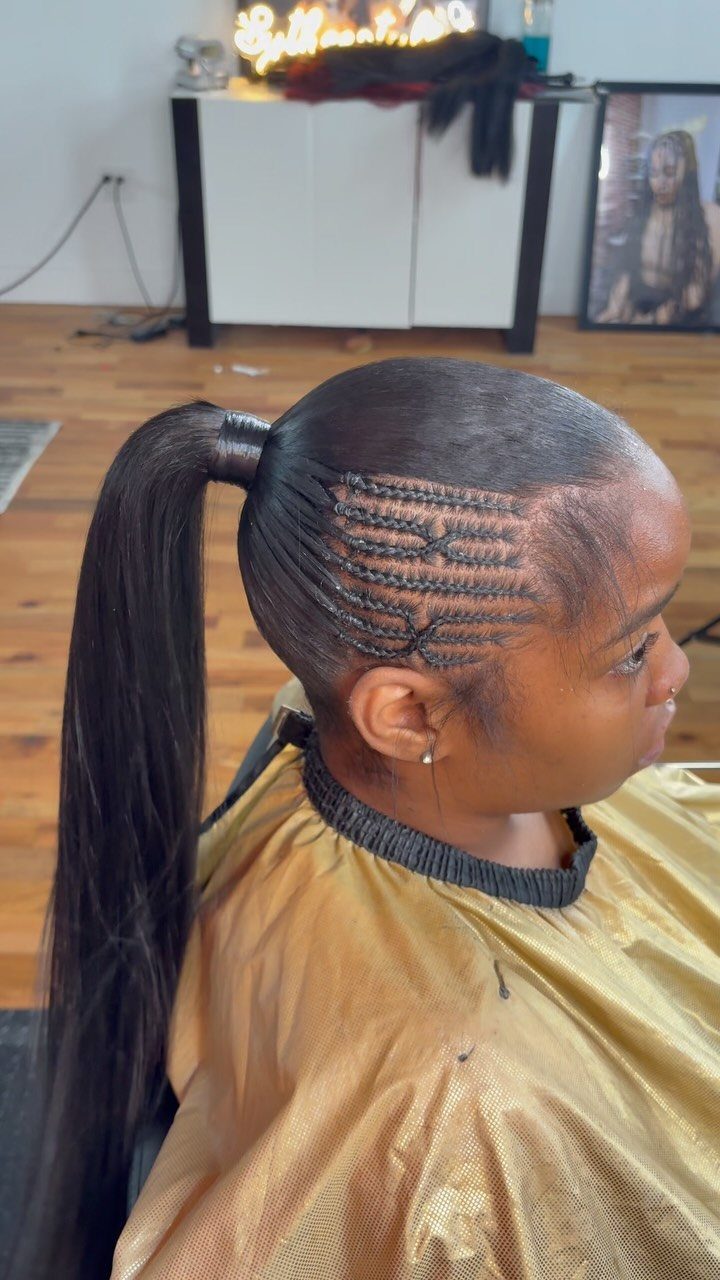
Cornrows run back or diagonally into one gathered point, then the remaining length hangs as a ponytail. The ponytail can sit high at the crown, mid-level, or low at the nape depending on where the braids converge.
A high placement gives more swing and visibility, but puts more pull on the hairline. Mid or low sits easier if you sleep on your back or want less tension overnight.
The cornrow base holds longer than the ponytail length, which can be refreshed or re-braided if it loosens first.
3. Goddess Braids
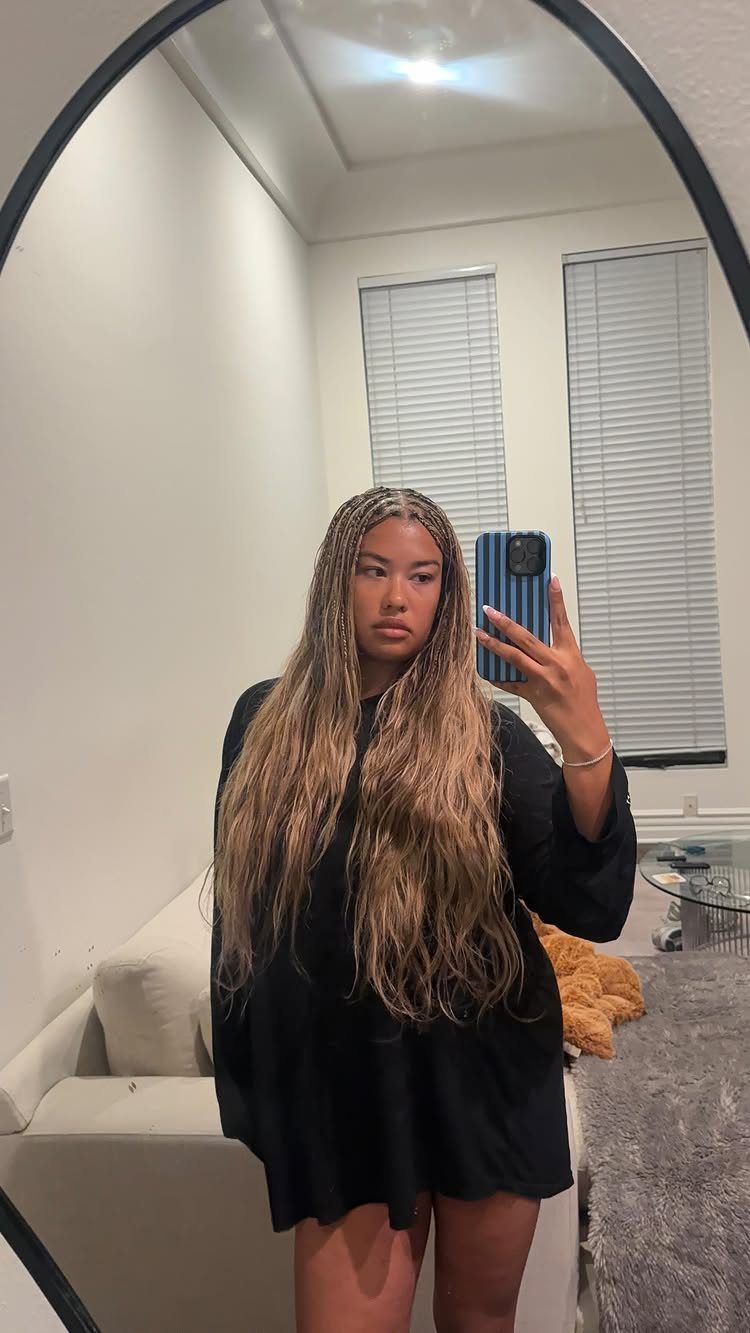
Goddess braids are thicker and fewer than standard cornrows, and the ends are left loose or blended with wavy or curly extensions.
The visible example uses body wave bundles, which adds cost but keeps the curl pattern consistent through the ends.
The fuller braid size means less chair time than micro feed-ins, usually 3–4 hours. The curly ends need light mousse or curl cream to keep definition, and sleeping in a bonnet or pineapple tie prevents matting.
This version works well for length and texture without the weight of fully braided ends.
4. Braided Updo
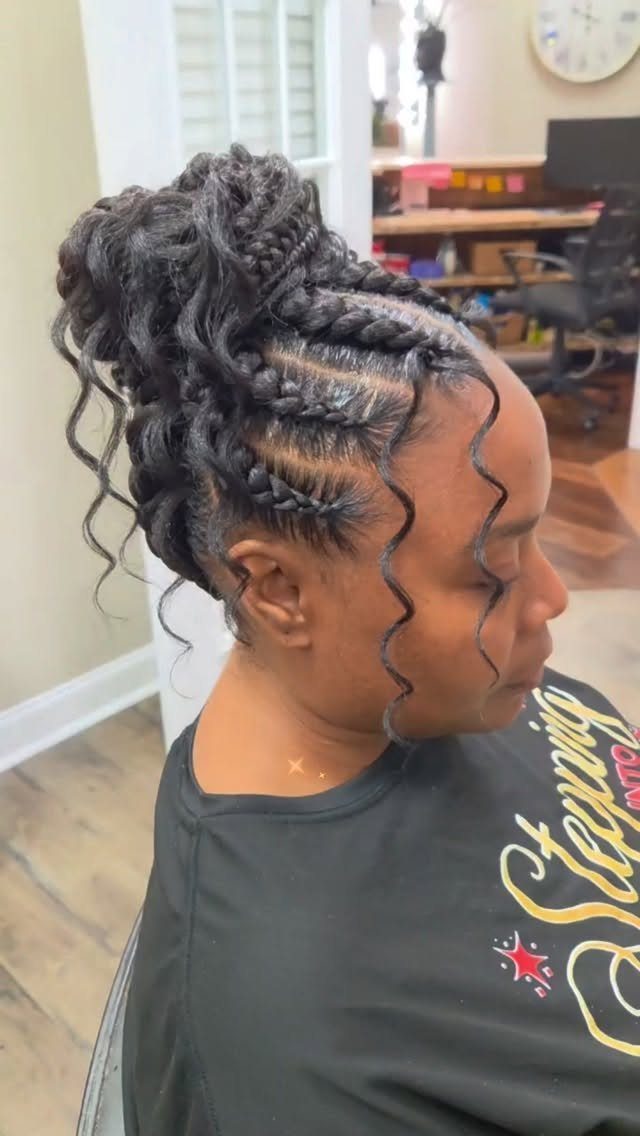
Cornrows are pinned or twisted into a high bun or rolled shape at the crown, with a few tendrils left loose in front. The updo keeps hair off the neck, which helps in heat or for formal settings.
You can do this with natural hair alone or add extensions for more volume in the bun. Pinning the braids securely takes more time than letting them hang loose, but the style holds through long days without much touch-up.
If edges are fragile, keep the tension light at the hairline and avoid pulling the bun too tight.
5. Braids with Curly Ends
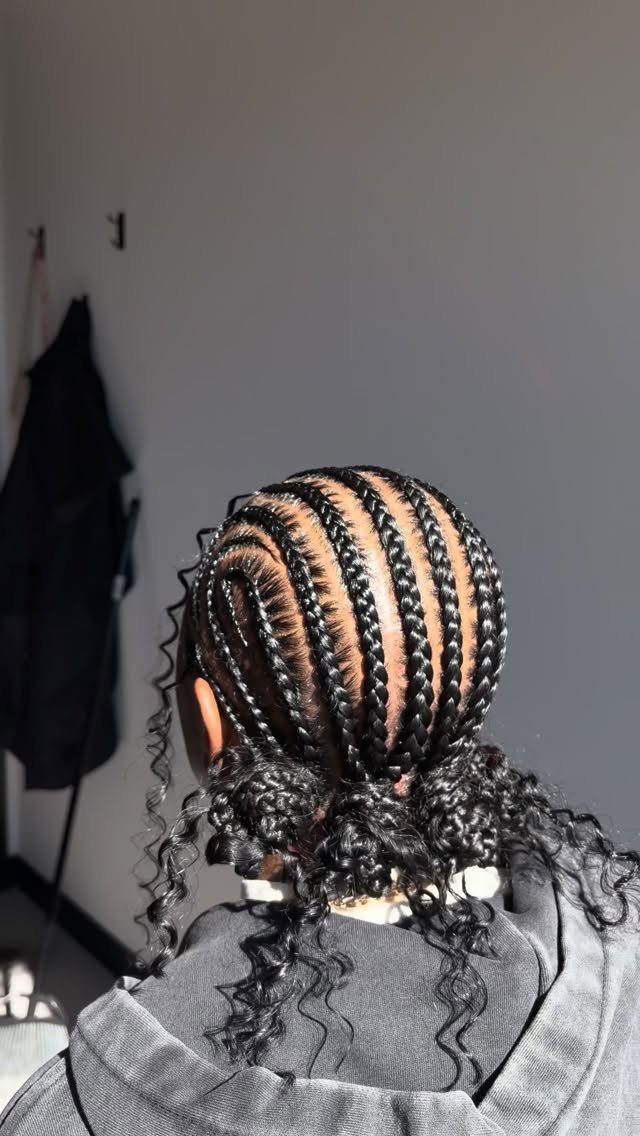
The braids run partway down, then transition into loose curls that add movement and volume at the ends. The visible example gathers the braids low before releasing into the curl, which keeps weight off the crown.
To book this, ask for feed-in braids with curly ends and specify whether the curls start high, mid, or low.
At home, you can braid to your desired length, then leave the remaining extension hair unbraided and set it on flexi rods or perm rods overnight.
The curls need daily finger-fluffing or a light curl refresher spray to keep separation. Sleeping in a bonnet protects both the braids and the curl pattern.
6. Side-Swept Braids
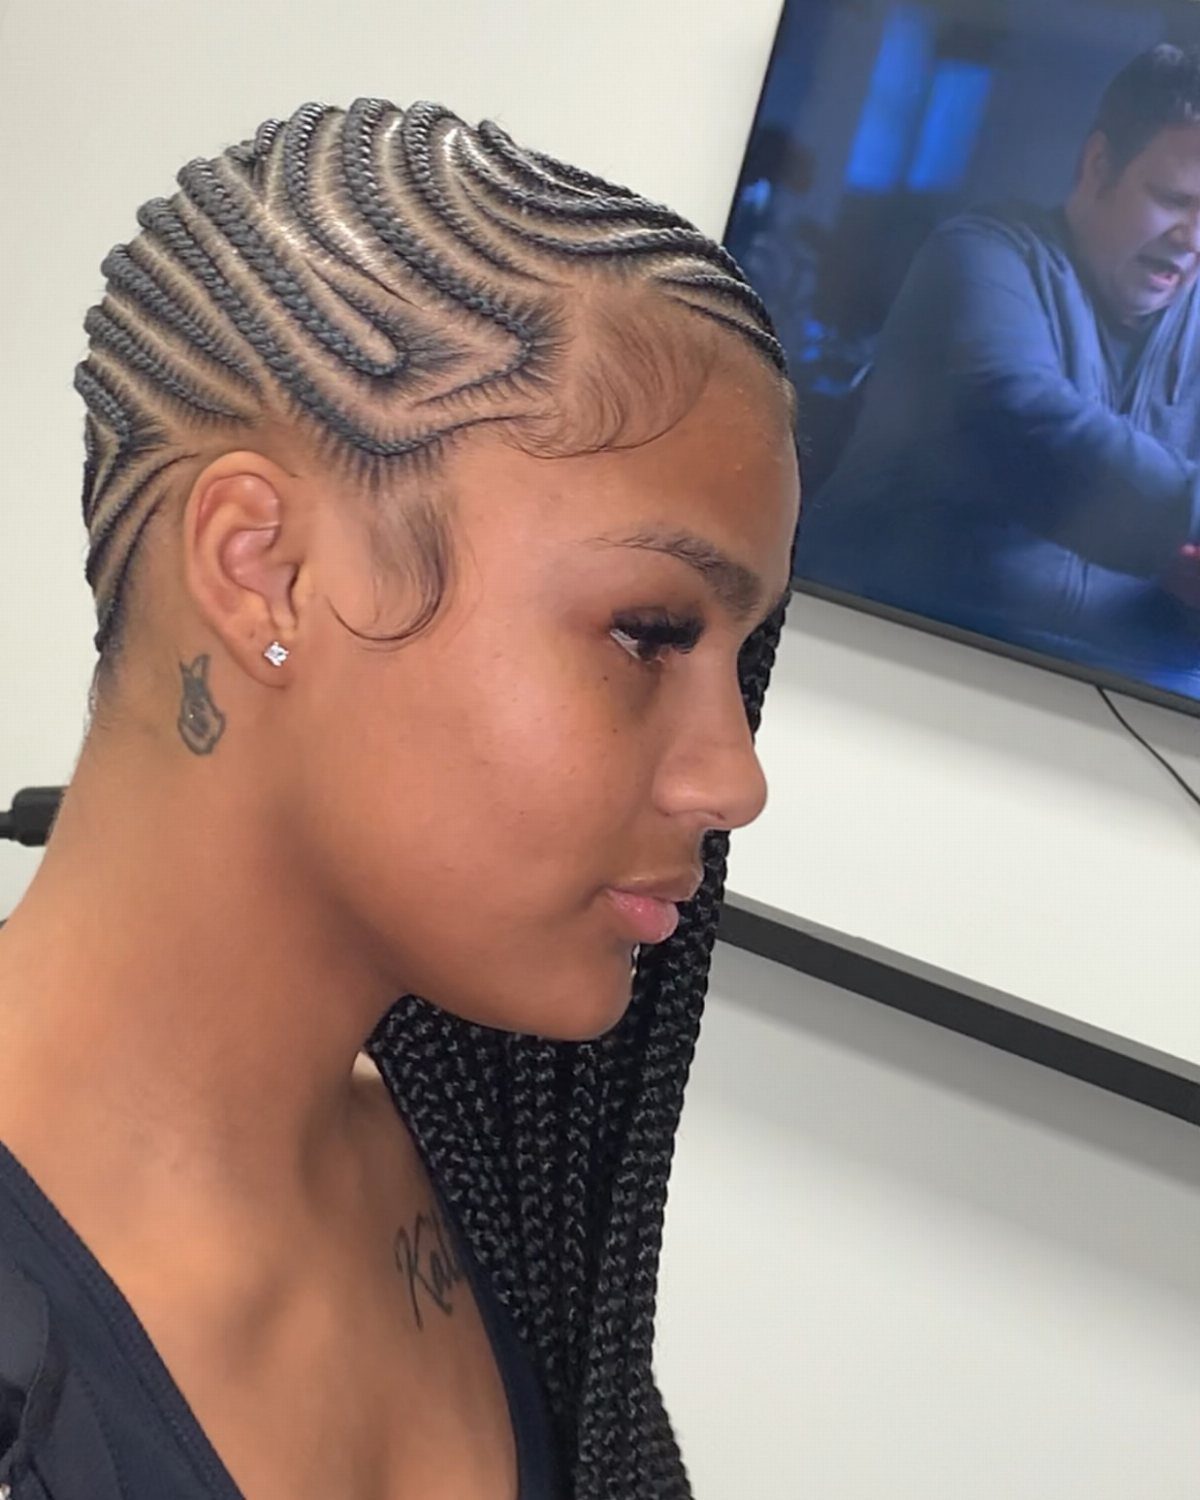
All the braids sweep to one side and fall over one shoulder, leaving the opposite side of the neck exposed. The parts can run straight or curved to follow the sweep.
This version suits asymmetrical cuts or if you prefer hair off one side for comfort or visibility.
The side with the most hair will feel heavier, so if you sleep on that side, a satin pillowcase helps reduce friction on the braids overnight.
7. Heart Design Braids
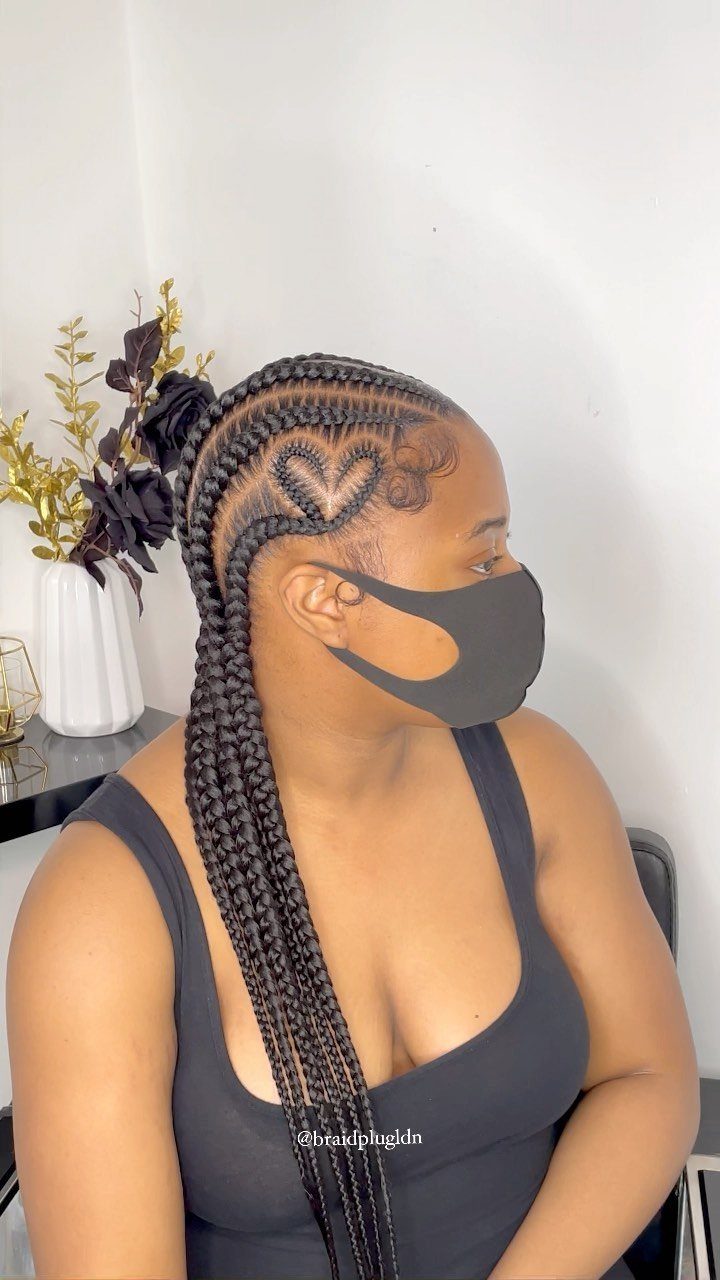
The heart is formed by curving the parts and braids into a recognizable shape, usually positioned above the ear or at the crown. The other braids can run straight back or follow their own pattern.
This works best when the braider maps the shape before starting, so the heart stays centered and proportional. If you’re booking this, bring a reference photo that shows the heart placement you want.
The decorative part takes longer to section and braid than straight rows, so plan for extra chair time.
8. Cornrow Bun
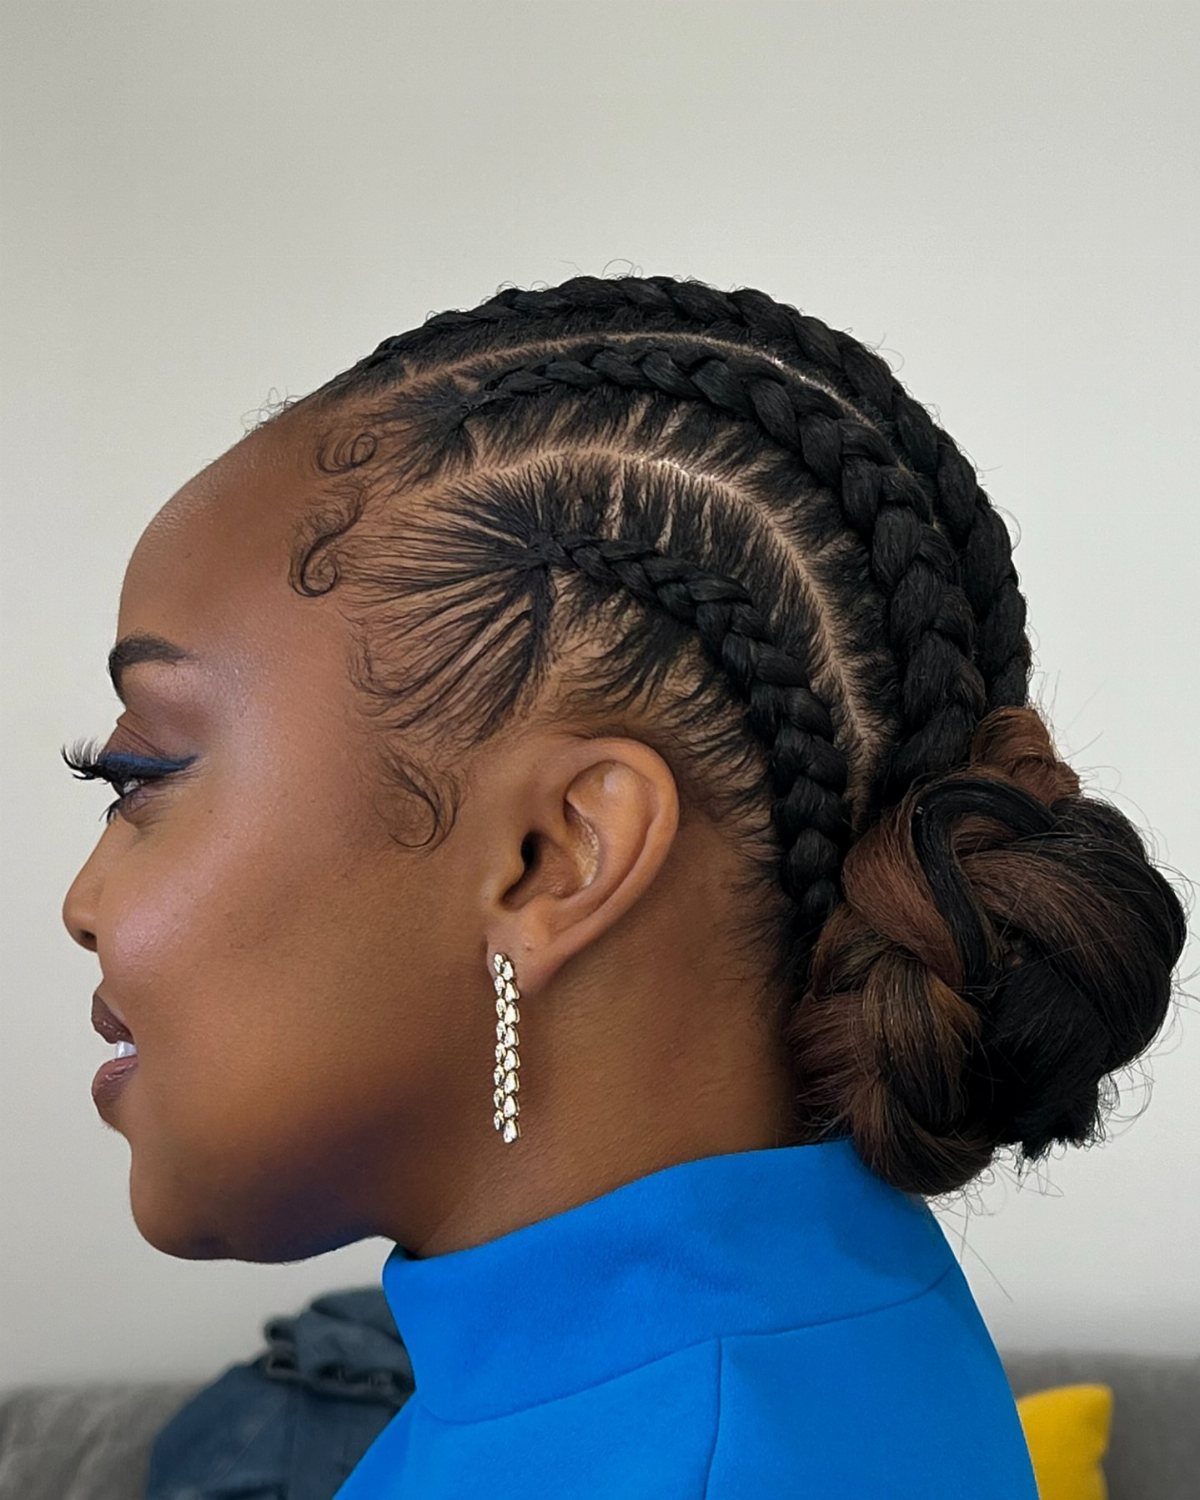
The cornrows run back to a single point, then the remaining length is wrapped or pinned into a bun instead of left hanging.
A low bun puts less pull on the hairline than a high one, and it sits flat enough to rest against a headrest without discomfort.
If the cornrows are thick, the bun will have more volume; thinner rows give a sleeker finish.
You can refresh the bun shape by re-pinning it without redoing the cornrows.
9. Snaky Hairstyle
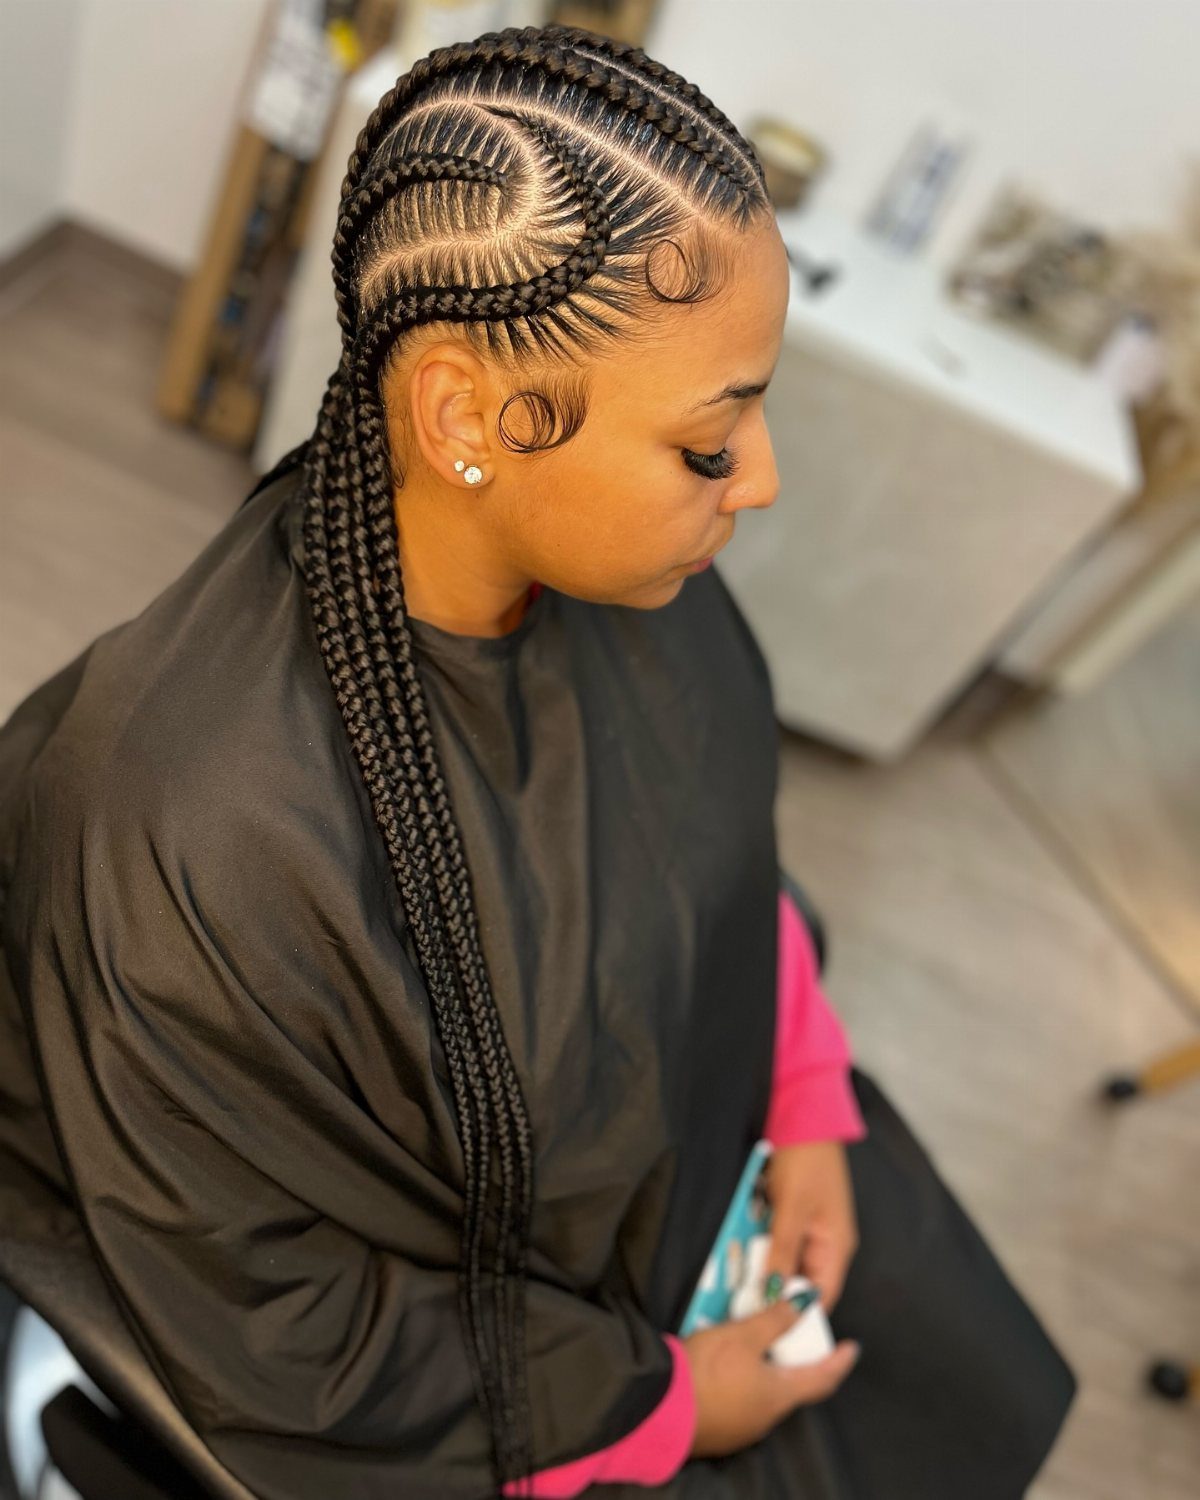
The braids curve and loop across the scalp in a winding pattern instead of running parallel. Each row follows its own path, creating a maze effect when viewed from the side or back.
Sectioning takes longer than straight-back rows because the braider has to plan the curves so they don’t overlap or leave gaps. This version suits anyone who wants a bolder look but doesn’t need fast installation.
The curved parts show best when the braids are fresh and the scalp is visible, so if you touch up edges, be careful not to obscure the design.
10. Side-Swept Bob
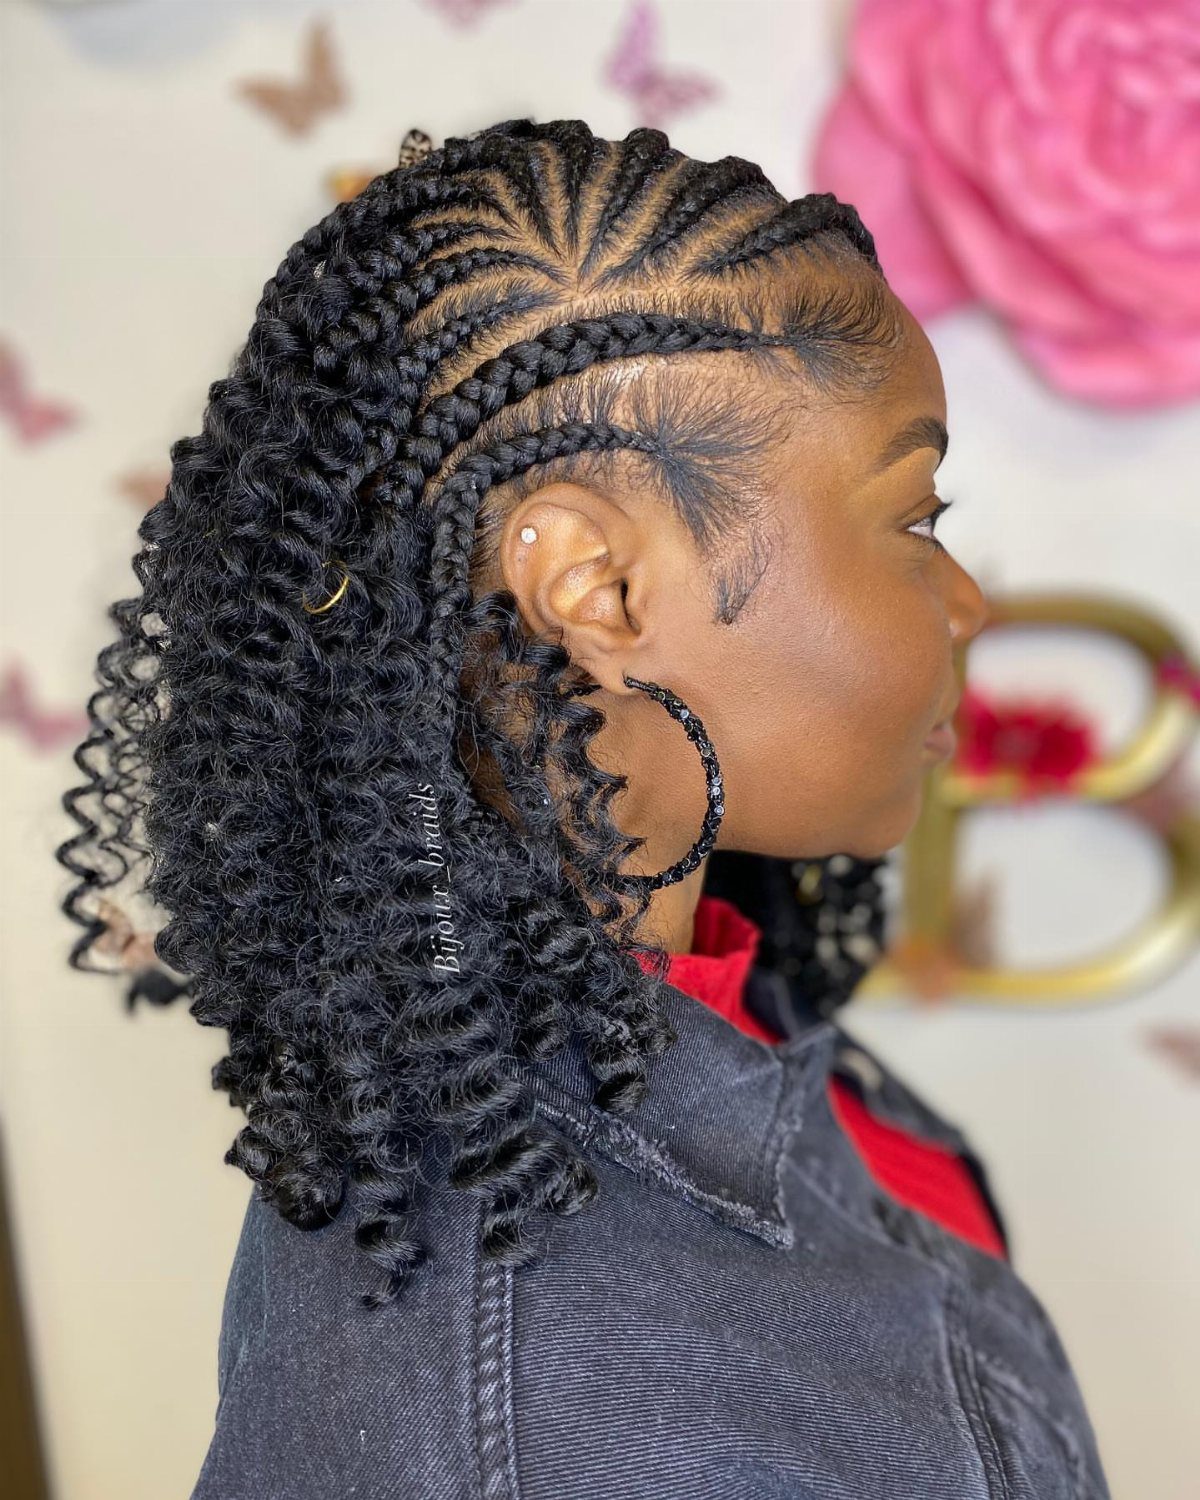
The braids end at bob length and are styled to fall over one shoulder. The visible version has loose curls at the ends, which adds texture and softens the blunt edge of a bob.
To wear this, you can braid to chin or shoulder length and curl the ends on flexi rods, or ask for pre-curled extensions that match the braid length.
The side sweep works well if you prefer hair off your face on one side or want an asymmetrical frame.
11. Feed-In Bob
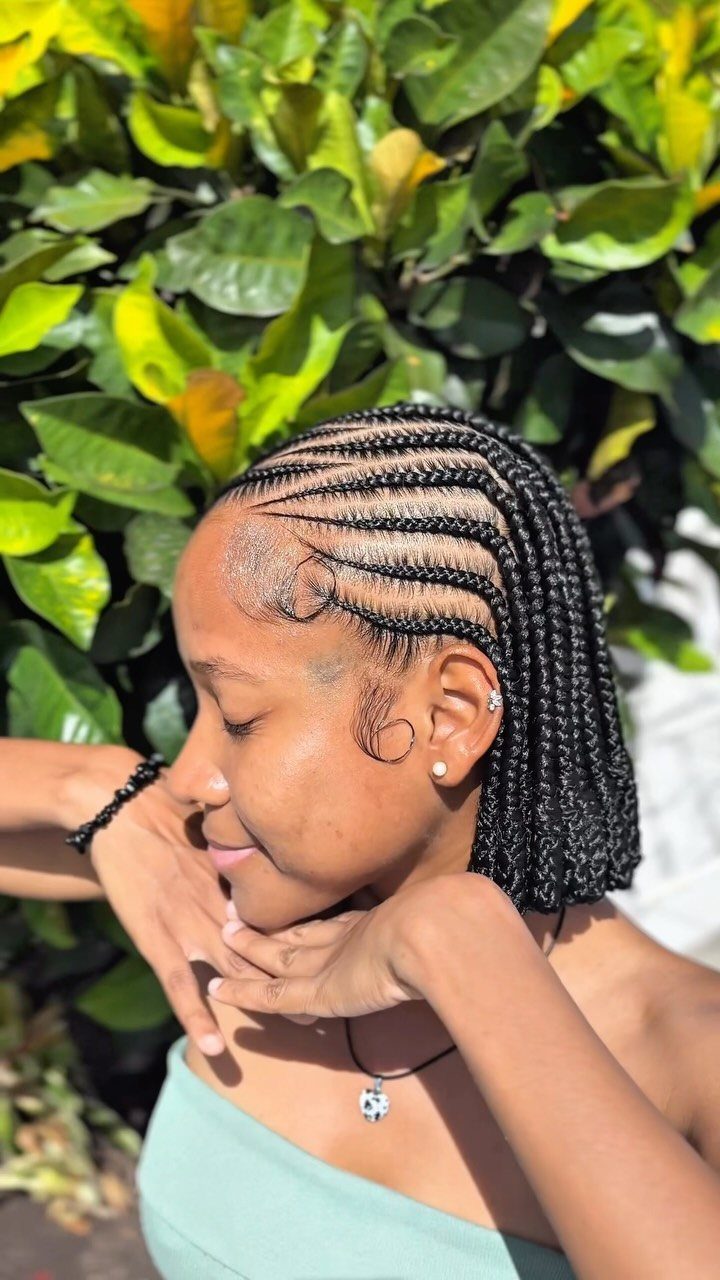
The braids stop at bob length, with no long tails or curls past the jawline. This keeps the weight light and the style compact.
A bob-length braid takes less time to install than waist-length rows, usually 3–5 hours depending on braid thickness. It also uses less extension hair, which cuts material cost.
If you’re growing out a shorter cut or want a protective style without the bulk of long braids, this version gives coverage and holds shape without extra maintenance on the ends.
12. Feed-In Topknot
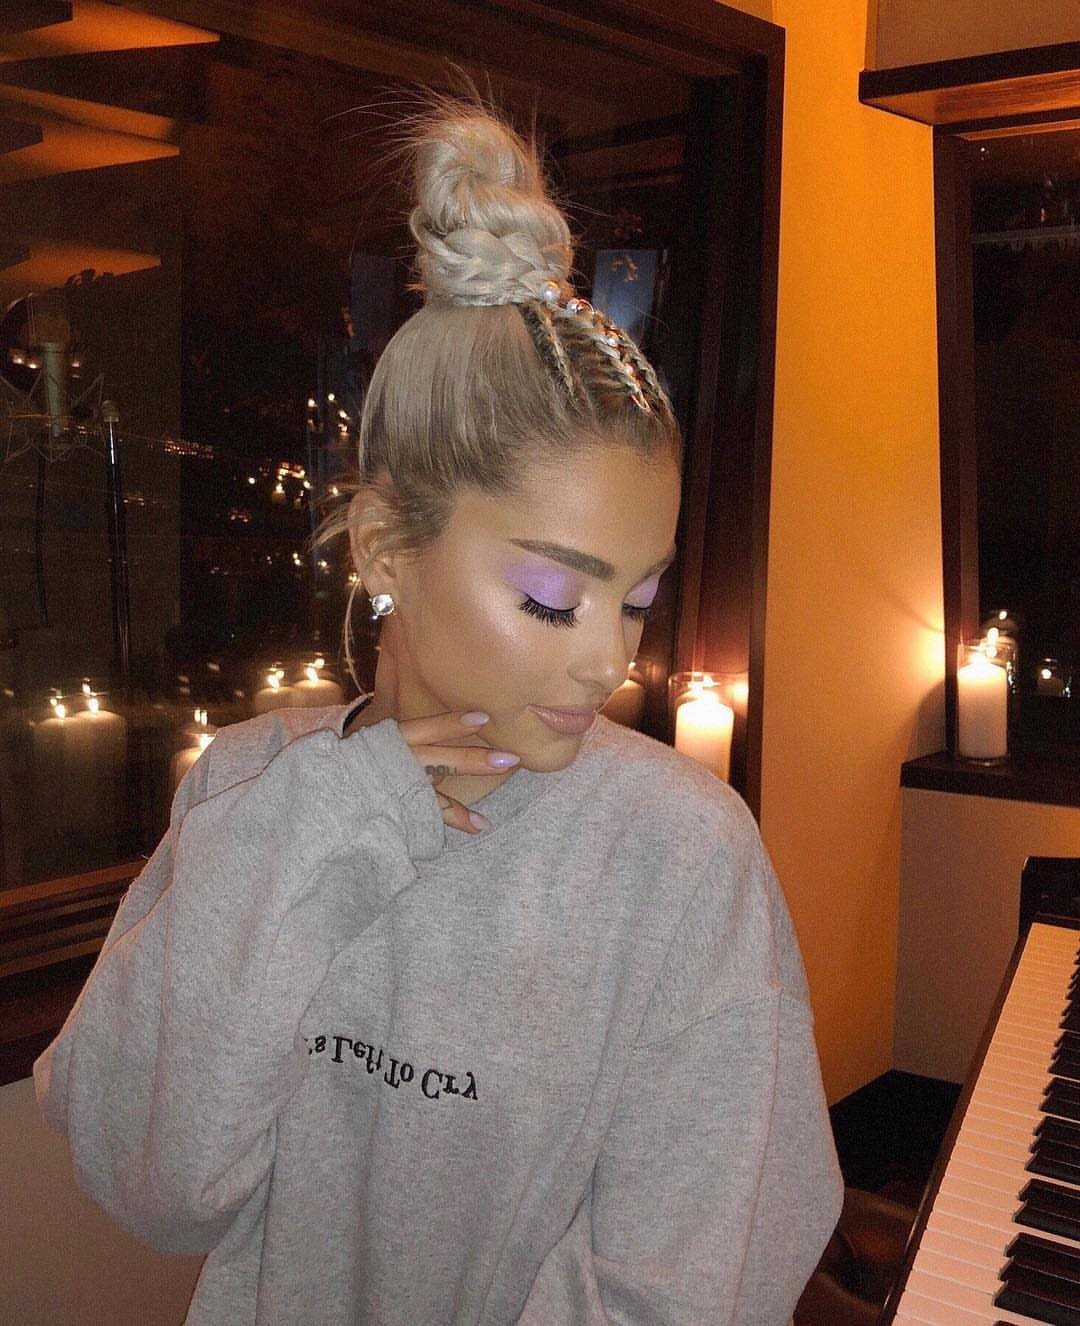
The braids are gathered high at the crown and secured into a topknot instead of left loose. The visible version uses blonde extensions, which contrasts with darker roots and makes the braid pattern more visible.
A high knot pulls on the hairline more than a low bun, so if your edges are thin, ask the braider to keep tension light at the front.
The knot can be wrapped or pinned depending on how much length you have past the gather point.
This version keeps hair off the neck and face, and it holds through workouts or long days without slipping.
13. Blue Braided Bob
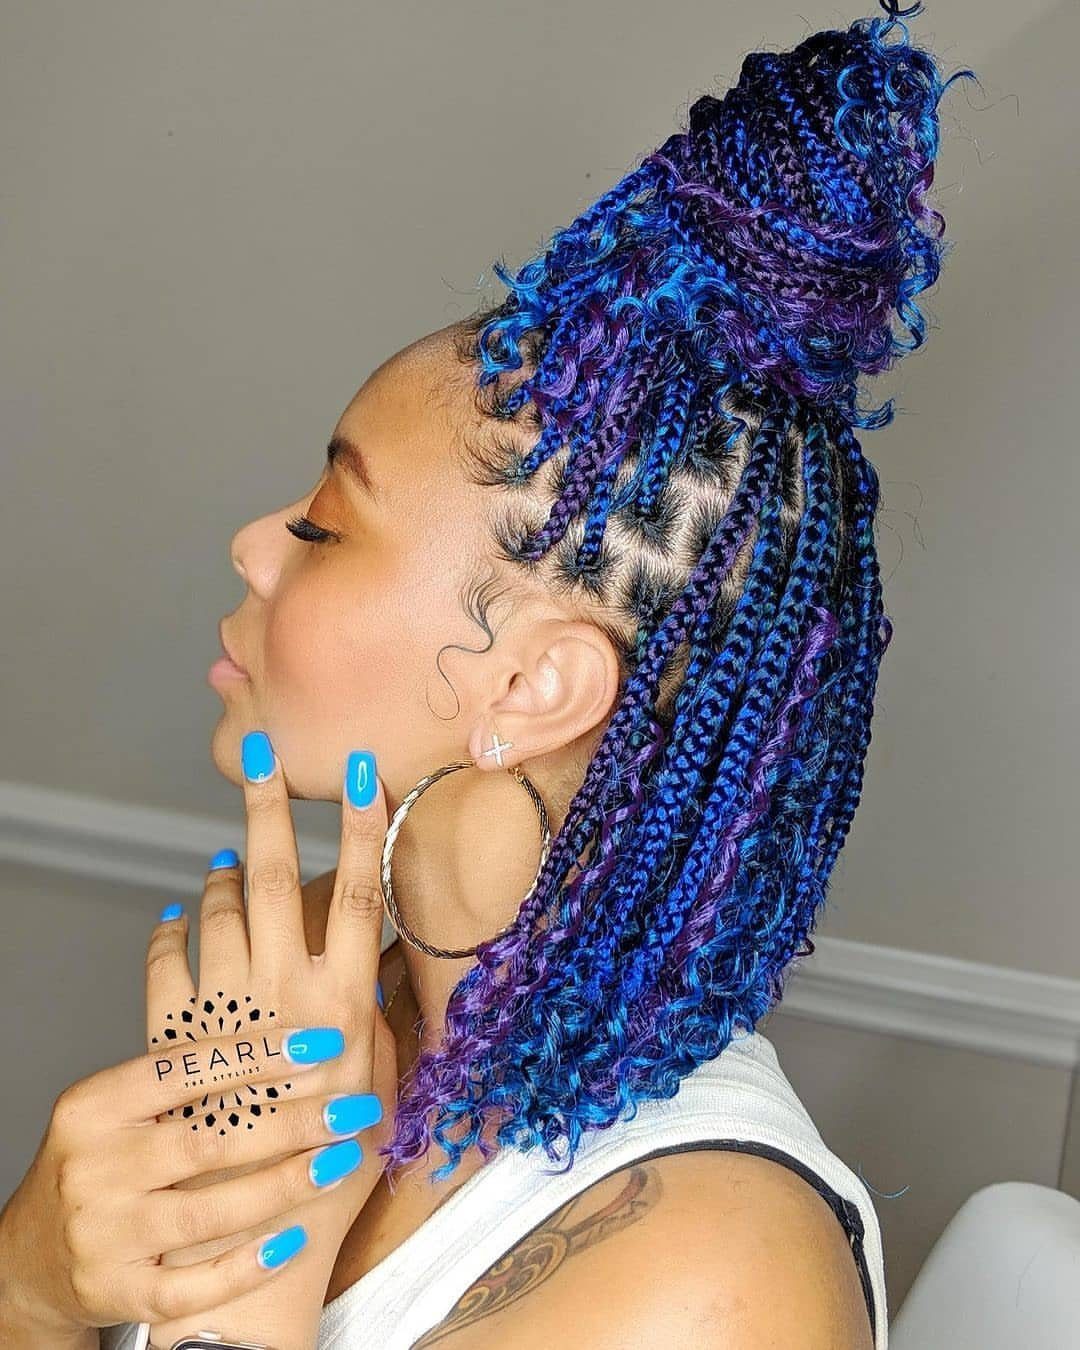
The braids stop at bob length and are styled in cobalt blue, with the bulk of the hair gathered into a high bun. A few loose purple curls frame the face.
To get this look, you’ll need pre-colored braiding hair in blue or purple, or you can dye extensions before installation. The color contrast between the blue braids and purple curls makes each element more visible.
The shorter length sits lighter, and pinning the top half up keeps your neck cool. If you want the curls looser or tighter, specify rod size when booking.
14. Extra-Long Cornrows
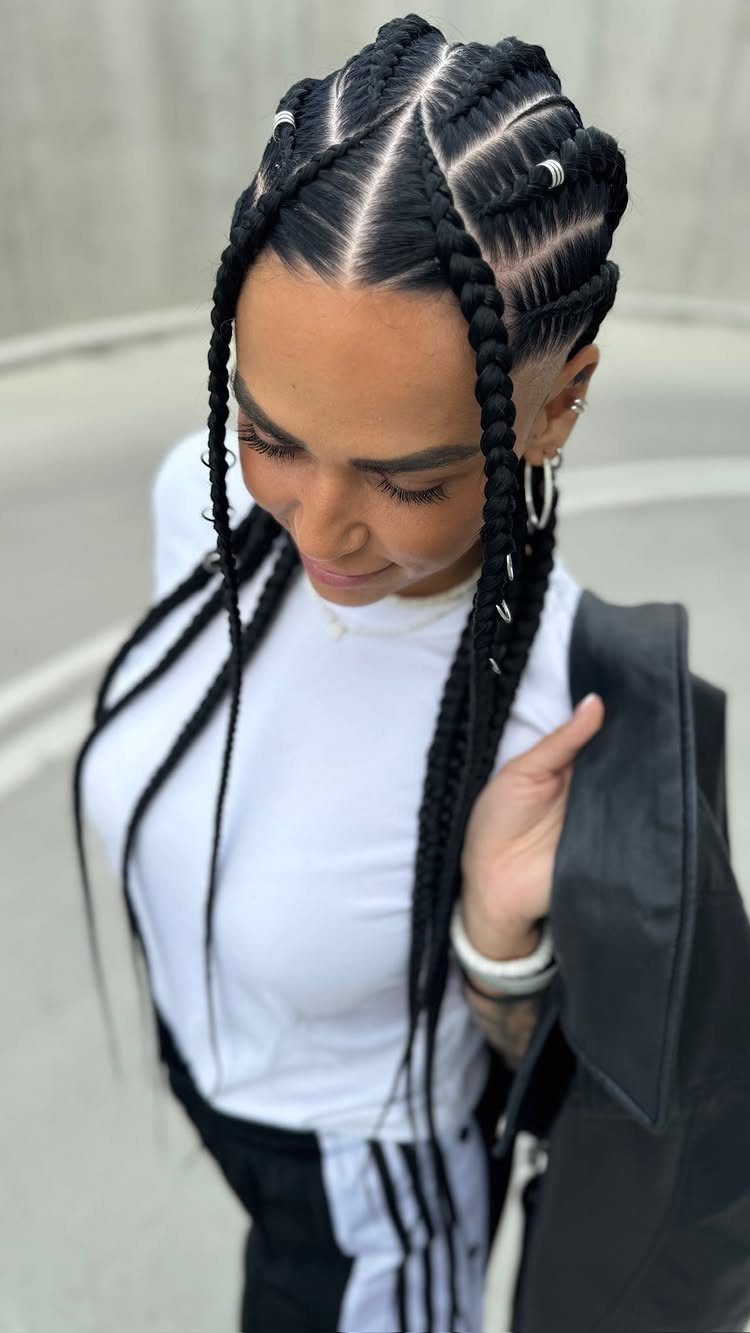
The braids extend well past the waist, giving full length without loose curls or texture changes at the ends. Each row stays uniform from root to tip.
Longer braids take more chair time and more extension hair, so expect to add 1–2 hours and extra material cost compared to shoulder-length rows.
The weight can pull on the hairline, so if your edges are fragile, ask for lighter tension at the front or stop the braids at hip length instead.
Sleeping in a bonnet or wrapping the length keeps the ends smooth and prevents tangling overnight.
15. Cornrow Bubble Braids
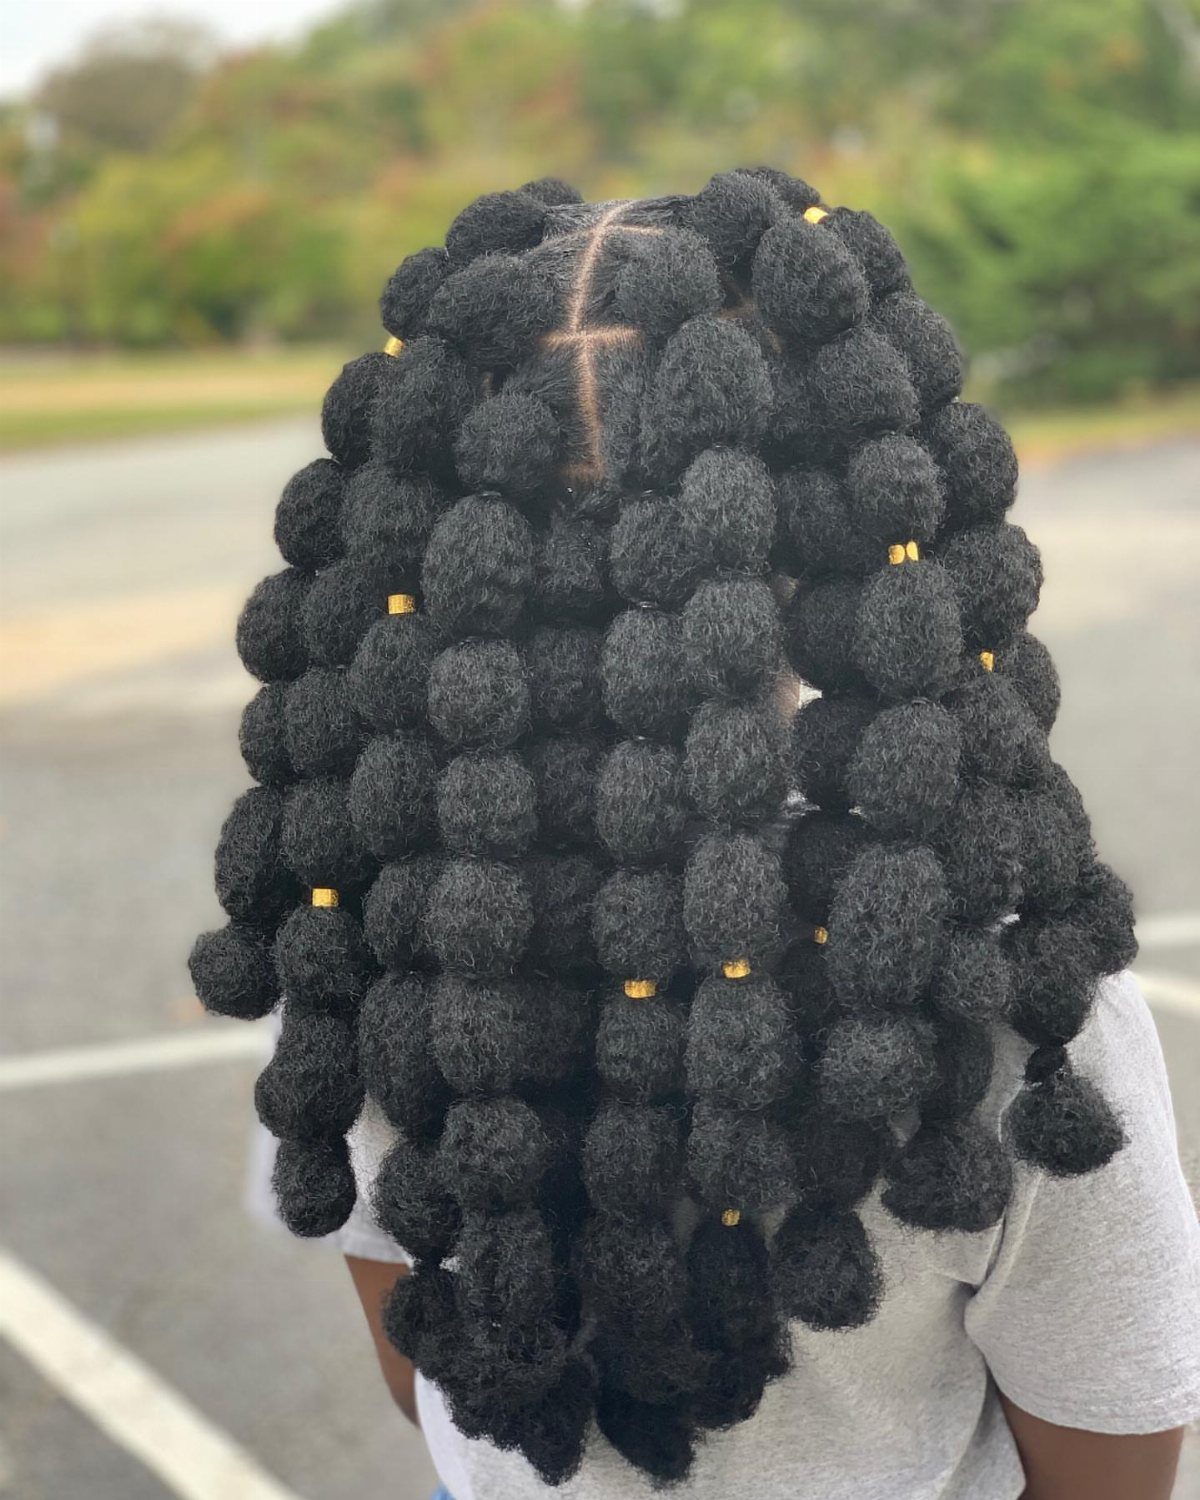
The cornrows end in bubble braids, where small elastics section the remaining length into rounded segments. The visible version uses gold bands, which catch light and add detail without extra hair.
To do this at home, braid the cornrows to the point where you want the bubbles to start, then place small elastics or hair ties every few inches down the loose extension hair.
Gently pull each section outward to create the bubble shape.
The elastics can be removed and repositioned without redoing the cornrows, so you can refresh the bubbles if they flatten.
16. Knotted Crown
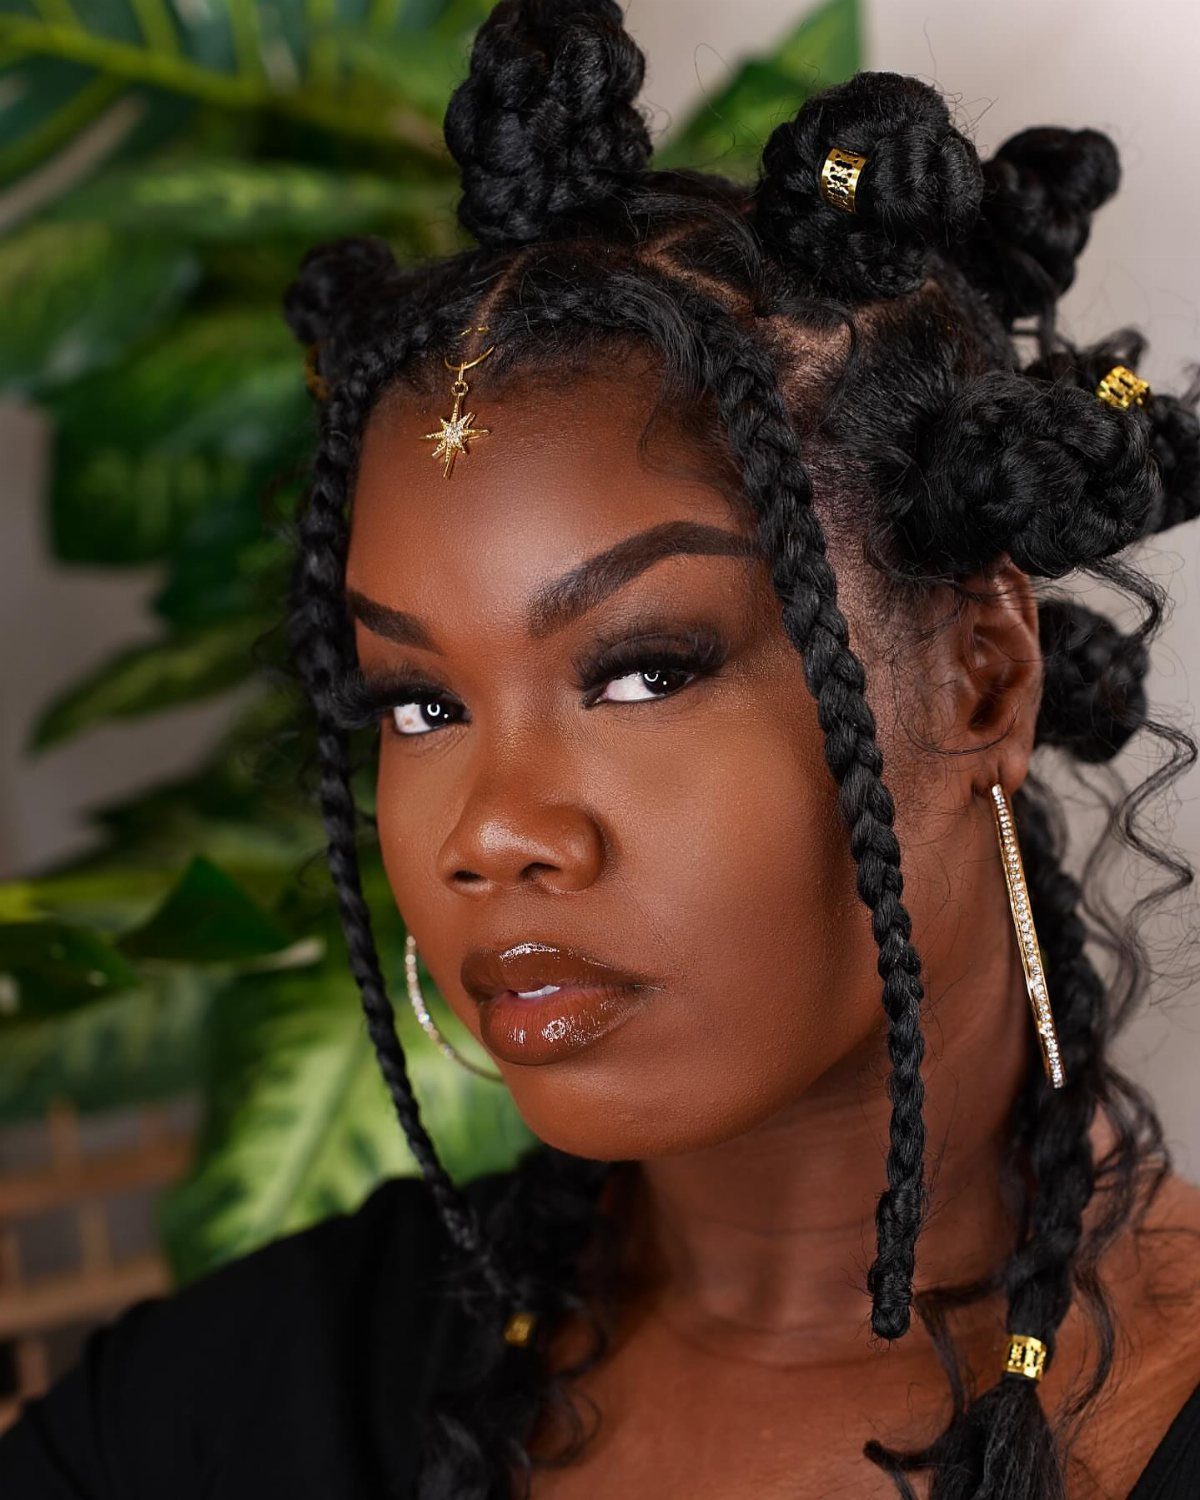
Bantu knots sit in a row across the crown, with long box braids hanging beneath them. The knots add volume and texture at the top, while the braids keep length.
The knots can be left as is or unraveled later for curls.
If you want them to hold as knots, secure each one with a small elastic or bobby pin. The box braids below can be any length or thickness, and the knots work with or without added color.
This version suits anyone who wants height and texture without heat styling.
17. Faux Shaved Side
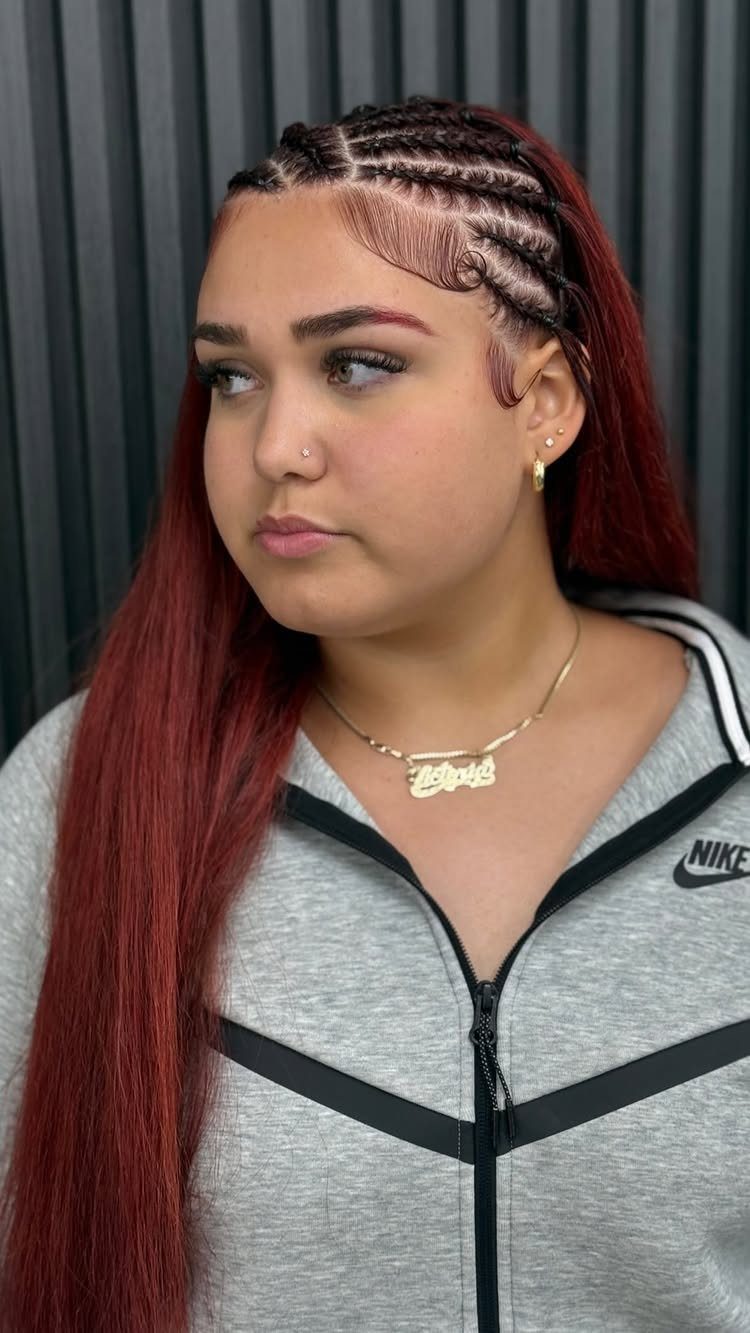
Cornrows run tight along one side of the head, giving the appearance of a shaved undercut without cutting any hair. The rest of the hair hangs loose or is styled separately.
This works well if you want the look of an undercut but don’t want to commit to the grow-out.
The cornrows can be redone when they loosen, and the loose hair can be worn curly, straight, or pulled into a ponytail.
If the cornrows feel too tight after installation, apply a light oil along the parts to ease tension on the scalp.
18. Scalp-Hugging Style
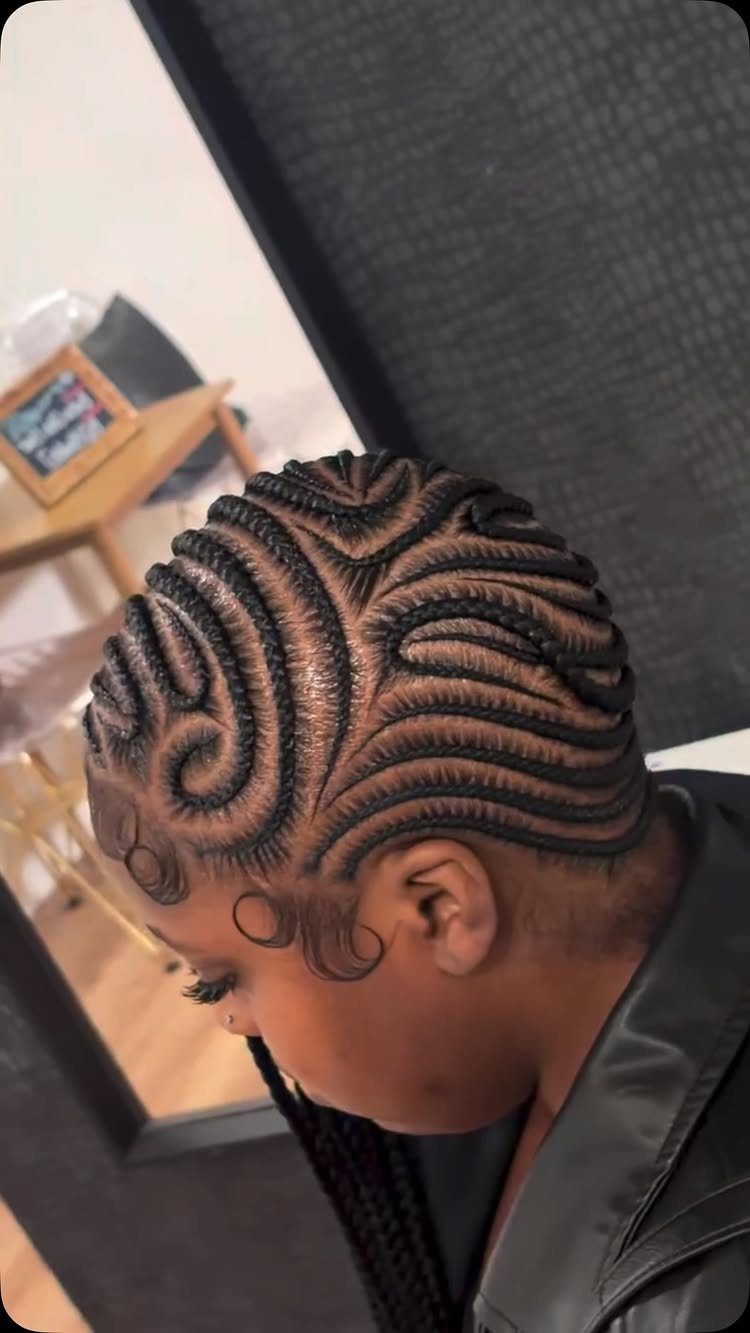
The braids curve and swirl close to the scalp in decorative patterns, with minimal length hanging past the nape. The visible version includes defined edges styled to follow the braid curves.
This style showcases the braid design itself rather than the length, so it works best when the scalp is visible and the parts are clean.
Mapping each curve before you start adds time to the chair, often an hour or more than straight-back cornrows.
19. Freestyle Small Braids
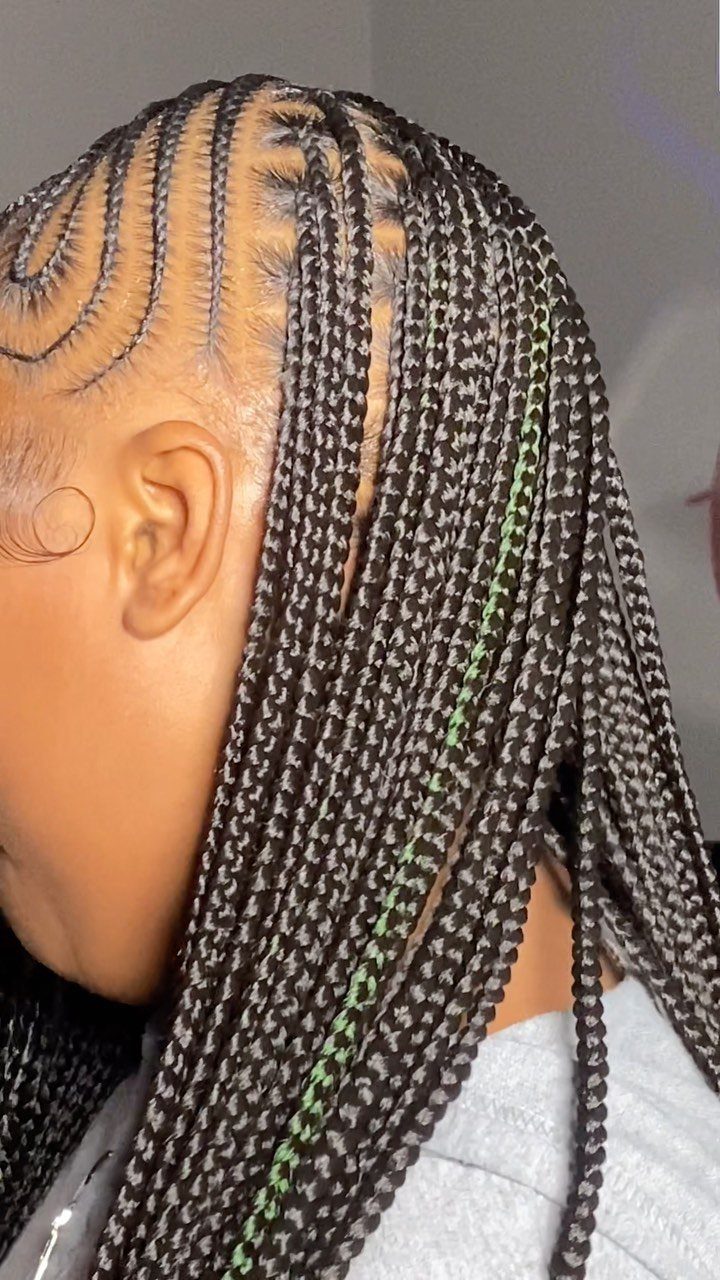
The cornrows are thin and follow curved, irregular paths instead of running parallel. Each braid moves in its own direction, creating a hand-drawn effect across the scalp.
The green highlights in the visible version add contrast and make the freestyle pattern easier to read. Without color, the design shows best when the braids are fresh and the parts are clean.
This version takes longer to section than straight rows because the braider maps each curve individually. If you book this, expect 1–2 extra hours in the chair compared to standard feed-ins.
20. Curvy Stitch Braids
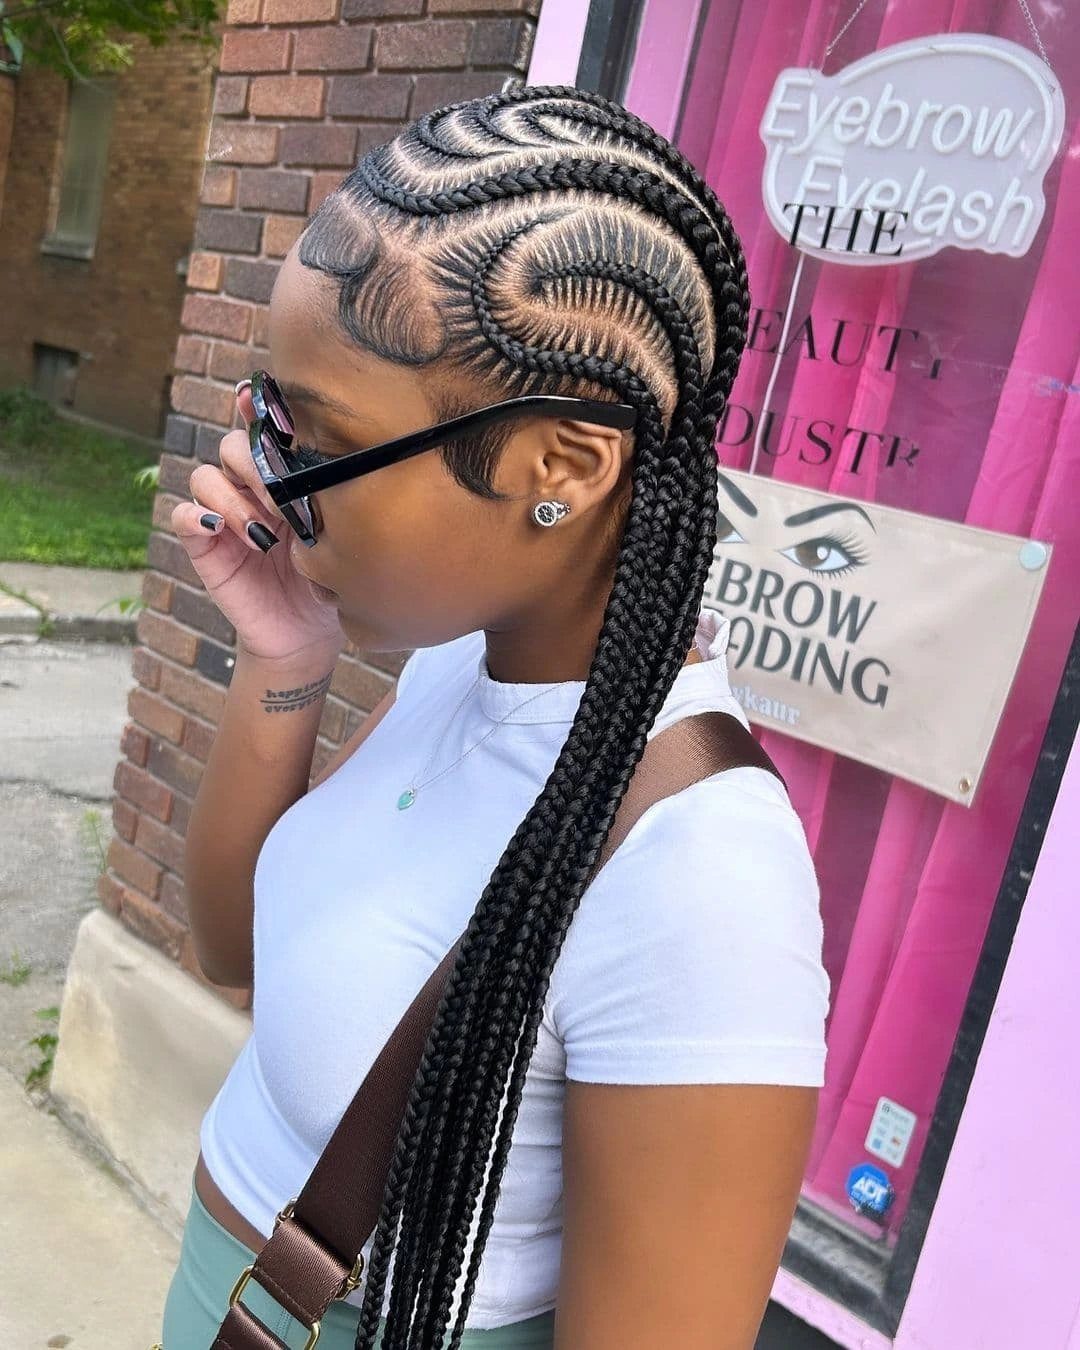
The visible stitching sits tight against each braid, which gives a clean edge even when the rows follow a curve.
Curved stitching takes more time than straight rows because the braider has to adjust tension through each turn to keep the pattern even.
The curves take time, so book a long appointment or plan to sit for most of the day.
21. Feed-In and Sew-In Mix
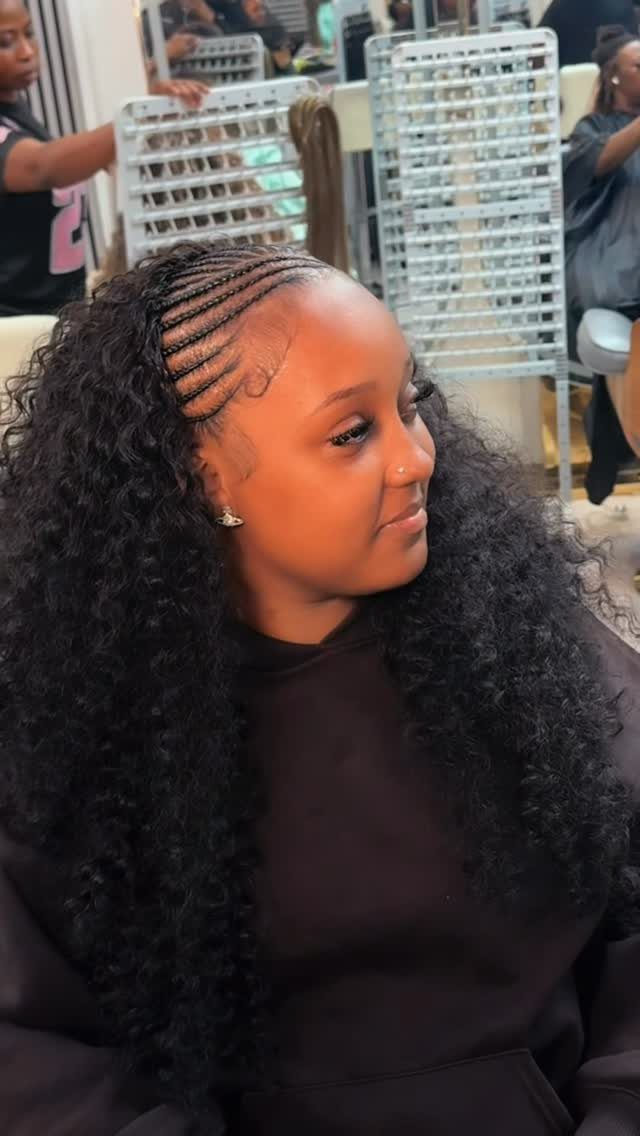
Feed-in cornrows cover the front and sides, then a sew-in weft is attached at the back to add curly length and volume. The visible version uses a curly texture that contrasts with the smooth braids.
This mix keeps tension off the hairline while still giving full length. The sew-in weft can be removed and reused, and the front cornrows can be redone without touching the curls.
To get this, book a braider who also does sew-ins, or do the cornrows first and have the weft installed separately.
22. Two Chunky Braids
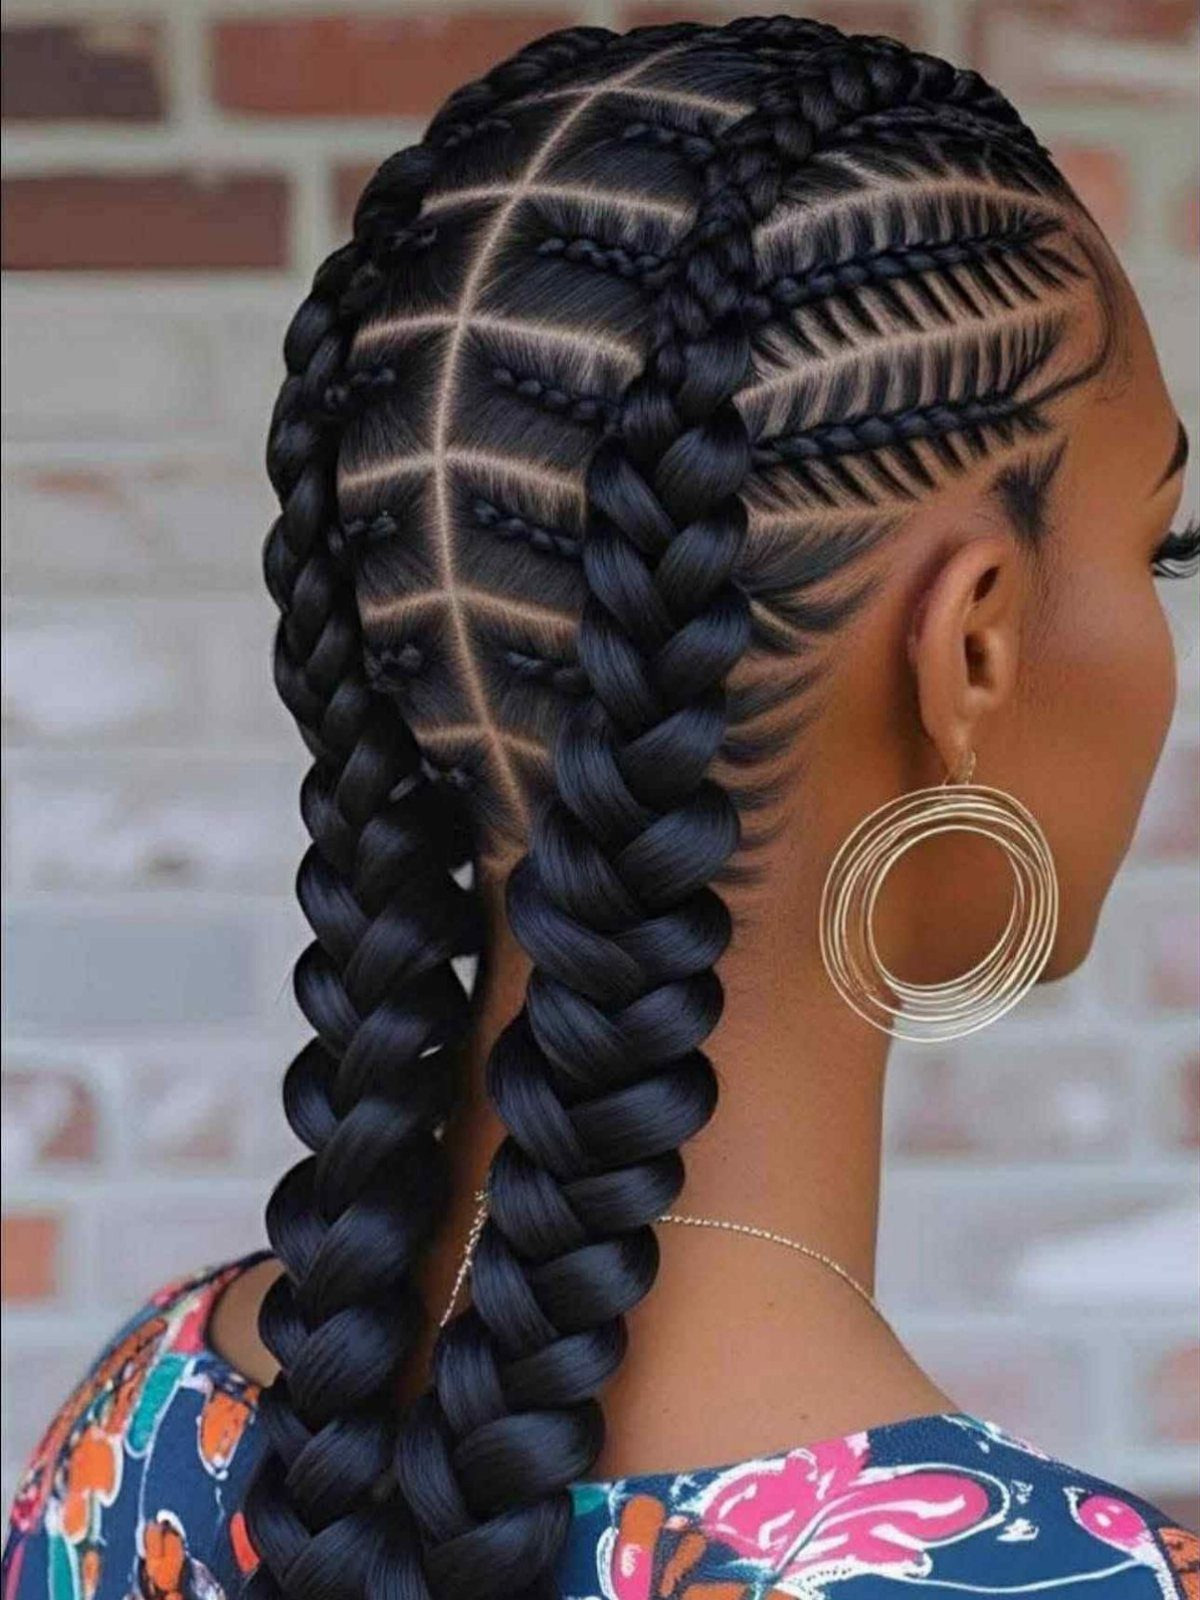
2 thick braids replace multiple rows, giving a clean, minimal look with less chair time. Each braid is fed in at the scalp, so the start stays flat and smooth.
Installation goes faster with fewer braids, and the thickness gives you structure that stays put.
If you have fine hair, the braider can add more extension hair to each braid to build thickness without adding rows.
23. Micro Braids with Curls
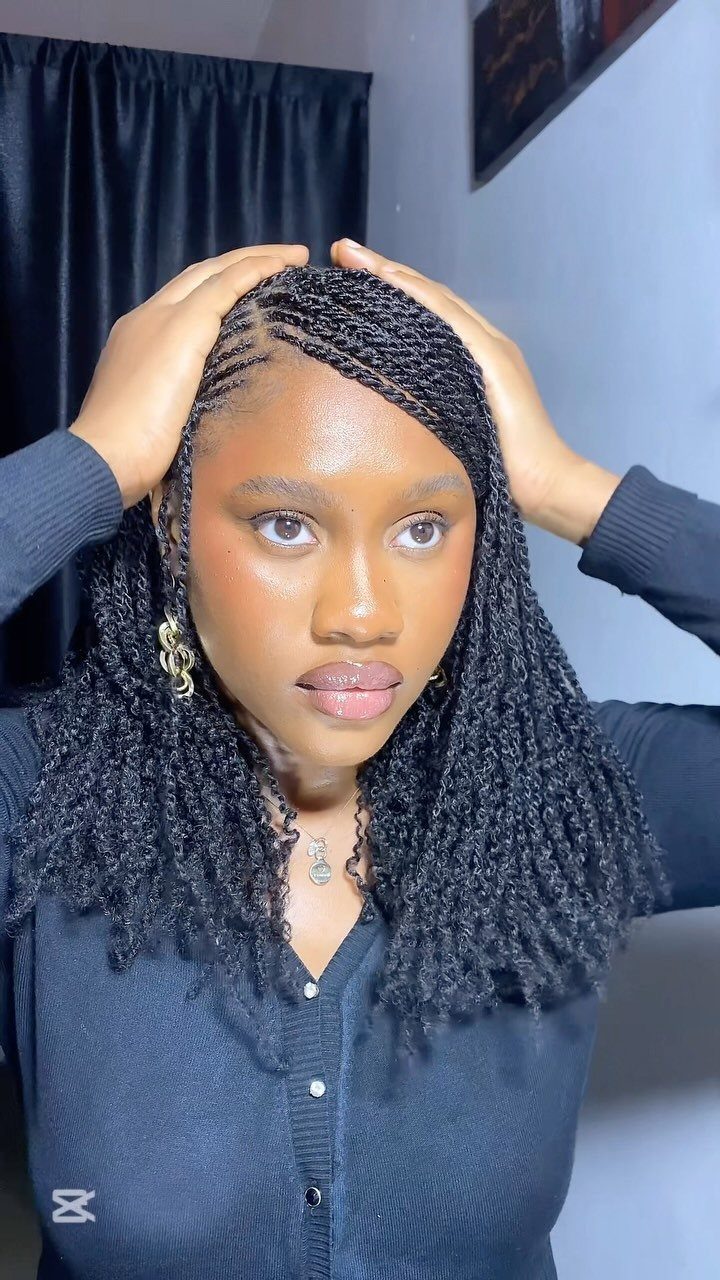
Each braid tapers from a thin root to a thicker midsection before opening into a curl. The shift from micro braids to curls gives texture and movement at the ends without adding bulk at the root.
Expect to spend most of a day in the chair since each braid is narrow and there are usually a lot of them.
The curls can be set on flexi rods or left loose, and they need light mousse to keep separation.
The micro sections put less pull on each follicle than thicker rows.
24. Stitch Braids Into Bun
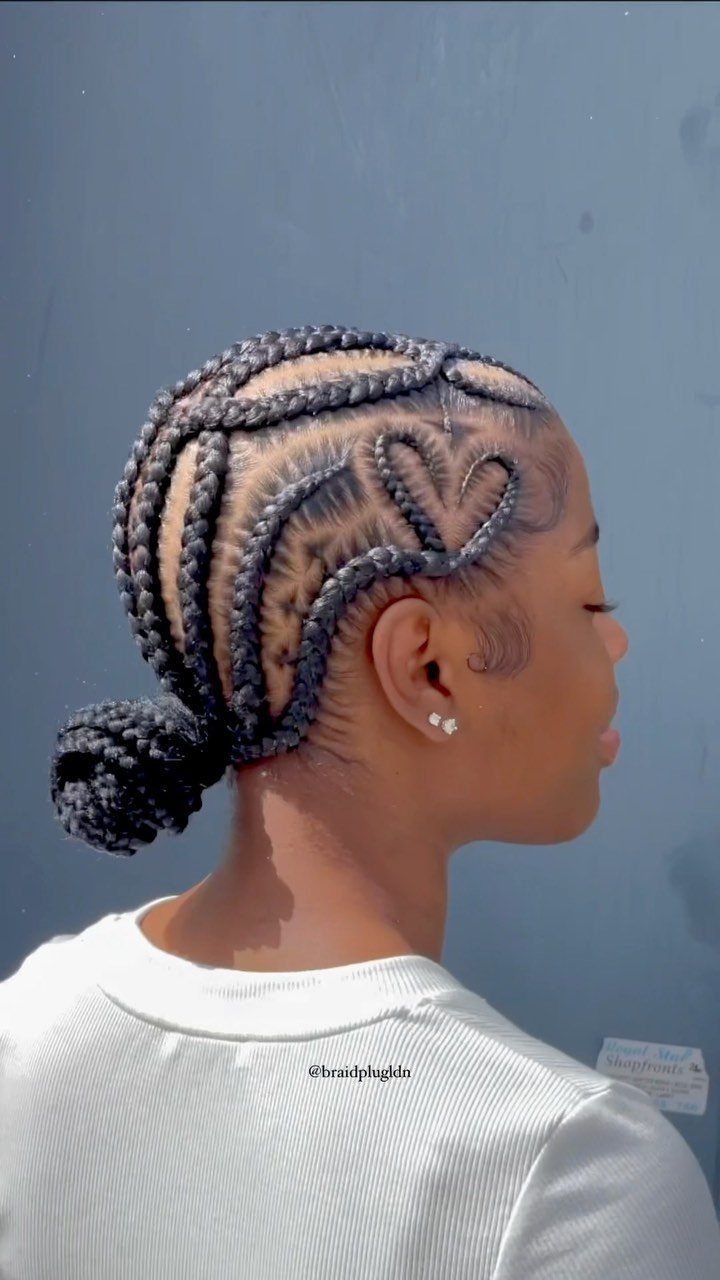
Stitch braids curve around a decorative part at the crown, then gather into a low bun instead of hanging loose. The bun keeps hair off the neck and shows the stitch pattern at the scalp.
You can re-pin the bun without redoing the stitching, so the style stays adjustable between washes.
25. Lemonade Plaits
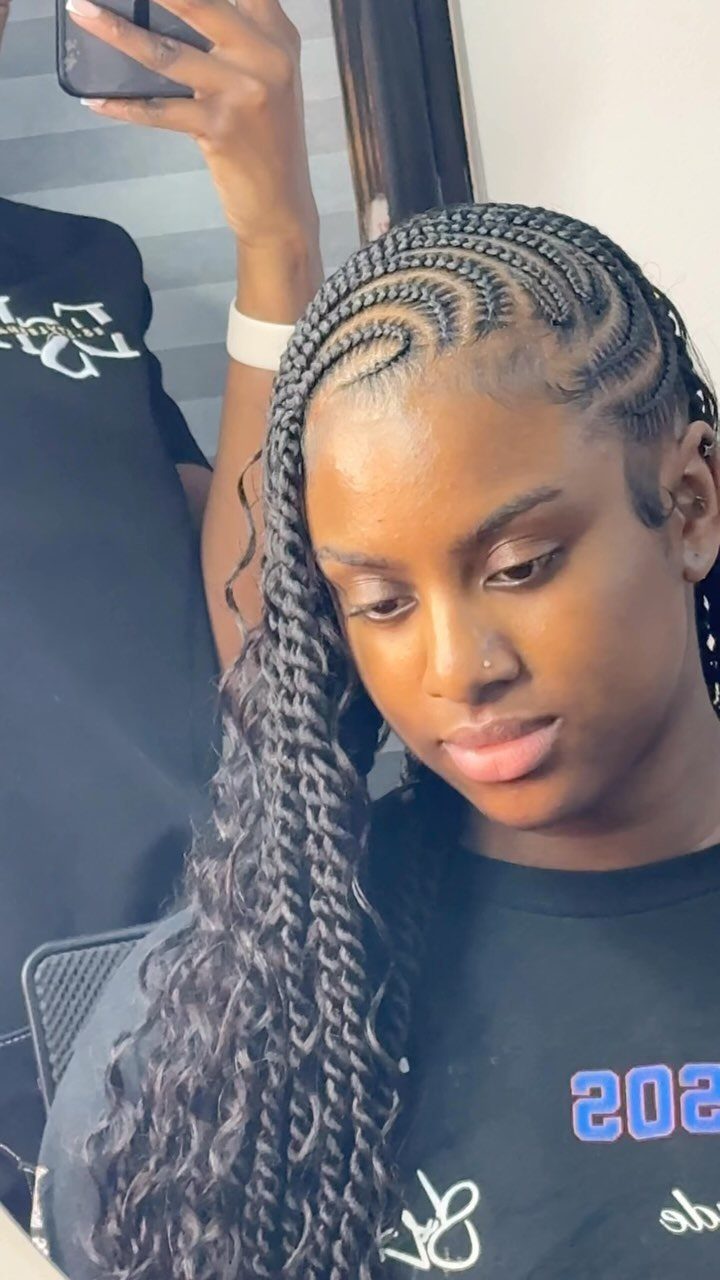
The cornrows sweep diagonally to one side and merge into long braids that drape over one shoulder.
The side-swept angle is the signature move of lemonade braids, and when you add Fulani-style parts or accessories, the two styles layer into one look.
This version keeps hair off one side of the face and neck, which helps in heat or if you prefer an asymmetrical frame.
The diagonal angle means the braider sections on a slant instead of straight back, so the rows follow the same direction from start to finish.
The long length past the shoulder can be wrapped or pinned up without redoing the cornrows.
26. Medium Plaits
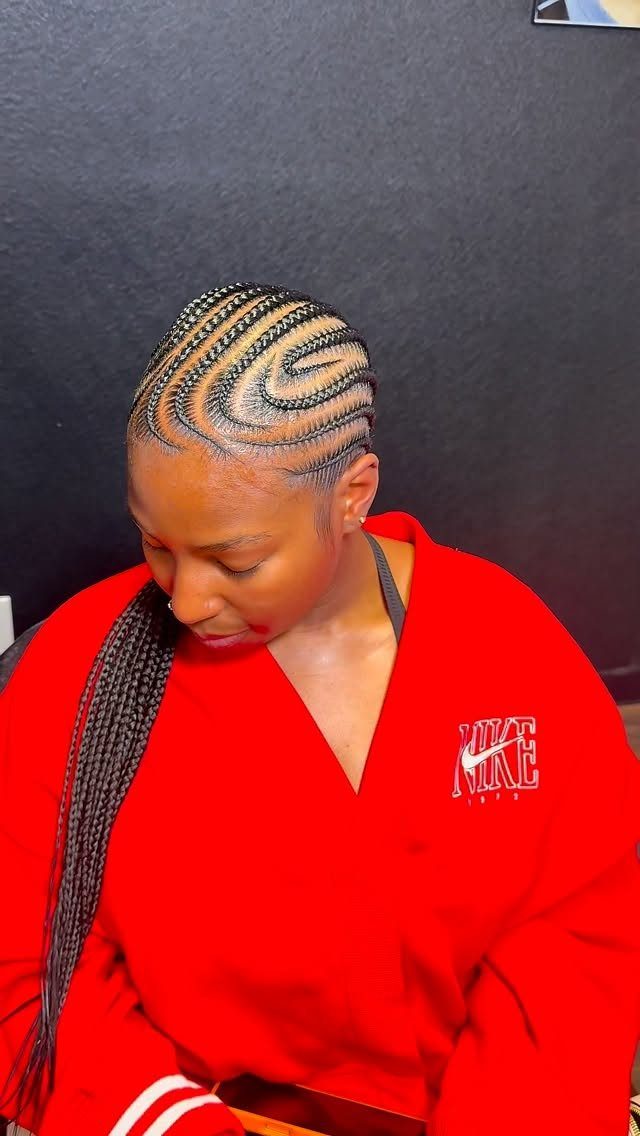
The cornrows are medium width and follow curved paths across the scalp before dropping into long braids over one shoulder. Styled edges frame the hairline and follow the curve of the first few rows.
Medium braids install faster than thin ones and put less tension on each follicle than chunky rows, so you get a balance between chair time and scalp comfort.
The curves add visual interest without the long sectioning time that freestyle patterns require.
If your edges are delicate, ask the braider to keep the first inch or two looser and use edge control instead of tight tension to hold the shape.
27. Red Curved Feed-In Braids
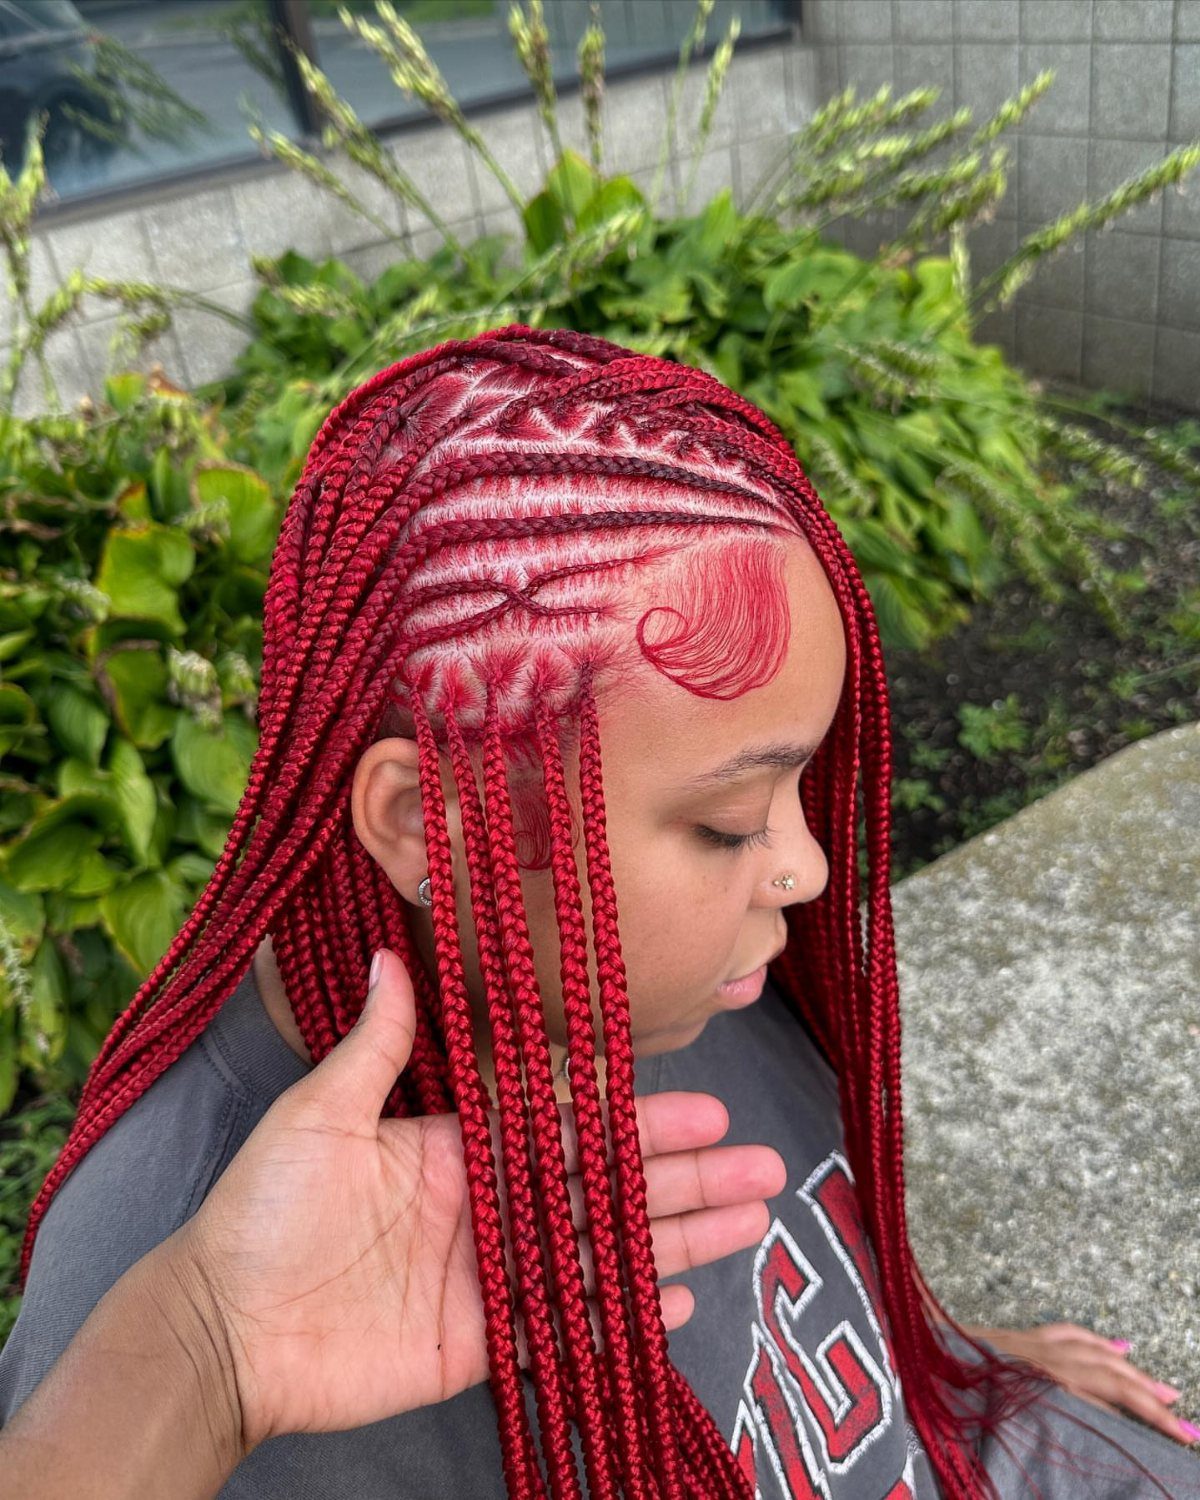
The braids are bright red and follow curved rows across the scalp before hanging long and loose. The color makes the braid pattern more visible and contrasts with darker roots if your natural hair shows through.
You’ll need extensions that are already dyed red or color them yourself before your stylist starts.
Parting each arc by hand instead of running a straight line adds time to the chair, sometimes an hour or more depending on how many rows you want.
Beads can be added to the ends after the braids are done, threaded onto each braid and secured with a small elastic or crimp bead.
28. Copper Feed-In Braids
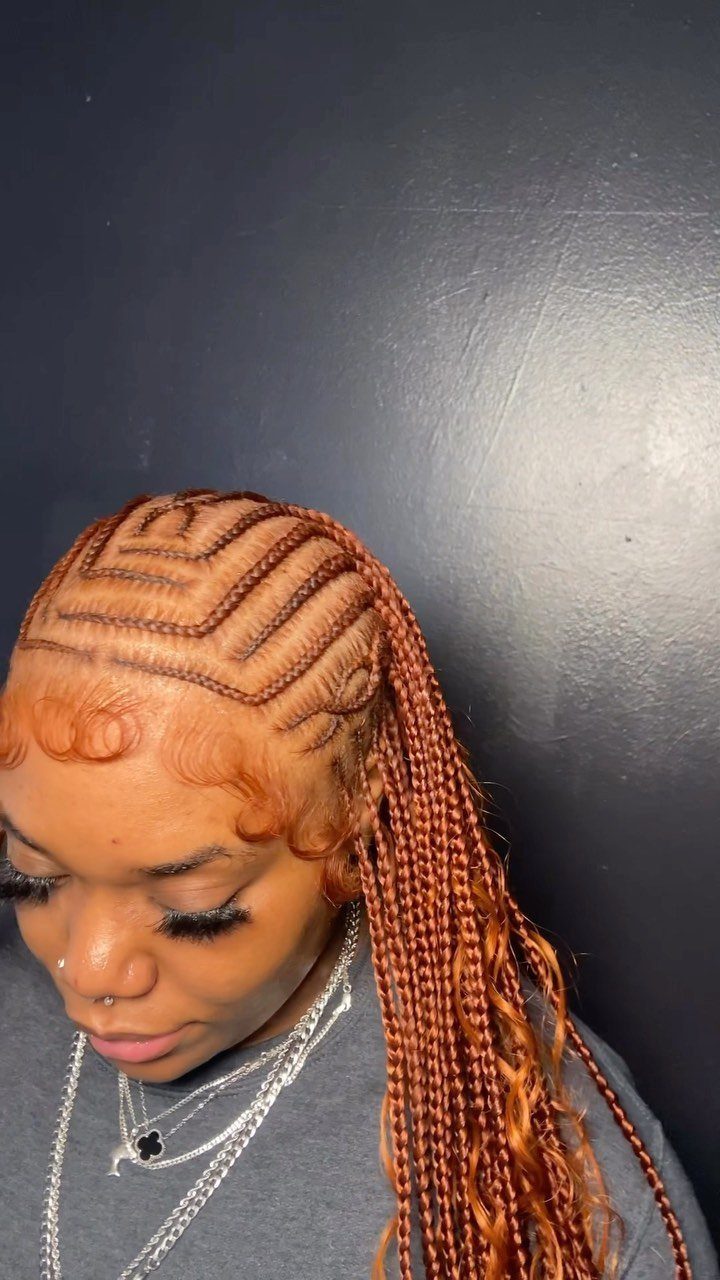
Copper-brown braiding hair feeds into tightly patterned scalp cornrows that fall over one shoulder. The warm tone sits between red and brown, so it reads as a natural highlight or a subtle color shift depending on your base color.
Copper extensions show up best against darker hair, and the color stays visible even when the braids are gathered or pinned. The side drape keeps the neck clear and puts the full length where you can see it.
If you want the copper tone without dyeing your own hair, ask for pre-colored braiding hair in a warm auburn or copper shade when booking.
Feed-in Technique and Benefits
The braider feeds extension hair in gradually instead of knotting it all at the base, so the braid starts flat and builds weight as it goes.
The gradual feed spreads tension along the braid instead of concentrating it at one point, which helps if your scalp is sensitive or your edges are fragile.
If a braid feels too tight the day you get it, speak up before you leave the salon.
Because your natural hair stays tucked inside the braid for weeks, this counts as a protective style. Daily heat tools and combs stay off your strands, which gives them time to rest.
Feed-in braids have a long history and are now one of the most popular protective styles around.
Basic Braid Maintenance
Cotton pillowcases pull moisture out overnight and create friction that lifts frizz along each row.
Massage a light oil onto your scalp between the rows to stop itching and keep skin comfortable.
Go light, buildup sits between the braids and grabs lint fast. A leave-in conditioner hydrates your natural hair underneath the braids, where air can’t reach it.
Frequently Asked Questions
What are feed-in braids?
Feed-in braids are a technique where extension hair is added gradually as you braid, instead of starting with a full bundle at the root.
You start thin at the root and add small amounts of hair as you braid, so the base sits flat and thickness builds toward the ends.
This gives you fuller or longer braids without the bulk or tension of traditional methods.
How do you feed in hair while braiding?
Start by parting the hair into even rows with a rattail comb, then braid each section with 3 strands. Braid all the way through so the extensions lock in and the whole row looks smooth.





