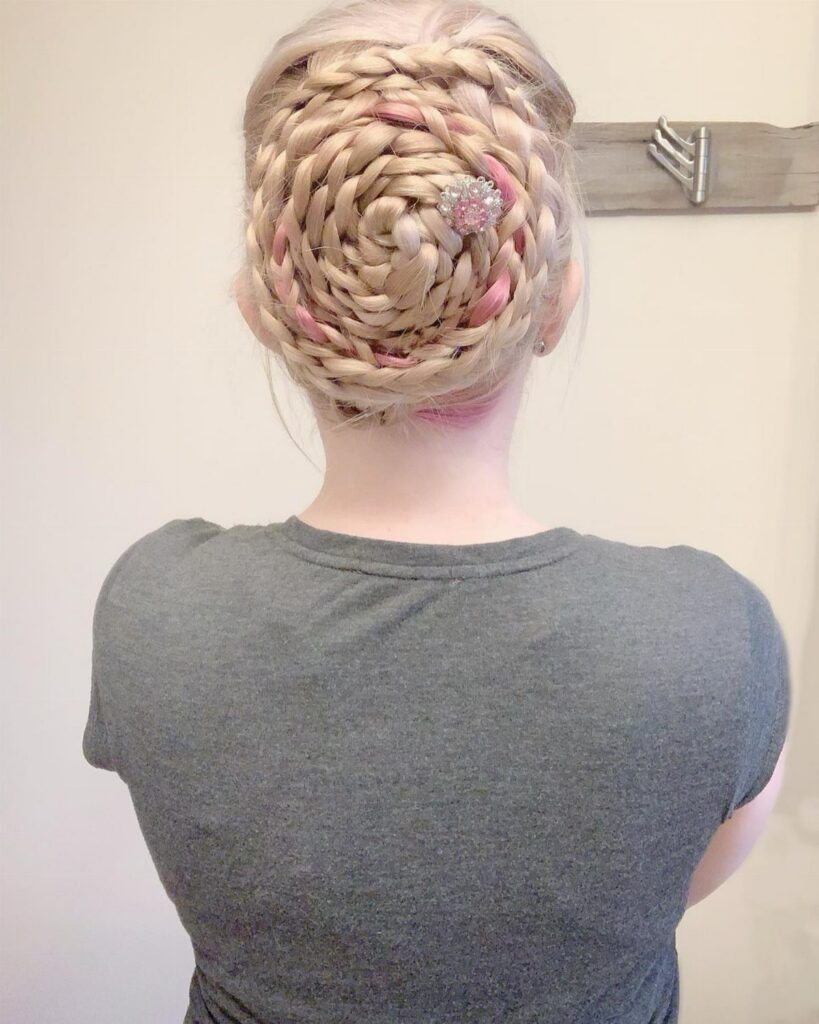
The structure you’re choosing decides how much prep time you need and whether the bun holds through a full day.
If your hair sits past your shoulders and you can braid a clean Dutch or rope braid, most of these work.
1. Vertical Braided Roll
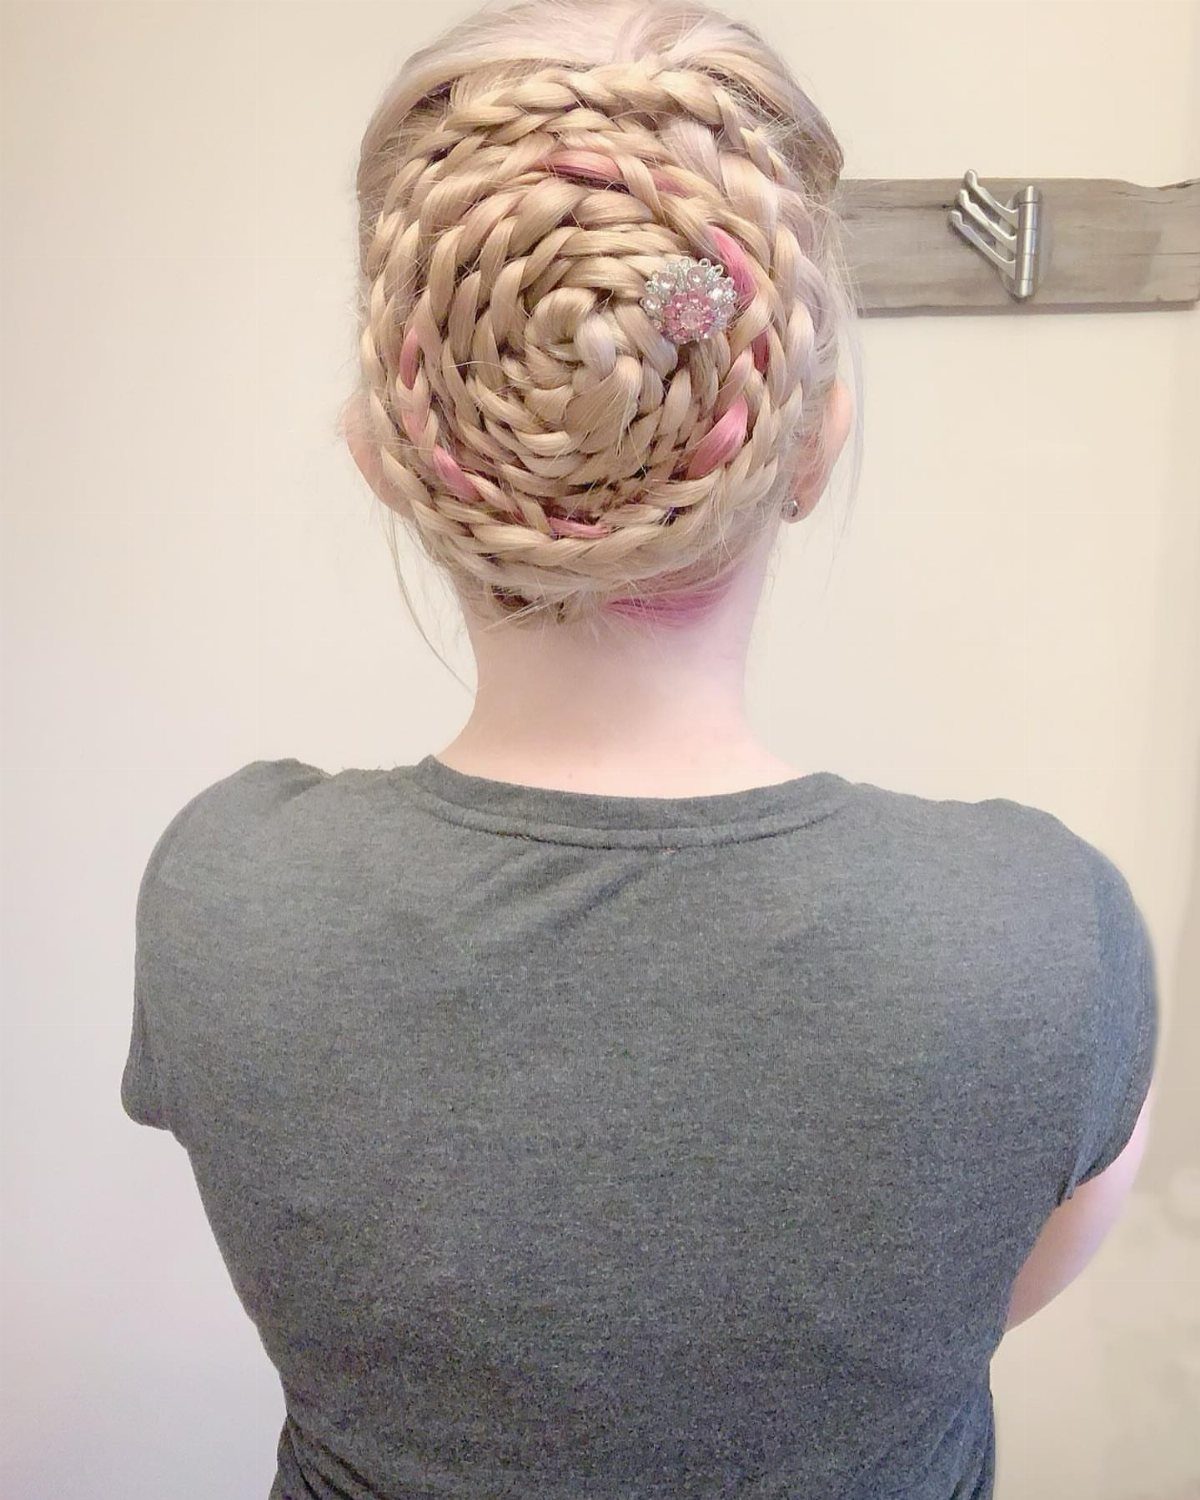
A braid is secured into a vertical roll instead of a round bun, so you get a long, raised shape down the back of your head.
This works if you prefer the structure of a braid with a more elongated silhouette than a typical bun gives.
Start with a braid, then tuck and pin it vertically, rolling the length up along the back of your head. The roll stays visible, so each section needs to lie flat against the next.
2. Bun with Ends Sticking Out
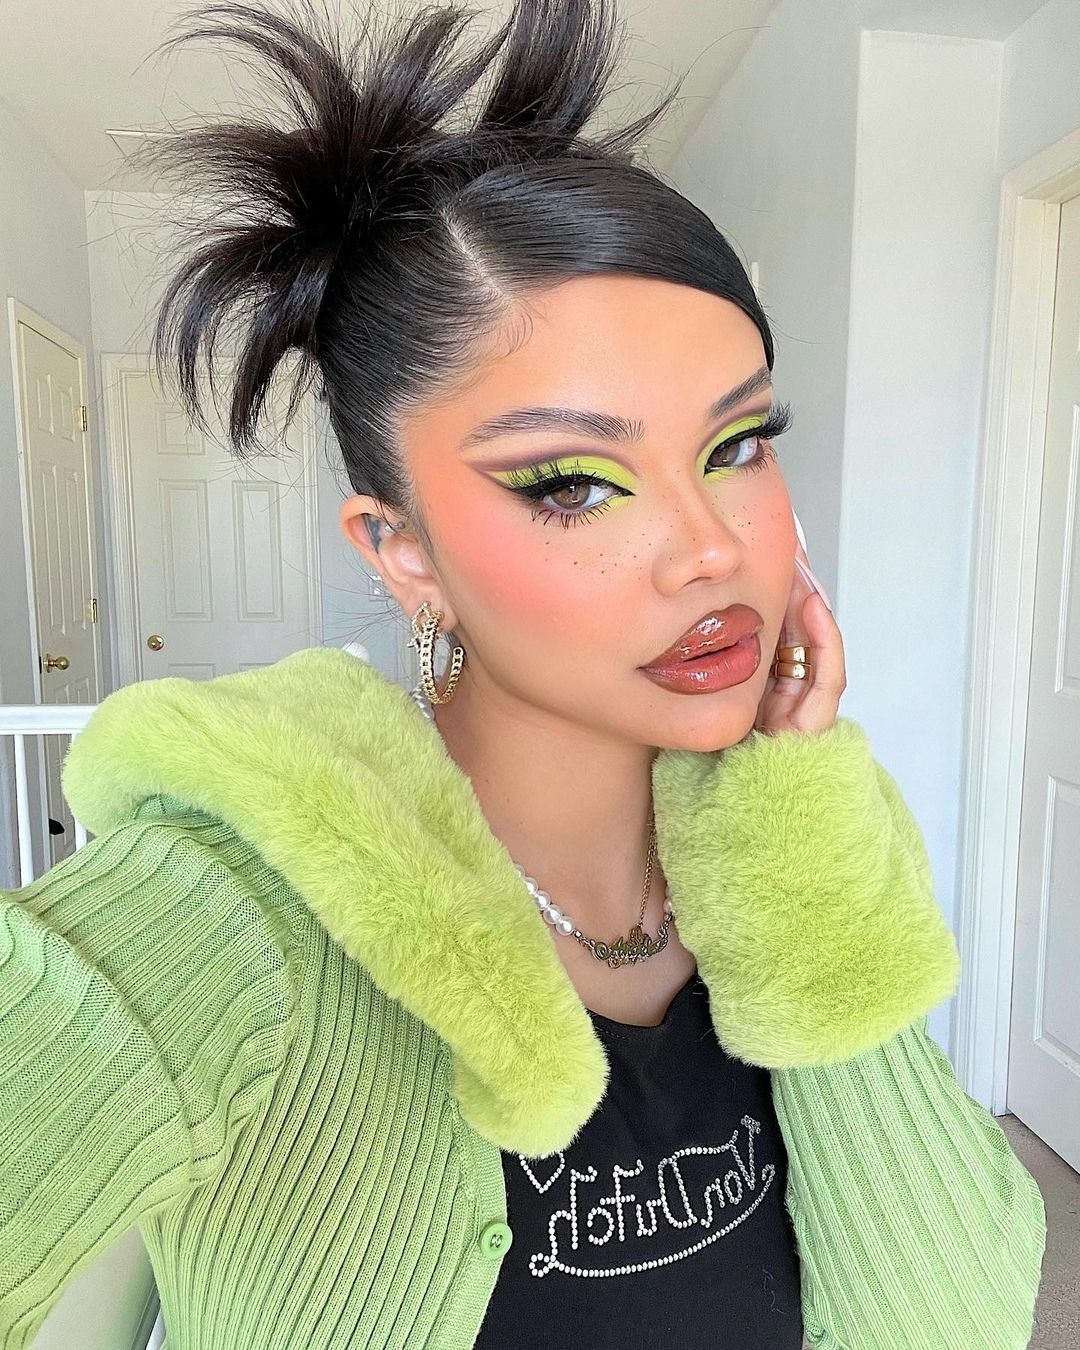
The bun is secured partway through, leaving the ends sticking up instead of tucking them under. You get a spiky, playful finish that suits high buns especially well.
Gather your hair into a ponytail, twist or wrap it into a bun, then stop before the ends are hidden.
Pin the base and let the rest stick out. The longer your hair, the more dramatic the spikes.
This reads younger and more casual than a polished bun, so skip it for formal settings.
3. Criss-Crossed Braided Bun
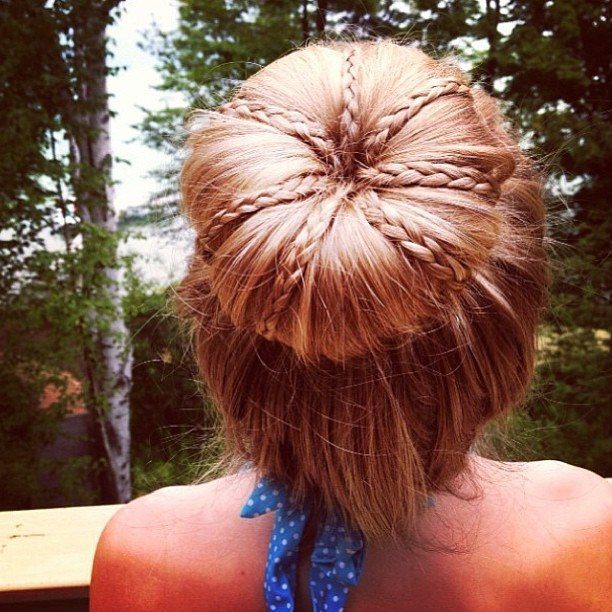
Thin braids cross over the surface of a sock bun, adding detail without weight. The base stays smooth and round, and the braids lie flat across the top.
Form a sock bun first, then braid 2 sections from the remaining hair and lay them across the bun, pinning at each end. If your hair is thick, the braids will stand out more; fine hair keeps them subtle.
This suits medium to long hair. Shorter lengths may not have enough left over after forming the bun.
4. Dutch Braid Swirled Bun
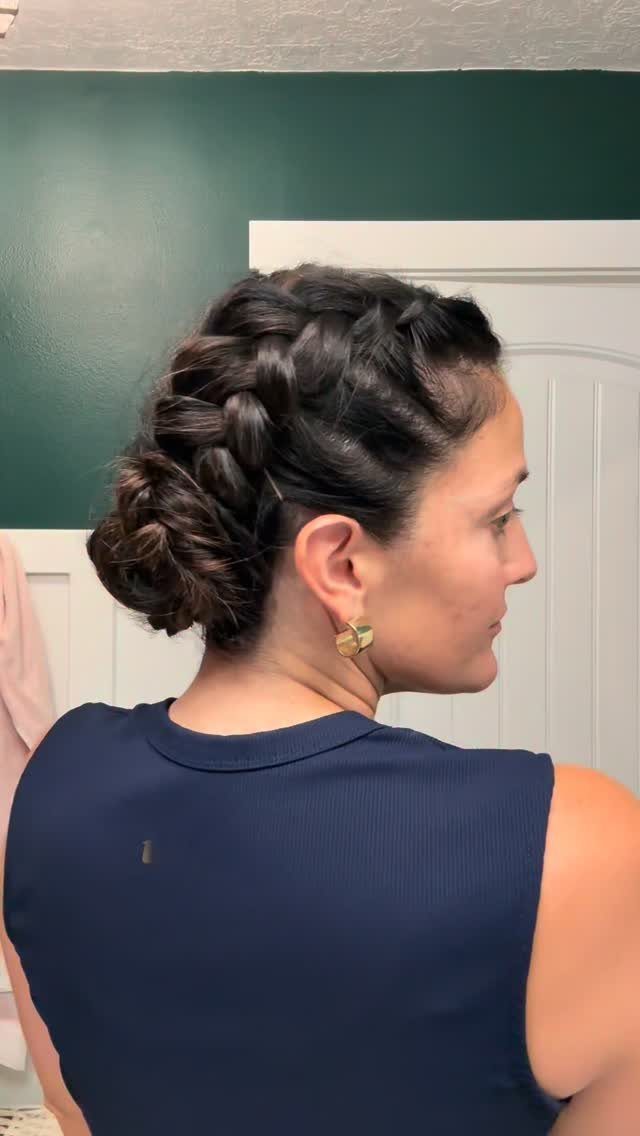
A Dutch braid curves along the side or back of your head, then spirals into a low bun. The braid follows the shape of your skull before it coils, reading as one continuous line.
Start the Dutch braid at your part or temple, following the curve you want, then gather the end into a twisted or spiraled bun.
Pin the coil flat against your head. The tighter your braid, the more defined the spiral will be.
5. High Crown Bun
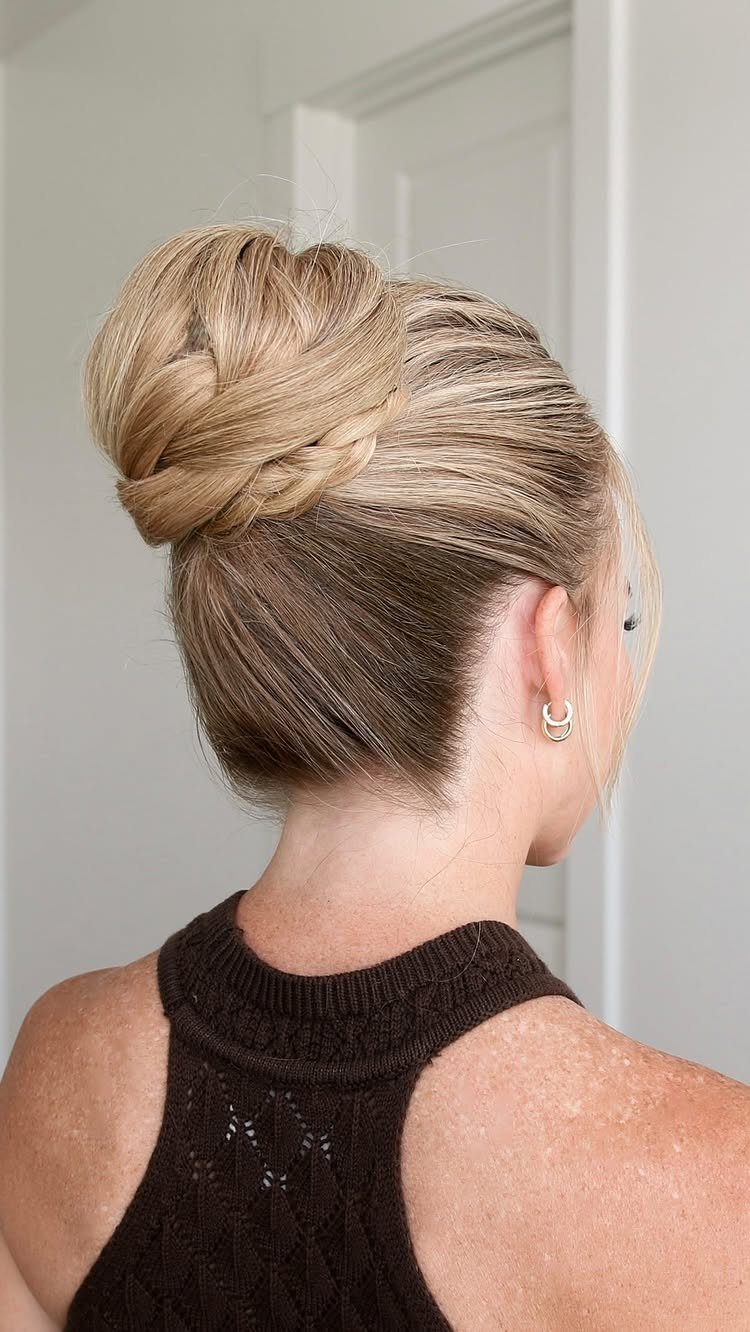
A thick braid wraps around the crown, meeting a full bun at the top of your head. The crown braid sits high and forms a strong horizontal line, giving the look a lifted, formal finish.
Braid a section at your hairline, wrap it across the top, then gather the rest into a sock bun or twisted bun directly behind it.
The braid needs enough thickness to balance the bun, so this suits medium to thick hair best.
6. Messy Braided Bun
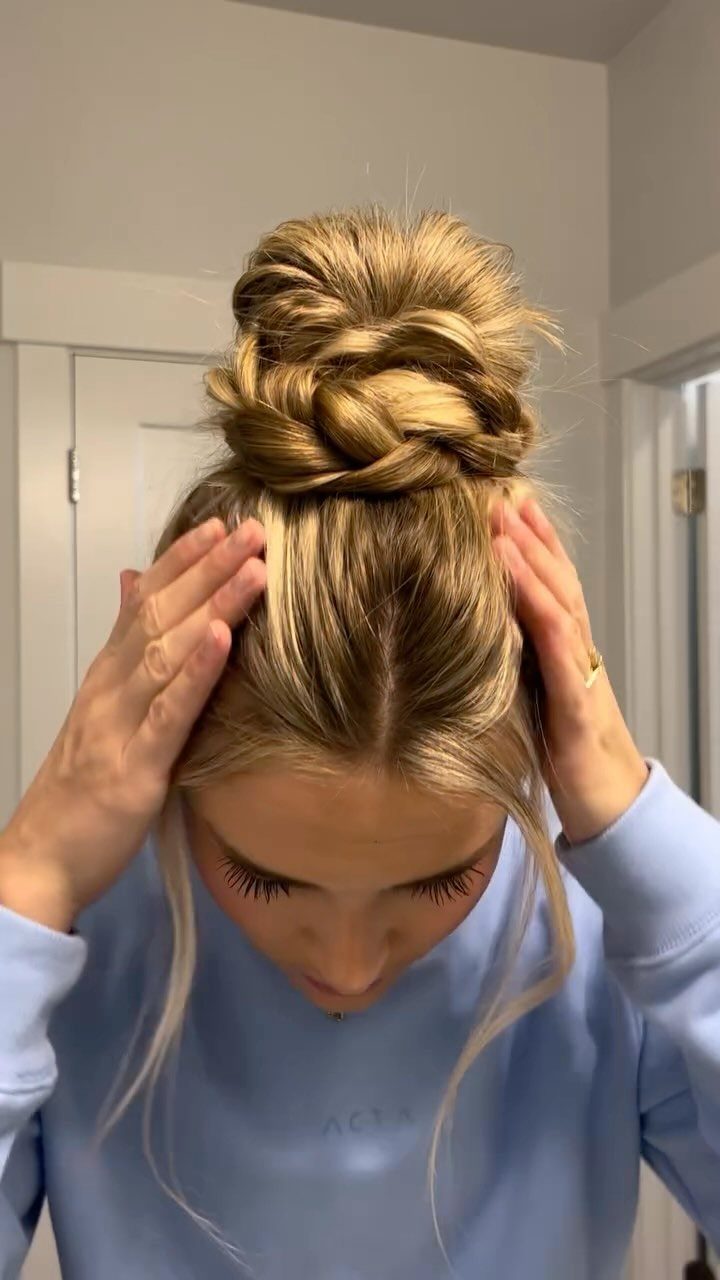
Several loose braids are woven together and pinned into a bun, with sections intentionally left uneven. The bulk comes from the braids themselves, not from a sock or padding, so the finish looks soft and undone.
Braid a few sections loosely, twist them around each other, then pin the ends at the back of your head.
Pull a few strands free as you go. This takes longer hair and works best when your hair has some texture or wave already.
7. Box Braid Bun
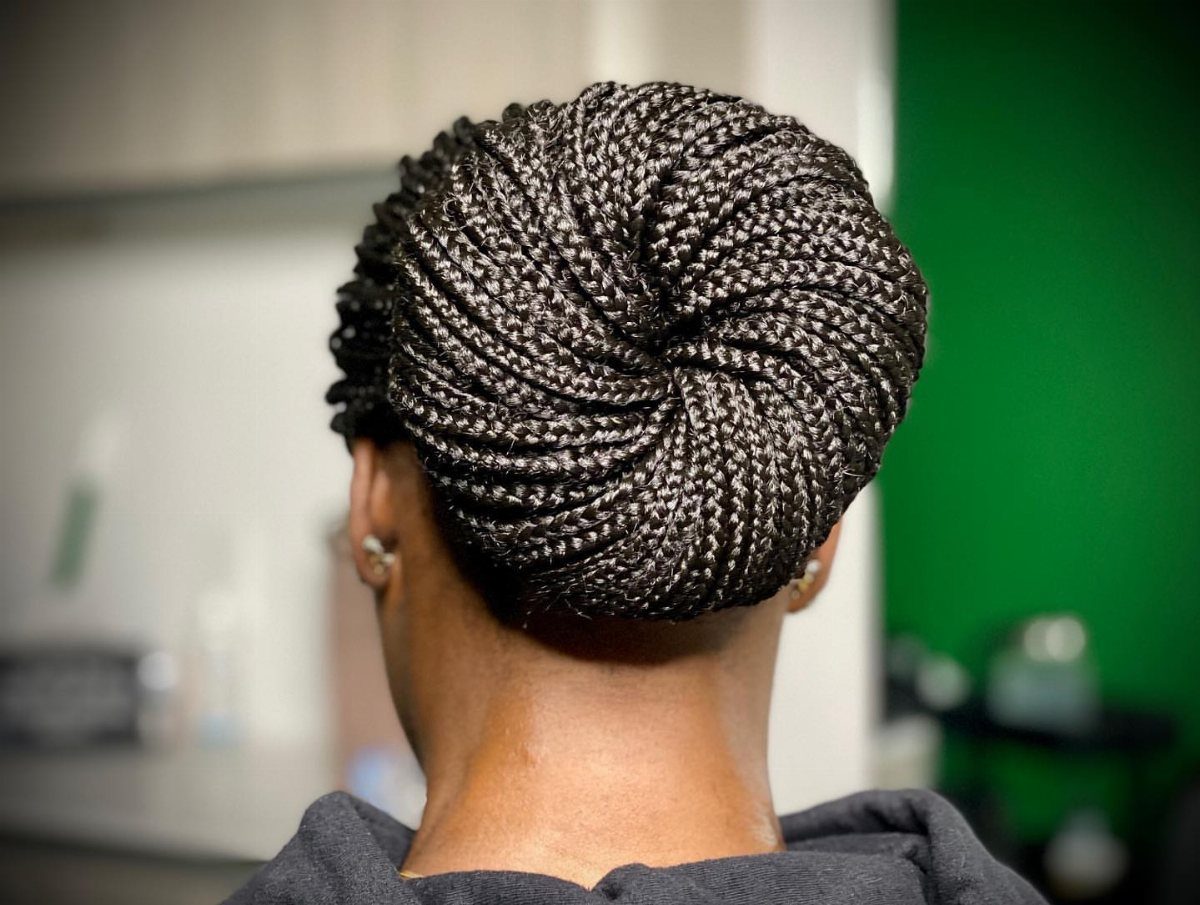
Box braids are piled and wrapped into a bun at the back of your head, keeping the individual braids visible throughout. This suits protective styles and gives you a polished finish without heat.
Gather the braids into a ponytail, then coil or twist them around the base and pin.
The bun sits heavy, so use enough pins to hold the weight. Longer braids give you more volume; shorter ones keep the bun closer to your head.
This works for any occasion and holds all day once it’s pinned.
8. French Braids Into Loose Bun
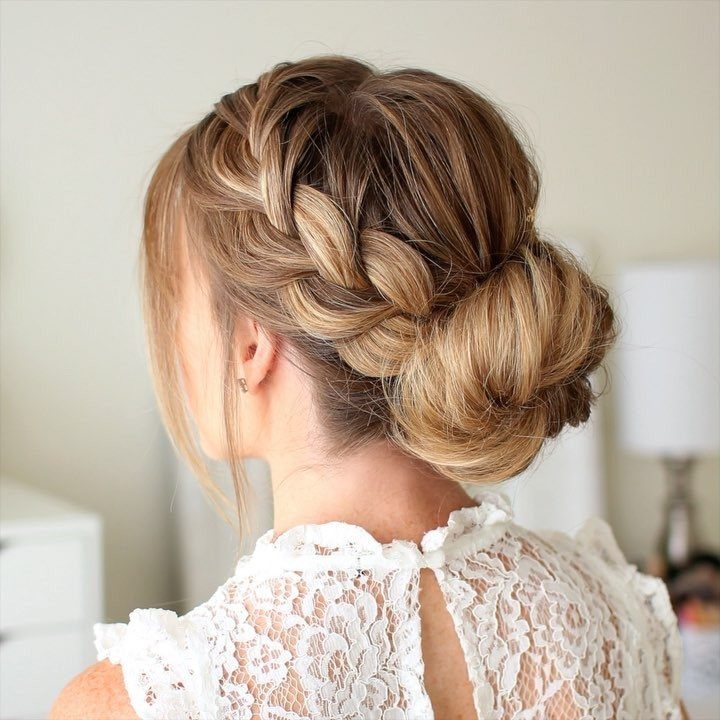
Loose French braids run from your hairline into a soft, gathered bun at the nape. The braids add structure at the top while the bun stays relaxed and textured.
Start two or three French braids at your crown, braid partway down, then gather all the ends into a low bun without pulling tight.
Pin loosely so the bun keeps its soft shape. Fine hair benefits from this because the braids give the illusion of more volume.
9. Cornrows Statement Bun
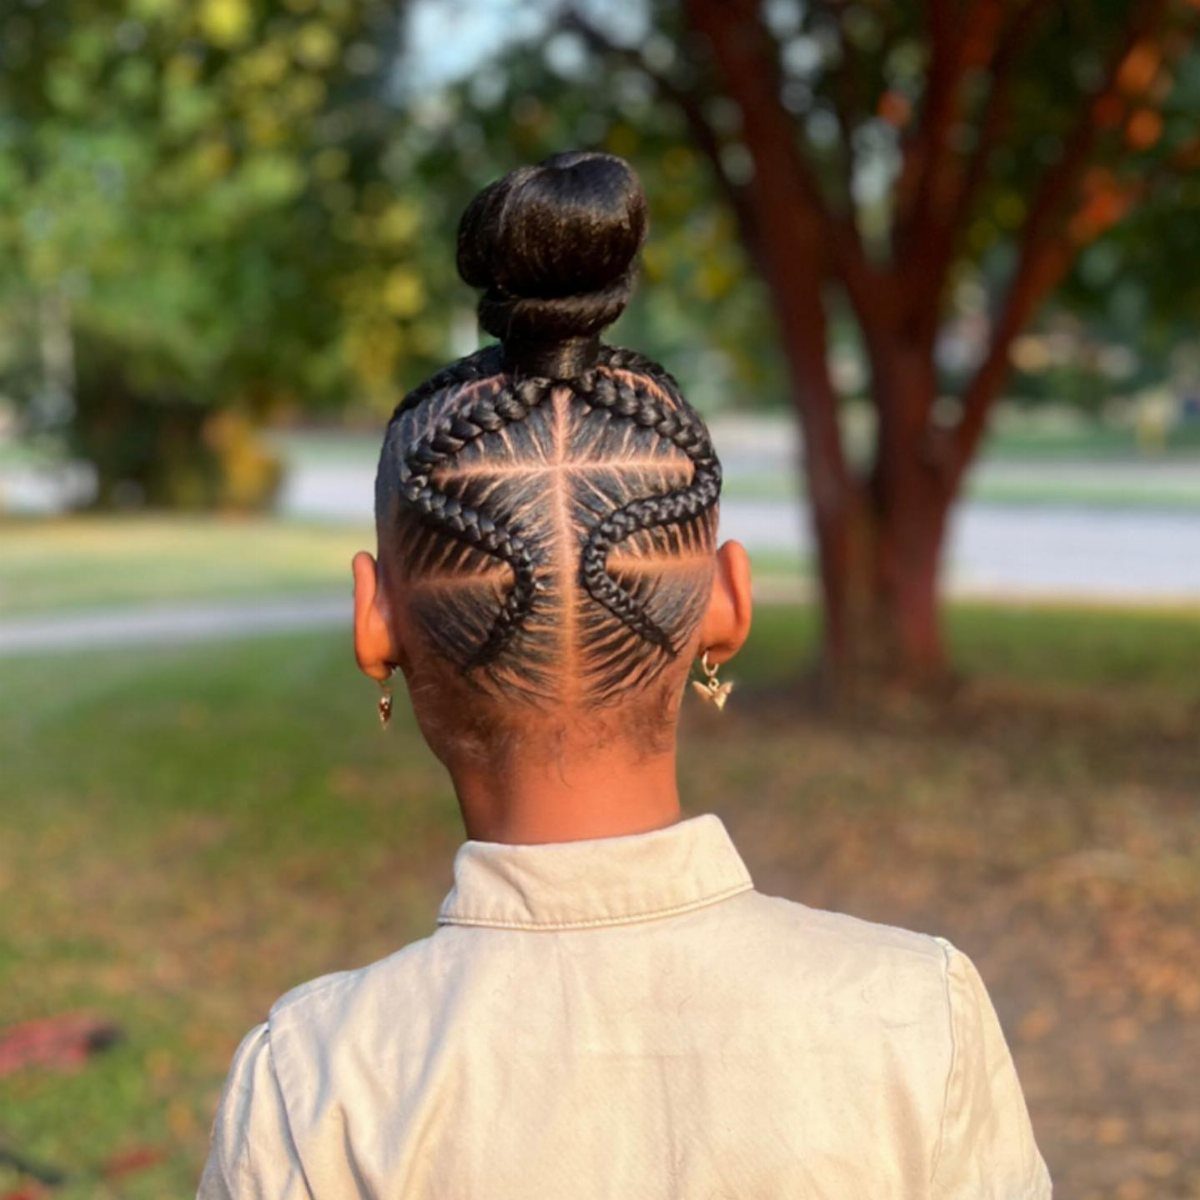
Cornrows braided close to your scalp lead into a high bun, turning the braids into the feature. The bun can be tight and sleek or full and rounded, but the cornrows always run clean and precise.
Cornrow the lower half or sides of your head, then gather the remaining hair into a bun at the crown.
The tighter your cornrows, the longer they’ll hold. This takes time to braid but lasts several days once it’s done.
10. Messy Bun with a Twist
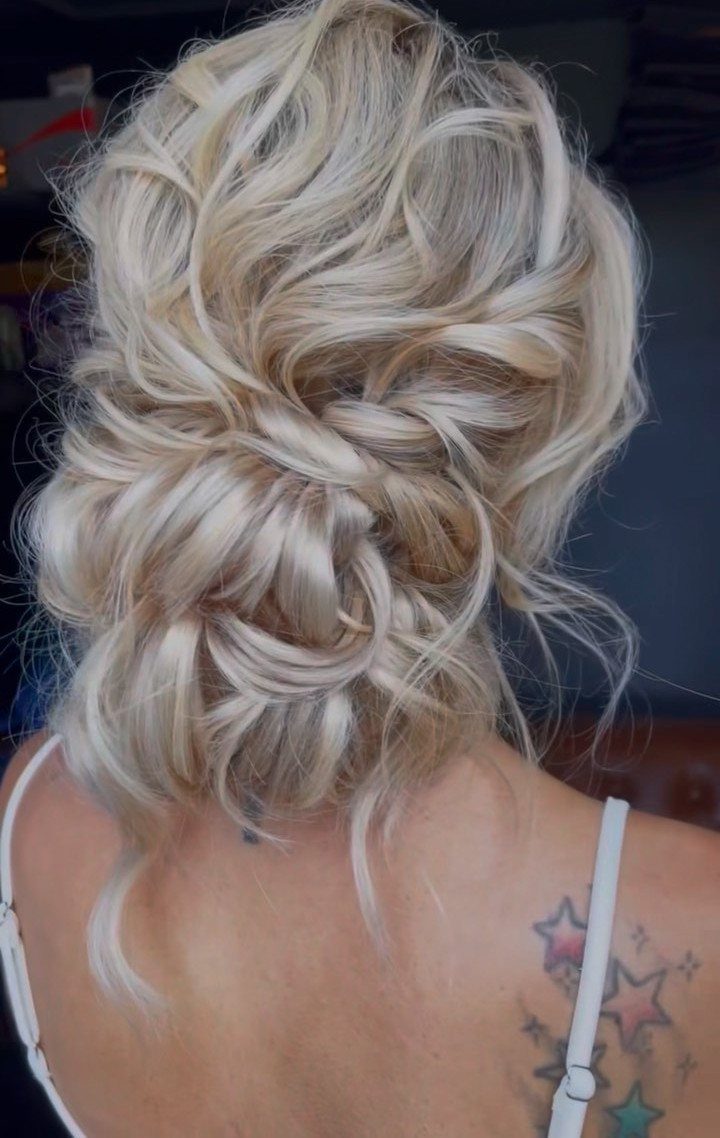
Thick twisted sections loop into a bun, with pieces left loose and uneven for texture. The twist adds dimension without the structure of a braid, so the bun stays soft and casual.
Twist sections of your hair loosely, wrap them around a ponytail base, then pin. The messy bun with a twist suits wavy or textured hair because it already has movement; straight hair may need texturizing spray first.
11. Side Braided Low Bun
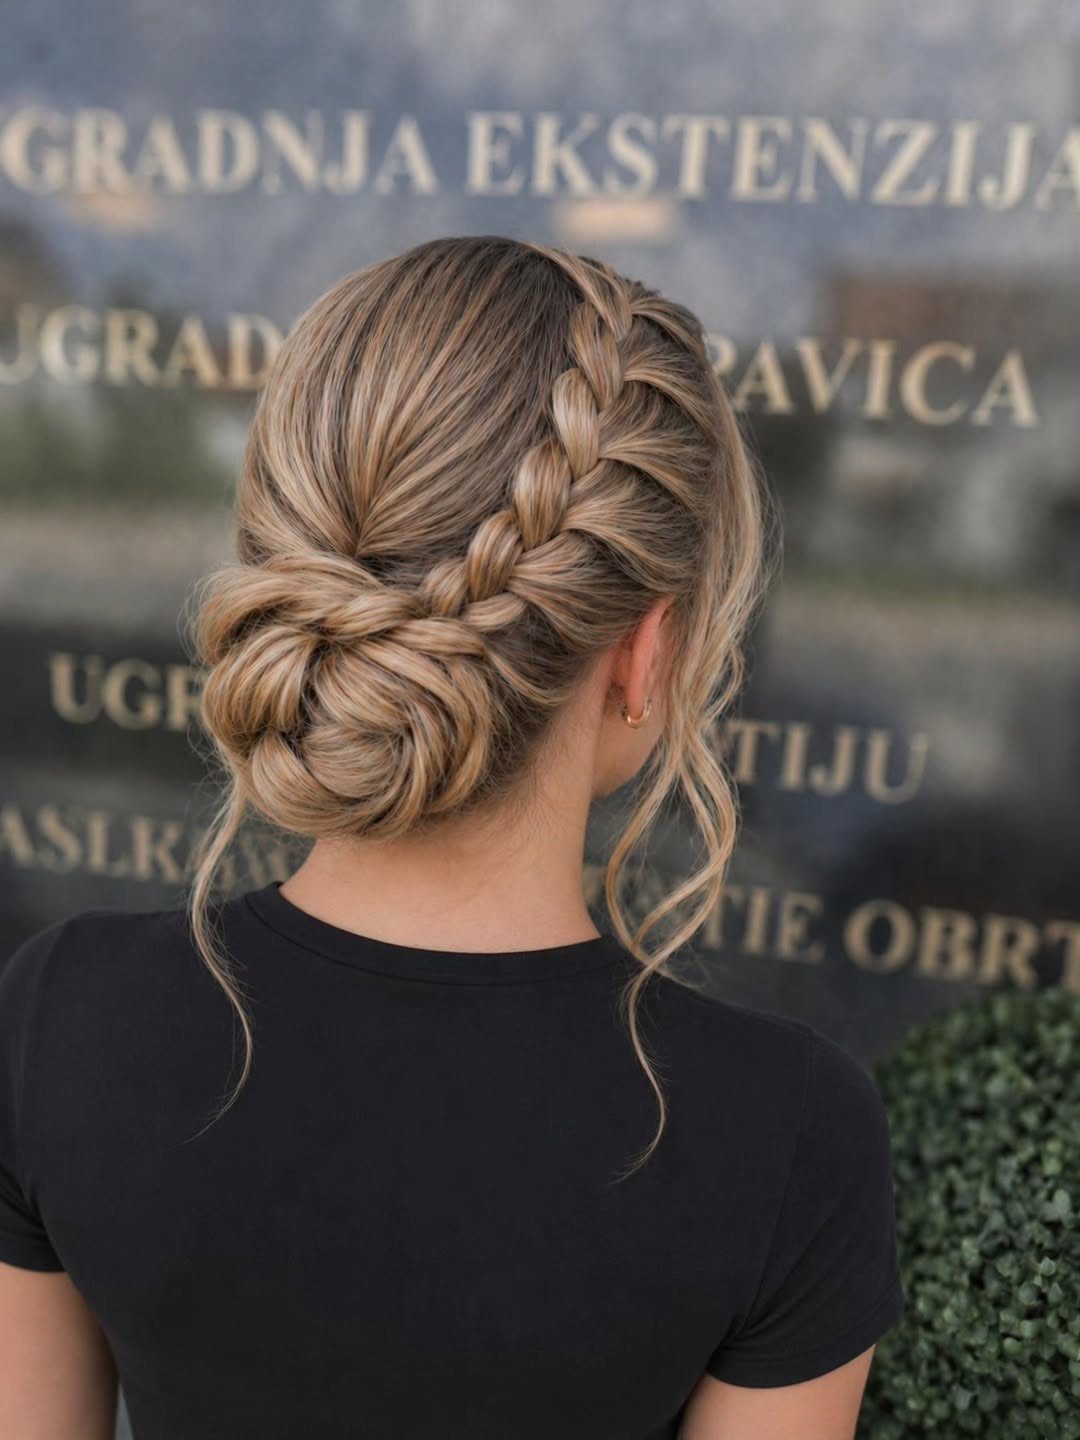
A single side braid curves across your head and feeds into a low bun positioned to one side. The braid follows your hairline or sits slightly above it, guiding the eye toward the bun.
Start the braid at your temple or behind your ear, then gather the end with the rest of your hair into a side bun.
Pin the bun low and slightly off-center. This suits medium to long hair and works better when the bun is loose rather than tight.
12. Rope Braid Bun
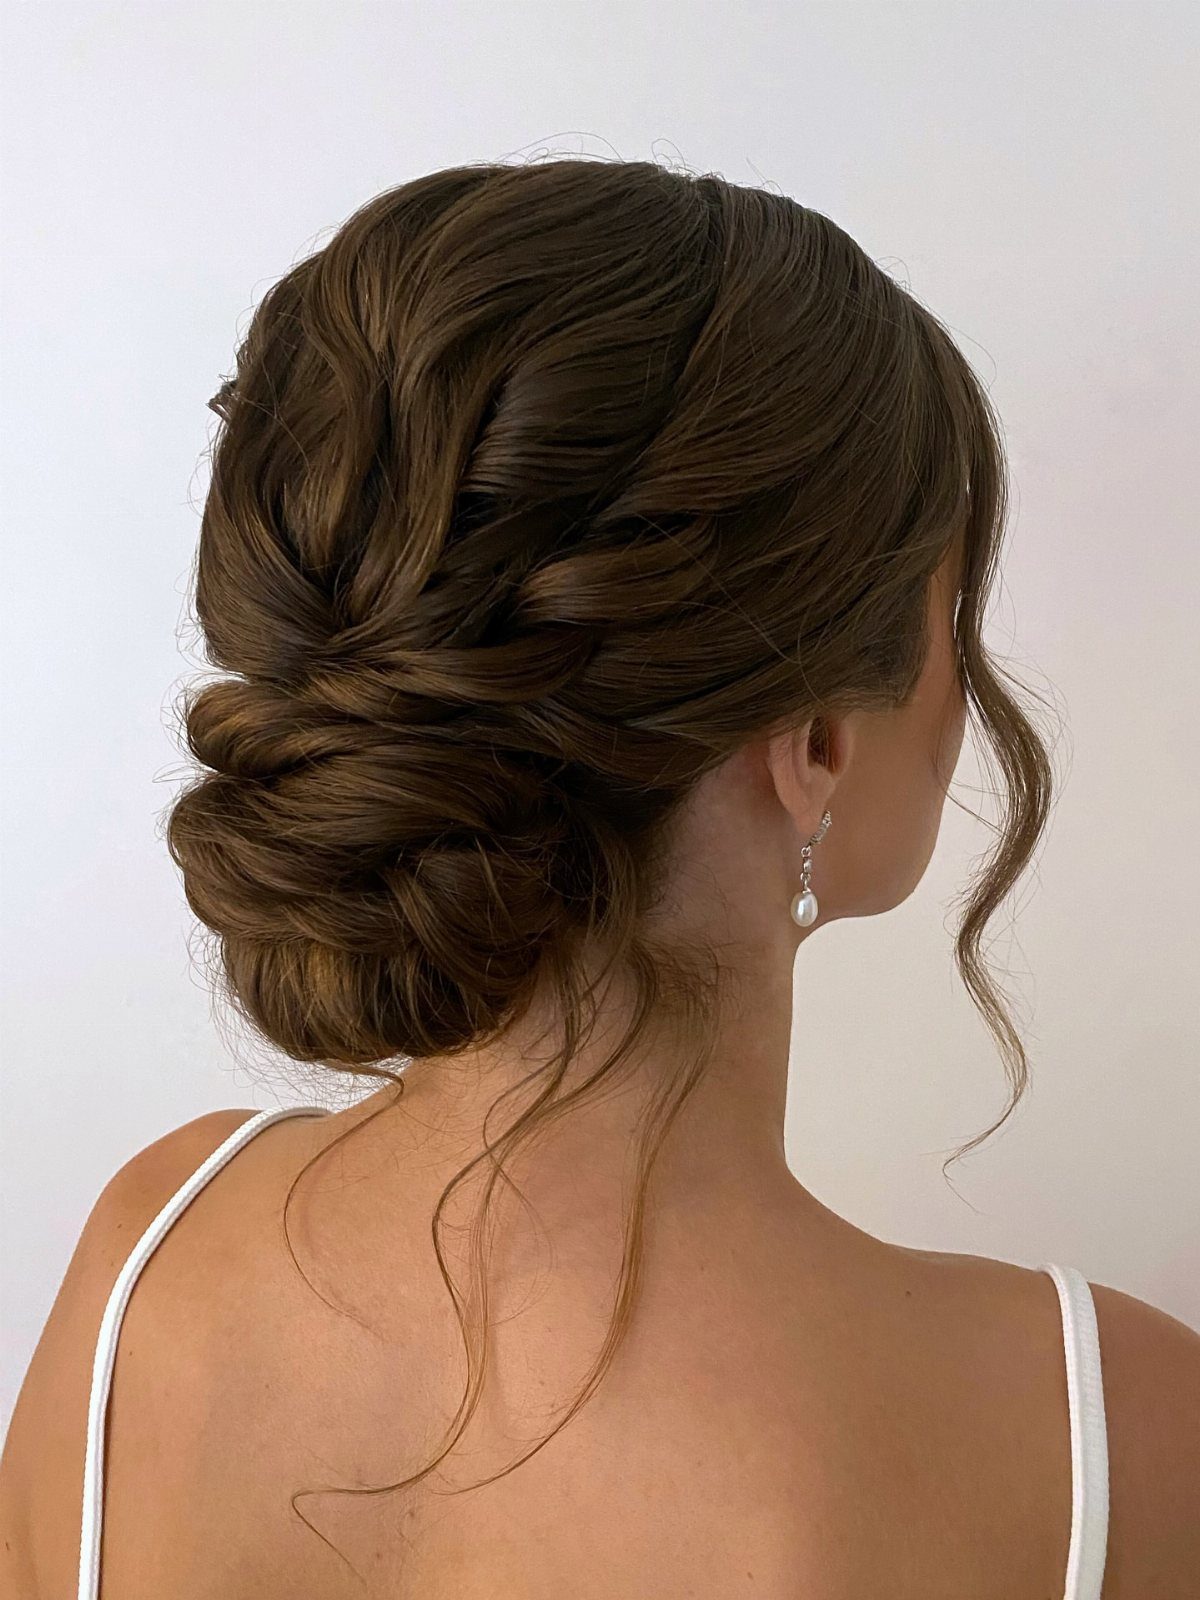
2 sections of hair are twisted around each other to form a rope braid, then coiled into a low bun. The twist shows clearly in the bun, giving it more definition than a standard twist would.
Divide your hair into two sections, twist each one, then wrap them around each other. Coil the rope into a bun and pin at the base.
The thicker your hair, the more the rope will stand out. This holds better on second-day hair than freshly washed.
13. Vintage Rope Braided Bun
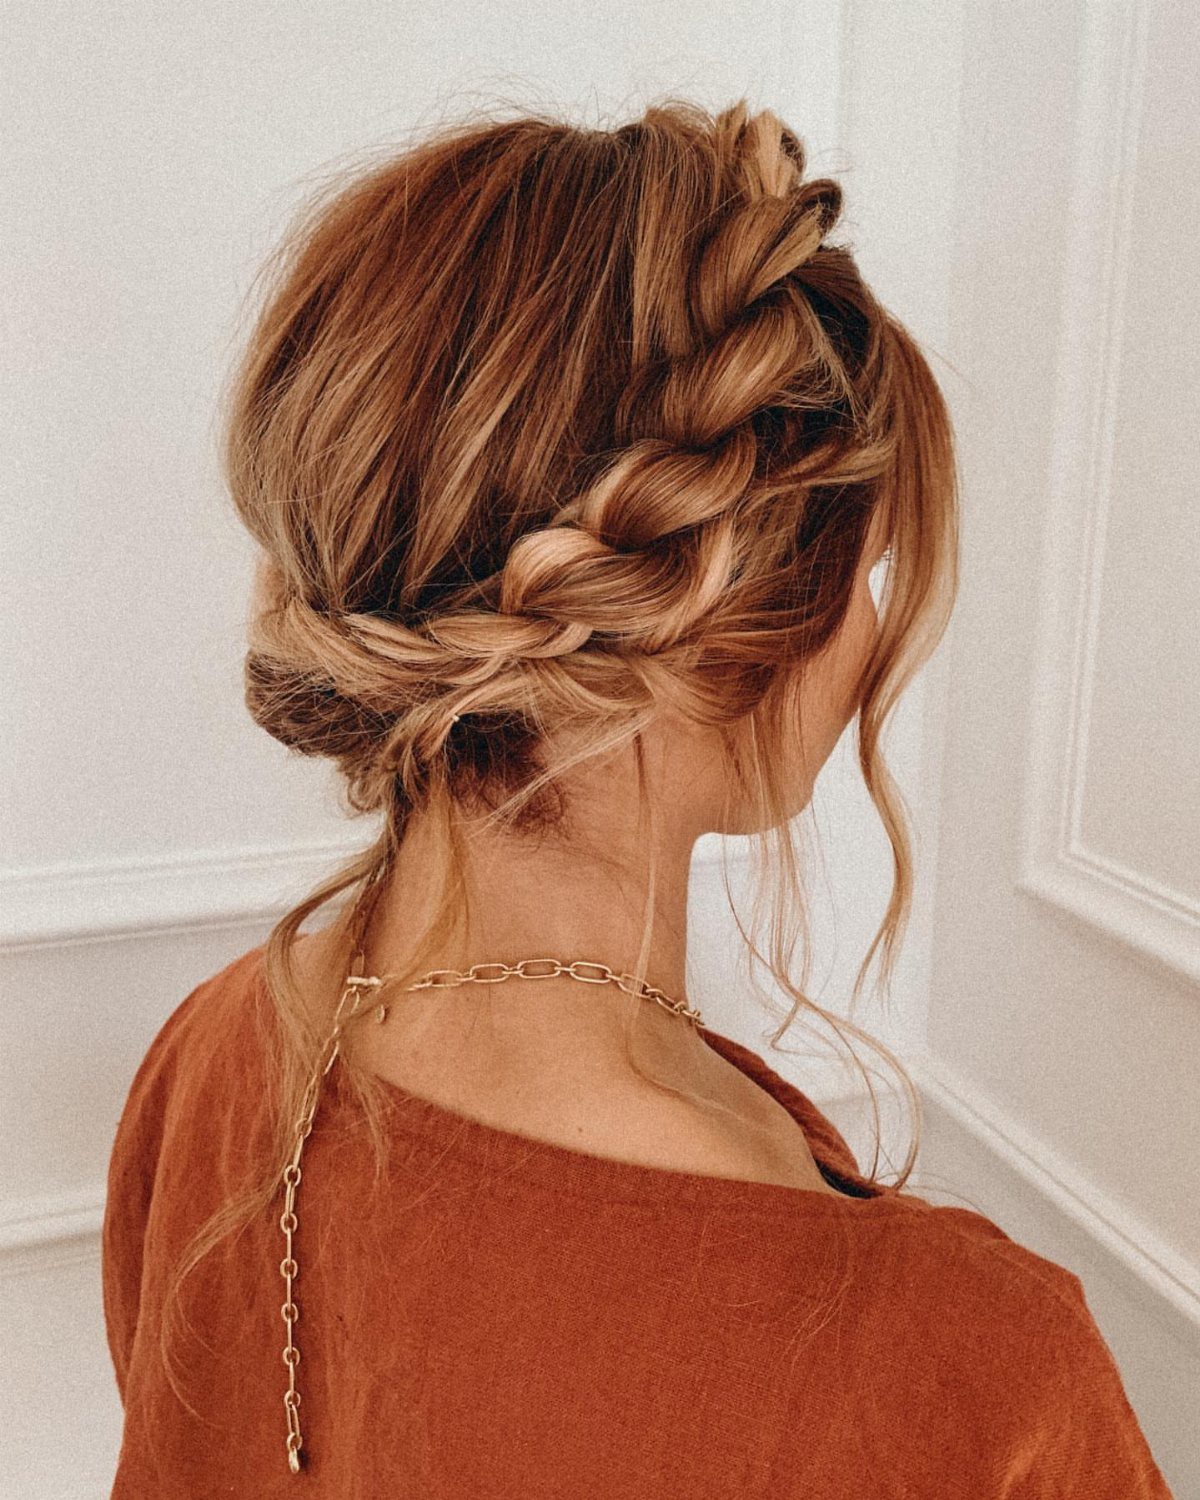
Rope braids curve and cross along the back of your head before coiling into a low bun, giving the finish a structured, retro feel. The braids stay thick and visible, so the bun reads as woven rather than smooth.
Divide your hair into sections, form rope braids, then layer them across the back and pin the ends into a coil at the nape.
This takes medium to long hair and holds better when your hair has some weight to it.
The more rope braids you add, the fuller the bun becomes.
14. Wavy Relaxed Chignon
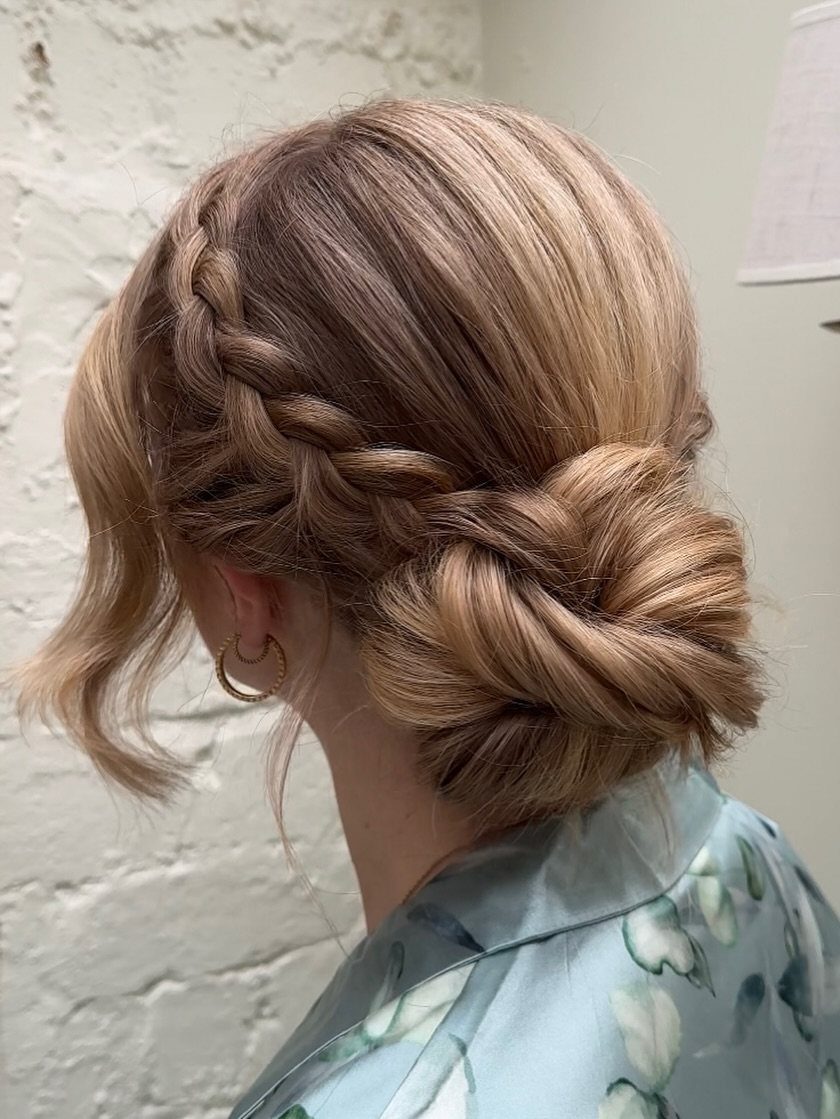
A side braid wraps into a low chignon, with loose waves left textured instead of pulled smooth. The braid adds one clean line while the rest stays soft and undone.
Fine hair can fake volume here if you tease the roots first.
This reads more casual than a tight chignon and suits events where polished still means relaxed.
15. Black Braided Crown Bun
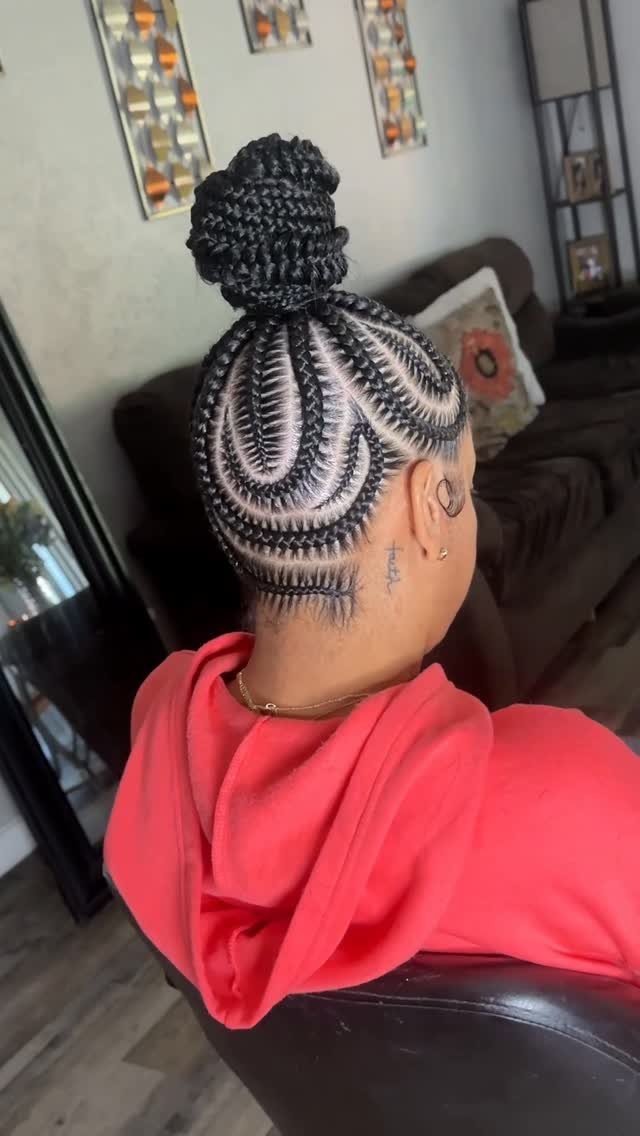
Cornrows curve along the sides and back, feeding into a braided bun at the crown. Some braids sit thin and tight, others thicker, giving the top visual weight while the sides stay clean.
The mix of braid sizes keeps it from looking uniform, which adds interest. This holds for days once it’s pinned and suits protective styling.
16. Knotted Mohawk Bun
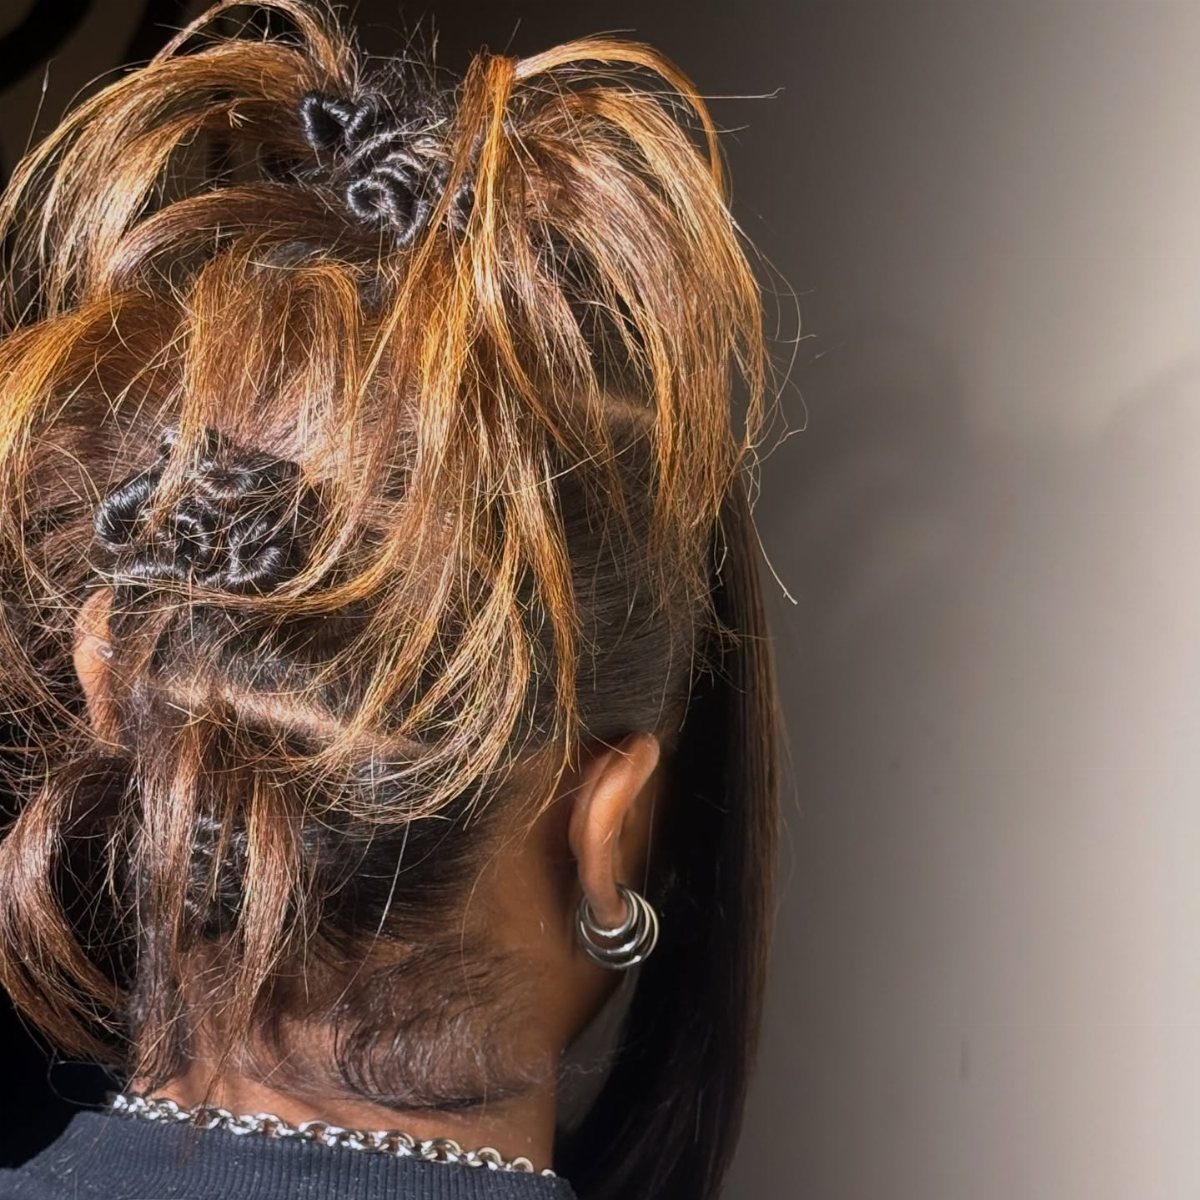
Hair is sectioned down the center, knotted in a row, then pinned into a raised line from front to back. The knots replace a single bun, forming a textured ridge instead of one rounded shape.
Part a strip down the middle, knot sections along the length, then pin each knot flat to hold the row. Sides stay slicked or left loose.
17. Bun with Braided Trim
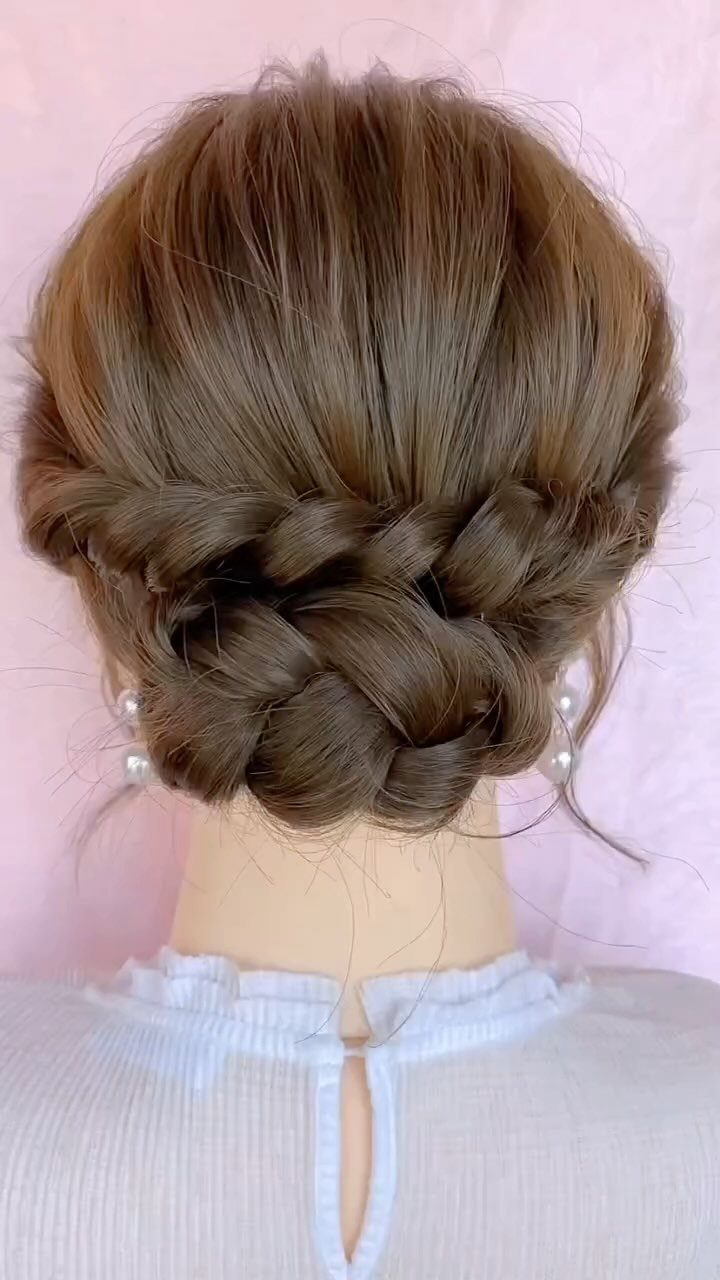
A thin braid wraps around the outside of a bun, outlining its shape instead of blending in. The braid acts as trim, giving the bun a finished edge.
Form a low bun first, then braid a small section separately and wrap it around the base, pinning the ends underneath. The braid stays visible as a border, so keep it tight enough to hold its shape.
18. Boho Crown Braid
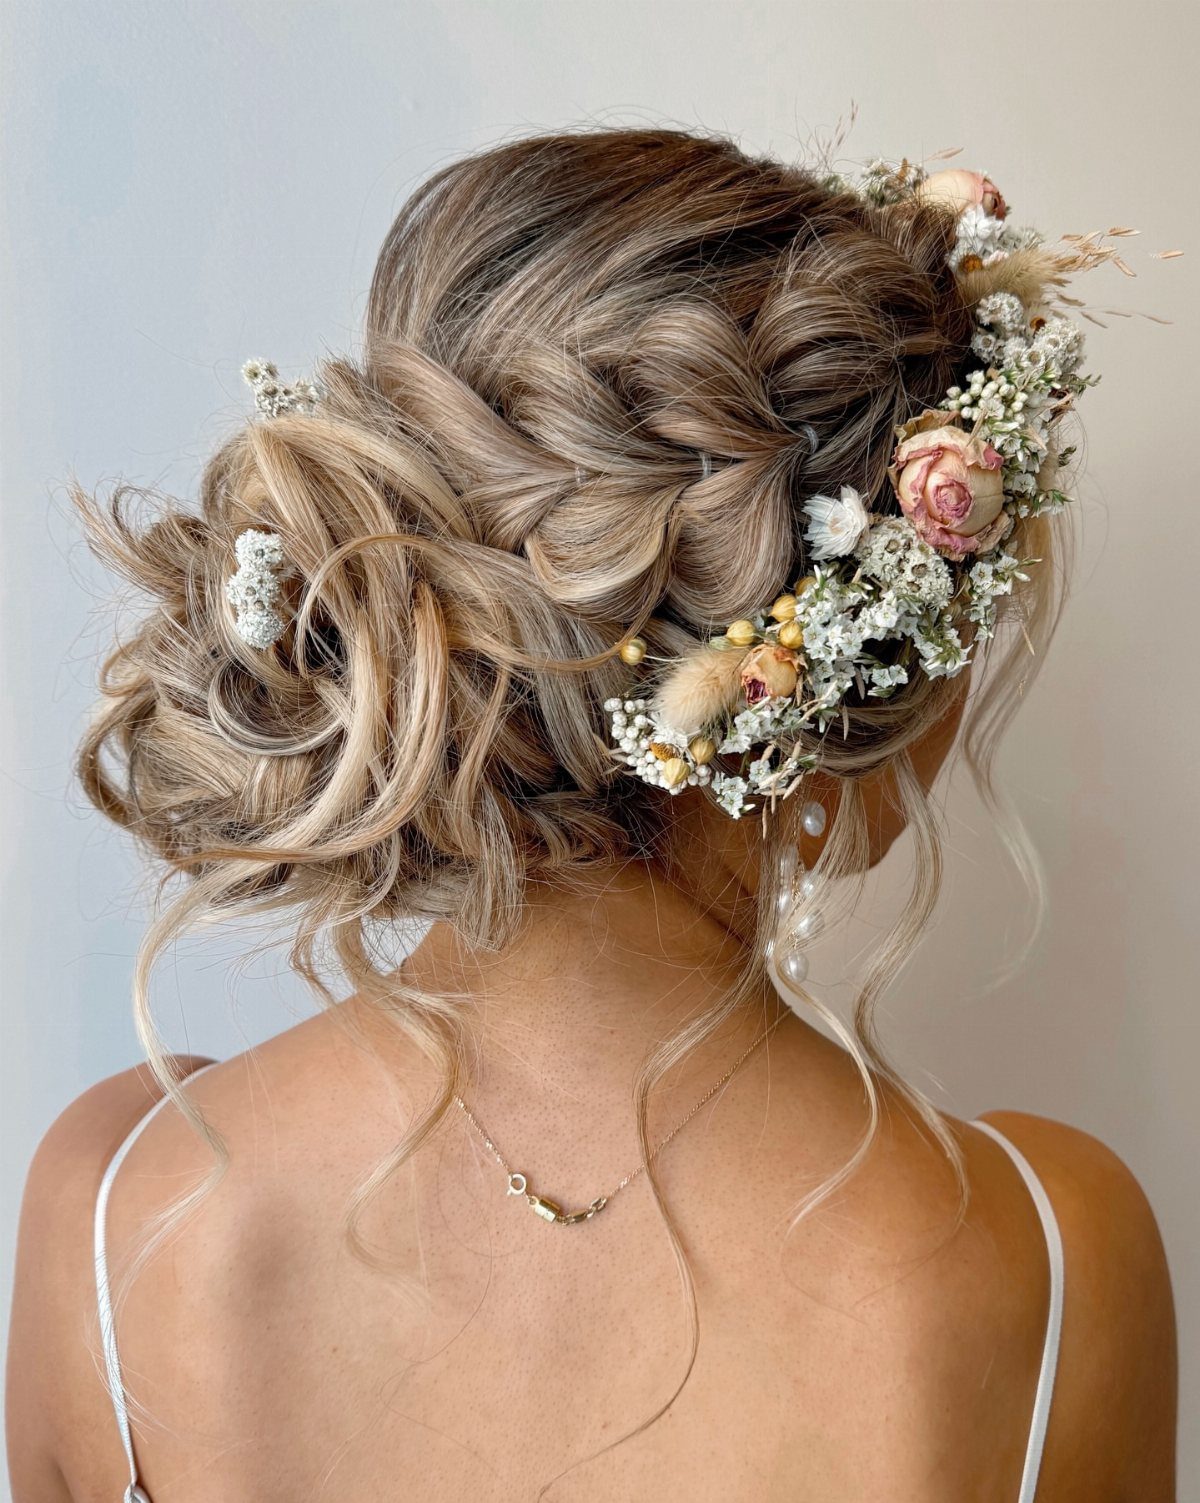
The braid sits high and rounds the top of your head, keeping everything soft and a little undone.
Braid from one side across the crown, then pin the end into a low bun without pulling tight. Loosen a few pieces as you go.
Then use a small clear elastic to finish off the braid at the scalp, and style chignon as normal.
— Glamour
19. Low Braided Bun
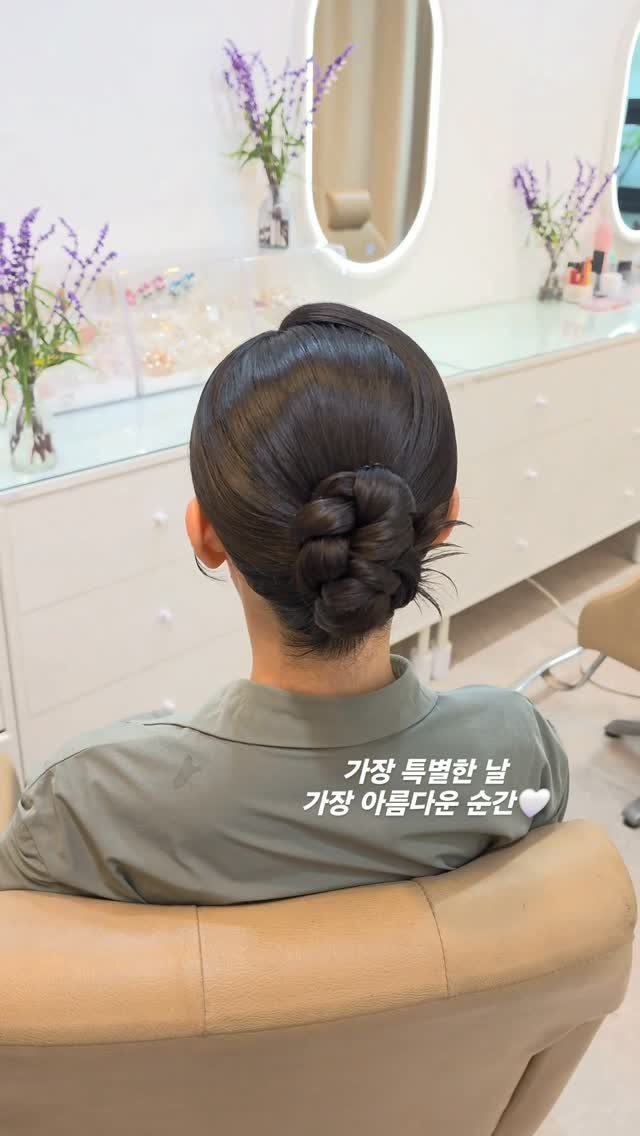
Sections are woven together and pinned at the nape, forming a rounded bun that sits low against the back of your head. The woven structure keeps the bun tight and smooth without a sock or padding.
Braid your hair partway down, then coil or fold the braid into a bun at the nape and pin. The bun holds better when the braid is tight from the start.
20. Braided Bun with Rolled Base
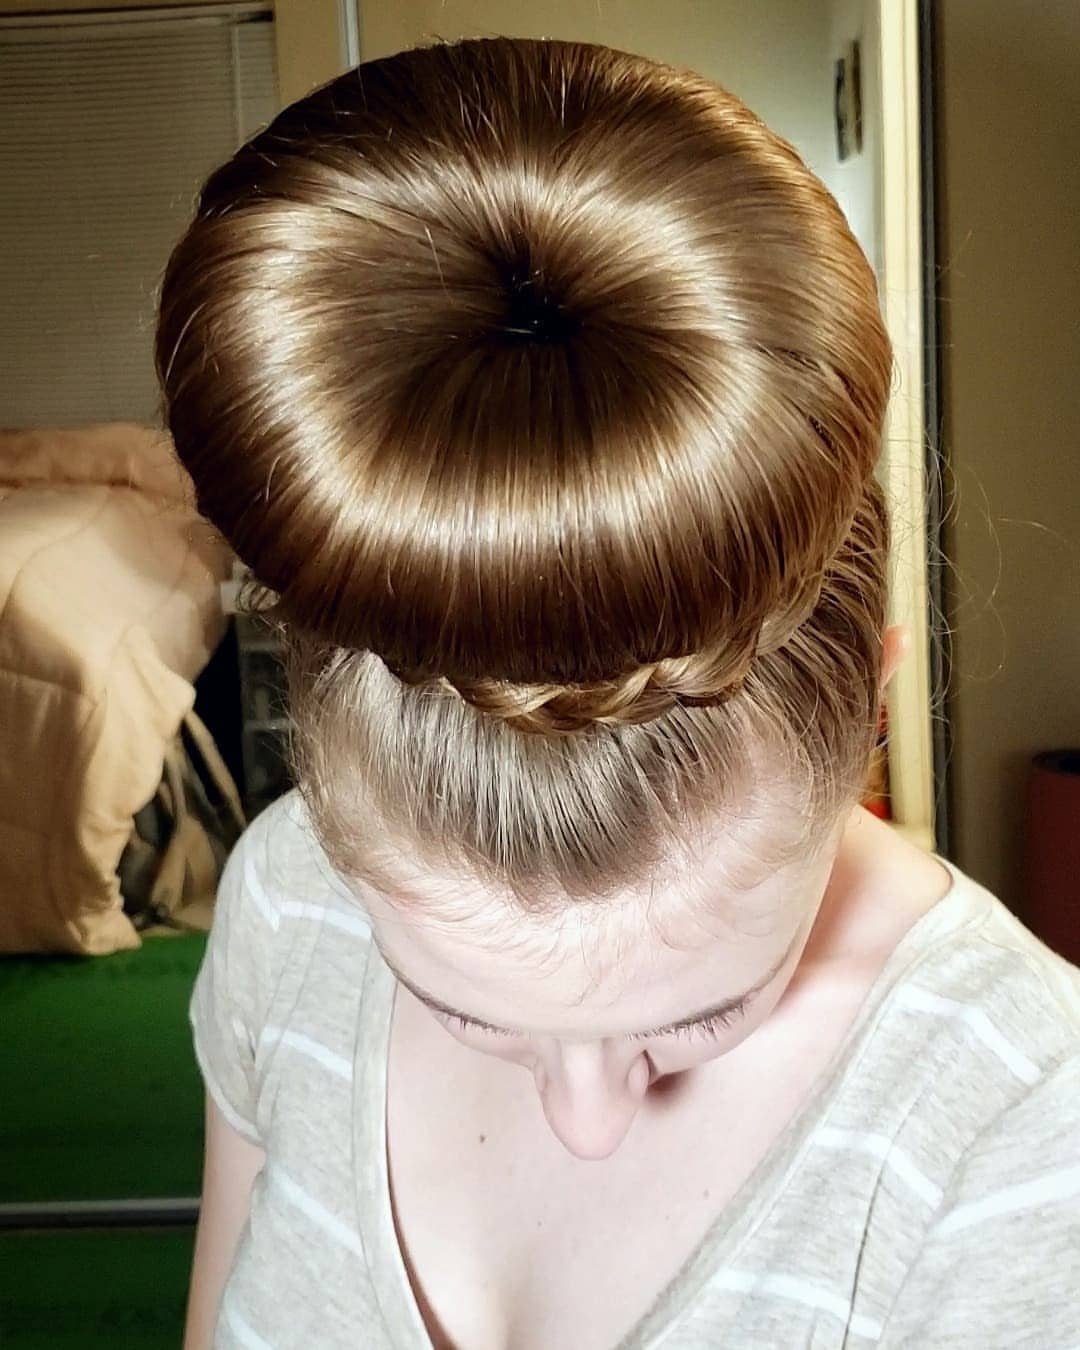
A smooth roll sits at the back, with a thin braid circling the lower edge. The roll carries the volume, and the braid adds a clean accent line without competing for space.
The braid needs to stay tight or it loosens and slides off the roll.
21. Braided Updo with Floral Pins
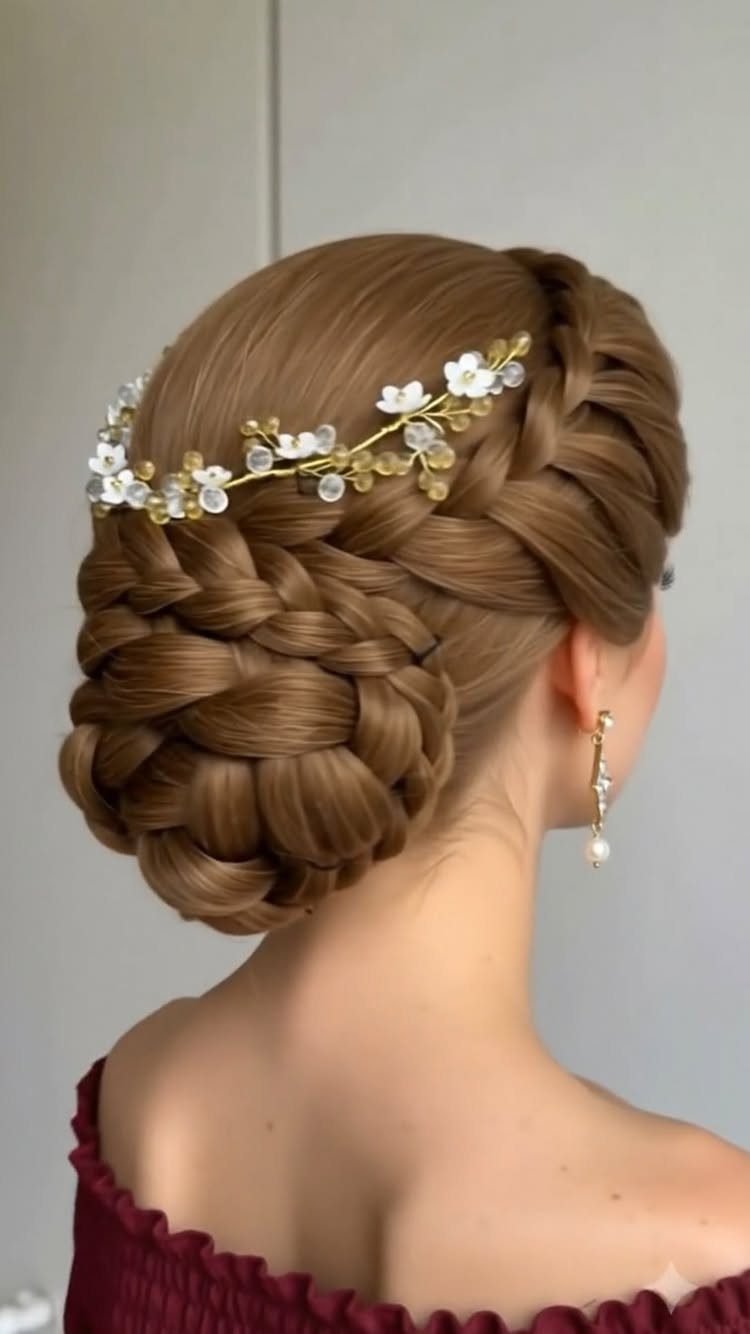
A braided bun is paired with a floral hair vine or decorative pins, turning a simple updo into something more dressed up. The braid provides the structure, and the pins add detail without needing extra styling.
Pin the bun first, then secure the vine or pins along the side or base.
This suits weddings or formal events where the braid stays visible but finished. The heavier the accessory, the more pins you’ll need.
22. Braided Double Buns
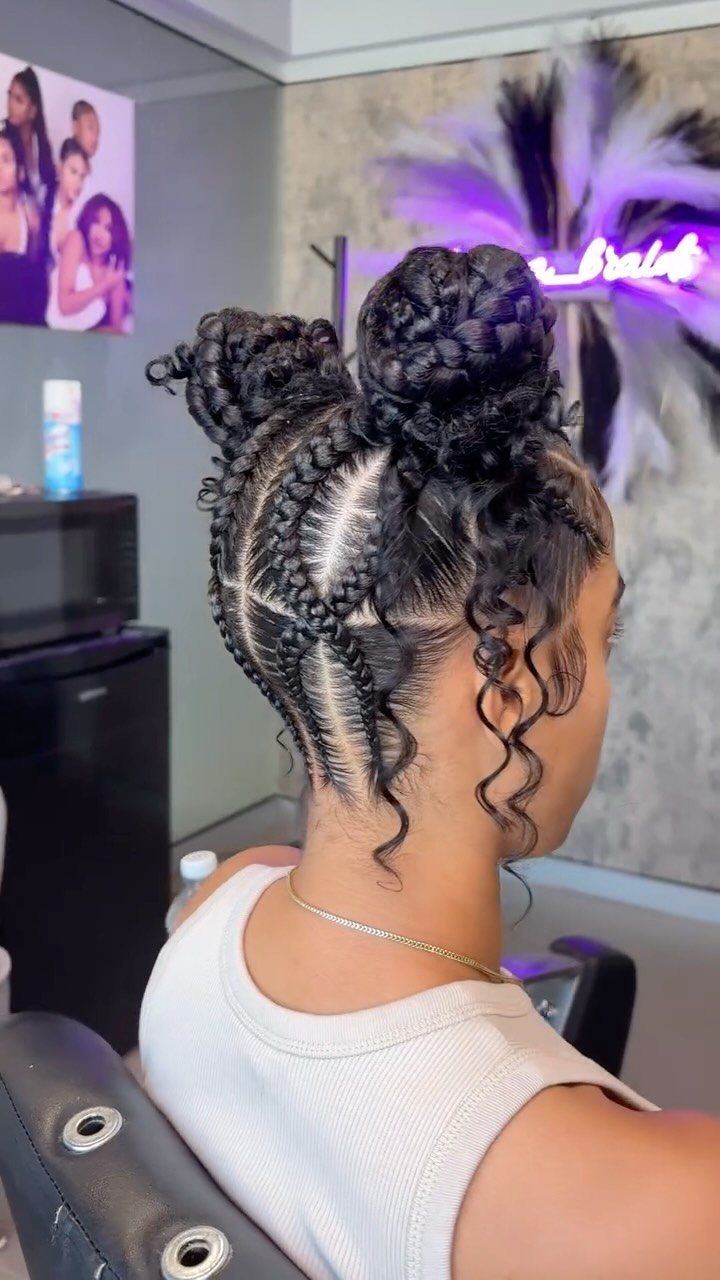
Two braided buns sit on either side of your head, with tight scalp braids leading into each one and loose curls left free at the ends. The combination gives you structure at the top and movement below.
Leave some sections unbraided if you want curls or texture around your face. This takes longer to set up but holds for days.
23. Sleek Braided Bun
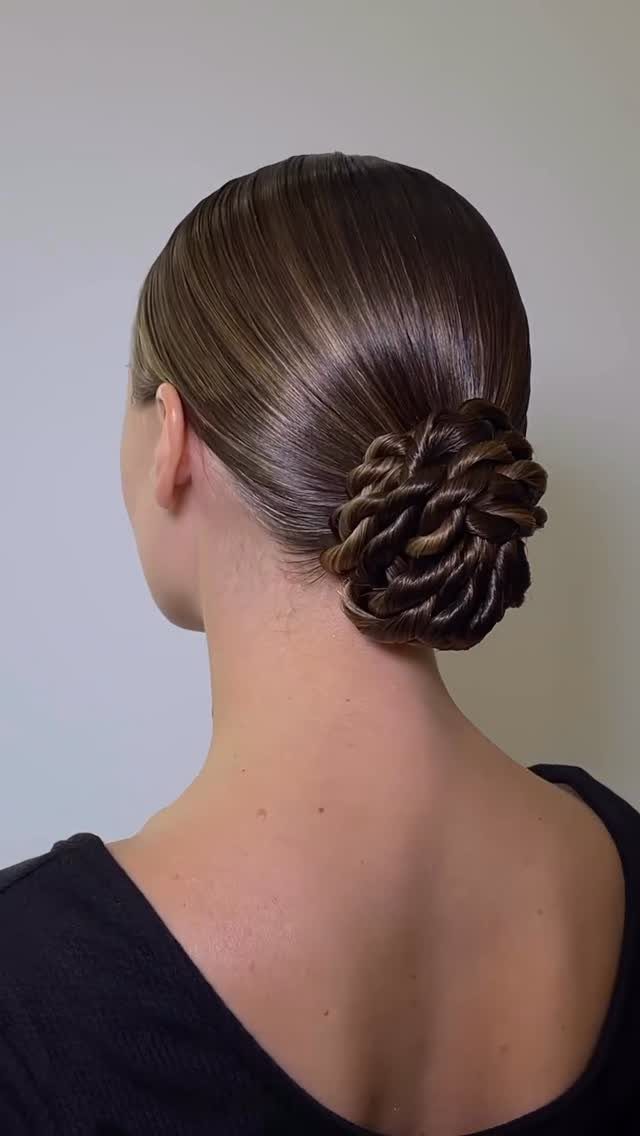
Hair is slicked smooth and gathered into a braided bun at the back, with no loose pieces or texture. The braid stays tight and the finish stays polished, making this one of the cleanest braided bun options.
The sleek braided bun suits straight or relaxed hair best and works for any setting where you need a sharp, finished look.
24. Braided Low Updo
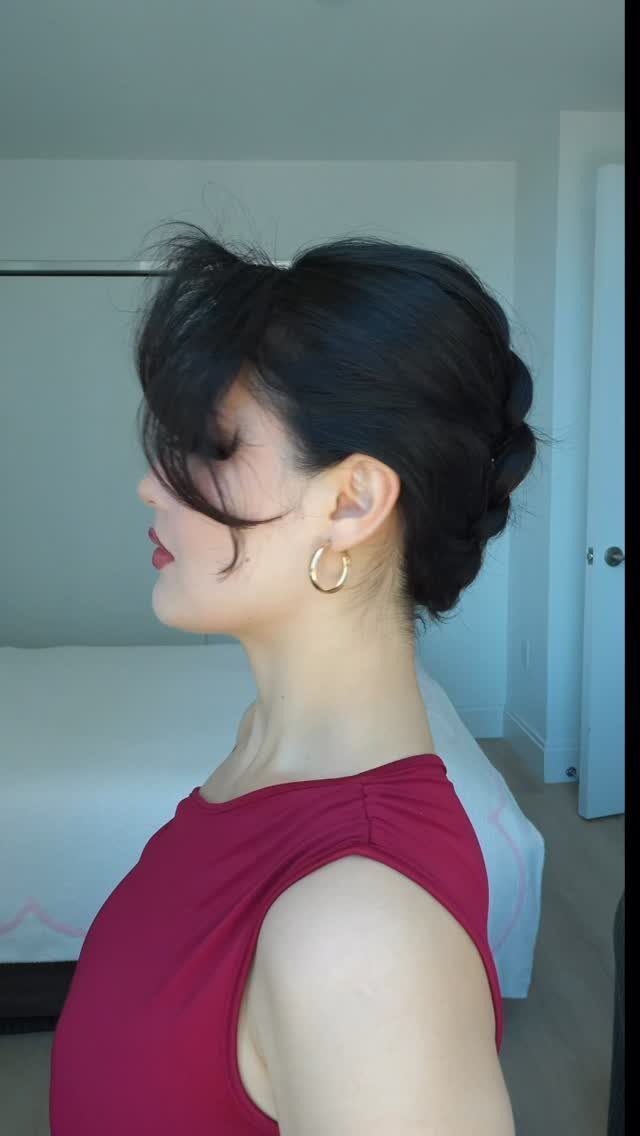
Hair is swept to one side and gathered into a low updo, with a braid running along the back before it reaches the bun.
The braid follows the curve of your head, adding one defined line to an otherwise soft finish.
Pin the braid into the bun so the two connect smoothly.
25. Side Braids Into Bun
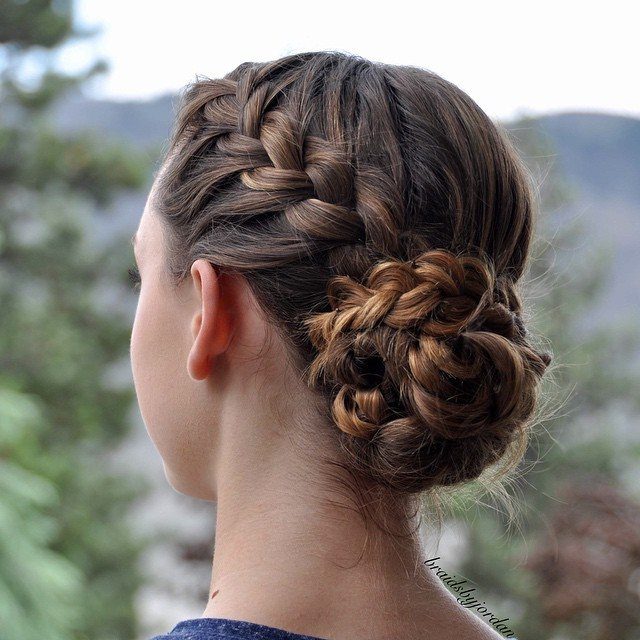
2 side braids meet at the nape and are woven together into a single bun. The braids lead the eye down from either side, and the bun holds everything in place without extra pins.
Take a piece from each side, braid them straight back, and sweep everything into a low bun.
Pin once the bun is coiled. The braids hold flyaways off your face and the shape works once you’re past shoulder length.
26. Loose-Ended Braided Bun
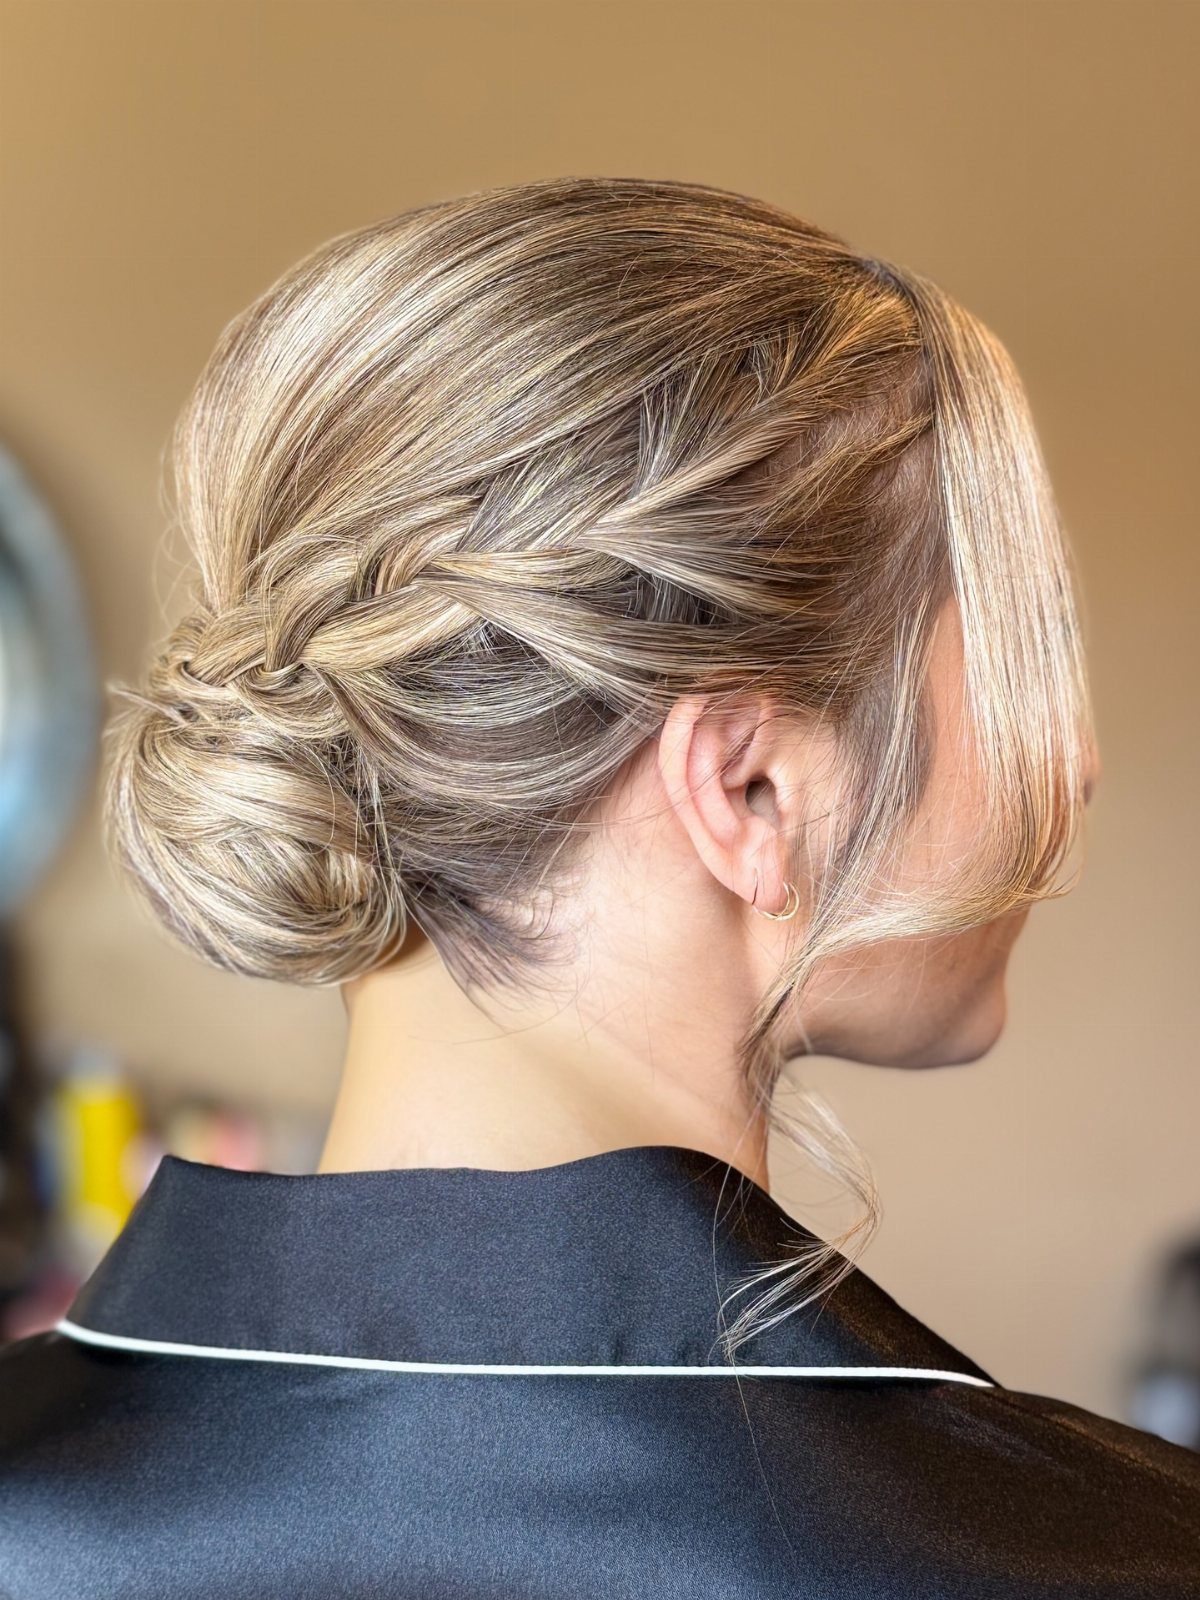
A braided bun gathers at the nape with a few strands left loose at the front. The loose pieces soften the finish, so the bun reads polished but not formal.
Braid your hair into a low bun, then pull a few face-framing pieces free before you pin.
The strands can stay straight or be curled after the bun is set. This suits any hair length past your shoulders and takes less time than a full updo.
Hair Length and Texture
Buns that start with a braid generally need hair past your shoulders.
Fine hair can slip, so add texture spray before you start or braid on second-day hair when there’s more grip.
Layers complicate things if the shorter pieces fall out of the braid before you reach the bun.
Practice helps, but if your layers are more than a few inches shorter than your longest length, plan to pin the loose ends separately or choose a messier finish where they won’t stand out.
Practice and Braid Technique
The flat version keeps the profile low, so the bun doesn’t stick out as far from your scalp.
If a ponytail makes the braiding easier, secure one first, but stop the braid before you reach the ends. You need that tail left over to form the bulk of the bun, so don’t braid all the way down.
Thicker braids need stronger anchoring. Spin pins work better than bobby pins for holding a rolled bun in place because they grip more hair at once and won’t slide out under the weight.
Frequently Asked Questions
How to make a bun with your braids?
Start by braiding down to mid-length, leave the rest loose, then wind or tuck that braid into a coil at your nape and secure it with pins.
You can also form a sock bun first and lay thin braids across the surface as trim. The tighter your braid, the better the bun holds.
What are the top styles of braids?
Box braids, cornrows, Dutch braids, French braids and rope braids all work well when gathered into a bun.
Box braids and cornrows suit protective styling and hold for days once pinned. Dutch and French braids add structure before coiling into a softer finish.
What is the easiest braid for beginners?
Start with a simple three-strand braid at the nape, stopping before you reach the ends so you have a tail left to coil into the bun.
If that feels tricky, form a ponytail first to make the braiding easier. Fine hair holds better when you braid on second-day hair.
Do you think this bun would work with 5 strand or more braids?
Five-strand and wider braids carry more bulk, so swap bobby pins for spin pins that thread through multiple layers and lock under tension.
A 5-strand braid will give you more bulk and texture, but you’ll need to pin carefully to keep the bun from pulling loose.





