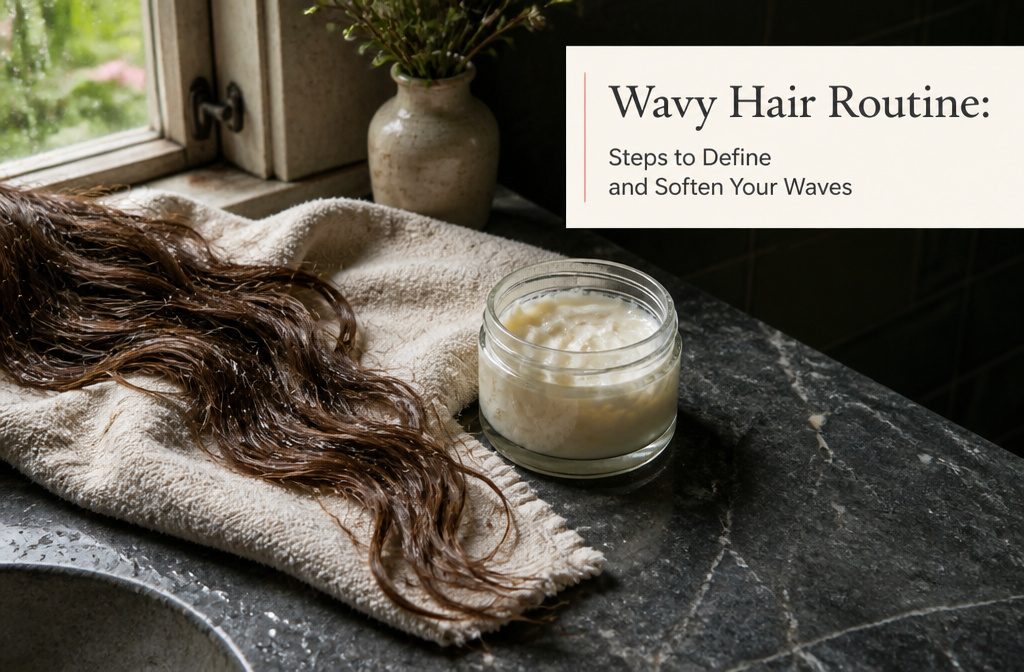
A routine for wavy hair is a short sequence of gentle steps, from sulfate-free shampoo to a silk pillowcase, that keeps waves defined instead of frizzy.
Product weight depends on your subtype: 2A gets buildup fast from heavy creams, while 2C needs deeper conditioning and real hold. Conditioner sits for 3–5 minutes before rinsing.
Know Your Wave Type Before You Start
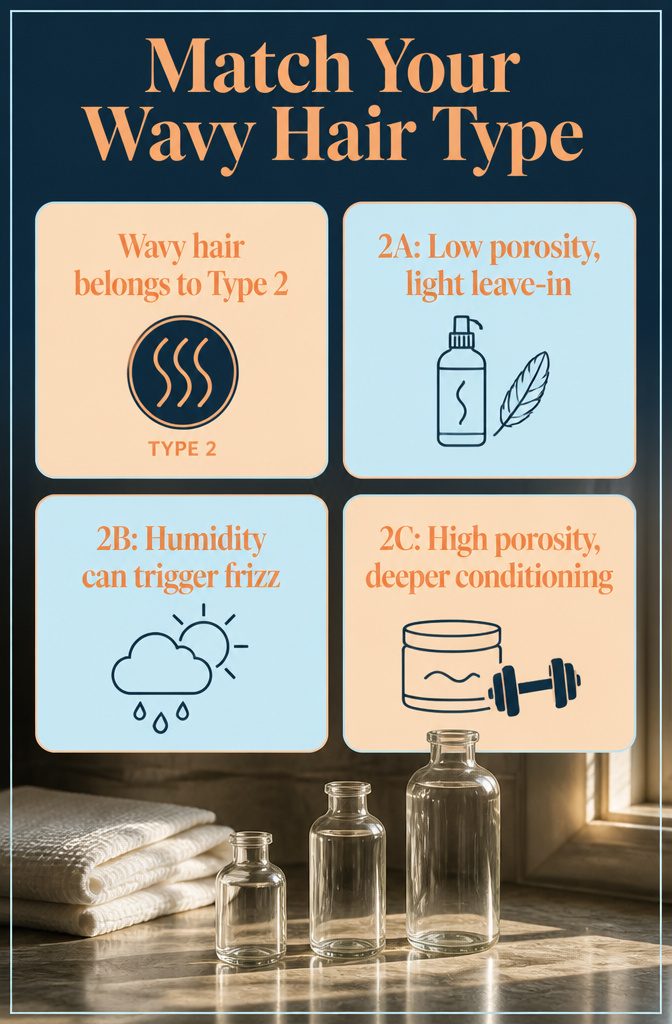
Wavy hair is Type 2, and its three subtypes call for different amounts of product. 2A is the loosest: fine, smooth, barely-there S-waves that tend toward low porosity, so heavy creams build up fast and a lightweight leave-in is usually enough.
2B has more defined S-waves that start closer to the roots, and frizz shows up when humidity climbs.
I’d let the weather, and how your hair feels that day, pick the conditioner weight. 2C sits closest to loose curls, with deep S-waves, a coarser texture and higher porosity, so it absorbs moisture quickly and frizzes more.
It needs deeper conditioning and real hold, while 2A does best with the lightest touch. Work out which one you have before buying anything.
1. Cleanse Your Scalp Without Stripping
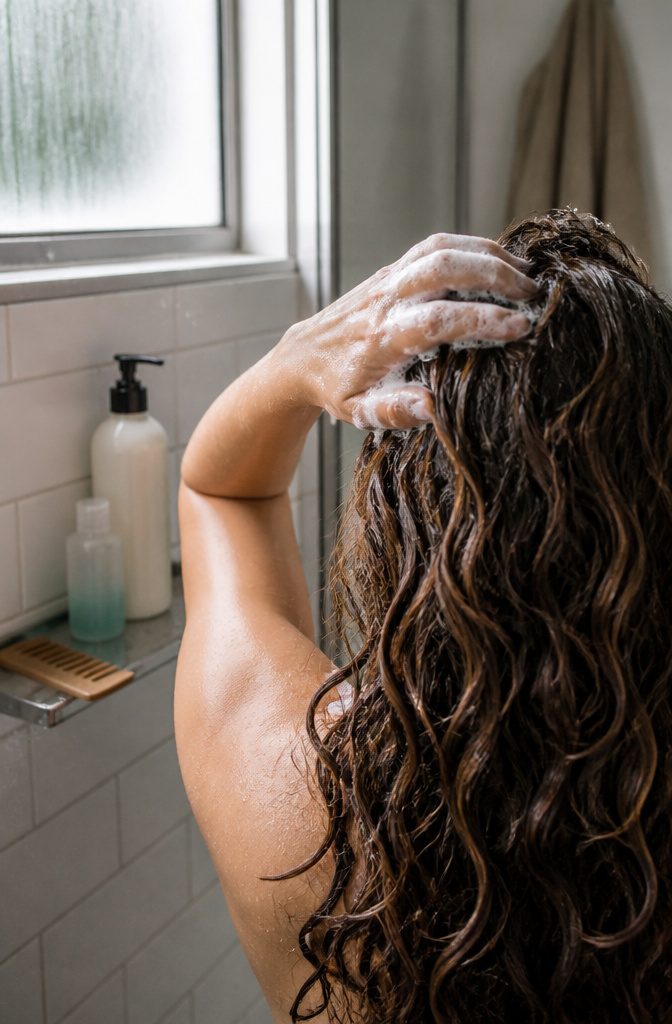
Sulfates dry the hair, irritate the scalp, and lift the cuticle, which invites frizz.
Native Moisturizing Shampoo – Coconut & Vanilla is free of sulfates and silicones, and its moisturizing formula suits waves that tend toward dry. Jessicurl Gentle Lather Shampoo is the other one I’d put in the cart.
Use a quarter-sized amount and work it into the scalp and roots with your fingertips. The suds will slide down the lengths on their own, so the ends never need scrubbing.
Oil travels down waves easily, so buildup shows up faster than it does on tighter curls. Clarify once or twice every 3–4 weeks to reset the scalp, using a clarifying shampoo that contains no silicones.
2. Condition and Detangle While Wet
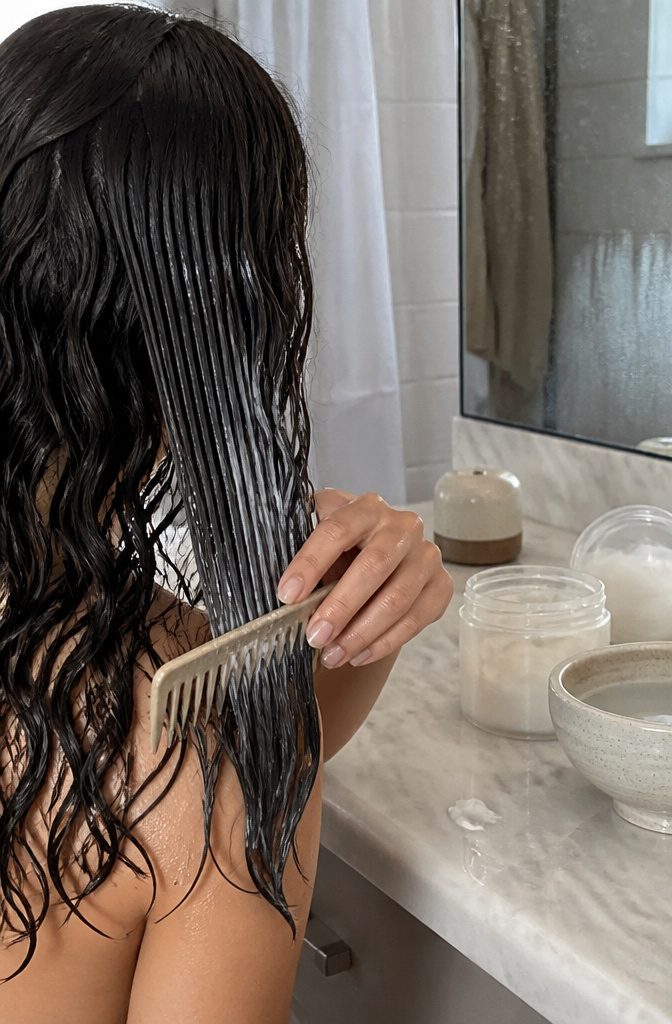
Apply conditioner mainly from the mid-lengths to the ends, then leave it on for 3–5 minutes before rinsing.
Use that time to detangle with your fingers or a wide-tooth comb while the conditioner is still in. Combing dry or barely damp strands is how waves break.
For this step I’d reach for GK Hair Balancing Conditioner ($27.00, in 10.1 or 33.8 fl. oz.) or Jessicurl Aloeba Daily Conditioner. Rinse with lukewarm water, never hot, since heat dries hair out.
Once a week, swap in a deep conditioner. Leave it on for 5–30 minutes, or 30–40 minutes if your hair needs more repair, and follow the label on the jar.
3. Remove Water Without Roughing Up the Pattern
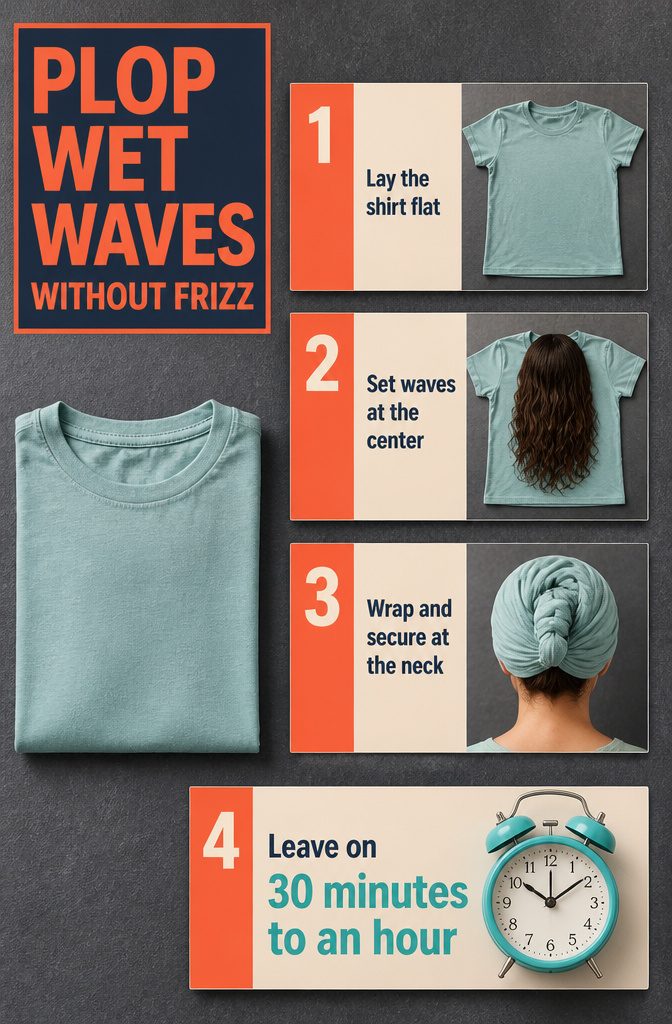
A regular bath towel is the wrong tool for wet waves. Wet wavy hair is at its most vulnerable, and a rough towel adds friction that brings frizz, breakage and a disturbed pattern.
I’d pick a microfiber towel or an old cotton T-shirt and scrunch upward, which squeezes out water without dragging on the strands.
Plopping goes a step further. Lay the shirt flat, lean over, set your hair in the middle, then wrap it and secure it at the base of your neck.
Leave it on for 30 minutes to an hour, or unwrap around the 20-minute mark if that suits you better. The hair dries in its natural wave shape because gravity isn’t pulling it down.
4. Apply Lightweight Products to Damp Hair
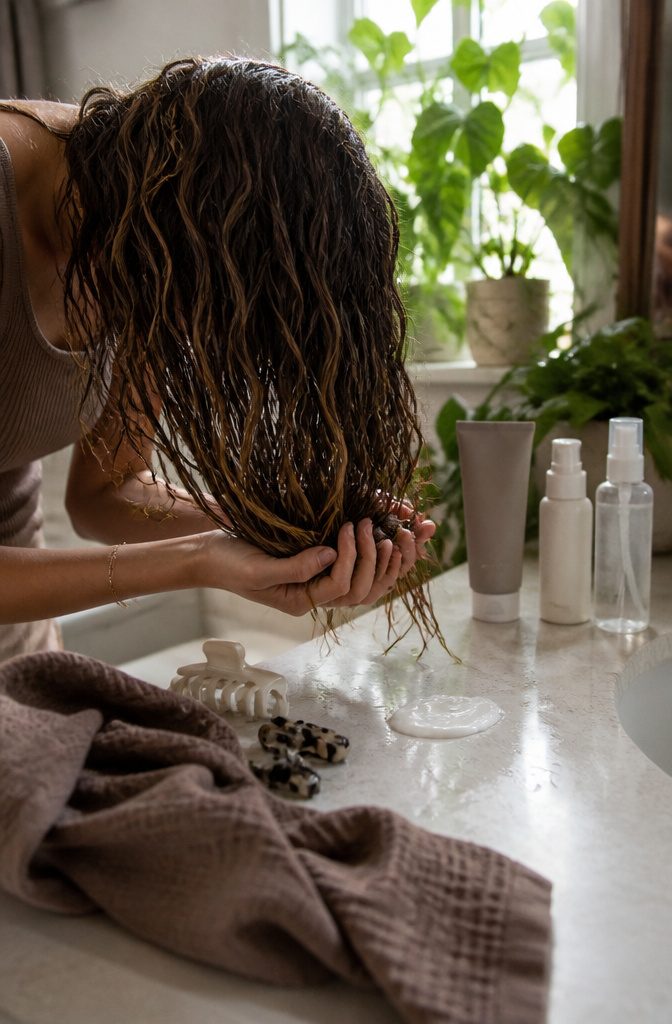
Start with the lightest product that still defines your wave. A curl cream raked through damp hair and scrunched in works for most patterns, and flipping your head upside down to scrunch upward adds volume.
Gel brings hold, and Jessicurl Spiralicious Styling Gel or Alaffia Beautiful Curls Curl Defining Gel are the two I’d reach for.
Jessicurl Rockin’ Ringlets Styling Potion and GK Hair ThermalStyleHer Cream ($23.00, 3.4 fl. oz.) are also worth a look. A mousse suits waves that fall flat.
Keep heavy products away from the roots, where weight shows first.
Begin with a pea-sized amount of primer. For beachy texture, spray Pacifica Salty Waves Texture Spray over wet hair and scrunch up from the ends.
5. Dry for Definition or Relaxed Texture
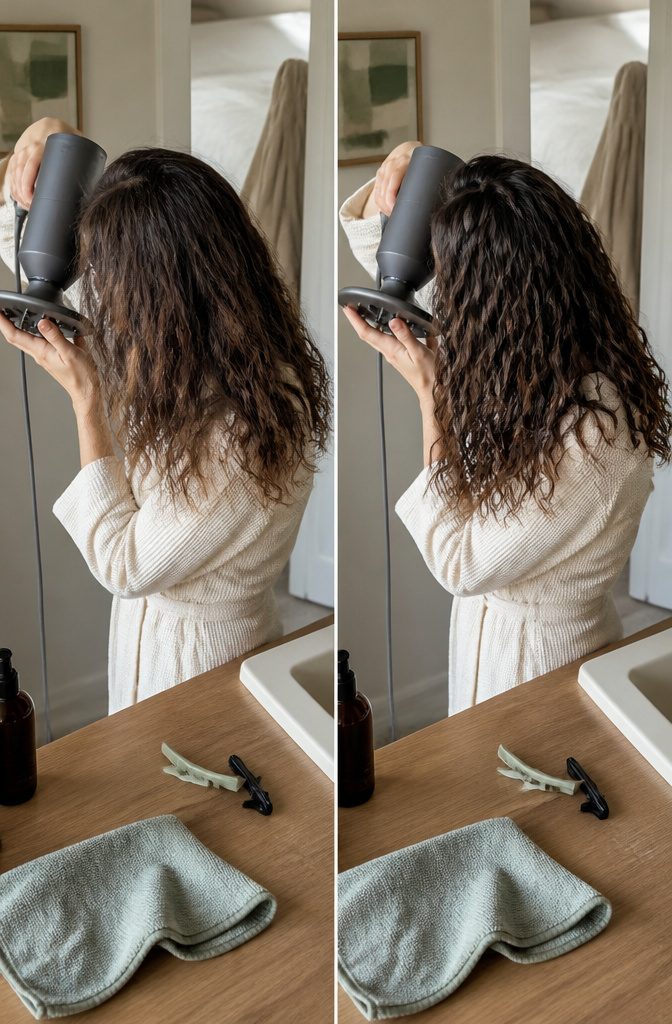
Air-dry for a softer wave or use a diffuser if you want more definition and lift at the root.
Air-drying takes longer but skips heat exposure entirely, and the result tends to be more relaxed. If you diffuse, divide your hair into four to six sections and use low or medium heat.
Hold the diffuser near each section for a second or two at a time, then move on. Limiting each pass keeps heat damage low, especially if you only diffuse every other day.
I always apply heat protectant before touching the dryer, and I let my hair partially air-dry first so the cuticle is not soaking wet when heat hits it.
The diffuser adds volume at the crown and tightens the wave closer to the scalp, but it takes more time and you have to keep the heat low.
If your morning routine is tight, air-drying while you get ready works just as well.
6. Finish and Soften the Cast
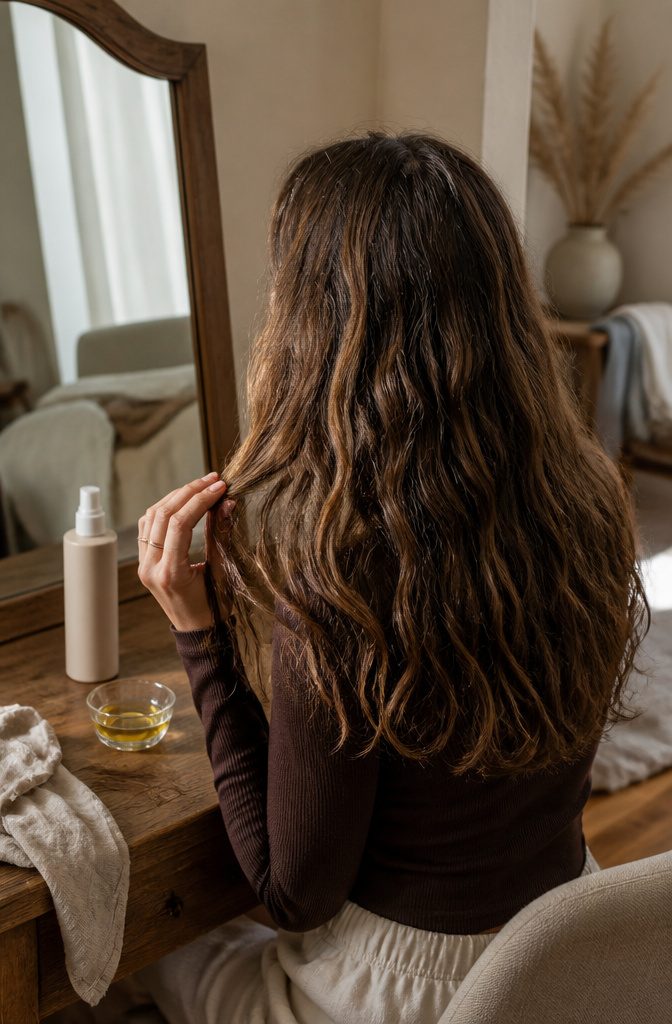
Once your hair is completely dry, you can gently separate the waves with your fingers to soften the cast from gel or mousse.
The waves will loosen on their own over the next few hours, so I go easy here. Too much manipulation and they fall out faster than you want.
A lightweight oil seals in moisture and adds shine without weighing the pattern down. Argan oil is one option that works well for wavy hair.
Use about a dime-sized amount, depending on length, and apply it from mid-shaft through the ends. Skip the roots or the hair will look greasy by lunchtime.
For extra hold and texture, a dry texture spray adds grit where waves have started to fall flat. Hold the bottle at arm’s length, spritz onto the hair, and scrunch to reactivate definition.
This works especially well around the crown or any section that dried too smooth. The spray keeps waves in place without making them stiff or sticky.
7. Refresh Day 2 and Day 3 Waves
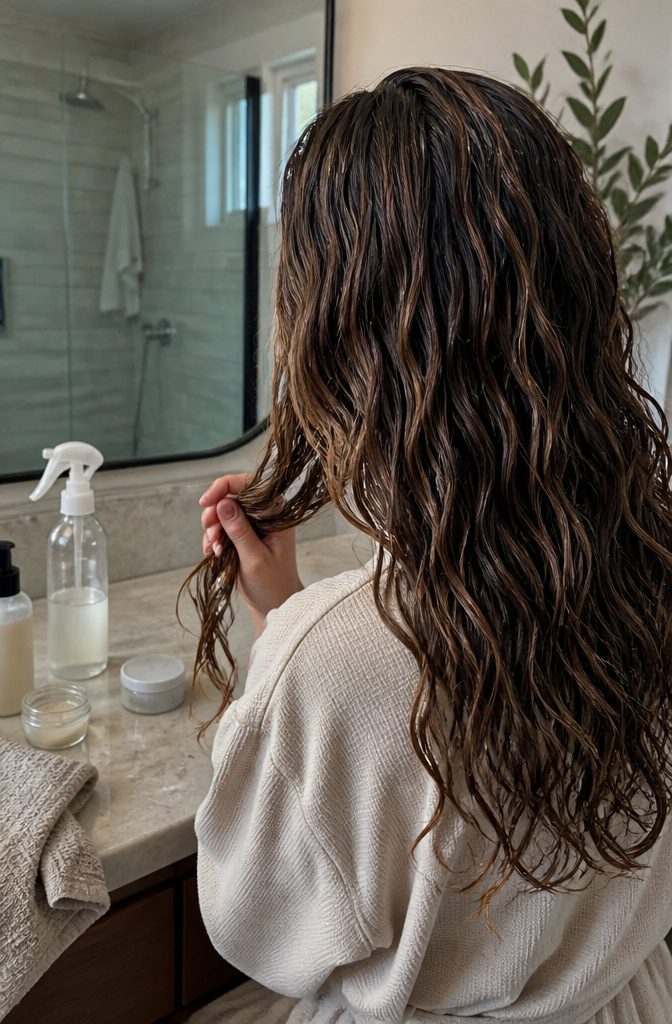
Refresh Day 2 and Day 3 Waves
Your waves will flatten and separate overnight, but there’s no need to start over. I mix water with a small amount of my leave-in conditioner in a spray bottle and mist the length—not the roots—until damp.
Then I scrunch upward from the ends, the same motion used on wash day, to bring the pattern back.
A curl-refreshing spray works the same way and saves mixing your own. Spray anywhere the wave has fallen or gone flat, then scrunch or massage those sections.
For stubborn areas, add a tiny amount of your original styling product—gel or mousse—directly to damp hair and work it through with your fingers.
Most people find that waves feel heavy by Day 3 or Day 4, and that means it’s time to wash again.
If you pushed to a third day and the refresh isn’t taking, shampoo and condition rather than layering more product onto buildup. The pattern comes back faster when the scalp is clean.
8. Protect Waves Overnight

Protect Waves Overnight
Friction is what flattens waves and creates frizz while you sleep, and switching to a silk or satin pillowcase is the simplest way to reduce it.
The smooth surface lets hair move without catching the way cotton does. If you prefer more coverage, a silk or satin wrap holds the whole style in place overnight.
For waves past shoulder length, the pineapple method keeps texture from tangling. Pull hair into a high ponytail before bed and secure it loosely with a scrunchie—no tension, just enough hold to keep the length off your face.
In the morning, remove the scrunchie, flip your head forward and shake gently to release the waves. A drop of oil brings back shine if the surface looks dull.
Never go to bed with soaking wet hair. Strands swell when saturated and break more easily under pressure, and you will wake up with frizz no amount of smoothing can fix.
How Often to Wash Wavy Hair
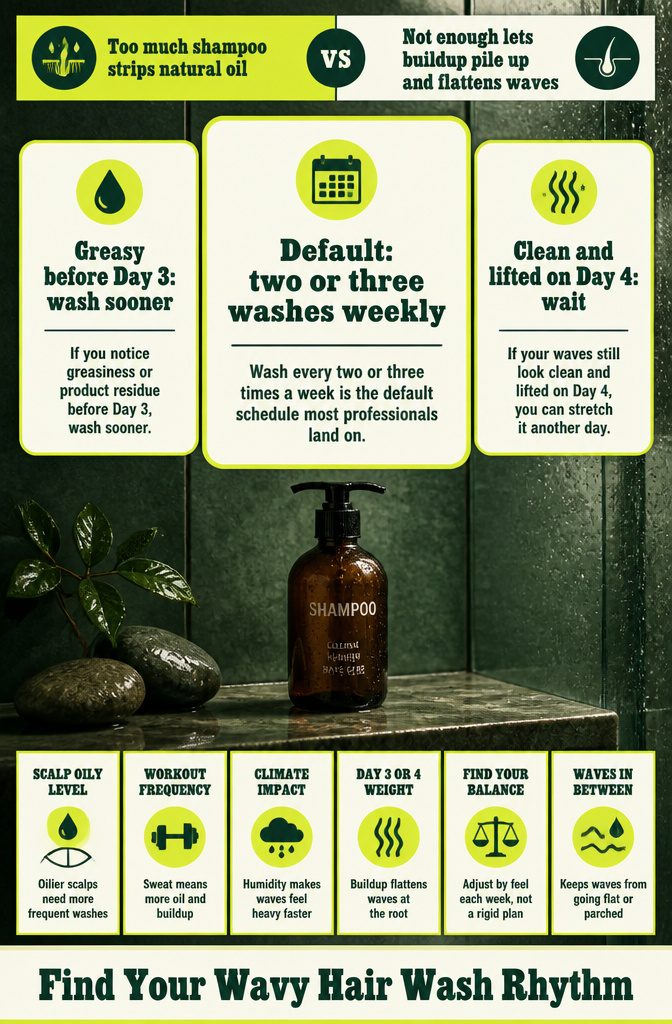
Wash every two or three times a week is the default schedule most professionals land on, but your actual frequency depends on how oily your scalp gets, whether you work out, and how humid the climate is.
Wavy hair after Day 3 or 4 tends to feel heavy from buildup, and that weight flattens the pattern at the root.
If you notice greasiness or product residue before Day 3, wash sooner. If your waves still look clean and lifted on Day 4, you can stretch it another day.
The trap most routines fall into is not how often you wash but how you do it.
Too much shampooing strips natural oil and leaves waves frizzy and limp. Not enough lets styling products and sebum pile up at the scalp, which collapses volume and makes refresh days harder.
I find balance matters more than a rigid schedule, and adjusting by feel week to week keeps waves from going flat or parched between washes.
Adapting Curly Girl Method for Waves
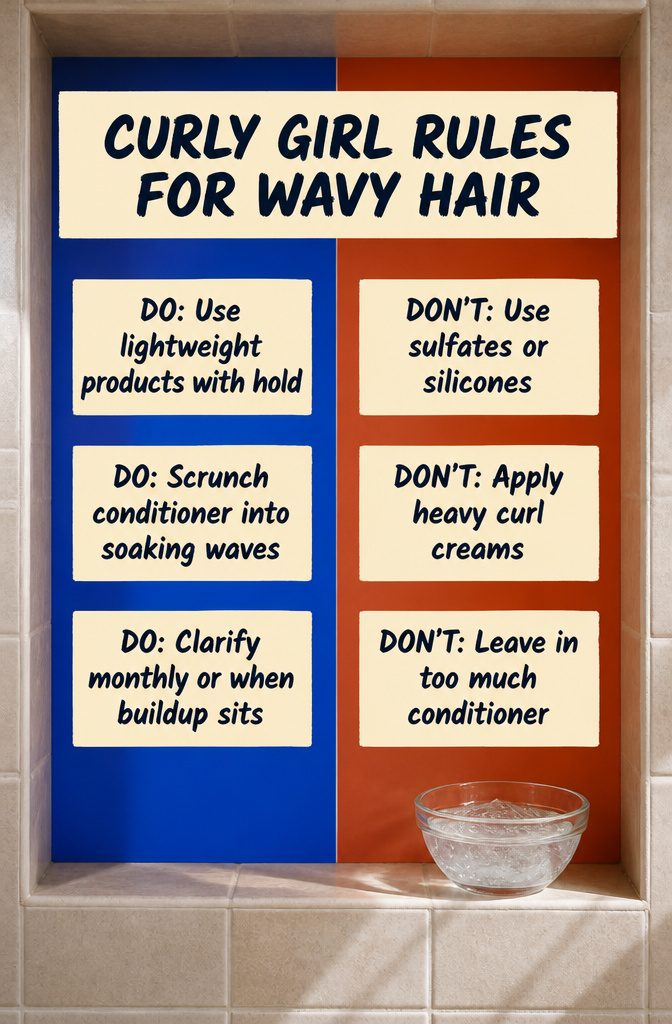
The Curly Girl Method drops sulfates, silicones, and heat styling in favor of moisture and definition, and most of those rules carry over when your texture sits closer to 2b or 2c.
No sulfates or silicones keeps buildup from flattening the pattern, and squish to condish still works to get conditioner deep into the strand while you scrunch.
Clarifying once a month or when product starts to sit heavy resets things without stripping.
Those with very curly hair will tend to use heavier products that could weigh your waves down. Stick with lightweight products with hold that aren’t sticky.
Waves sit flatter at the root and widen toward the ends, so they need hold without the rich creams tighter curls rely on.
Gel still does the job, but you want less of it and you want it applied to soaking hair so it spreads thin.
The other adjustment is how much you leave in: waves need slip to clump but not so much weight that they stretch out by midday.
Start with half the conditioner a 3b routine would call for, rinse most of it, and let one styling product do the work.
Choosing Products by Porosity
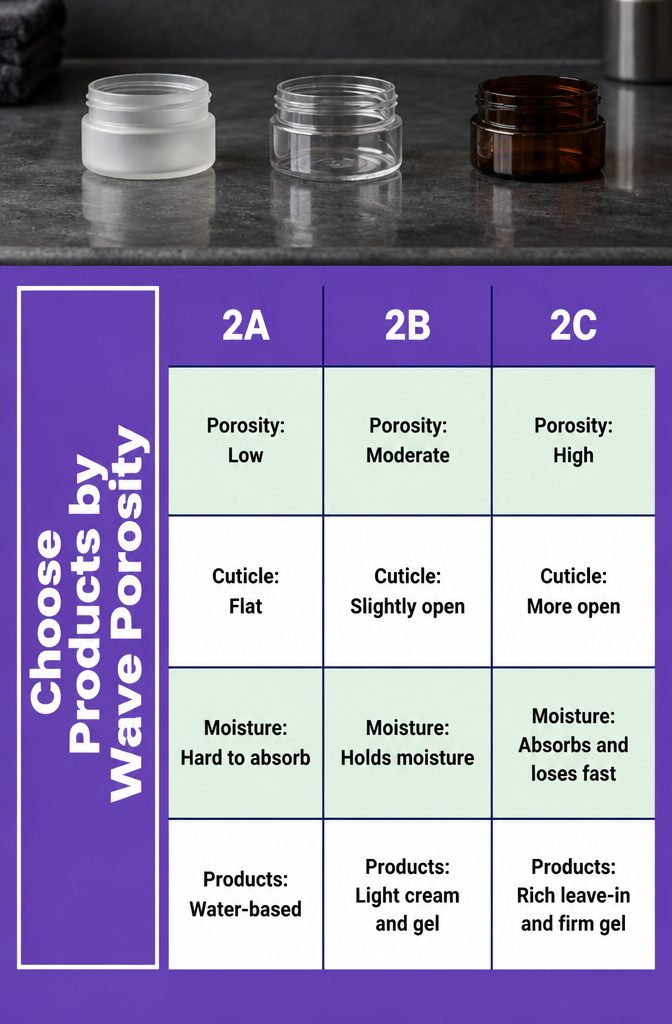
Porosity decides how your waves take in product and whether lightweight formulas sit on top or heavier ones soak through.
Type 2A usually comes with low porosity, which means the cuticle lies flat and product has a hard time getting in.
That same tight cuticle makes buildup show up fast, so the routine for 2A leans on water-based leave-ins and mousses that won’t cling to the surface.
Type 2B sits in the middle with moderate porosity. The cuticle opens just enough to let moisture in and hold it without grabbing everything you put on.
You can layer a light cream under a gel without the wave collapsing, and frizz stays manageable unless humidity pushes past what the cuticle can handle.
Type 2C porosity runs higher. The texture is coarser and the cuticle more open, so moisture gets absorbed quickly and leaves just as fast.
That makes 2C prone to frizz and dryness, so the product routine skews heavier: rich leave-ins, curl creams, and gels with more hold to lock in what the hair soaks up before it evaporates.
Why Trims and Scalp Care Matter
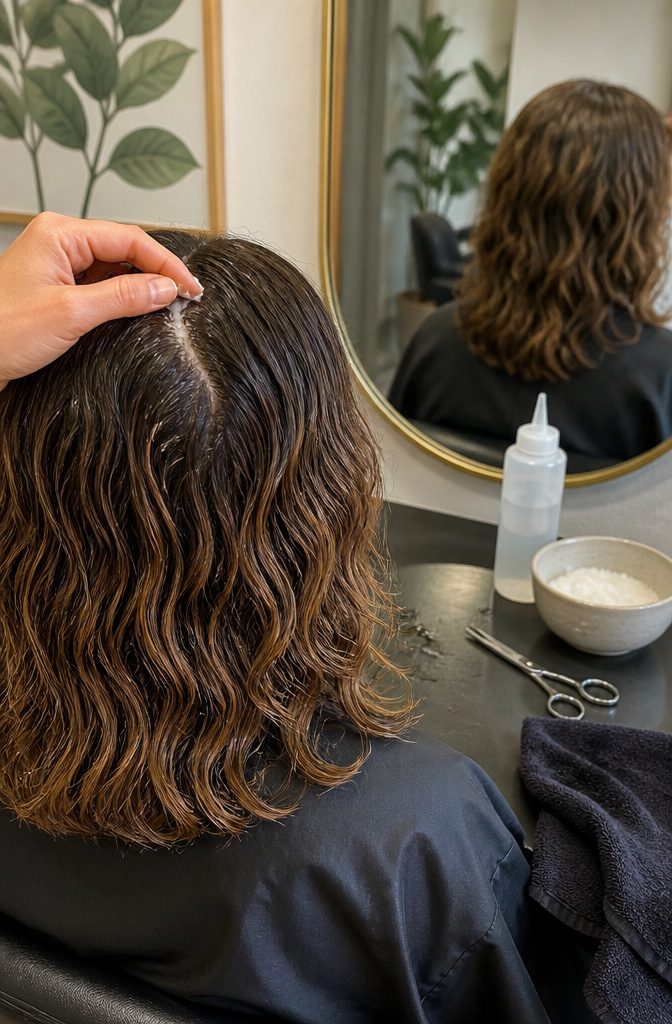
Your scalp and your ends both decide how well your waves take shape and hold it. A scalp coated in buildup makes it harder for styling product to grip, and that’s where most patterns start to fall flat by lunchtime.
Treating your scalp twice a week with a clarifying rinse or a scrub keeps follicles clear and lets conditioner work where it should, at mid-length and below.
That separation matters because wavy hair needs weight off the root and moisture through the length.
Split ends unravel the pattern from the bottom up, and no conditioner will glue them back together. Trimming every six to eight weeks keeps the ends clean enough to clump instead of fray.
Skipping trims means you’re trying to define waves with damaged fiber, and damaged fiber doesn’t wave. It frizzes.
What Frizz Actually Comes From

Frizz happens when the hair cuticle lifts.
Wavy hair already has a bent structure that slows natural oil from traveling root to tip, so the ends sit exposed and dry. Add UV radiation, pollution, hard water, heat styling, hot weather or exercise and you compound the problem.
Each one either dries the strand further or roughs up the cuticle, inviting moisture from humid air to swell the cortex unevenly. That swelling is what you see as frizz.
The routine built around this tackles each cause in sequence. Cleansing removes buildup that blocks moisture.
Conditioning smooths the cuticle while the hair is wet and pliable. Microfiber or cotton t-shirt drying replaces the friction of a bath towel.
Leave-in product seals the shaft before humidity reaches it. Heat protectant goes on before any diffuser or sun exposure.
Silk or satin at night keeps friction low while you sleep. Skip one and you reopen a vector.
How Layers Help Waves Hold Shape
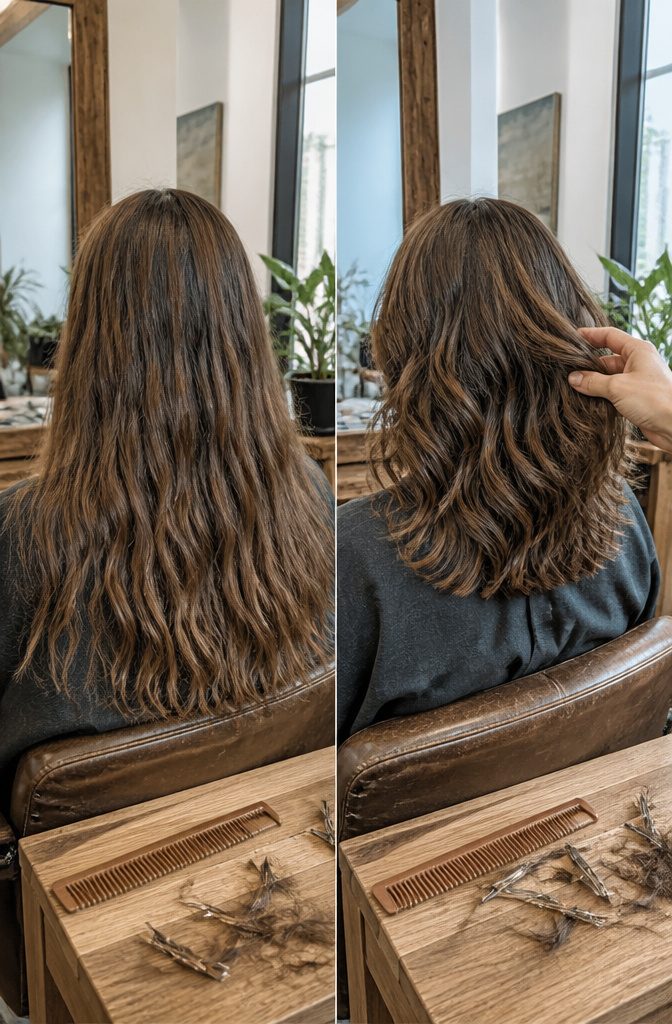
A layered cut lets waves stack and bounce instead of hanging as one flat sheet.
When every strand ends at the same length, the weight pulls from root to tip and the pattern stretches out. Layers remove that weight selectively, so the wave can contract and hold its shape through the day.
Shoulder length hits a useful range: long enough that the cut gives you options for styling, short enough that gravity works with you instead of against you.
I’ve seen this play out in my own routine. The difference showed up most clearly after a layered shoulder-length cut, where waves that used to relax by midday kept their definition through a full wear.
Layers are genuinely helpful if you find you like the wash-and-go method and want the shape to last.
A wavy routine works without a cut, but if you do get a trim, ask for layers and watch how much easier it gets to hold the pattern you’re working toward.
Frequently Asked Questions
What is a basic wavy hair routine?
Wash with a gentle, sulfate-free shampoo, condition from the mid-lengths down, and detangle while the conditioner is still in.
Then apply a lightweight cream or gel to damp hair, and either air-dry or diffuse. Keep heavy product away from the roots, since weight shows there first.
How is a wavy hair routine different from a curly hair routine?
Waves need lighter products and less moisture than tight curls. Rich creams made for curls weigh waves down, so look for lightweight formulas with hold that don’t feel sticky.
Waves also sit flatter at the root and widen toward the ends, so apply gel to soaking wet hair where it spreads thin.
What is a good routine for 2A wavy hair?
Keep everything light.
Type 2A is fine and tends toward low porosity, so heavy creams build up fast, and a lightweight leave-in is usually enough. Shampoo the scalp, condition from the mid-lengths down, and favor water-based leave-ins and mousses over rich formulas.
Can I use Moroccan oil on wavy hair?
Yes, in small amounts.
Use about a dime-sized drop on the mid-shaft and ends, and skip the roots. Too much weighs waves down, cuts volume, and leaves hair looking greasy.
Does wavy hair need a diffuser?
No. Air-drying gives a softer, more relaxed wave and skips heat entirely, while a diffuser adds definition and lift at the root.
If you diffuse, apply heat protectant first, split your hair into 4–6 sections, and use low or medium heat for a second or two at a time.
How do you do the Curly Girl Method for wavy hair?
Skip sulfates and silicones, keep heat low, and use lighter products than a curly routine calls for.
Squish to condish to work conditioner into the strands, and clarify about once a month. Waves also do better with less conditioner and one styling product doing the work.
Should you brush wavy hair?
Only when it’s wet and coated in conditioner.
Detangle with your fingers or a wide-tooth comb at that stage. Combing dry or barely damp strands is how waves break and the pattern gets disturbed.





