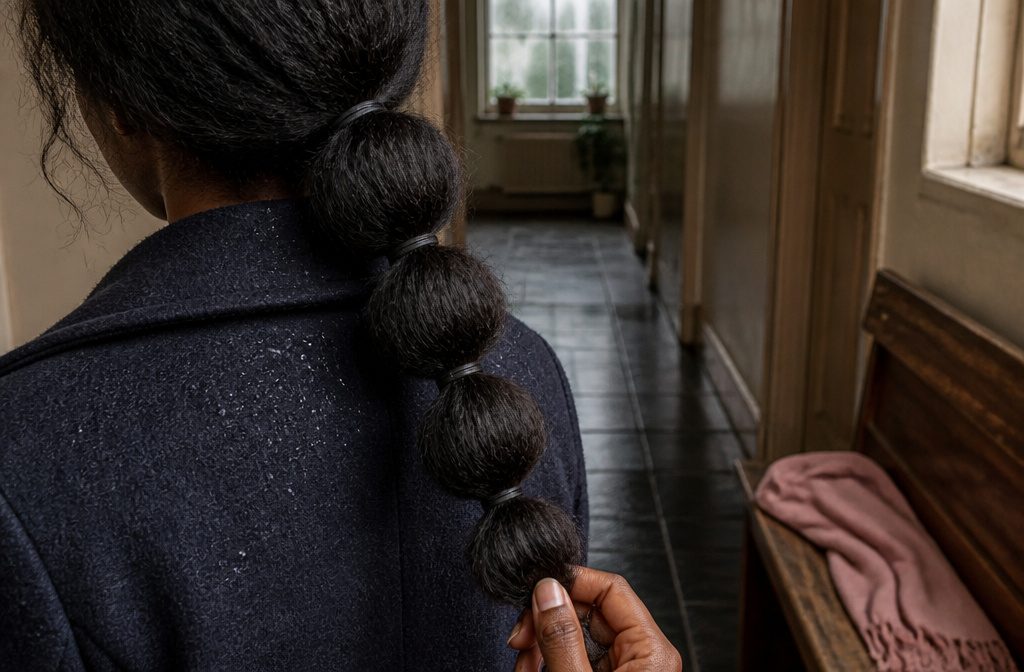
A bubble braid takes a ponytail, 4–8 elastics and a few minutes, and most people ruin it at the puffing step by tugging too hard.
The condition is length: hair needs at least 4–6 inches to hold, and coily textures need elastics 2–3 inches apart instead of 3–4.
1. Pull your hair into a ponytail
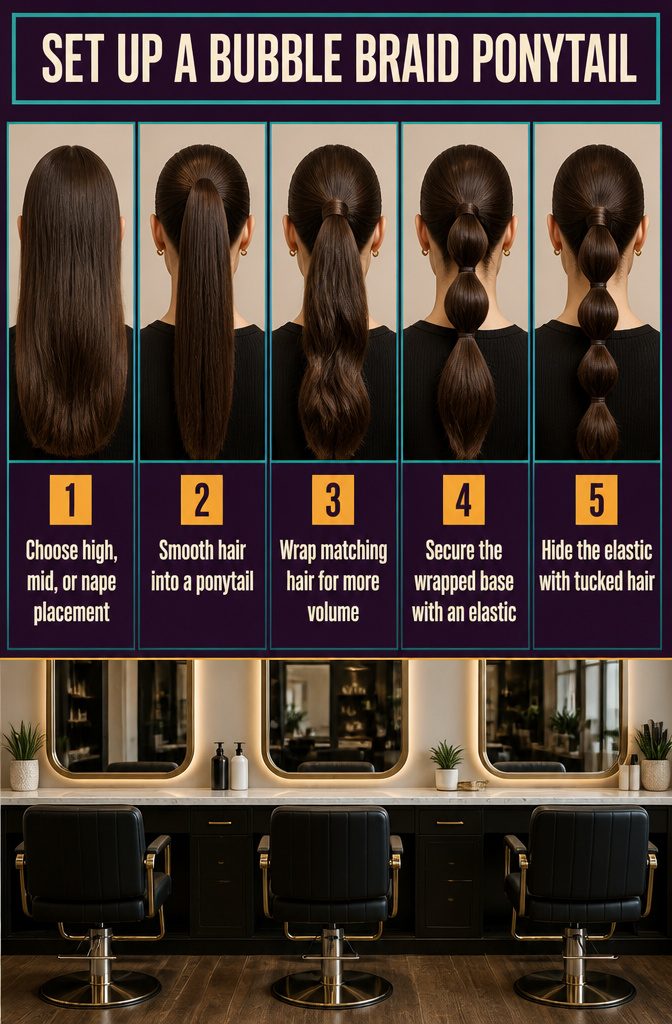
- Pick the placement. A high ponytail at the crown gives the most dramatic bubbles, a mid-height one is the classic, and a low one at the nape looks softer. I’d start high, since the puffs show up best there.
- Gather your hair and slick the base down smooth. Bumps at the base show through once the bubbles are in.
- For extra length and volume, wrap matching textured braiding hair around the base before you secure it.
- Tie the first elastic over the wrapped base.
- Wrap a small piece of hair around the top elastic and tuck the end in. The elastic disappears, and the style looks cleaner.
2. Add the next elastic 1–2 inches down
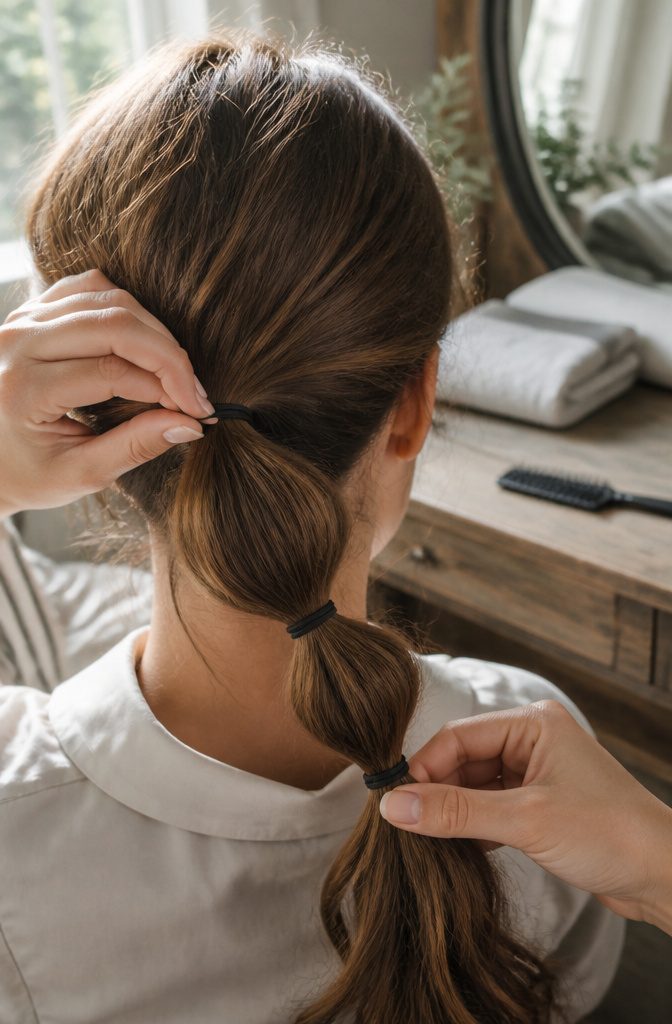
Slide down the ponytail 1–2 inches below the base elastic and tie a second one, snug but not cutting into the hair.
The hair trapped between the two ties becomes your first bubble, so this gap sets the size of everything that follows. Tighter spacing gives smaller, more numerous bubbles.
A wider gap, up to 2–4 inches, gives fewer and larger ones. For a first attempt I’d stay near 2 inches, since the hair puffs out easily and forgives a slightly crooked tie.
Pinch the base elastic with your free hand while you tie so it doesn’t creep down. Even spacing is what makes the finished braid look polished, so match this gap on every tie.
3. Puff the first bubble gently
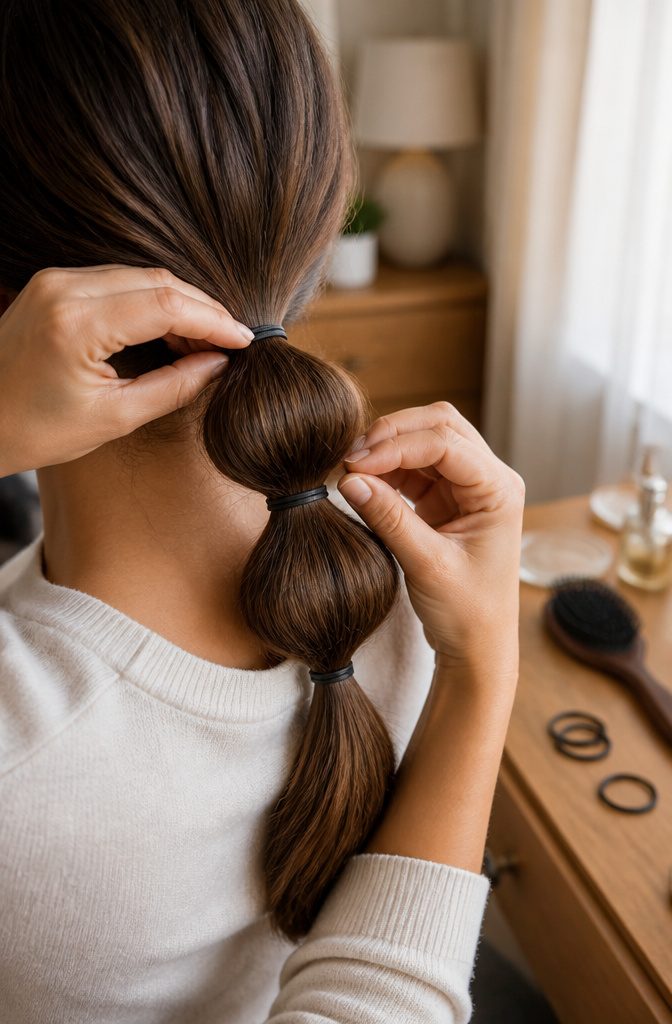
Hold the top elastic steady with one hand and ease the hair between the two elastics outward with the fingers of the other.
Stretch it sideways, lift it slightly upward, then round out the bottom so the section reads as a ball rather than a flat loop.
Pull gently and stop as soon as the shape looks full. Tugging hard is the quickest way to wreck this step, and it’s much easier to puff a section a bit more than to coax an overstretched one back.
Fine hair needs help.
Lightly tease (back-comb) each section before you puff it, and the bubble will hold its shape. Thicker hair usually forms bubbles on its own, so I’d skip the comb there.
4. Repeat down the ponytail
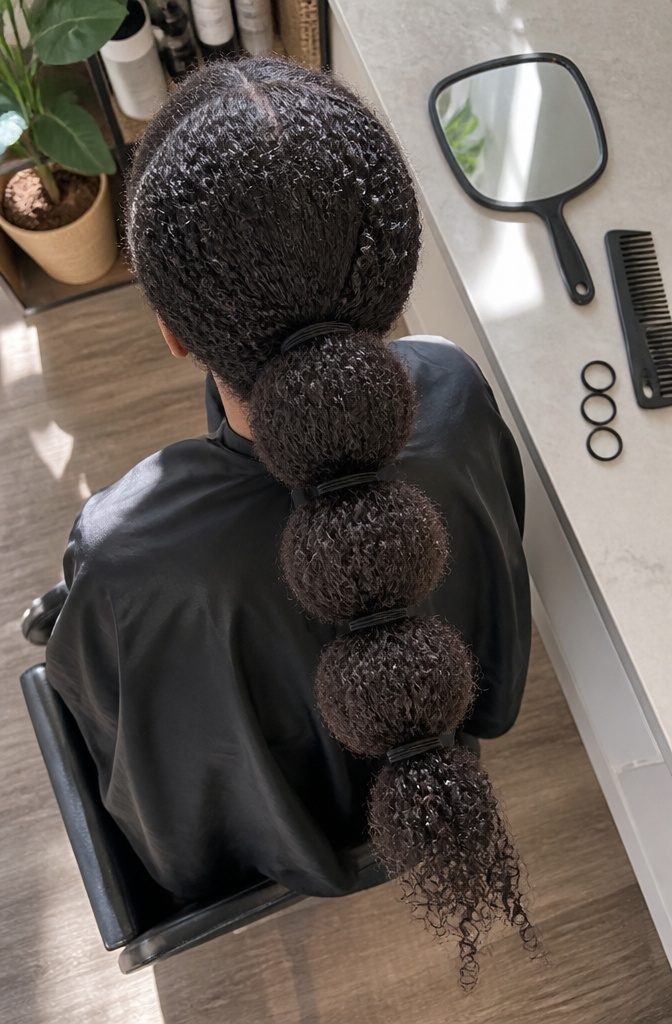
Tie the next elastic farther down the ponytail, puff the section above it, and repeat until you reach the ends.
Most ponytails hold 3–5 bubbles, spaced 2–4 inches apart. I’d eyeball the first gap, then match it every time, because uneven spacing is what makes a bubble braid look sloppy.
Coily hair needs tighter gaps, and Carol’s Daughter puts it simply:
For coily hair, 2–3 inches between elastics generally works better than 3–4 inches.
On 4A–4C hair, coils pack in more texture per inch, so a wide gap makes each bubble look stretched thin. Stay at 2–3 inches.
5. Try the pull-through method for a fuller look
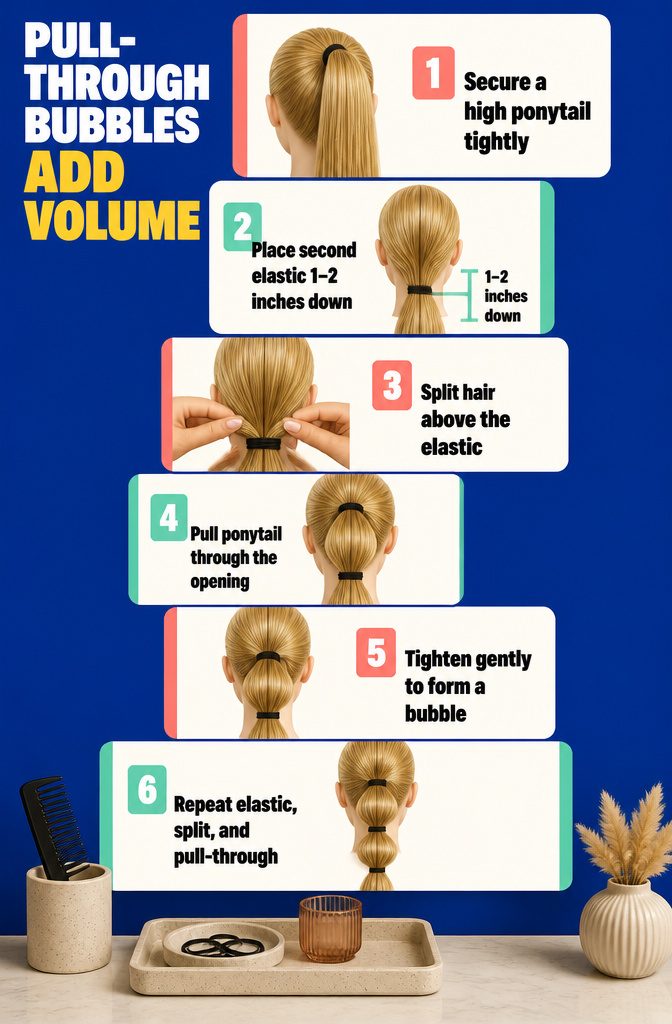
The pull-through method gives fuller bubbles than plain puffing, and the hair looks woven where it passes through each tie. I reach for it whenever volume is the goal.
- Make a high ponytail and secure it tightly with an elastic.
- Tie a second elastic 1–2 inches down the ponytail.
- Split the hair above the second elastic into two parts to make a small hole.
- Pull the entire ponytail below that elastic up through the hole.
- Tighten gently. This forms your first bubble.
- Add another elastic further down, split the hair above it, and pull the tail through again. Repeat to the ends.
6. Prepare short hair with extensions
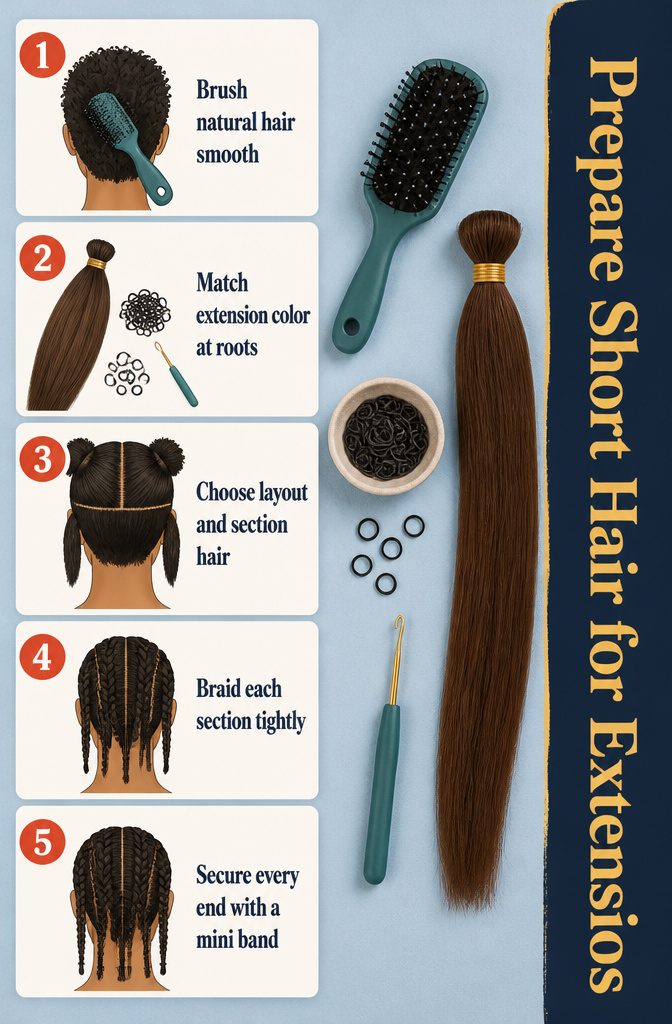
- Brush your natural hair until it is smooth, so tangles don’t turn into lumps in the braids.
- Set out human braiding hair in a color that matches yours, mini rubber bands, and a crochet hook. Color matters most at the roots, where the extension sits right against your own hair.
- Choose the arrangement before you part anything: a ponytail, pigtails, or another layout. Section your natural hair at those spots.
- Braid each section in a simple 3-strand braid from roots to ends. Braid it tightly, because these small braids are what hold the extensions.
- Wrap the end of each braid with a mini rubber band and pull it as tight as it will go. Repeat for every section.
7. Attach the braiding hair with a crochet hook
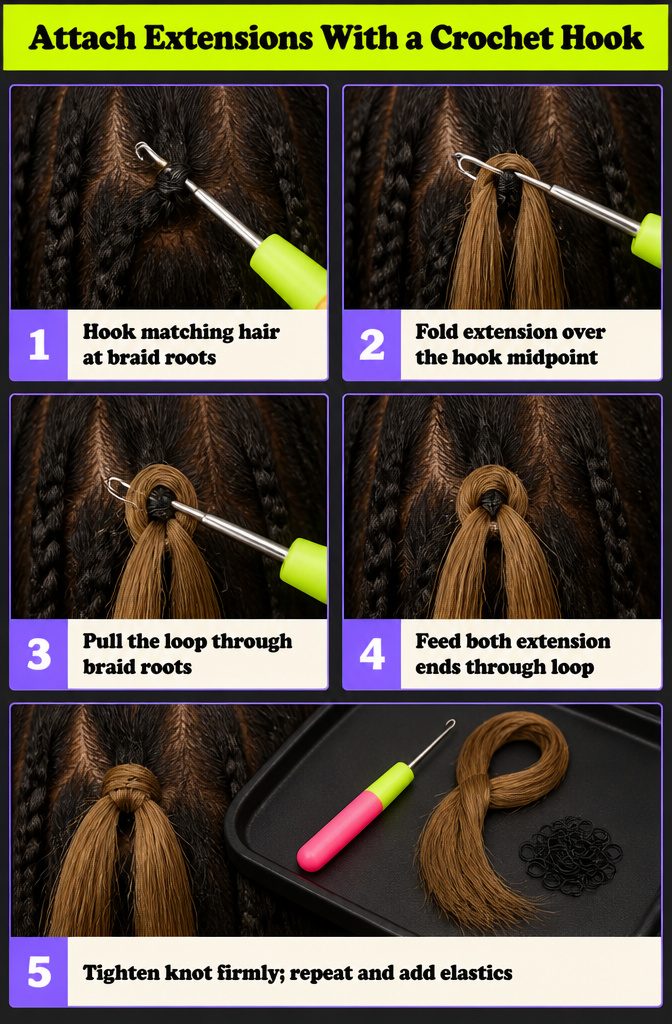
- Slide the crochet hook through the roots of one small natural braid, the one you secured at the end with a mini rubber band, and hook a piece of braiding hair that matches your color.
- Fold the extension piece over the hook so the hook catches its midpoint.
- Pull that loop back through the braid roots.
- Feed both ends of the extension through the loop.
- Pull the ends and tighten the knot as hard as you can. This is the step I’d never rush, since a loose knot is the first thing to slip.
- Repeat on each braid, then add elastic bands along the attached braiding hair to form the extension bubbles.
8. Bubble Braid Ponytail
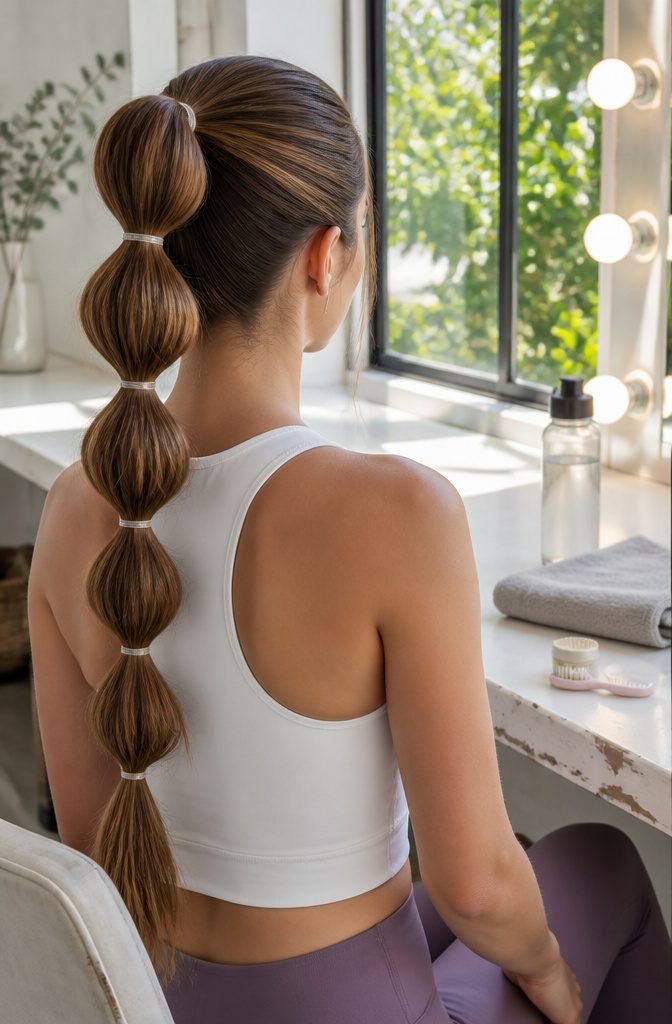
The high ponytail is the bubble braid at its most dramatic.
Set at the crown, it gives the biggest bubble effect. A mid-height ponytail reads more classic and versatile, and one at the nape turns softer and more elegant.
I’d pick the crown for most people, because it looks sporty and polished at once. The same style works at the gym, on errands, at the office or at a summer festival, where it keeps hair off your neck.
Slick the base smooth before adding any bubbles.
A soft toothbrush and a little balm along the hairline keep the edges sleek. Then work the bubbles down the length with either the Classic or Pull-Through method.
9. Bubble Braid Pigtails
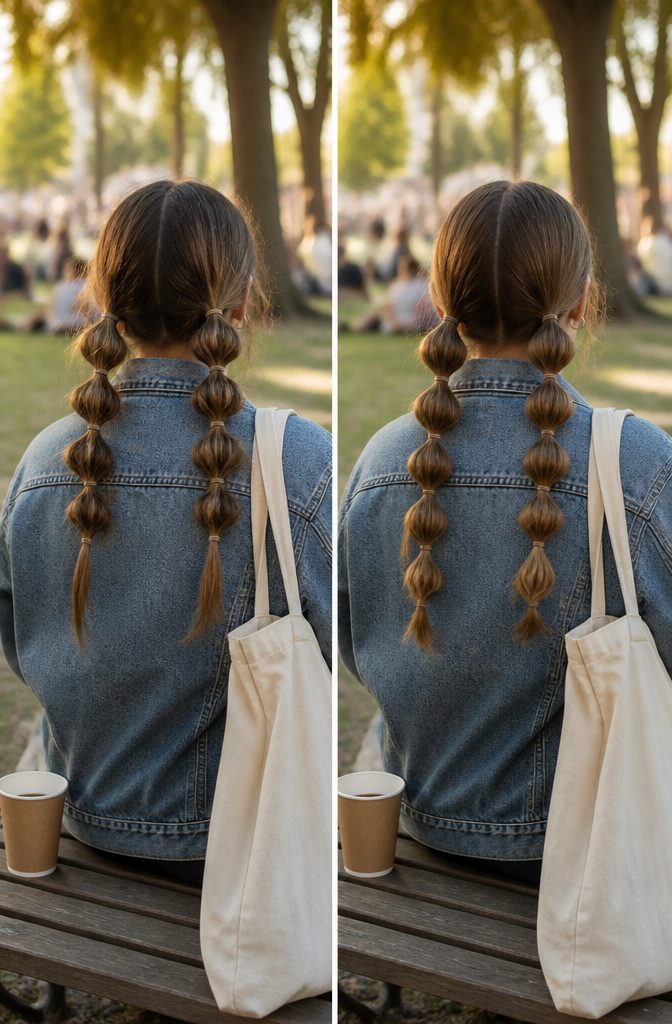
Bubble braid pigtails start with a center part and two ponytails secured at whatever height you like.
High sits near the crown, mid lands around the ears, and low drops closer to the nape. Bubble each ponytail separately, working down one side and then the other.
The twin-ponytail setup reads younger and more playful than a single pony, and the symmetry lands somewhere between retro and festival-ready.
I think of this as the Coachella version of the style: it has the energy of doubled braids without the weight or the time commitment.
You get movement on both sides of your face, and the pigtails hold their shape better through a full day than a single ponytail tends to.
This is the one for concerts, theme parks, casual weekend plans, or any day when you want the look to carry some personality without reading too polished.
It works well with looser bubbles for a softer finish or pulled tight for sharper definition.
10. Half Up Bubble Braid
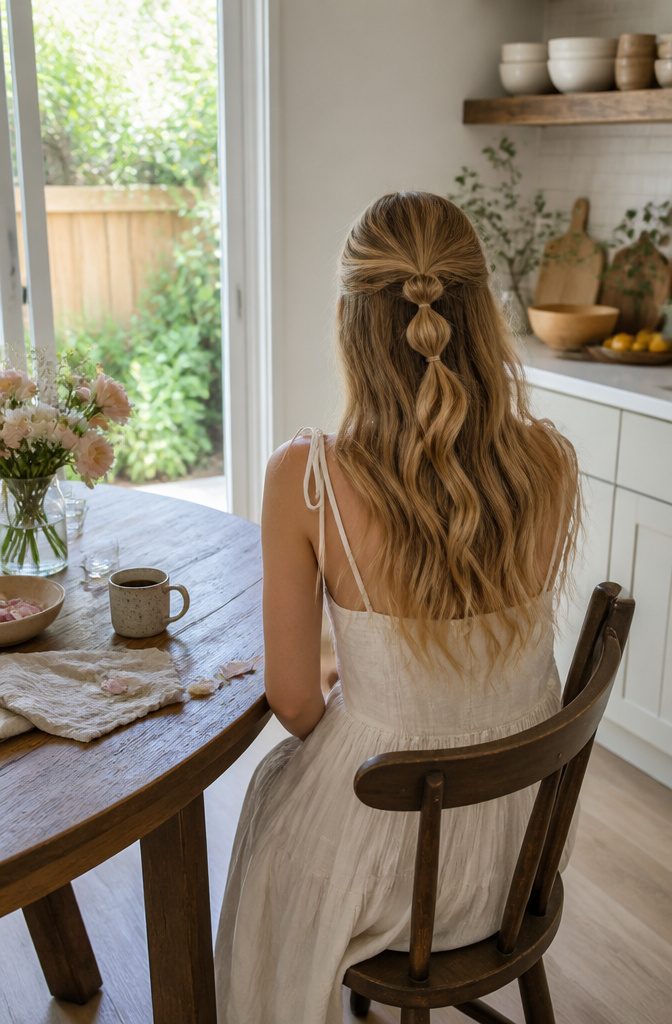
Gather the section from the crown to your ears into one small ponytail, bubble it, and leave everything below loose.
The bubbles sit against a curtain of down hair instead of competing with it, which is why the style reads as romantic and effortless.
I choose it over a full ponytail whenever the occasion is soft: a brunch date, a farmers market morning, a casual wedding or a bridal shower.
It also suits short hair better than most versions.
If you have only 4–6 inches to work with, keep the pony small, stop at 2–3 bubbles, and use smaller elastics so the proportions hold. Any more bubbles and a short ponytail looks crowded.
11. Mohawk Bubble Braid
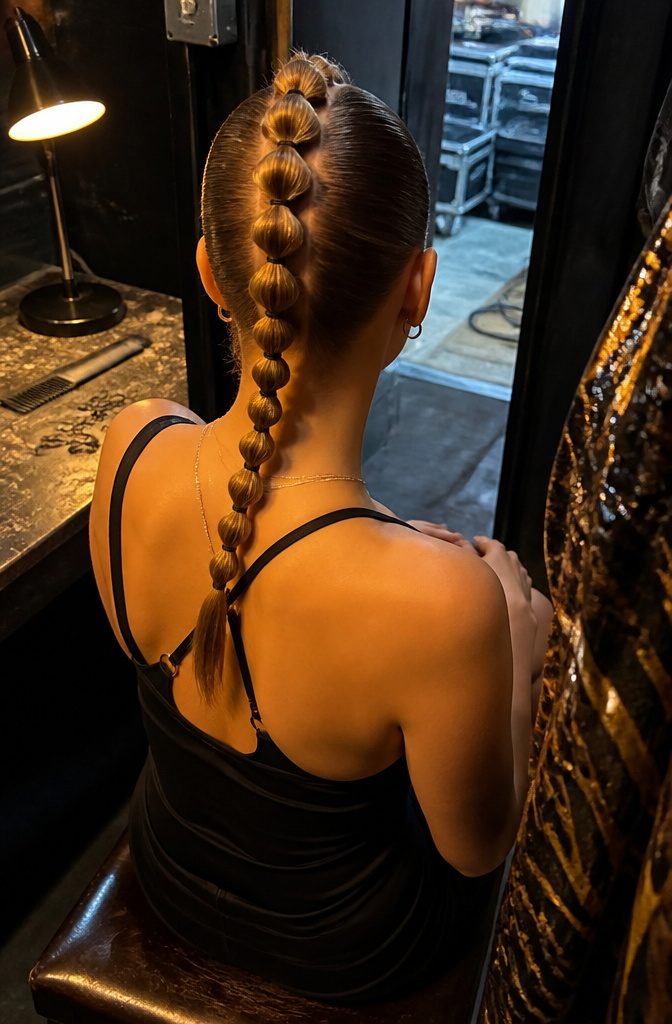
A row of small ponytails runs straight down the center of the head, forehead to nape, and each one gets bubbled on its own.
The result reads as a ridge of puffs rather than a braid, which is why it looks edgy and bold instead of sweet.
I’d pick it for a music festival, a concert or a party, any time you want heads to turn. For an office day or a quiet errand, a ponytail or pigtail version is the better call.
Keep the ponytails small and the strip dead straight, since that line from forehead to nape is the whole look and any wobble shows from every angle.
12. French Bubble Braid
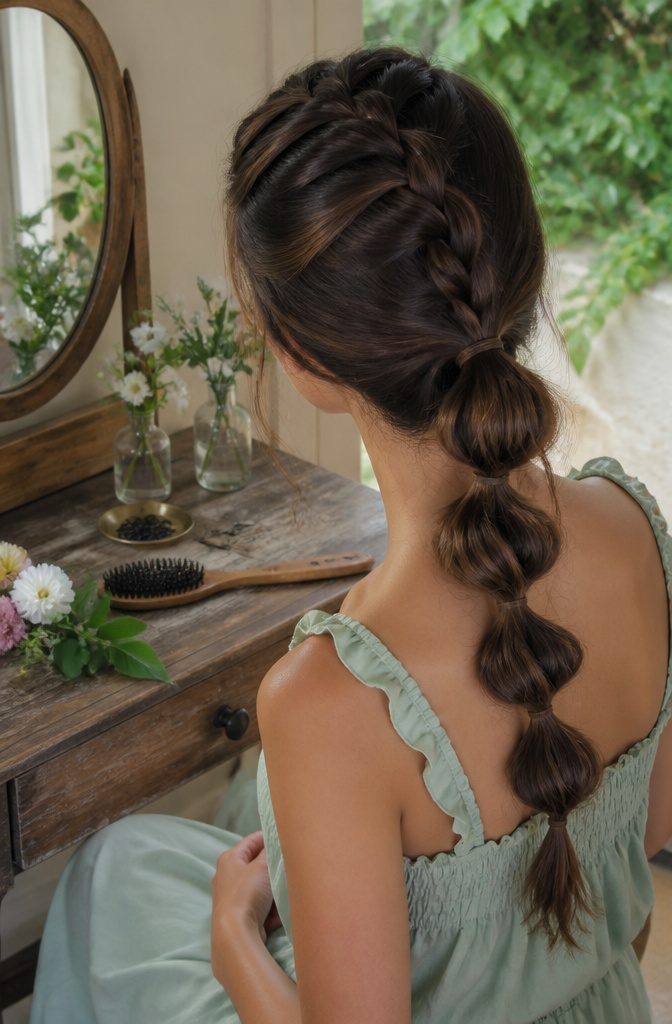
A French bubble braid opens like a regular French braid and then drops the technique early. Work just 2–3 stitches at the crown, adding a little hair from each side with every pass.
Then gather everything into one ponytail and bubble down the length. The short braided cap gives the top a smooth, sculpted line that a plain bubble ponytail lacks, while the bubbles below keep the length playful.
I pick this version over a standard bubble ponytail whenever the occasion calls for polish: a dinner date, graduation, a garden party or a work event.
It looks intricate but is much easier than a full French braid, because you commit to only a few stitches before the elastics take over.
13. Face-Framing Bubble Braids
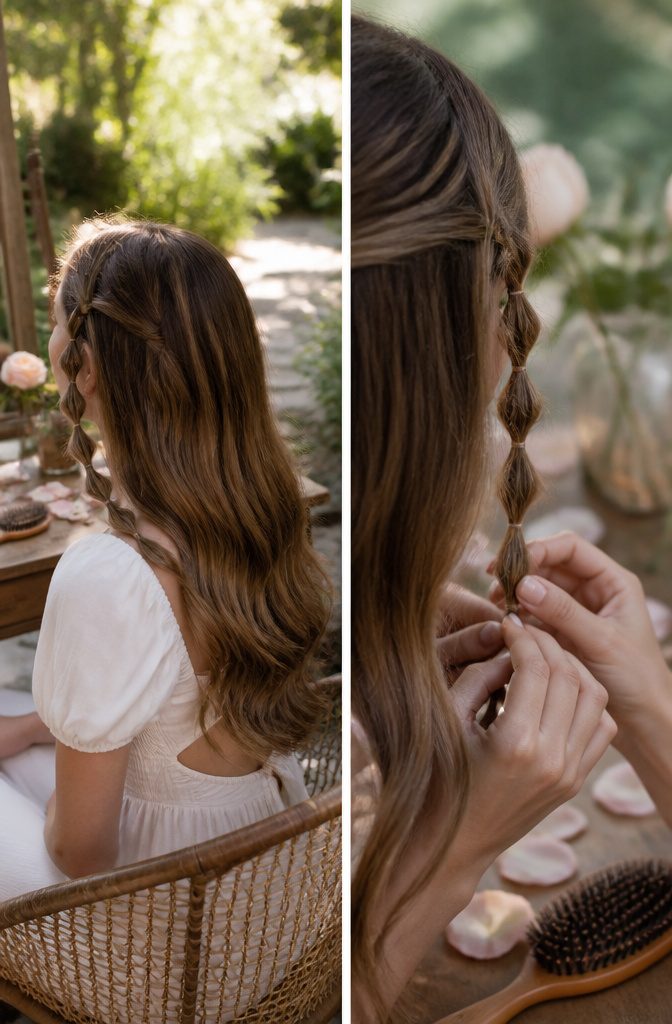
Two small sections taken near the temples, each bubbled just 2–3 times and left hanging loose, make up the whole look.
The strands fall in soft, puffed segments beside your cheekbones, and the rest of your hair can stay down or be pulled into a low bun or ponytail. The result is soft, flattering and boho-chic.
I reach for this one over the fuller bubble styles for photoshoots, outdoor weddings and date nights, where you want a romantic touch without committing your whole head to a braid.
Keep each section small and stop at 2–3 bubbles, so the strands read as an accent rather than a clump. If you want the braid itself to be the statement, choose a full-length version instead.
14. Chunky African Bubble Braids with Cuffs
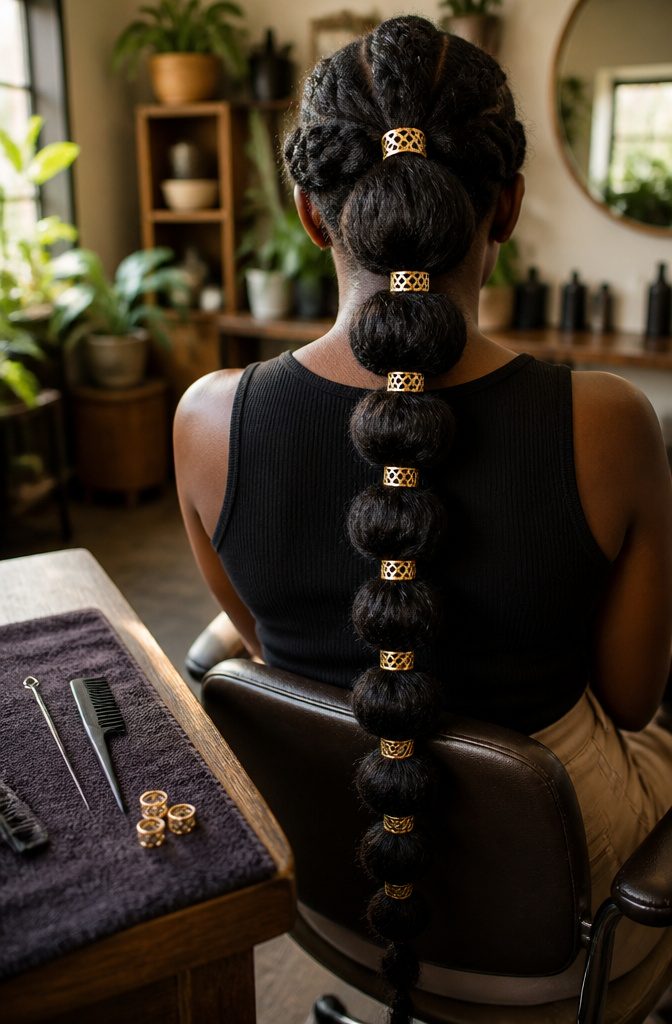
Small, even sections make this version look deliberate. Each gets a small elastic, then another elastic 1–2 inches down, repeated to the ends.
Decorated hair cuffs slipped over the elastics set it apart from a standard bubble braid. I’d choose them over plain bands every time, because they hide the rubber and turn each bubble into a deliberate accent.
The style draws from African braiding traditions, and appreciation and respect for those origins come with wearing it. Know where it comes from, and credit it when someone asks.
For extra length and fullness, attach texture-matching crochet hair at the roots with a latch hook, then blend it with your own hair before forming the bubbles.
15. Tucked Updo with Face-Framing Bubble Braids
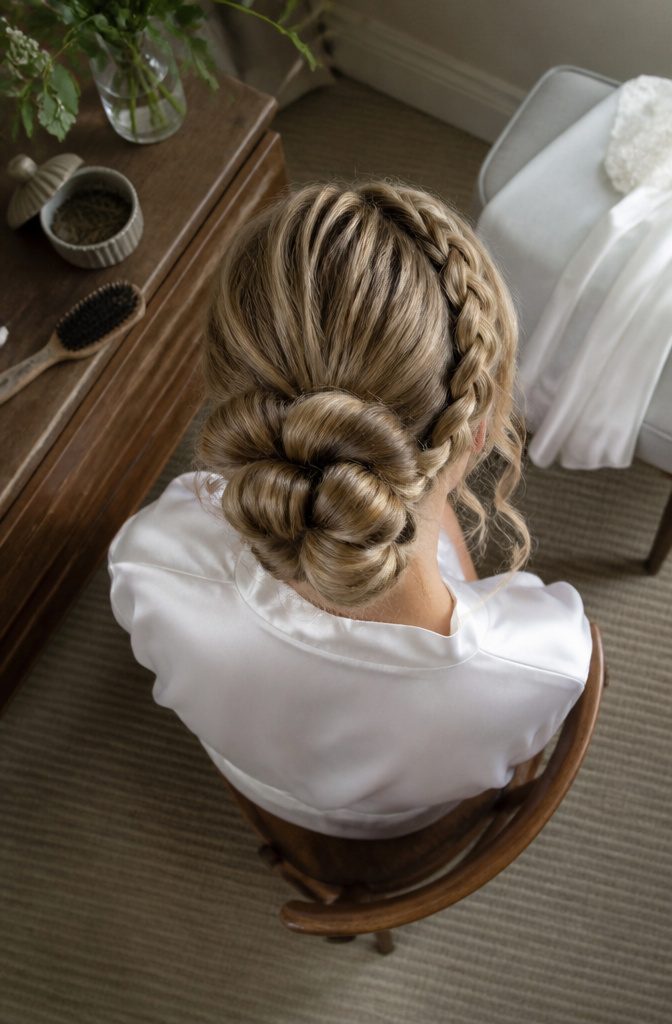
Two loose bubble braids along the face, then the rest of the hair gathered into a low ponytail: that is the whole structure.
Divide the ponytail into 3–4 equal sections and secure each with a clear elastic, then puff each section into a bubble.
Twist or fold the bubbled length up into a bun and pin it at the nape of your neck. Keep the face-framing braids loose, since they soften the bun and stop the look from turning severe.
I’d choose this over the plain bubble ponytail for anything formal.
It reads elegant and chic with a youthful twist, which suits weddings, formal dinners, graduation and job interviews. Clear elastics blend into the hair, so the bubbles look like shape rather than hardware.
What you need before you start
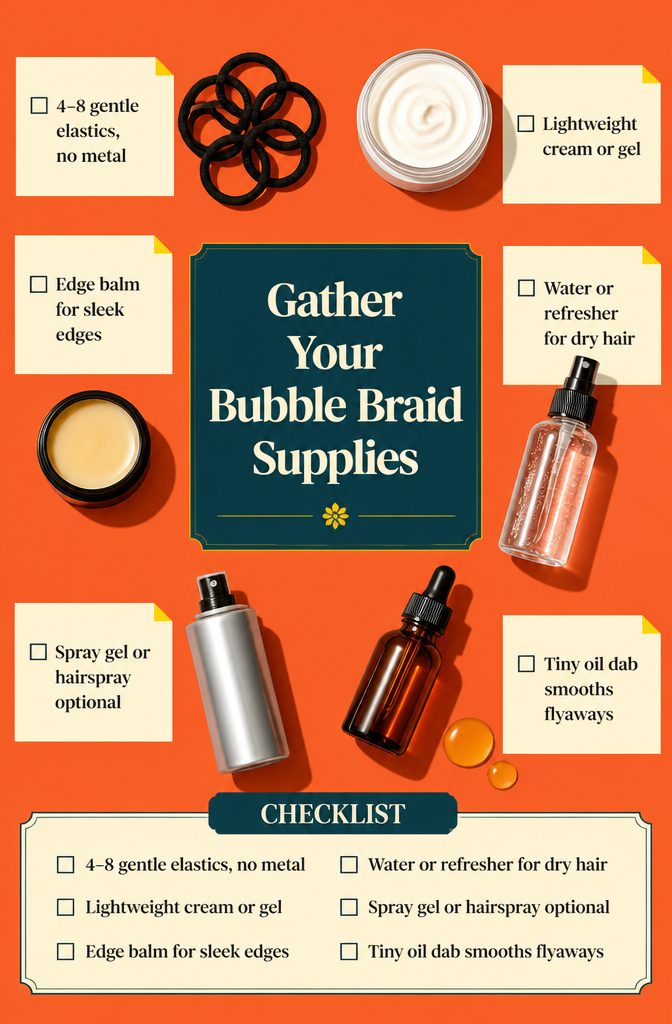
Prep is minimal, but gather everything before the first elastic goes in:
- 4–8 hair elastics, the gentle kind with no metal clamps.
- A lightweight styling cream or gel for smoothness. Coco Crème Curl Shaping Cream Gel with Coconut Oil fits the job.
- Edge balm for sleek edges: Goddess Strength Smooth & Shape Balm.
- For dry hair, a water bottle. Hair Milk Refresher Spray or Goddess Strength Divine Strength Leave-In Milk can do the same work with a bit of slip.
- Spray gel or hairspray for hold, optional.
- Goddess Strength 7-Oil Blend Hair & Scalp Oil, as a stand-in when you have no hairspray. A tiny dab on your fingertips smooths flyaways, and too much deflates the bubbles.
Day-2 or day-3 hair grips better than fresh
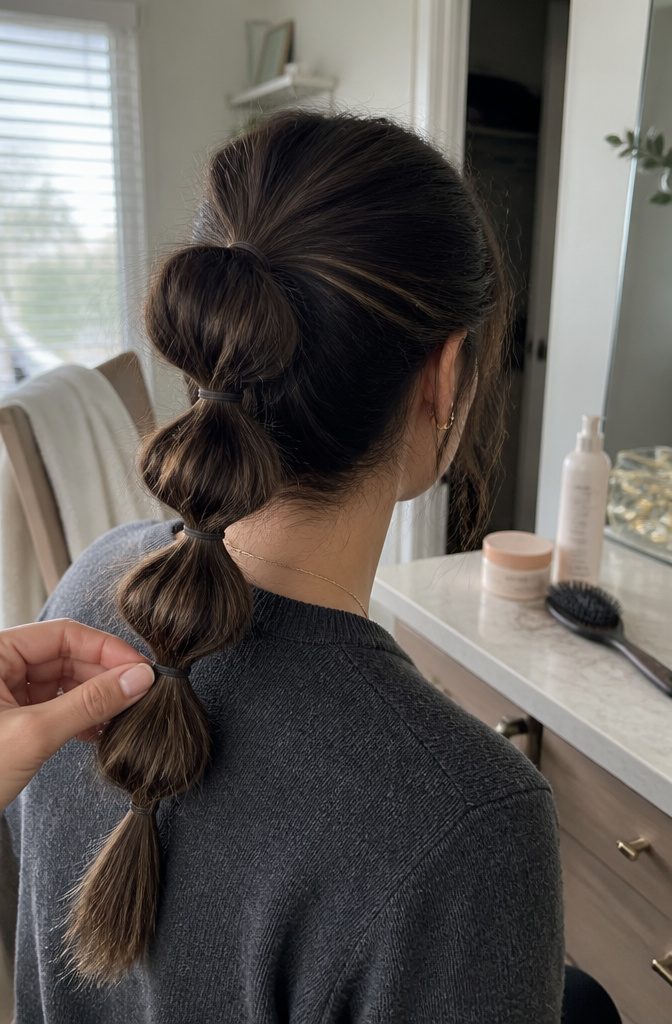
Elastics slide on clean, slippery strands, so a bubble braid on day-2 or day-3 hair usually holds its shape better.
The fuller texture gives each band something to grip. Heavily conditioned hair slips the most, and I’d skip a deep-conditioning session the night before.
Washing first is fine if that’s your routine. A moisturizing sulfate-free shampoo such as Wash Day Delight Sulfate Free Shampoo cleans without leaving residue, and Coco Crème Coil Enhancing Moisture Butter adds moisture and definition afterward.
Then wait. Bubble braids on wet hair don’t hold their shape, so let your hair dry fully before the first elastic goes in.
Let hair dry to at least 90% before styling
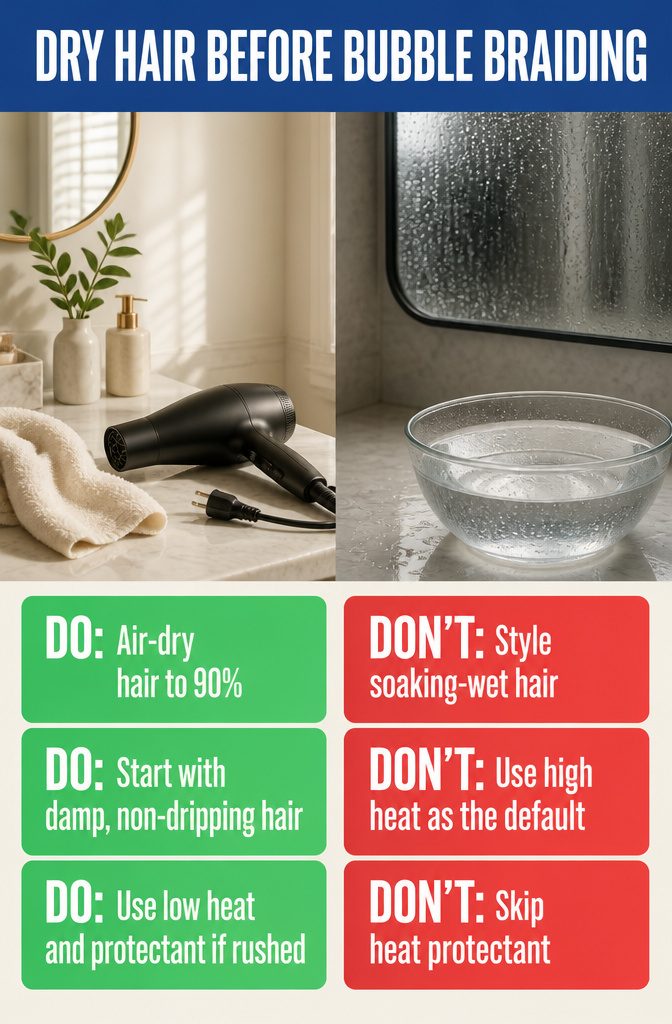
Wet hair is the wrong canvas for a bubble braid. Wet strands compact too tightly into the elastics, so the puff you’re after never forms.
Let your hair air dry to at least 90% before you start. That means damp at most, with no dripping or cold, heavy sections.
If the morning is short, blow-dry on low heat instead, and use a heat protectant first. Goddess Strength Divine Strength Leave-In Milk is one option.
I’d still pick air drying whenever you have the time, since it skips the heat entirely. The blow dryer is the backup for rushed days.
Adjustments for coily and thicker textures
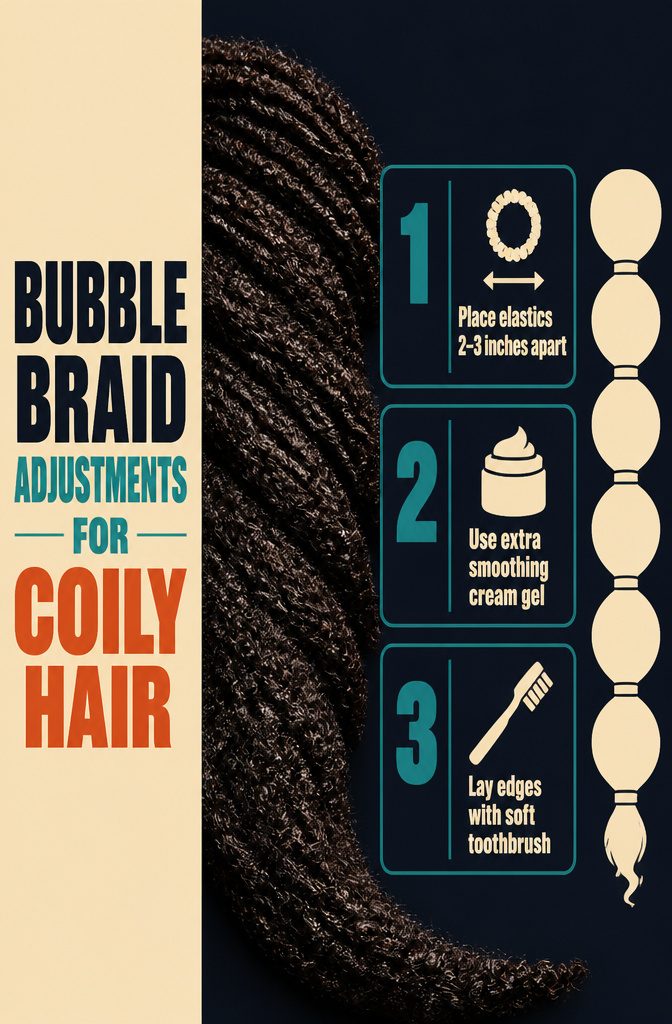
Bubble braids work on every hair type and length, and 4A–4C hair needs three small changes:
- Place the elastics 2–3 inches apart rather than 3–4. Coily hair packs more texture into each inch, so wider gaps make the bubbles look overstretched.
- Use more smoothing cream gel than you would on looser patterns. Work it through before you gather the ponytail so the sections stay smooth when you tug them into bubbles.
- Give your edges extra care. Coily hair often shows more baby hairs, so lay them down with a soft toothbrush and Goddess Strength Smooth & Shape Balm before pulling everything into the ponytail.
Short hair needs at least 4–6 inches
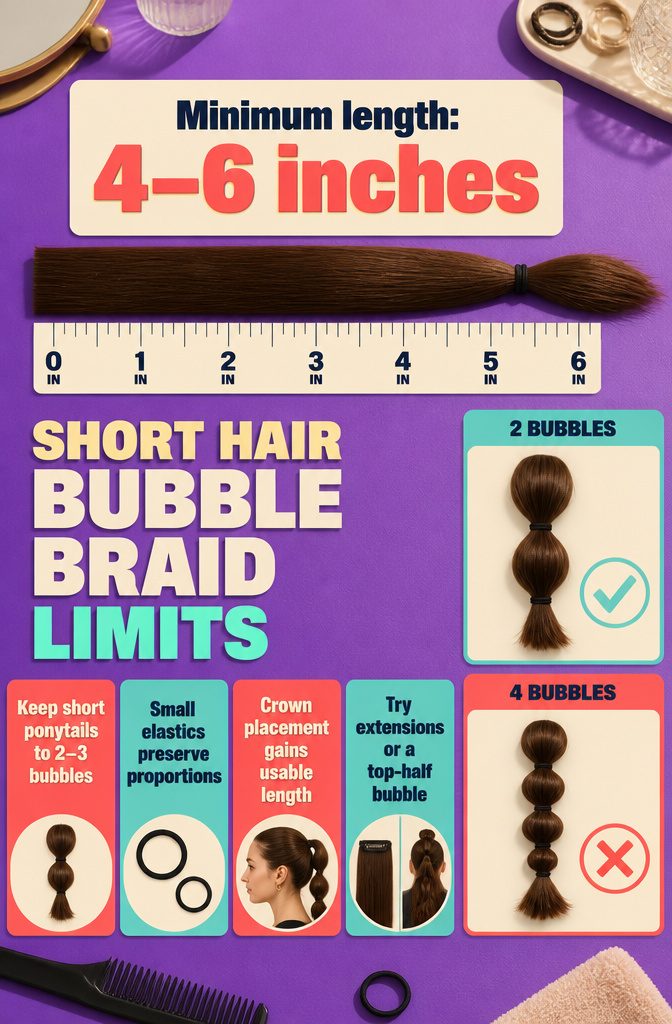
Bubble braids need at least 4–6 inches of hair to hold their shape. Keep it to 2–3 bubbles, because any more and the ponytail looks crowded; I’d rather see two clean, round bubbles than four squashed ones.
Smaller elastics keep the proportions right on short lengths, and setting the ponytail at the crown buys a little extra length to work with.
If your hair still falls short, a faux pony or clip-in extensions add the missing inches.
To keep it all your own hair, pull just the top half into a small bubble pony and leave the rest down. For most short cuts, I’d pick that partial style.
Lock in the style with a light spritz
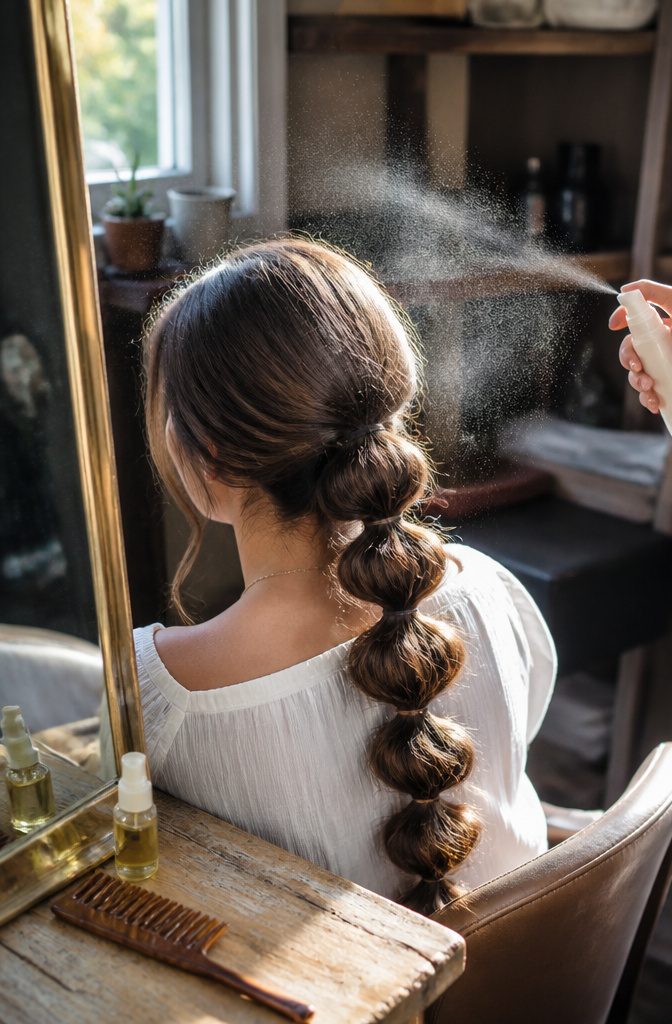
A light spritz of hairspray or spray gel sets the bubbles without making them stiff, and I’d reach for it first. Spray once the last bubble is puffed, so you aren’t tugging at sticky hair while you shape the rest.
Hair oil is the fallback, and it works best for flyaways. Rub a tiny amount between your fingertips, then smooth it only over the strands that stick out.
Go light with oil, because too much deflates the bubbles. Heavy, slick hair slumps against the elastics and loses the round shape you just worked for.
If the style still looks flat after finishing, add a little more spray rather than more oil.
Bubble braids usually last one day
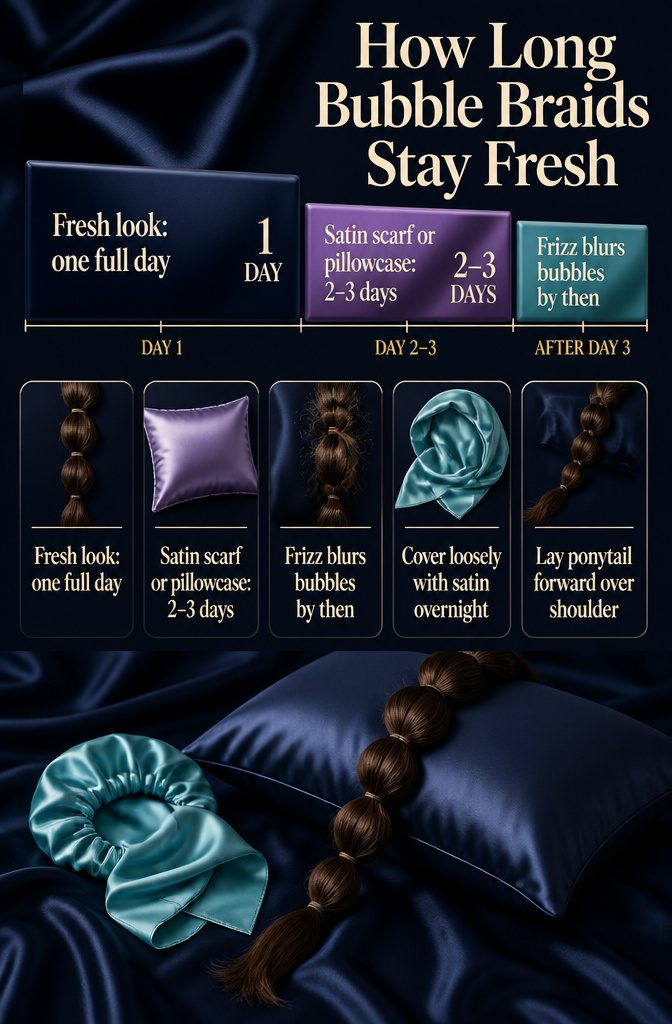
Most bubble braids look fresh for one full day.
With a satin scarf or pillowcase overnight, I’d expect 2–3 days. By then frizz and fuzzing blur the bubbles, and I’d redo the style rather than try to refresh it.
You can sleep in one, but the elastics may dent the hair where they sit overnight.
Cover the braid loosely with a satin scarf or bonnet, sleep on a satin or silk pillowcase, and lay the ponytail forward over your shoulder instead of lying on top of it.
If a slightly more relaxed look in the morning doesn’t bother you, sleeping in it is fine.
They are mostly not a protective style
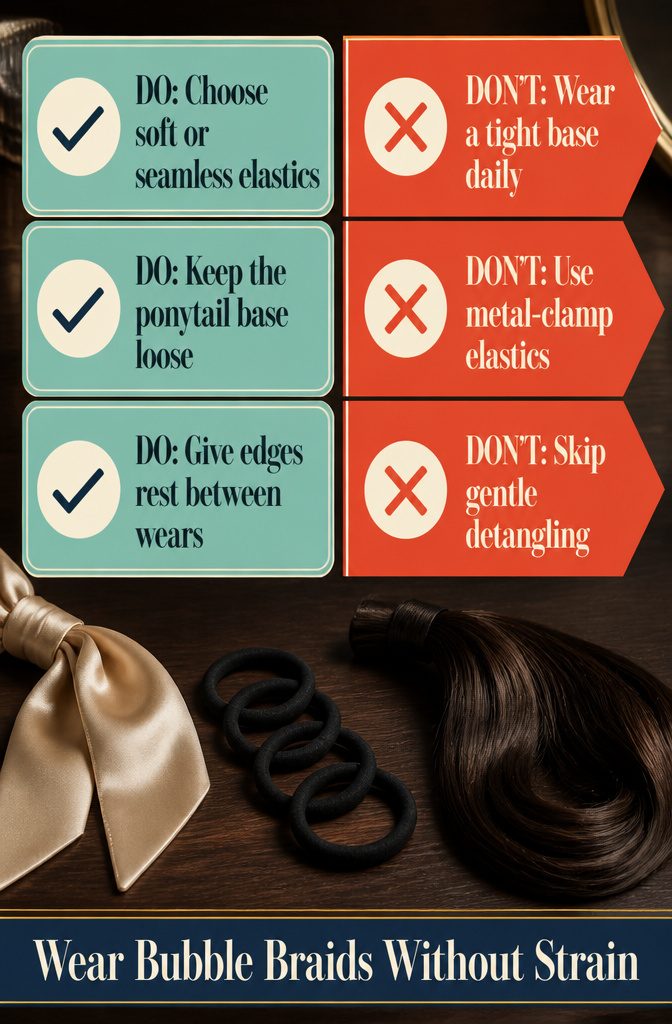
Bubble braids tuck the ends away, but they barely cut down on manipulation, so I don’t count them as a protective style. The ponytail base is the weak spot: worn daily and pulled tight, it stresses the edges.
Box braids, knotless braids, or crochet braids protect better. If you love the look, add extensions or a faux pony so your own hair gets a break.
The style doesn’t damage hair on its own, but how you wear it matters.
I’d choose soft fabric or seamless elastics, never metal clamps, and keep the base loose rather than tight. Give your edges days off between wears, and detangle gently first.
Frequently Asked Questions
What is a bubble braid (or bubble plait)?
A bubble braid, sometimes called a bubble plait, is a ponytail with elastics spaced down its length, where the hair between each pair is pulled out into a rounded puff.
It looks braided, but nothing is woven. It works on all hair types and lengths.
How do you do a bubble braid in a ponytail?
Tie a smooth ponytail, then add a second elastic 1–2 inches down and ease the hair between the two ties outward into a ball.
Repeat that spacing to the ends; most ponytails hold 3–5 bubbles. A high ponytail at the crown gives the biggest puffs.
Can you do bubble braids on wet hair?
No.
Wet strands compact tightly into the elastics, so the puff never forms. Let your hair air dry to at least 90% first, or blow-dry on low heat with a heat protectant if you’re short on time.
Should you wash your hair before doing bubble braids?
Day-2 or day-3 hair usually grips better, because elastics slide on freshly washed, slippery strands. Washing first is fine if that’s your routine, but the hair has to be fully dry before the first elastic goes in.
How long do bubble braids last?
Most look fresh for one full day. With a satin scarf or pillowcase overnight, expect 2–3 days, though by then frizz blurs the bubbles and a redo looks better than a refresh.
What size elastics should I use for bubble braids?
Soft, gentle hair elastics are the right pick, and you’ll need about 4–8 for one style.
Avoid metal clamps, and skip thick scrunchies and tiny rubber bands for the ponytail itself. On short hair, smaller elastics keep the proportions balanced.
Can you do bubble braids with extensions?
Yes.
Attach a clip-in or drawstring ponytail to your natural ponytail base, then add elastics down the combined length. On short hair, color-matched braiding hair can be attached to small natural braids with a crochet hook before you add the elastics.
Can you sleep in bubble braids?
Yes, though the elastics may leave dents in the hair overnight.
Cover the braid loosely with a satin scarf or bonnet, sleep on a satin or silk pillowcase, and lay the ponytail forward over your shoulder instead of lying on it.
Are bubble braids a protective hairstyle?
Mostly no.
They tuck the ends away but barely reduce manipulation, and a tight ponytail base stresses the edges. Box braids, knotless braids or crochet braids protect better, and adding extensions or a faux pony gives your own hair a break.
Do bubble braids damage your hair?
Not by themselves.
Damage comes from a tight base, daily wear, metal-clamp elastics and rough detangling. Use soft elastics, keep the base loose, detangle gently, and give your edges days off between wears.





