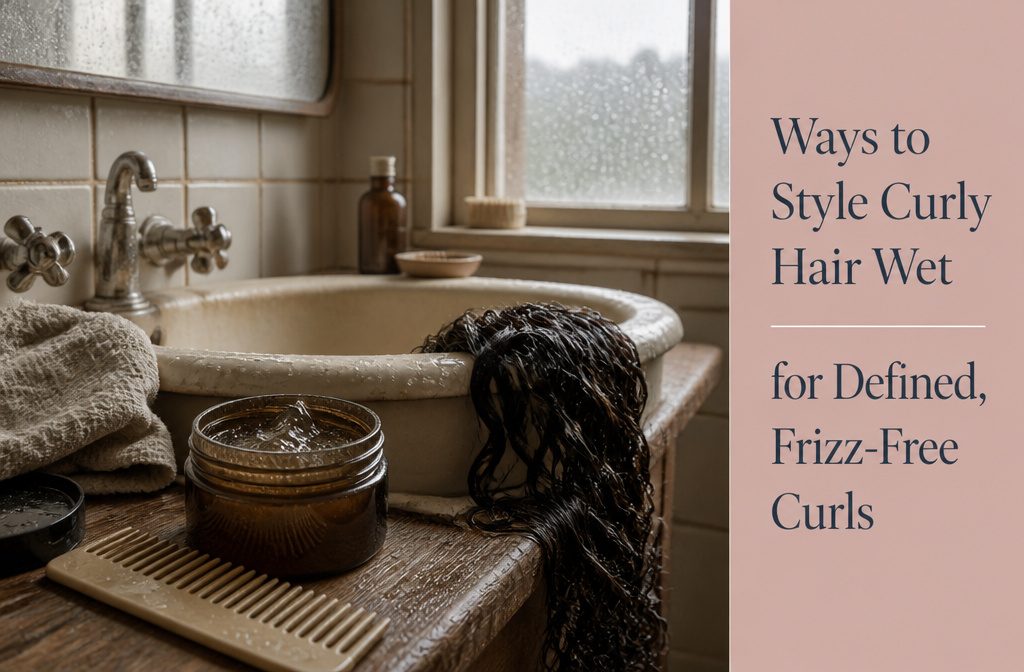
Wet styling sets the curl pattern with product and a technique before the hair dries, and the shape locks in wherever it sits.
Touching curly hair wet, before it sets, breaks up clumps and brings frizz. Gel on soaking-wet hair gives thicker clumps; braids, headbands and rollers need 4–5 hours to set.
1. Wet Styling with Curl Products and Scrunching
Wet Styling with Curl Products and Scrunching
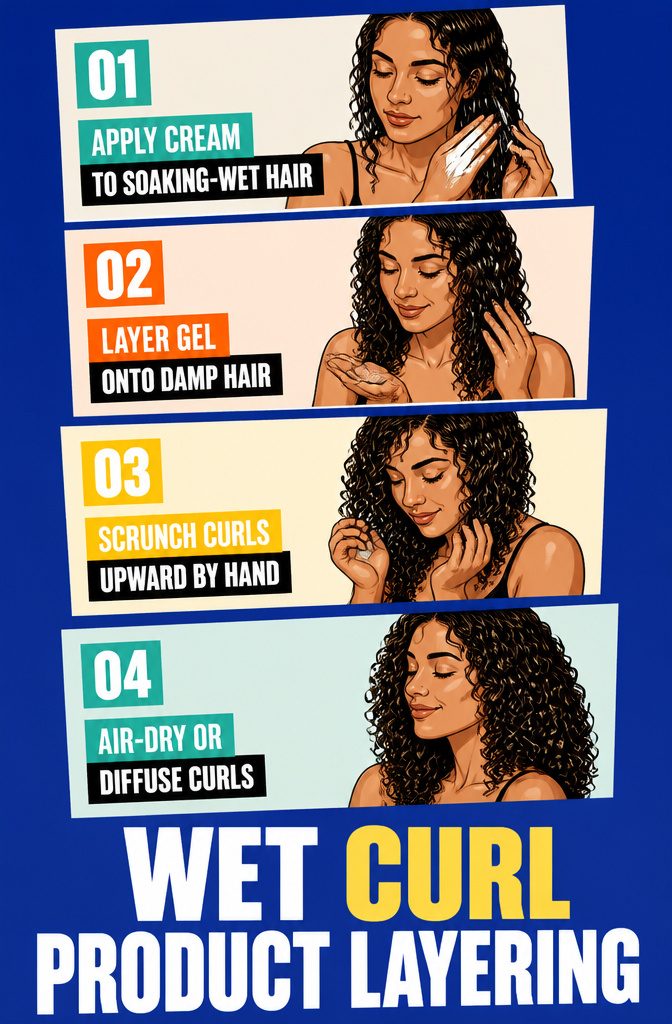
The choice between soaking wet and damp comes down to clump size and volume. Applying product to soaking-wet hair gives thicker clumps, stronger definition, and less frizz.
Damp styling, after you’ve scrunched out water with a microfiber towel, produces finer clumps and more volume at the root, which matters most if you have wavy or fine texture that tends to stretch out when too saturated.
One technique splits the difference: apply cream on soaking-wet hair, then layer gel once the hair is damp. That builds definition first and seals it second.
After product goes on, scrunch upward with your hands to encourage curl formation. The motion compresses sections of hair so the curls clump naturally instead of hanging loose.
From there, air-dry or diffuse. Microplopping with a t-shirt or towel pulls out excess water and speeds dry time without roughing up the cuticle.
2. Braiding or Twisting Wet Hair
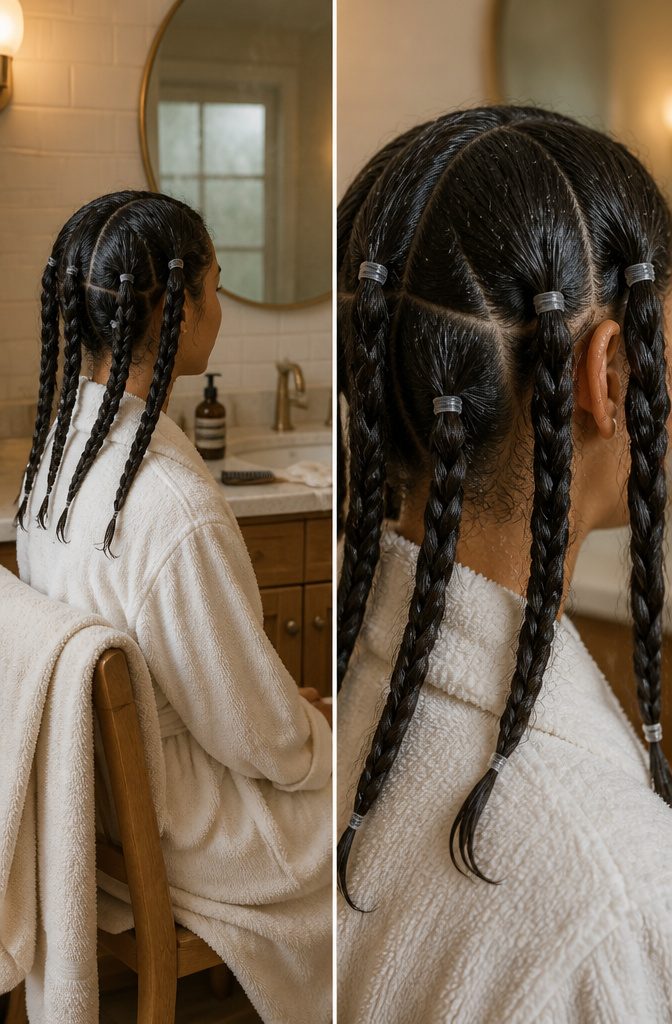
Dividing damp hair into sections and braiding or twisting each one is the low-effort way to get defined waves or curls without heat.
The choice is in the number of sections: part your hair down the middle and tie a ponytail on each side for loose, relaxed waves, or work in four to six ponytails if you want tighter curls.
A single ponytail delivers the loosest result.
Once the ponytails are secured, braid each one by separating it into three sections and alternating right over middle, left over middle, until you reach the ends. Tie off with an elastic.
For tighter texture, twist each ponytail into a two-strand braid instead. If you prefer mermaid waves, stick with the three-strand braid.
Let the braids set for at least 4–5 hours, or leave them in overnight if your hair is thick. When it’s dry, untie the elastics, loosen the braids gently and shake out the curls.
3. Finger-Coiling
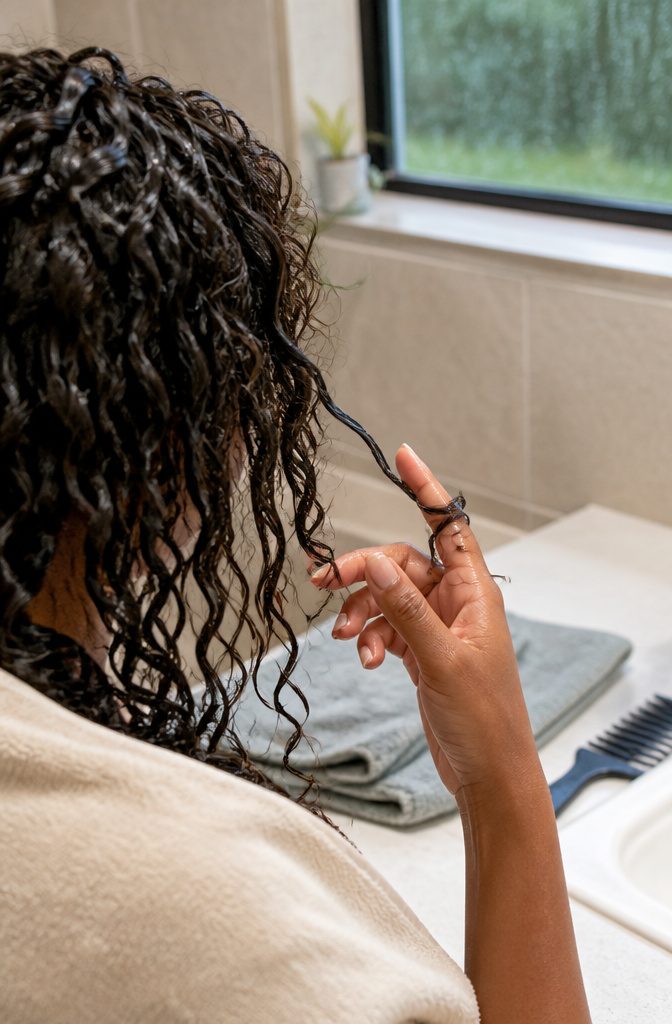
Finger-coiling wraps individual curl clumps around your index finger to build spirals that dry in uniform, defined ringlets. The method works on dripping wet hair, after you’ve applied a leave-in conditioner cream and a curl-defining spray.
Comb the product through so it reaches every strand, then take one clump at a time and coil it tightly around your finger from root to tip.
The thickness of each clump determines how tight the finished ringlet looks: thinner sections give you pencil-tight coils, wider ones produce looser spirals.
Once every section is coiled, I smooth gel over each spiral to lock the shape in place, then squeeze out the excess water with a microfiber towel or old T-shirt.
That final squeeze cuts drying time and helps the gel cast form faster.
The result is a head full of spirals that look machine-made in their uniformity, which is exactly the point when your natural clumping pattern is loose or irregular and you want ringlets that read as intentional.
4. Headband Wrapping
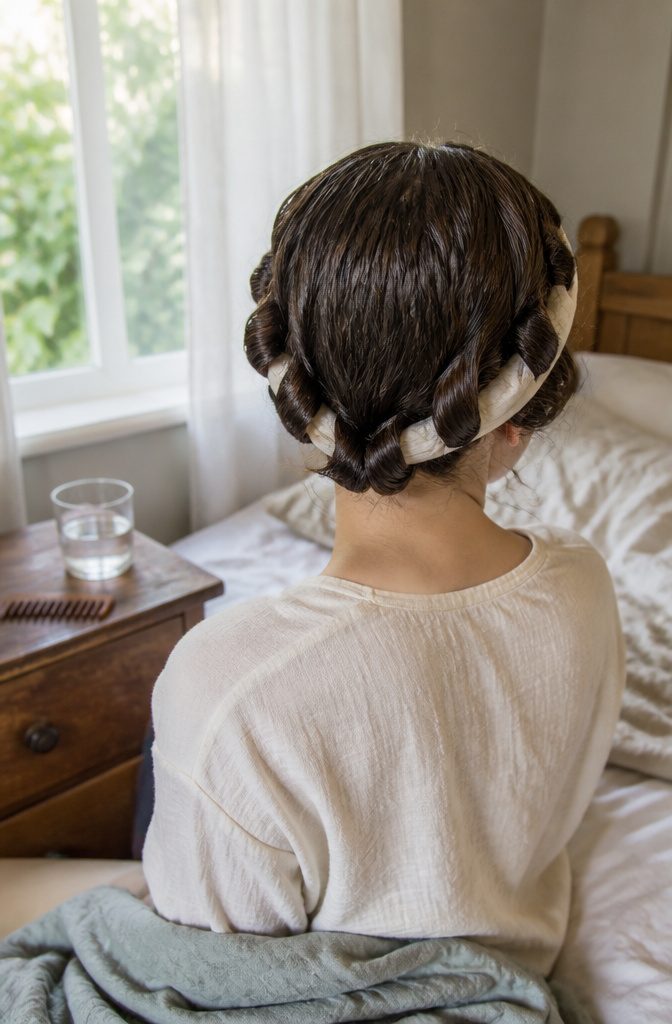
Headband wrapping turns damp hair into heatless curls by looping sections around an elastic band and letting them set as they dry.
You slide the headband over your head and across your forehead, positioning it wherever you want the curls to begin.
Then you take a section of hair as wide as you want each curl to be, loop it up and over the band, pull it through, and tuck the end in or pin it.
Work symmetrically from both sides of your face toward the back so the pattern stays even.
The curls come out smooth and spiral without frizz, since you never apply heat.
I like this method for anyone who wants defined ringlets and has at least four to five hours to let the hair dry, or who can sleep with the headband in overnight.
The longer it sets, the stronger the curl holds. Once dry, you unwind the sections and the shape is locked in.
5. Rollers or Fabric Curlers
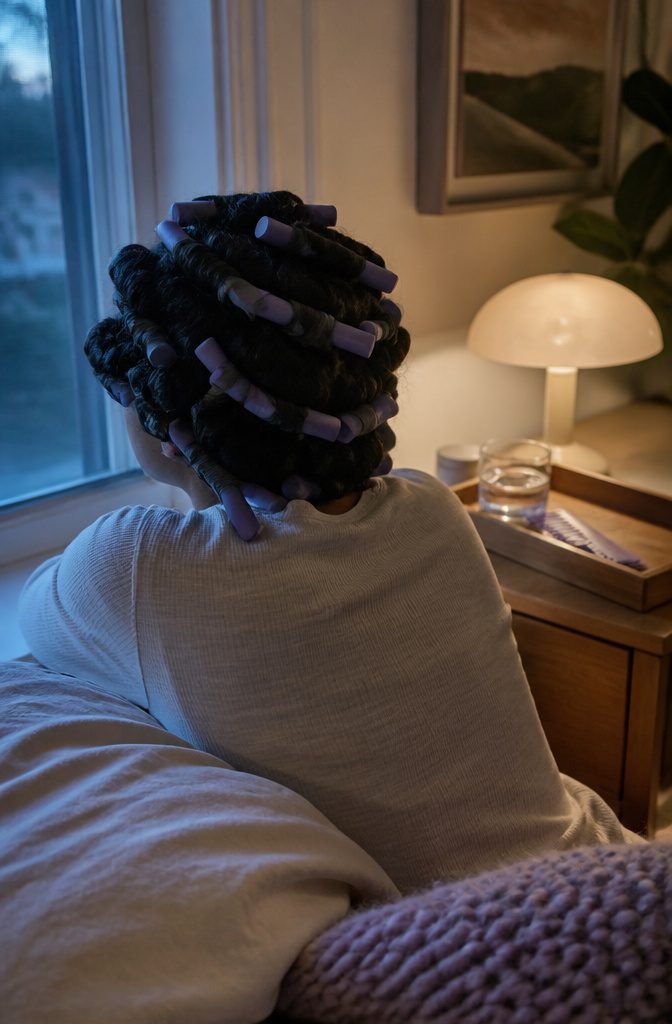
Rolling damp hair onto wet-set rollers or fabric strips lets you shape curls without heat, though you need patience.
The rollers stay in overnight or at least four to five hours, long enough for the hair to dry completely around the form.
Soft rollers made from foam or silicone are the better choice if you plan to sleep in them, since they let you roll onto your side without waking up with a hard plastic edge digging into your scalp.
Before you start, detangle with a wide-toothed comb.
Your hair should be damp, not soaking. Take sections about the width of the roller, starting at your forehead.
Lay the roller horizontally at the ends and roll all the way up to your scalp, or just as far as you want the curl to begin, then secure it.
For the sides, rolling over gives you bouncy curls while rolling under adds volume. The back can go horizontal like the rest or vertical for a corkscrew effect.
Once your hair is dry, unfasten the rollers and pull them out gently.
Use your fingers to separate or fluff the curls. A hairbrush will pull them apart and leave you with frizz instead of definition.
Keeping Curl Shape While Hair Dries
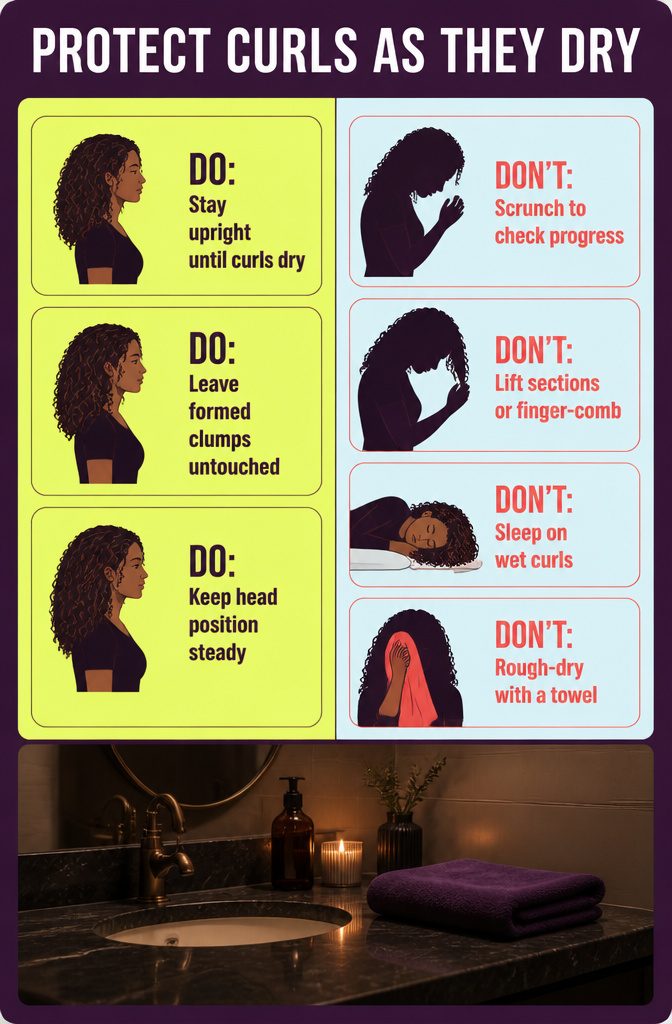
The curl pattern you styled in sets while the hair is wet, and anything that moves, compresses or disrupts it before it dries fully can flatten clumps, create frizz or leave you with bends you never asked for.
I leave styled hair alone once product is in and clumps are formed. No scrunching to check progress, no lifting sections to see if they dried underneath, no fingers running through to separate anything.
Friction against wet hair breaks up the curl structure you just built, and the shape locks in wherever the hair sits when it dries.
Sleeping on wet curls flattens one side and leaves kinks that need re-wetting in the morning, which is why timing a wash for when you can stay upright matters.
Rough towel-drying does the same thing: it roughs up the cuticle and scatters clumps.
Position matters too. If you tilt your head to one side while curls dry, that is the direction they will hold.
Moisture and Frizz Control
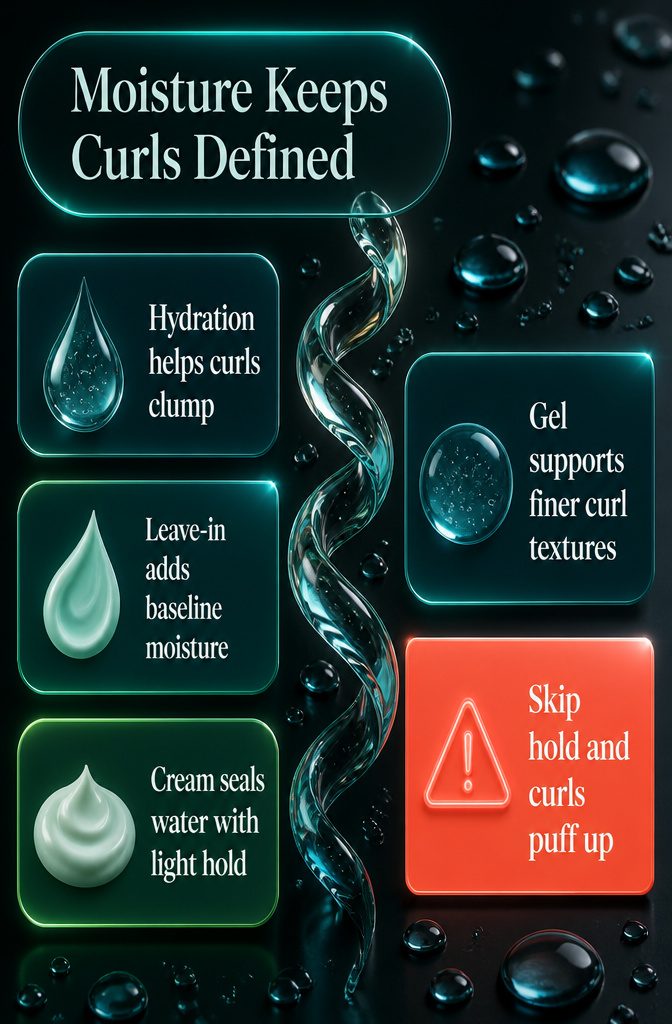
Moisture is the thread that holds curl definition and controls frizz as wet hair dries. Without enough hydration locked into each strand, curls lose their shape and puff up instead of clumping into the coils you started with.
Leave-in conditioner applied to damp hair adds that baseline moisture, but you need styling product on top to provide structure.
Curl creams give light hold while sealing in water, which keeps curls from going limp. Gel offers stronger hold and works especially well for finer textures that need extra support to maintain shape through the entire dry-down.
For tighter coils that need both moisture and shine, mixing gel with pomade or oil creates a formula that hydrates while giving the slicked hold that prevents frizz.
The warning is this: if you skip the hold product or towel-dry too aggressively, the curls you shaped while wet will straighten and fluff as they dry, leaving you with the frizz and lost definition you worked to avoid.
Drying Methods
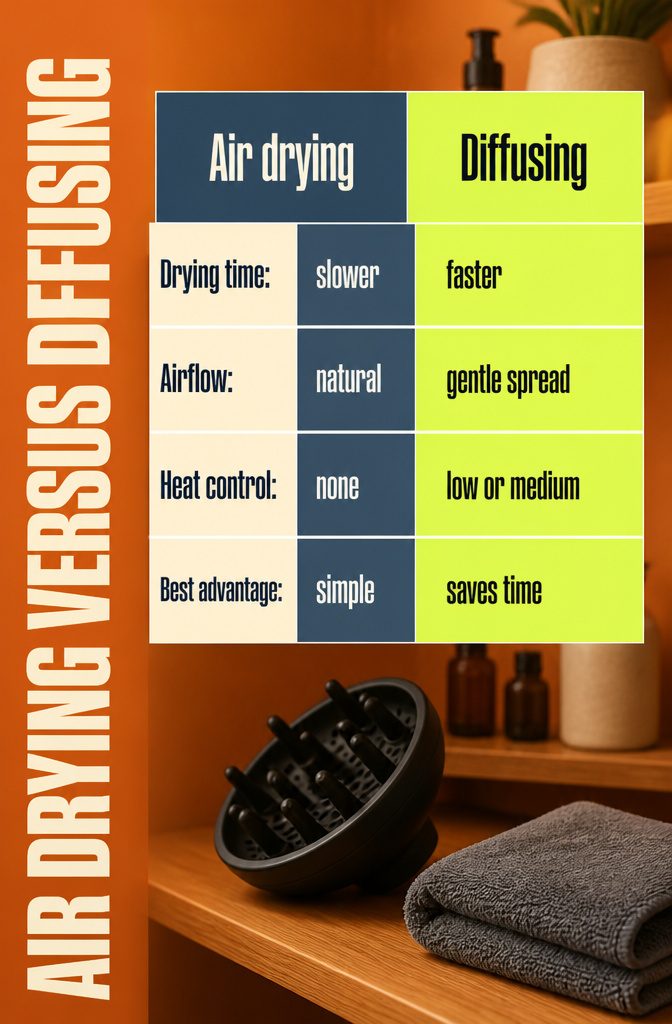
Air drying is the simplest route. You style your hair wet, let it sit, and wait for it to dry on its own.
Time is the price: thick hair dries slowly, and if you styled soaking wet rather than damp, you’re waiting even longer. Low porosity hair holds moisture longer than high porosity, and humid climates add hours to the process.
A diffuser attachment speeds things up without wrecking your work.
The diffuser spreads airflow more gently than a concentrator nozzle, so curls dry without getting blown apart. I keep the dryer on low or medium heat to avoid damage.
Curlsmith’s Defrizzion dryer and XXL diffuser can dry hair in under 15 minutes, thanks to the oversized diffuser head. Even diffusing halfway and letting the rest air dry cuts the wait.
Root clips lift hair away from the scalp so air can reach it, which helps if you’re committed to air drying.
Microplopping after styling pulls out excess water and product: scrunch your hair with a microfiber towel or cotton T-shirt, then go straight to drying. If that creates frizz, smooth on another light layer of gel before you start.
Product Application and Hold
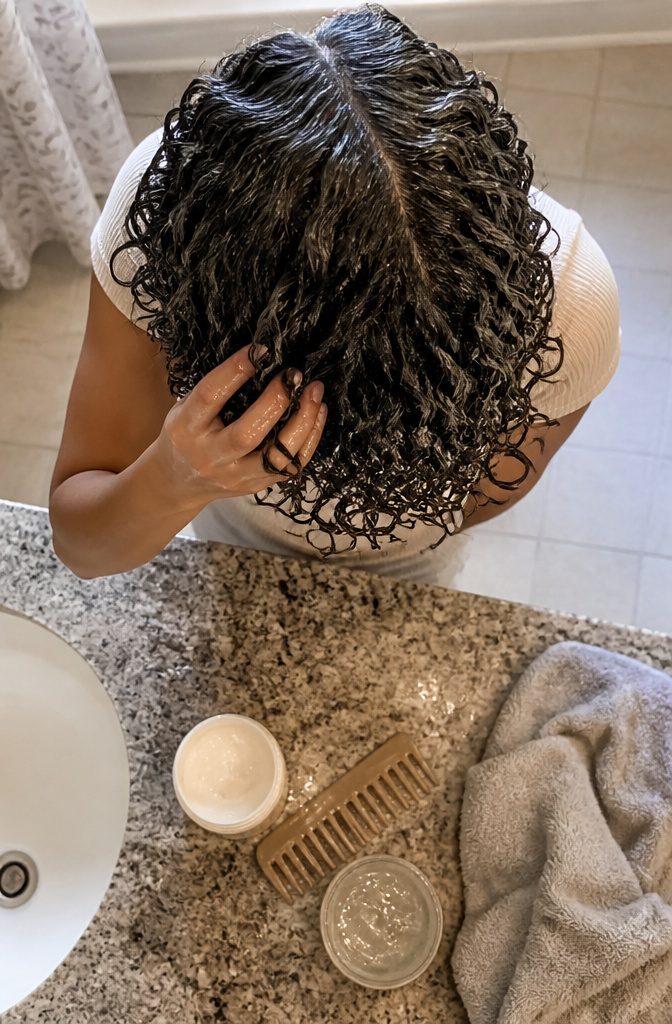
Product choice happens right after detangling, while hair is still dripping.
The order matters because wet hair lets products coat every strand evenly, something damp or nearly dry hair will not do. Start with a leave-in conditioner or curl cream.
These moisturizing products define the curl and reduce frizz, but they do not lock anything in place on their own. For hold, layer a gel on top once the cream has been worked through.
Using gel without hair cream will leave your hair crunchy.
— Vogue
That combination keeps curls hydrated while giving them structure.
Gel alone can harden the hair and turn springy curls into stiff coils. The pairing softens that crunch without sacrificing definition.
GK Hair CurlsDefineHer at $29.00 for 3.4 fl. oz. is one option that offers hold with less stiffness. Apply it to soaking-wet hair, then scrunch or coil each section.
When finished, hair should feel hard and contain little or no moisture. That dry, rigid shell is what you will scrunch out later for soft, defined curls.
A light-hold hairspray sets everything once the curls are completely dry, but hold back on the amount. Too much mist weighs curls down and reintroduces stiffness you spent time scrunching away.
Frequently Asked Questions
What is wet styling for curly hair?
Wet styling means putting your styling products on soaking-wet hair, shaping the curls, and letting them dry completely. The easiest way is to keep your cream and gel in the shower and apply them right after rinsing out conditioner.
If you style in front of a mirror instead, keep a misting bottle handy to rewet the hair as you go.
Is it good to style curly hair wet?
Yes, for most curl types. Product applied to soaking-wet hair coats every strand evenly, which gives thicker clumps, stronger definition, and less frizz.
If your hair is wavy or fine, styling it damp instead of dripping can give more root volume and keeps it from stretching out.
How can I get the best results when styling curly hair wet?
Detangle first with a wide-tooth comb or your fingers, then work leave-in conditioner or curl cream through evenly, focusing on the mid-lengths and ends.
Layer gel on top for hold, then scrunch upward or finger-coil sections to form clumps. Leave the curls alone while they dry, whether you air-dry or diffuse on low or medium heat.
Why is my hair curly when wet but straight and puffy when dry?
Wet hair is at its most malleable, and curls often drop as moisture leaves the strand, especially in porous or finer hair.
Skipping a hold product, or towel-drying roughly, breaks up the pattern while it dries. Applying a leave-in plus gel while the hair is soaking wet and keeping your hands off it as it dries helps the curls keep their shape.
How do I dry curls fast before bed?
Microplop first: scrunch your styled hair with a microfiber towel or cotton T-shirt to pull out extra water. Then use a diffuser on low or medium heat, since it spreads the airflow gently and won’t blow the curls apart.
Even diffusing halfway and air-drying the rest cuts the wait, and root clips lift hair off the scalp so air reaches it.
Can I sleep with wet curls?
It’s best to avoid it, because sleeping on wet curls flattens one side and leaves kinks. If you have no choice, lay your curls out over a silk or satin pillowcase so air can reach your roots.
Don’t wrap them in a towel or stuff them under a covering, and expect some misshaped curls in the morning.





