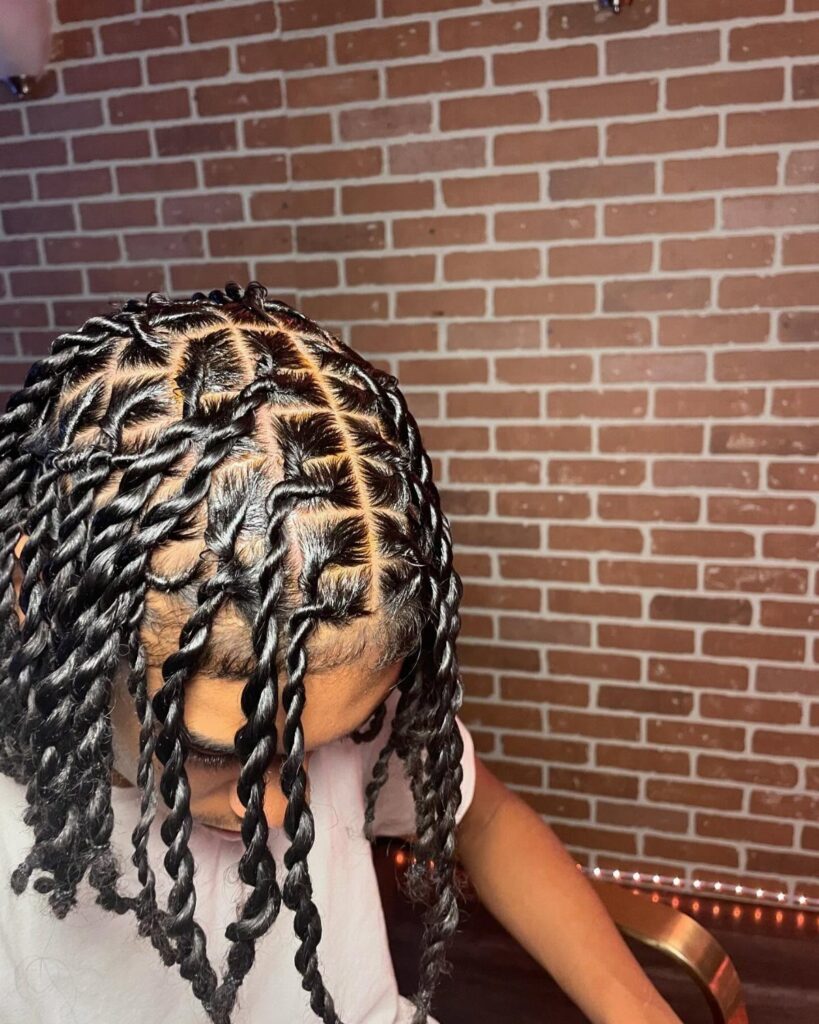
Loose twists on short hair take an hour, mini twists closer to half a day when you’re working pencil-thin sections that last weeks.
If you want the style to hold through humidity and last longer than a few days, twist smaller sections: half-inch squares for mini twists stay defined as the days go by, while chunky twists an inch wide or wider dry faster but lose definition sooner.
1. Loose Two-Strand Twists
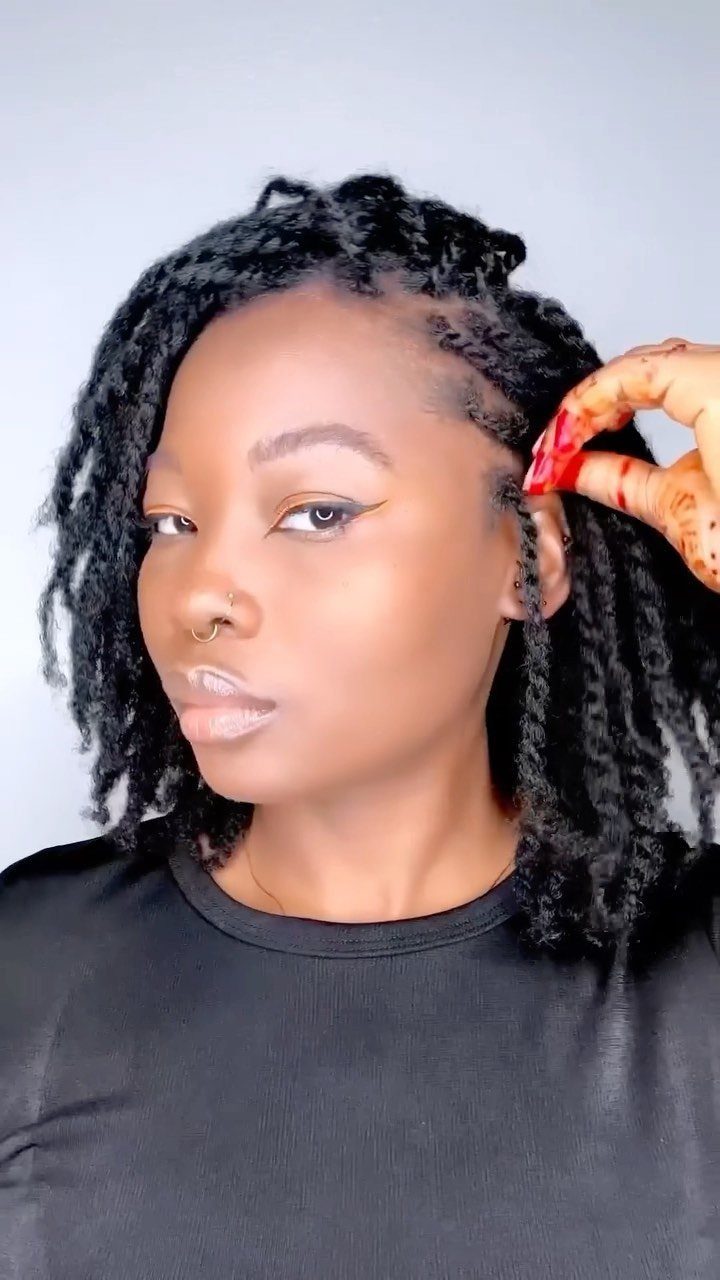
Two-strand twists worn down, falling from the scalp without being pinned or pulled into a style. The length shows off the work, and if you twisted it yourself you get to wear it exactly as it finished drying.
At home, section the hair, apply a twisting cream or gel to damp sections, and twist 2 strands around each other from root to tip.
Let air-dry or sit under a dryer. The twists hold for days and unravel into a twist-out when you’re ready for volume.
2. Mini Twists
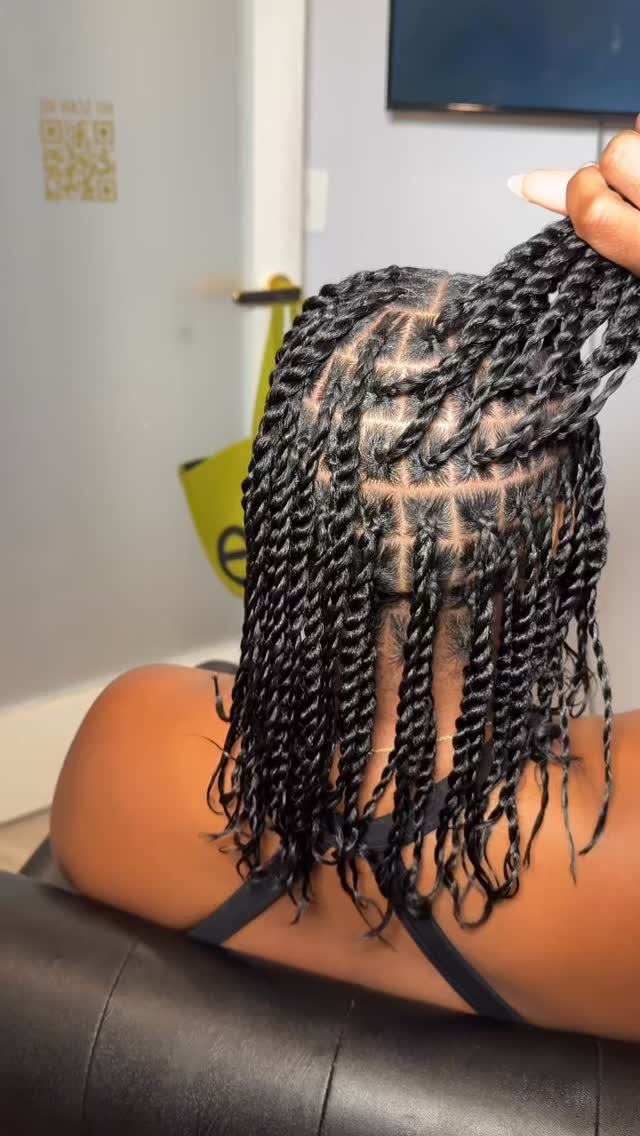
Pencil-thin twists set into small sections all over. The size takes longer to install than chunky versions, but mini twists last weeks with careful wrapping at night and stay defined through rain and humidity.
Section the hair into squares or rectangles about half an inch across, then twist each one.
Smaller sections mean more definition and less frizz as the days go by. If your arms get tired halfway through, clip the finished half and come back to it the next morning.
3. Gold Cuffs
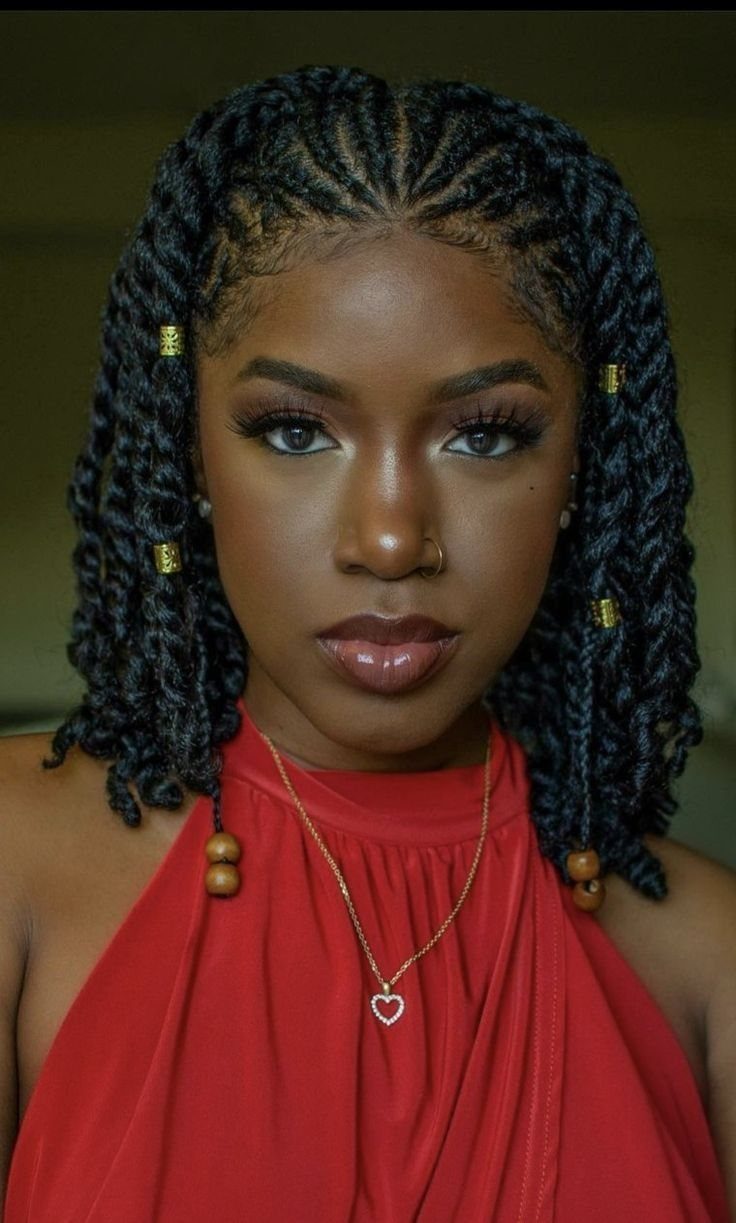
Metal cuffs slid onto individual twists, spaced along the length or clustered near the ends. Gold reads warm against most skin tones, and a few cuffs placed at different heights catch light without looking overdone.
Slide the cuff over the twist end and push it up to the spot you like.
If the twist is thicker than the cuff’s opening, fold the end before threading it through. Start with a few cuffs and add more for a fuller look.
4. Short Two-Strand Twists
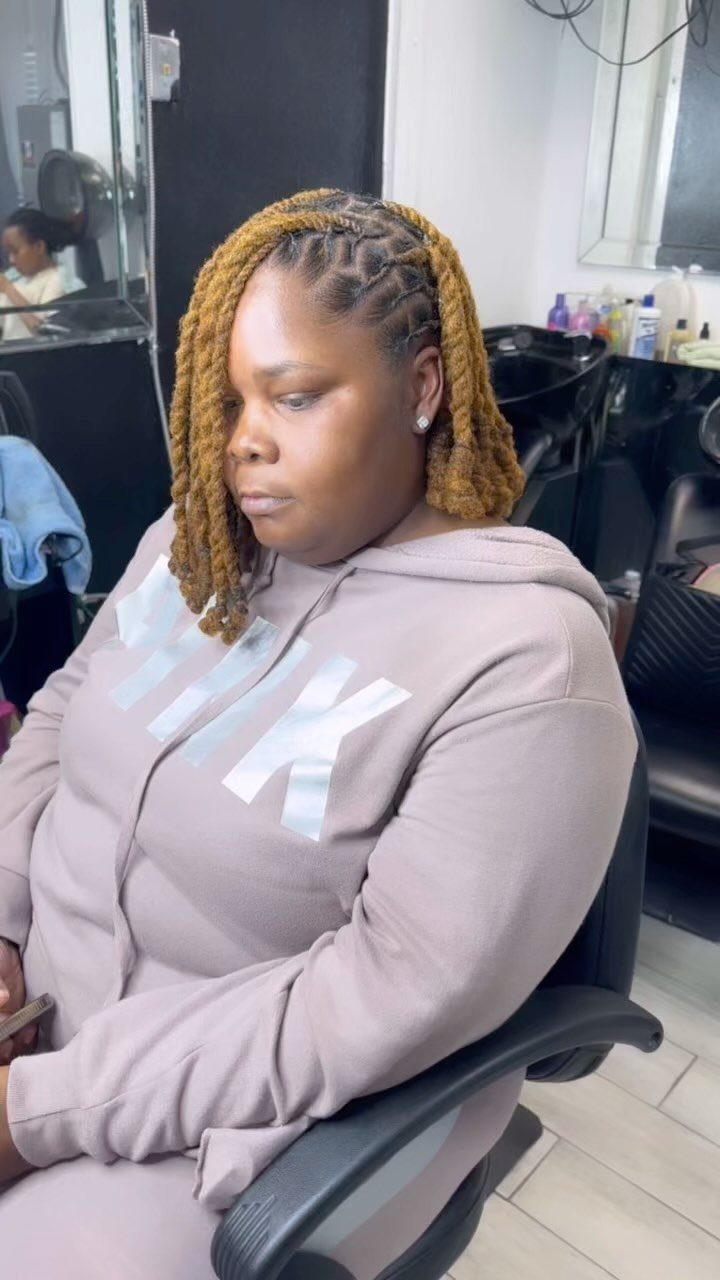
Two-strand twists installed on natural hair that sits around chin or shoulder length. Shorter hair means fewer twists to install and faster drying time, and the style still gives you texture and definition without the weight of longer lengths.
The process is the same as longer twists: section, twist from root to tip, and let dry. On short hair the ends may spring up instead of hanging straight, which adds volume around the face and sides.
5. Side-Parted Twists
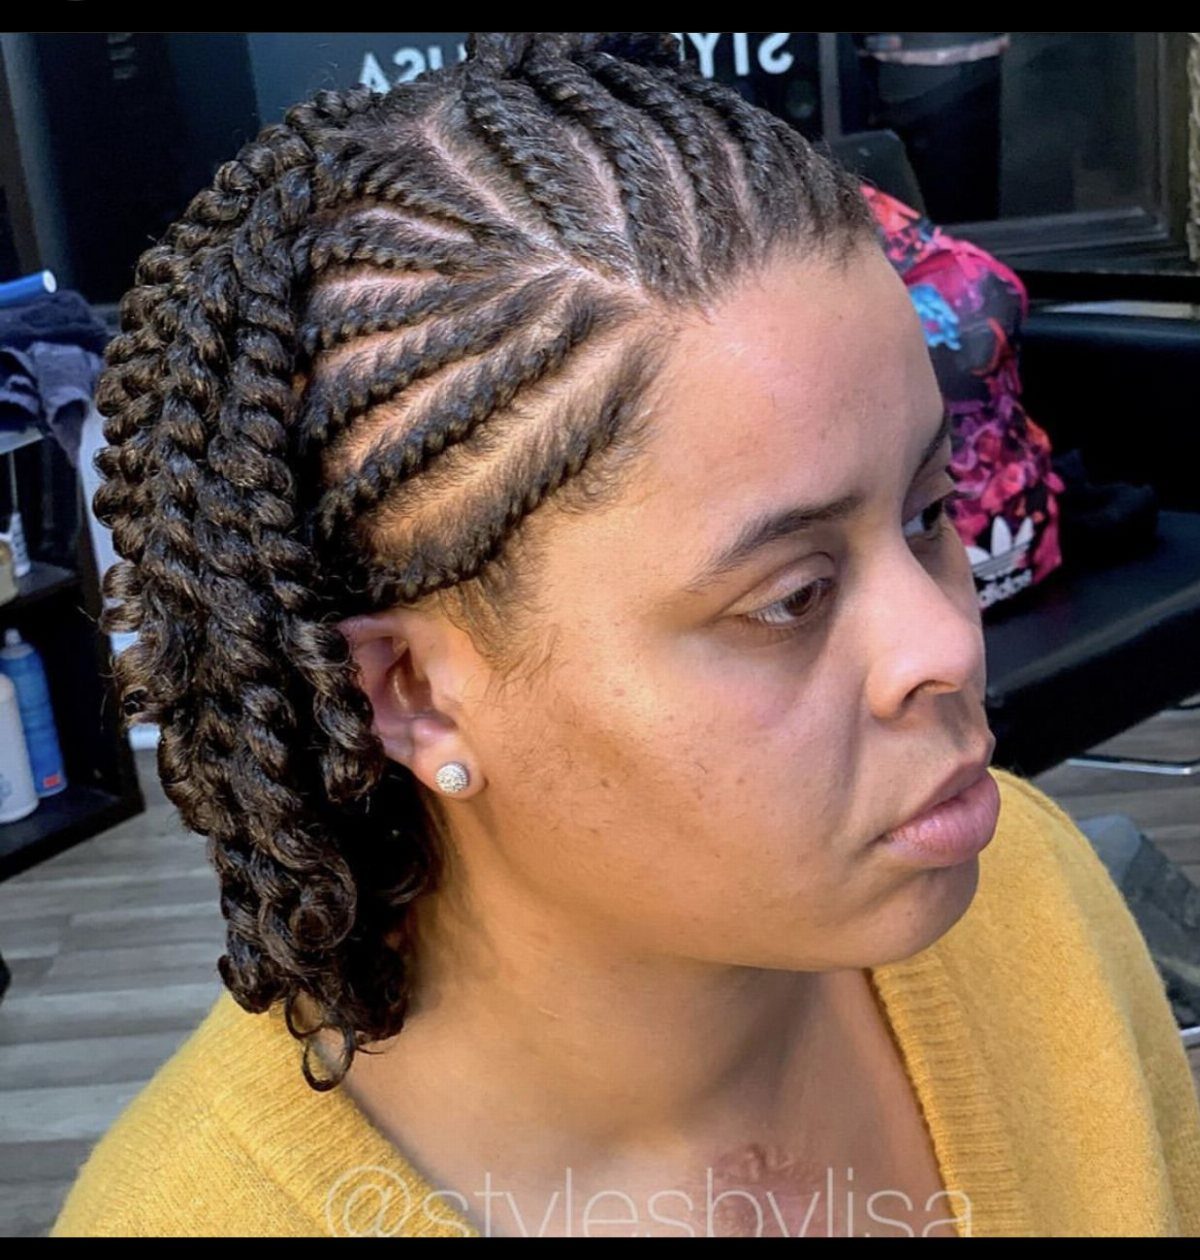
Twists arranged along a side part, with the hair falling toward one shoulder. The asymmetry frames the face differently than a center part, and you can shift the part line to whichever side you prefer that day.
Part the hair while it’s damp, then twist each section following the direction of the part. Pin or tuck the shorter side behind the ear if you want more contrast, or leave both sides loose for a softer look.
6. Curled Twist Ends
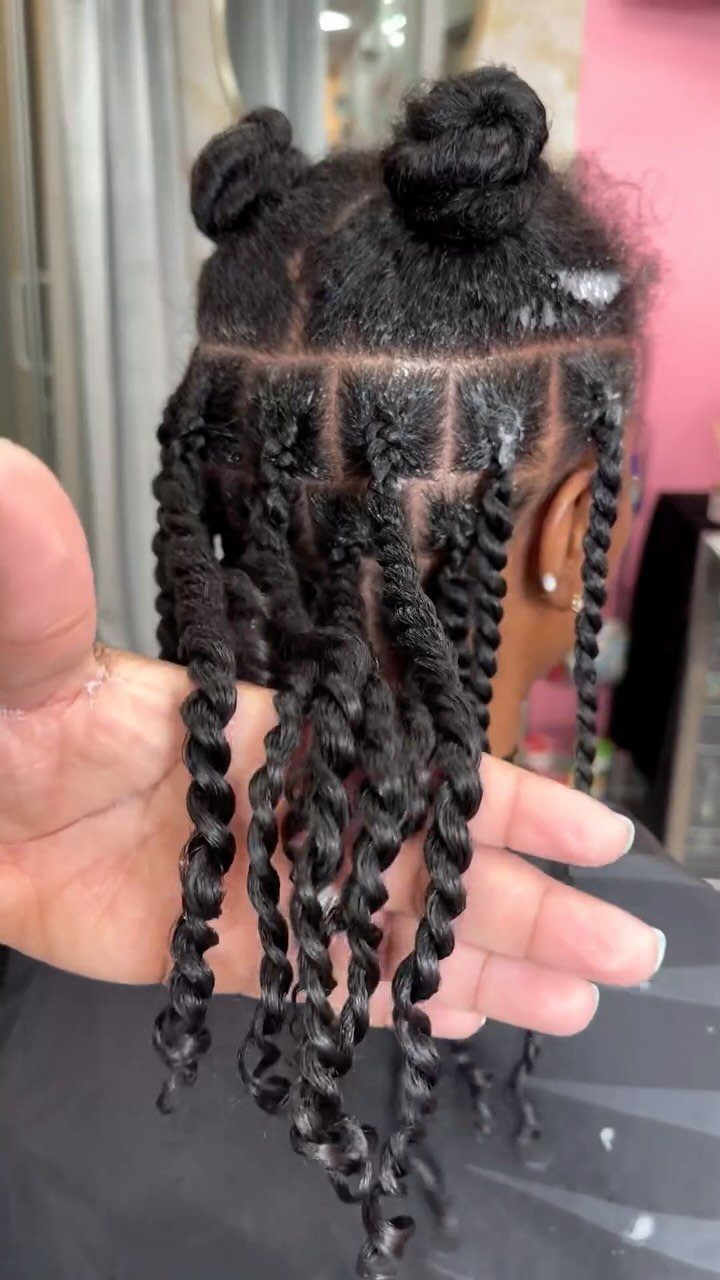
Twists finished with a curl at the tip, either from wrapping the end around a rod or setting it on flexi-rods overnight. The curled ends soften the straight line of a standard twist and give the style a polished edge.
After twisting each section, wrap the last inch around a small perm rod or flexi-rod and secure it.
Let the hair dry completely before removing the rods. The curls loosen over a few days but keep their shape longer than plain twist ends.
7. Curved Flat-Twist Rows
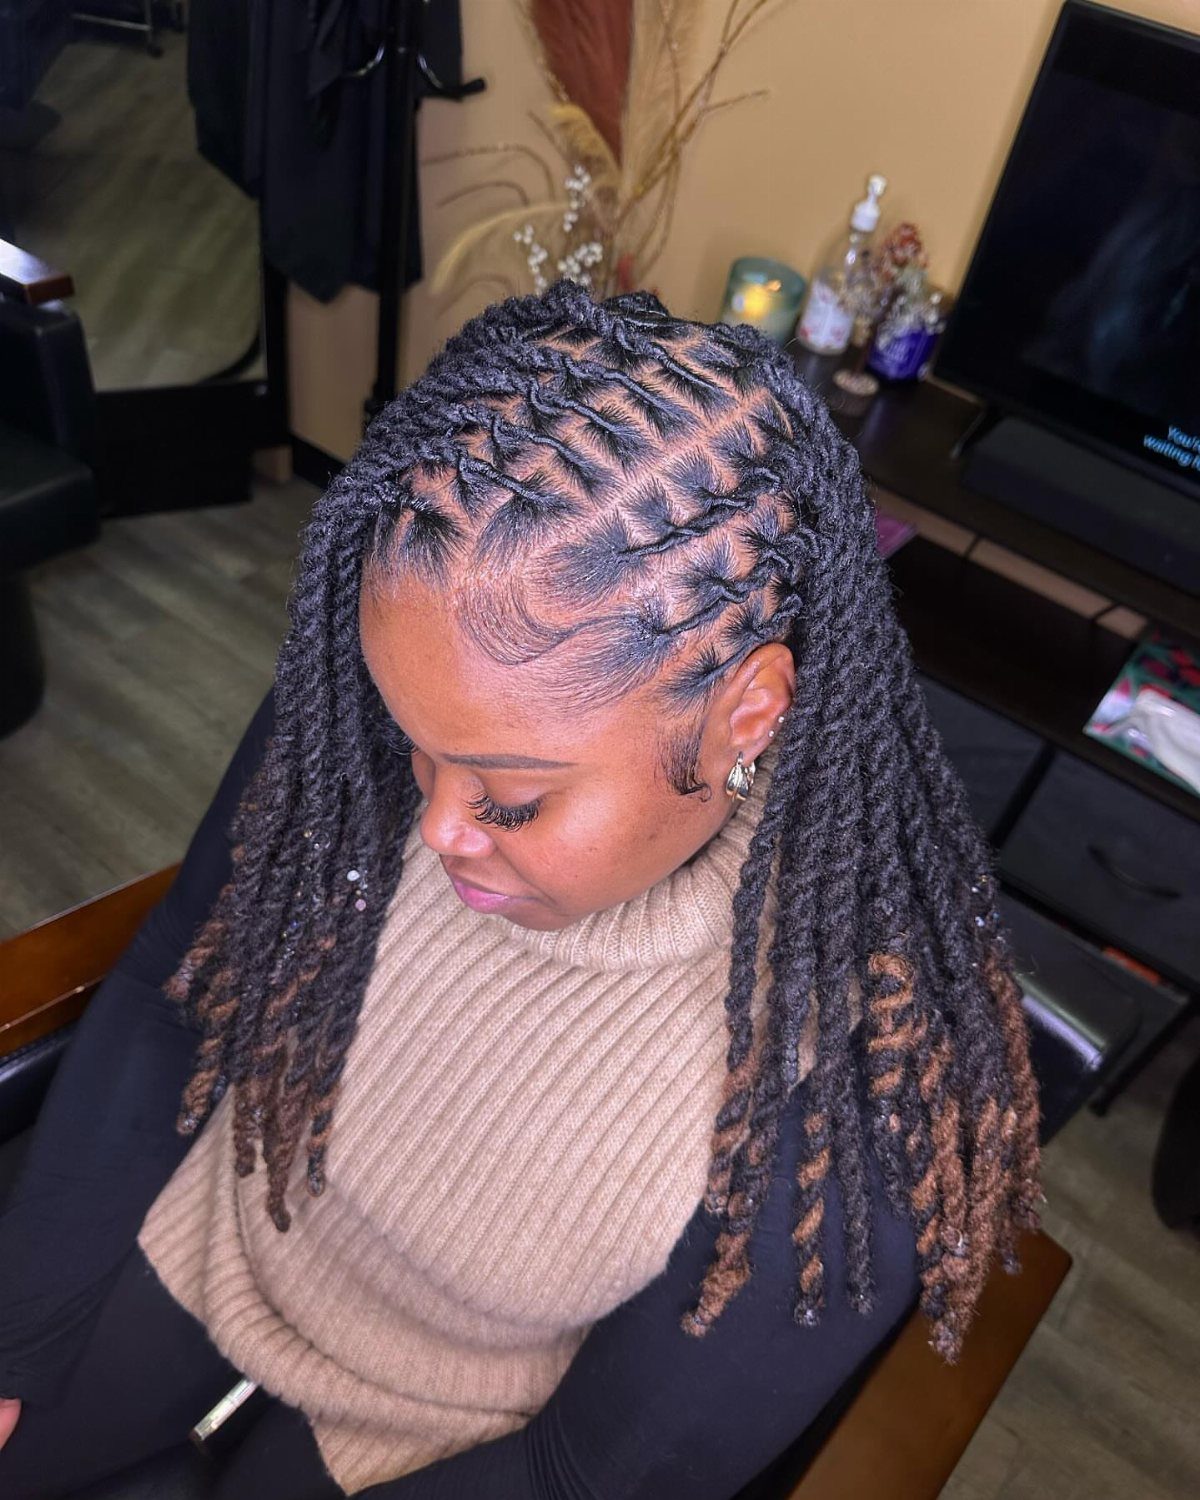
Flat twists laid in curved rows that follow the shape of the head, then released into two-strand twists partway down. The rows create a pattern at the scalp before the twists fall loose.
Start each flat twist at the scalp by adding hair as you twist 2 sections over each other, keeping the twist tight against the head.
Follow a curved line instead of a straight row. Once the flat twist reaches the point where you want the twists to hang free, stop adding new hair and finish as a regular two-strand twist down to the ends.
8. High Bun
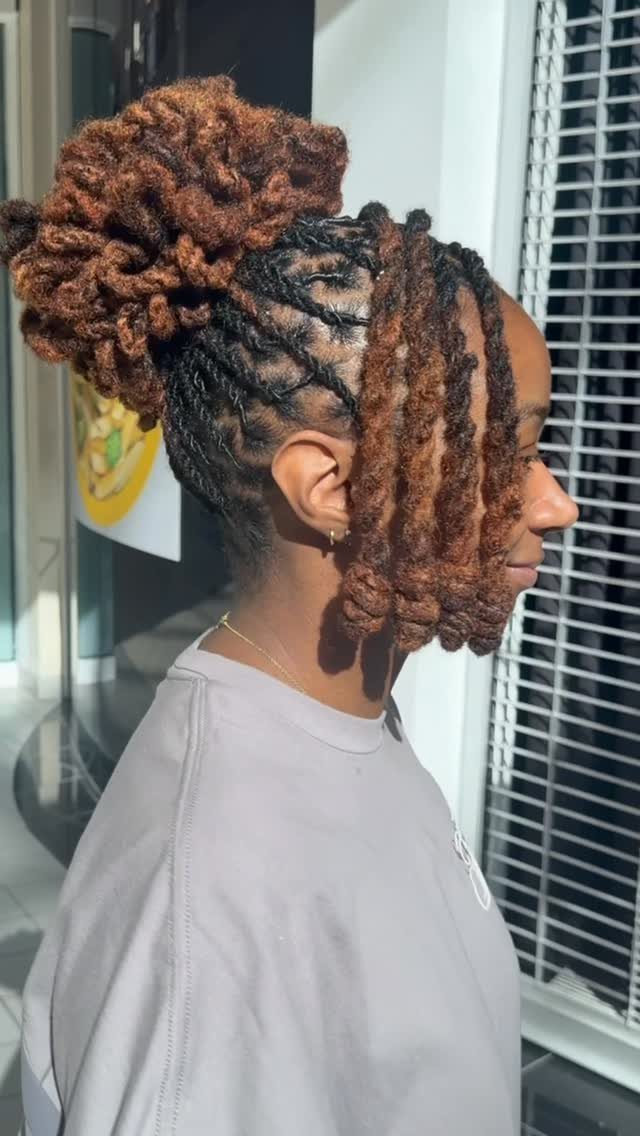
Twists pulled up and wrapped into a bun at the crown or higher. The style lifts the weight off your neck and keeps the twists secure for workouts, sleep or a second-day look without restyling from scratch.
Gather the twists into a high ponytail, then wrap them around the base and pin.
Leave a few twists out around the hairline if you want face-framing pieces. The bun holds through the day and comes down without disturbing the twist definition underneath.
9. Beaded Twists
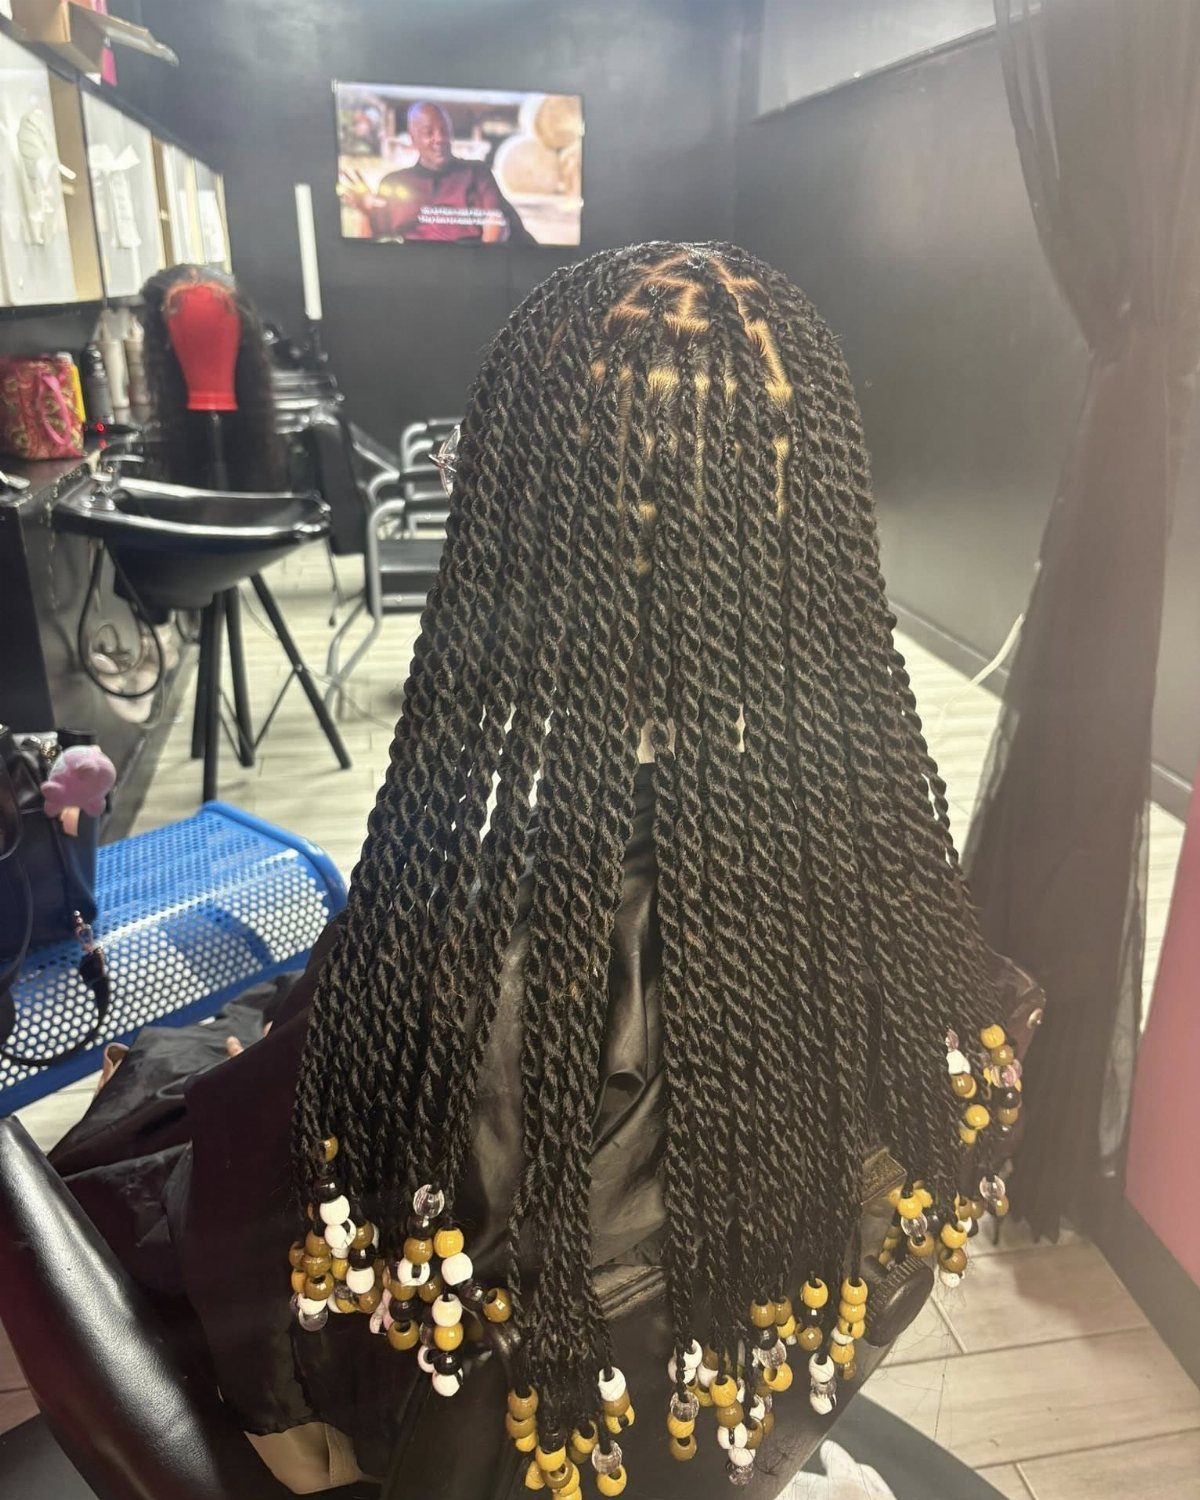
Twists threaded with beads at the ends or spaced along the length. The beads add weight that helps the twists hang straighter and click softly when you move.
Slide beads onto the twist ends while the hair is damp, or thread them higher and secure each one with a small elastic or by folding the twist back through the bead opening.
Wood and plastic beads are lighter than metal, and larger beads cover more length with fewer pieces.
10. Cornrow-Accented Twists
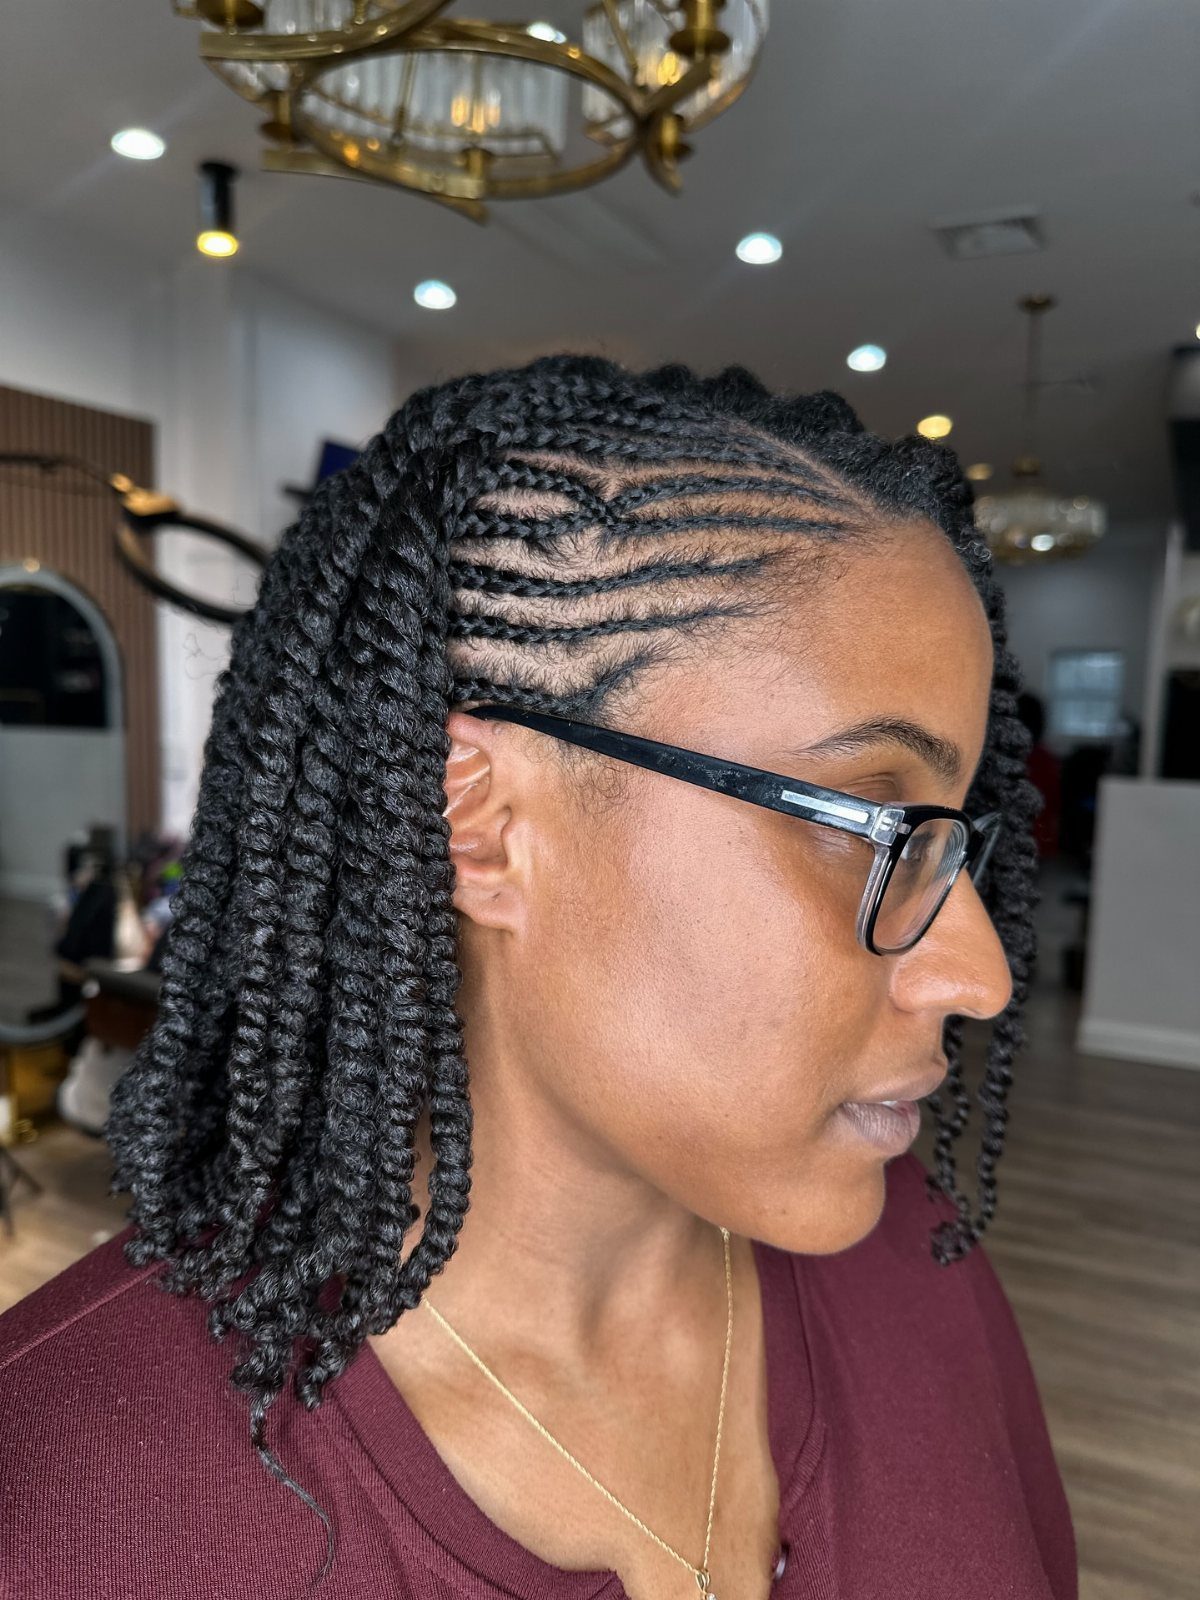
Cornrows braided close to the scalp in one or more rows, then transitioned into two-strand twists at the point where the braid lifts away from the head.
The cornrow sections stay flat and last longer than twists alone at the root.
Braid each cornrow as usual, adding hair from the scalp until you reach the spot where you want the twist to begin.
Stop adding new hair, divide the remaining braid tail into 2 sections, and twist them around each other down to the ends.
11. Chunky Twists
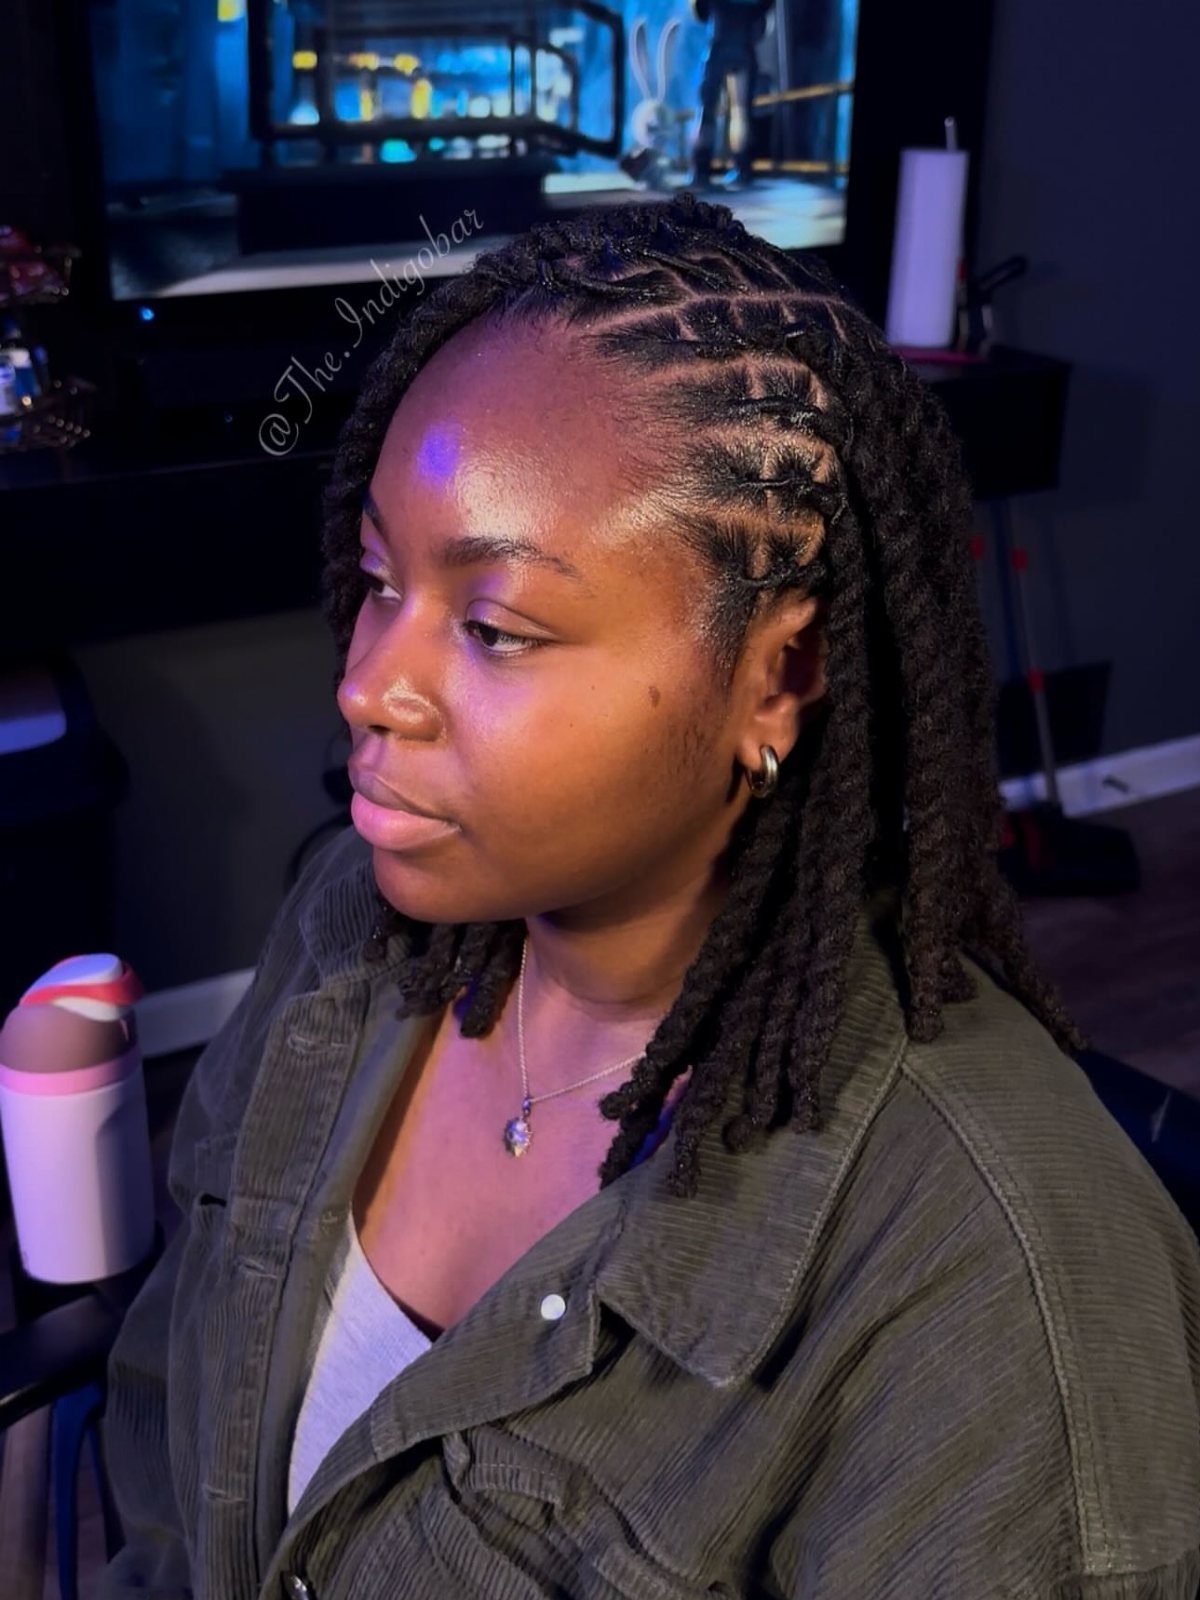
Thicker twists made by sectioning the hair into larger pieces, usually an inch or wider. Fewer sections mean faster installation and a bolder look, though chunky twists may not hold definition as long as smaller ones.
The wider twists dry faster and feel lighter on the scalp. If you want more volume, fluff the roots once the twists are dry.
12. Square-Part Twists
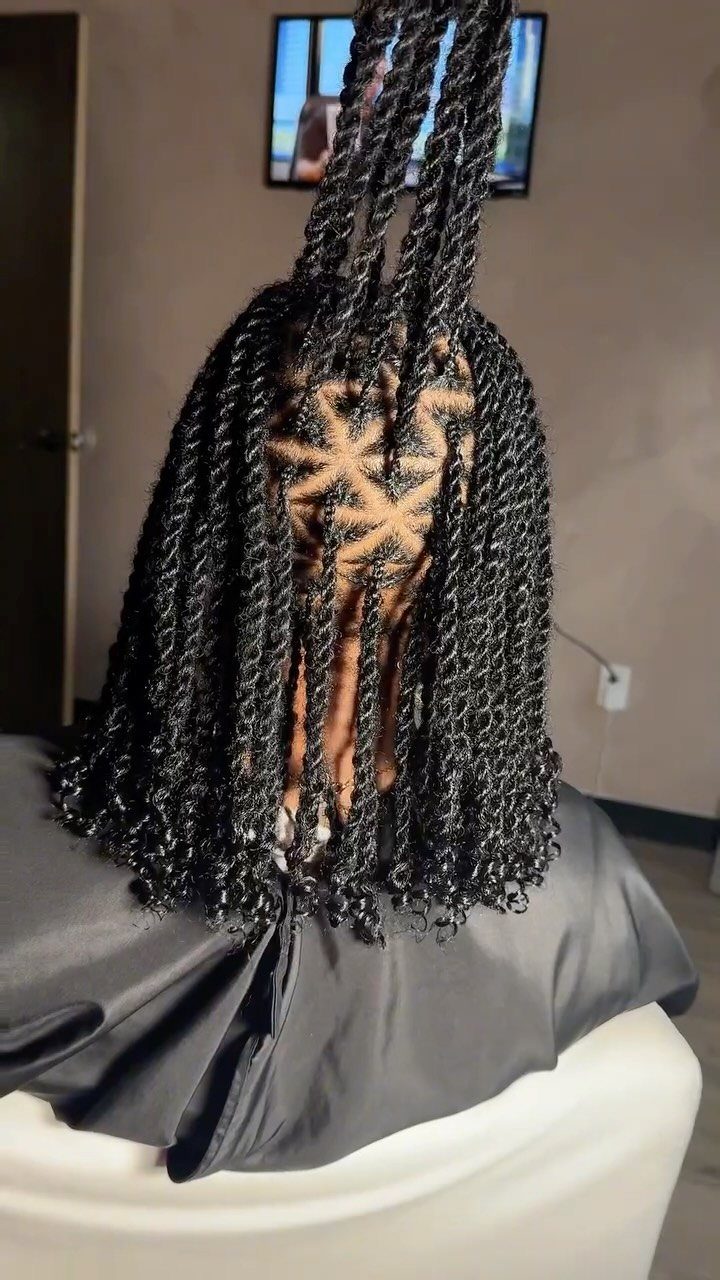
Twists installed in sections parted into neat squares or rectangles across the scalp, so each twist sits in its own grid. The clean partings show through at the roots and give the style a polished, geometric finish.
Part damp hair into even squares using a rattail comb, then clip each section until you’re ready to twist it.
The parting takes longer than freehand sections, but the grid stays visible for the life of the style and makes retwisting easier when the time comes.
13. Rope-Like Coils
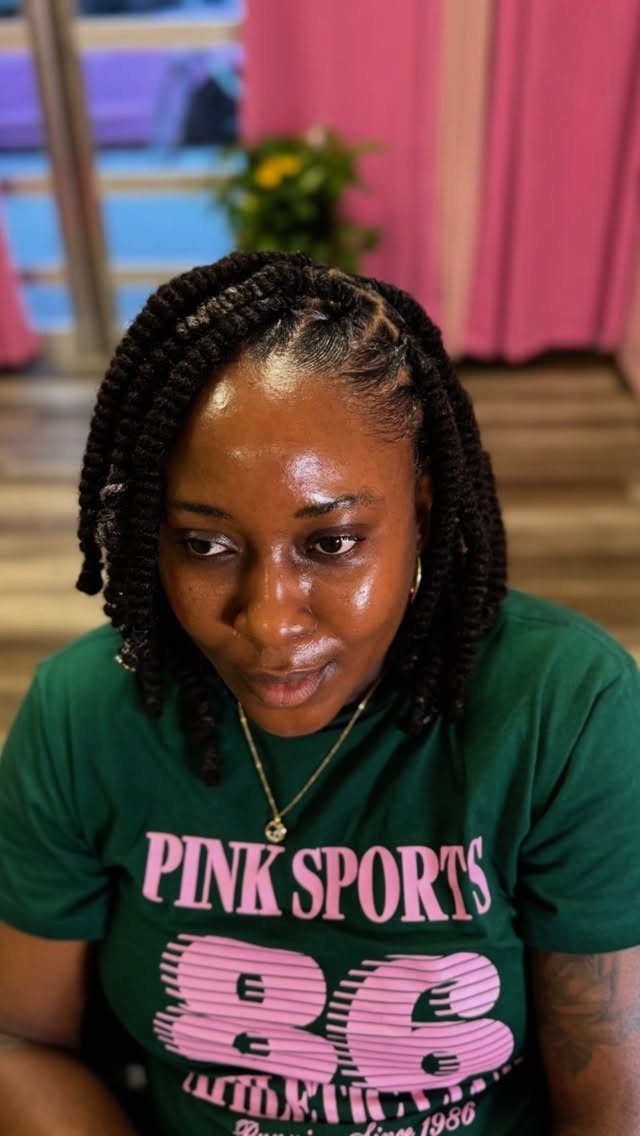
Twists twisted tight enough that each one coils on itself and reads as a single thick rope. The tension gives the coils a springy bounce and keeps them from unraveling as quickly as looser versions.
Twist each section firmly from root to tip, keeping the strands close together as you work.
The tighter the twist, the more it coils back on itself once you let go. If the coils feel stiff at first, they soften after a day or two but keep their shape longer than standard twists.
14. Straight-Back Twists
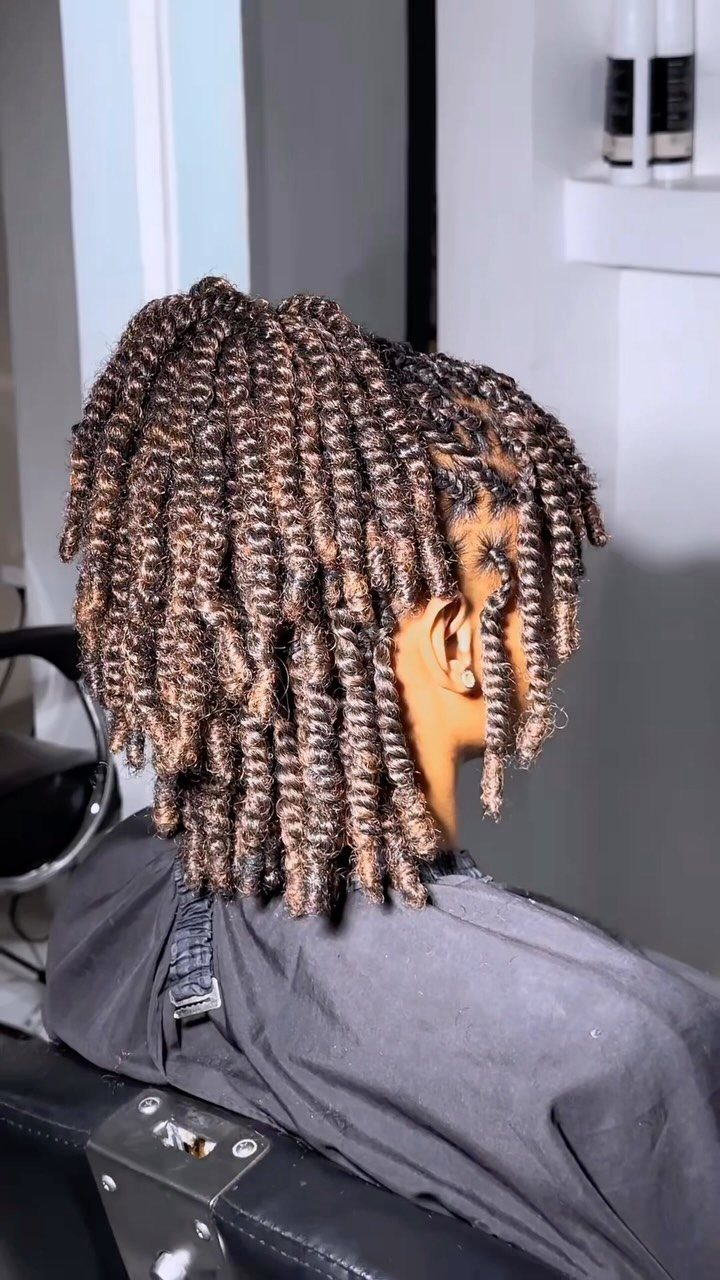
Twists parted and installed in straight rows that run from the hairline to the back, following the direction of growth. The rows sit parallel and give the style a clean, uniform look that shows off the scalp partings.
Part damp hair into horizontal or slightly diagonal rows, then twist each section in the same direction so the twists lie flat and follow the row.
The straight-back arrangement works well on shoulder-length hair and looks tidy without needing pins or accessories.
15. Half-Up Twists
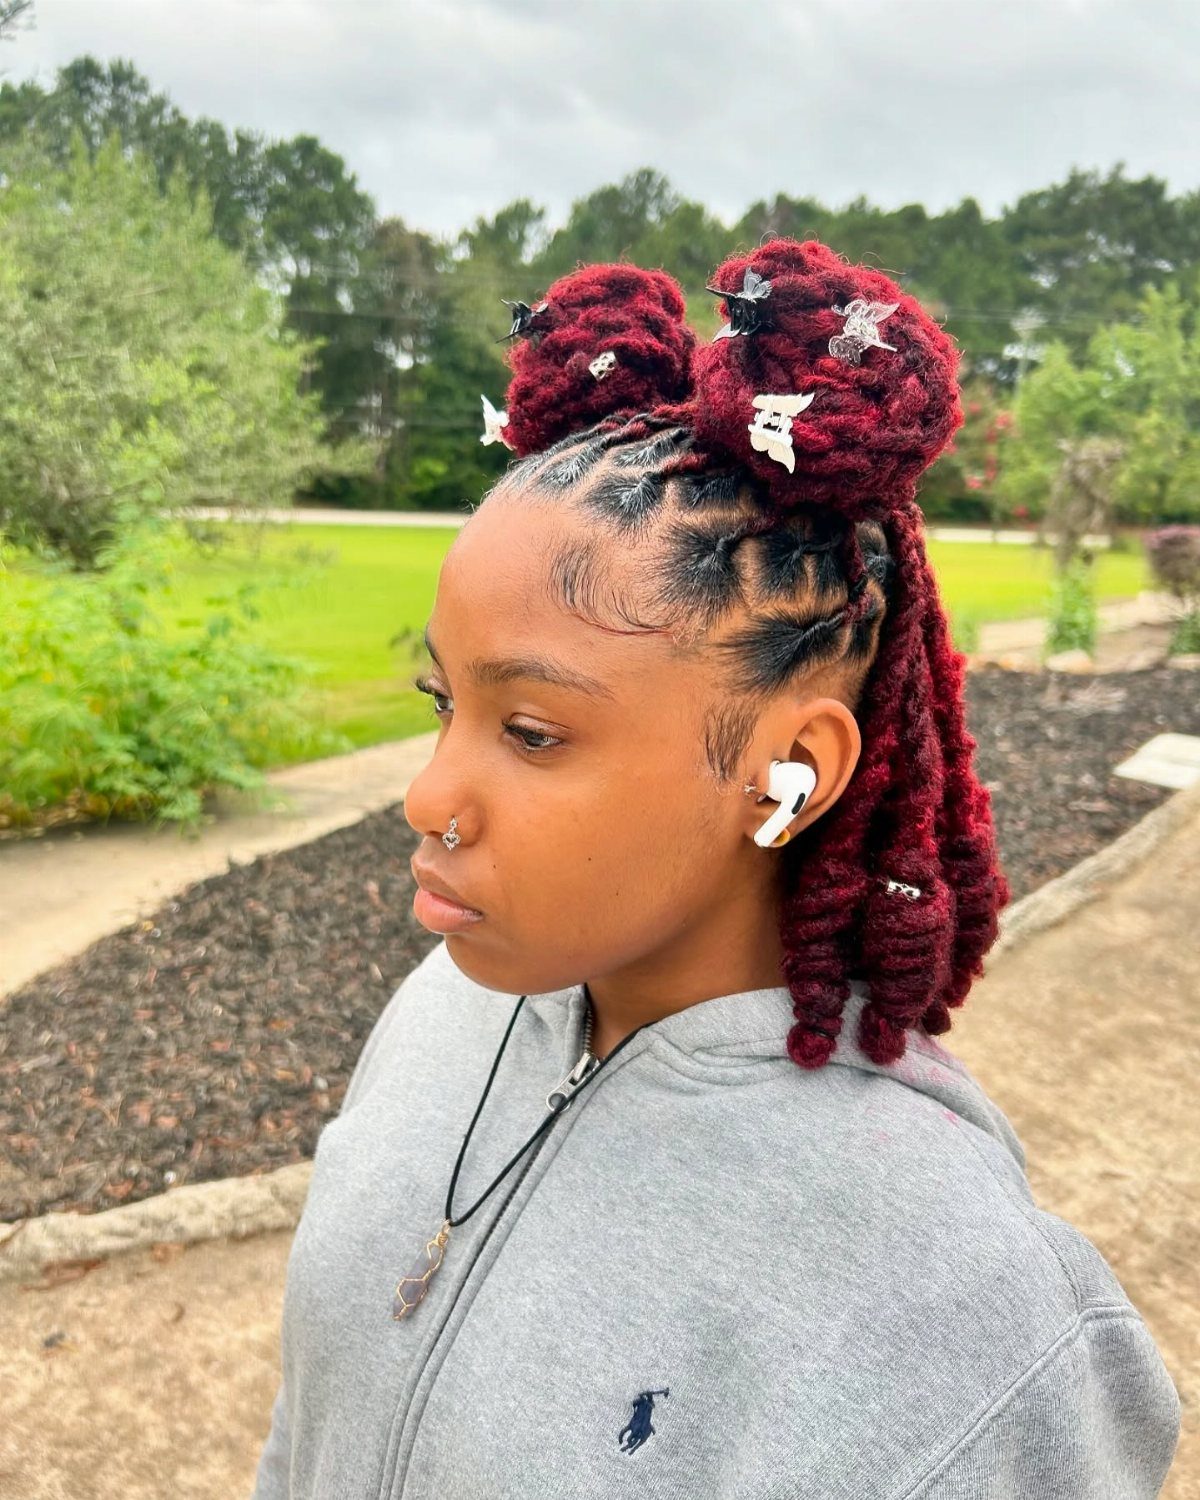
Some of the twists pulled up and secured while the rest hang loose. The style keeps hair off your face and gives you height at the crown without pinning every twist up.
Gather the top section of twists and tie or wrap them into a bun, ponytail or top knot.
Leave the back and sides down. The half-up version takes seconds to adjust and works whether the twists are fresh or a week old.
16. Side-Swept Twists
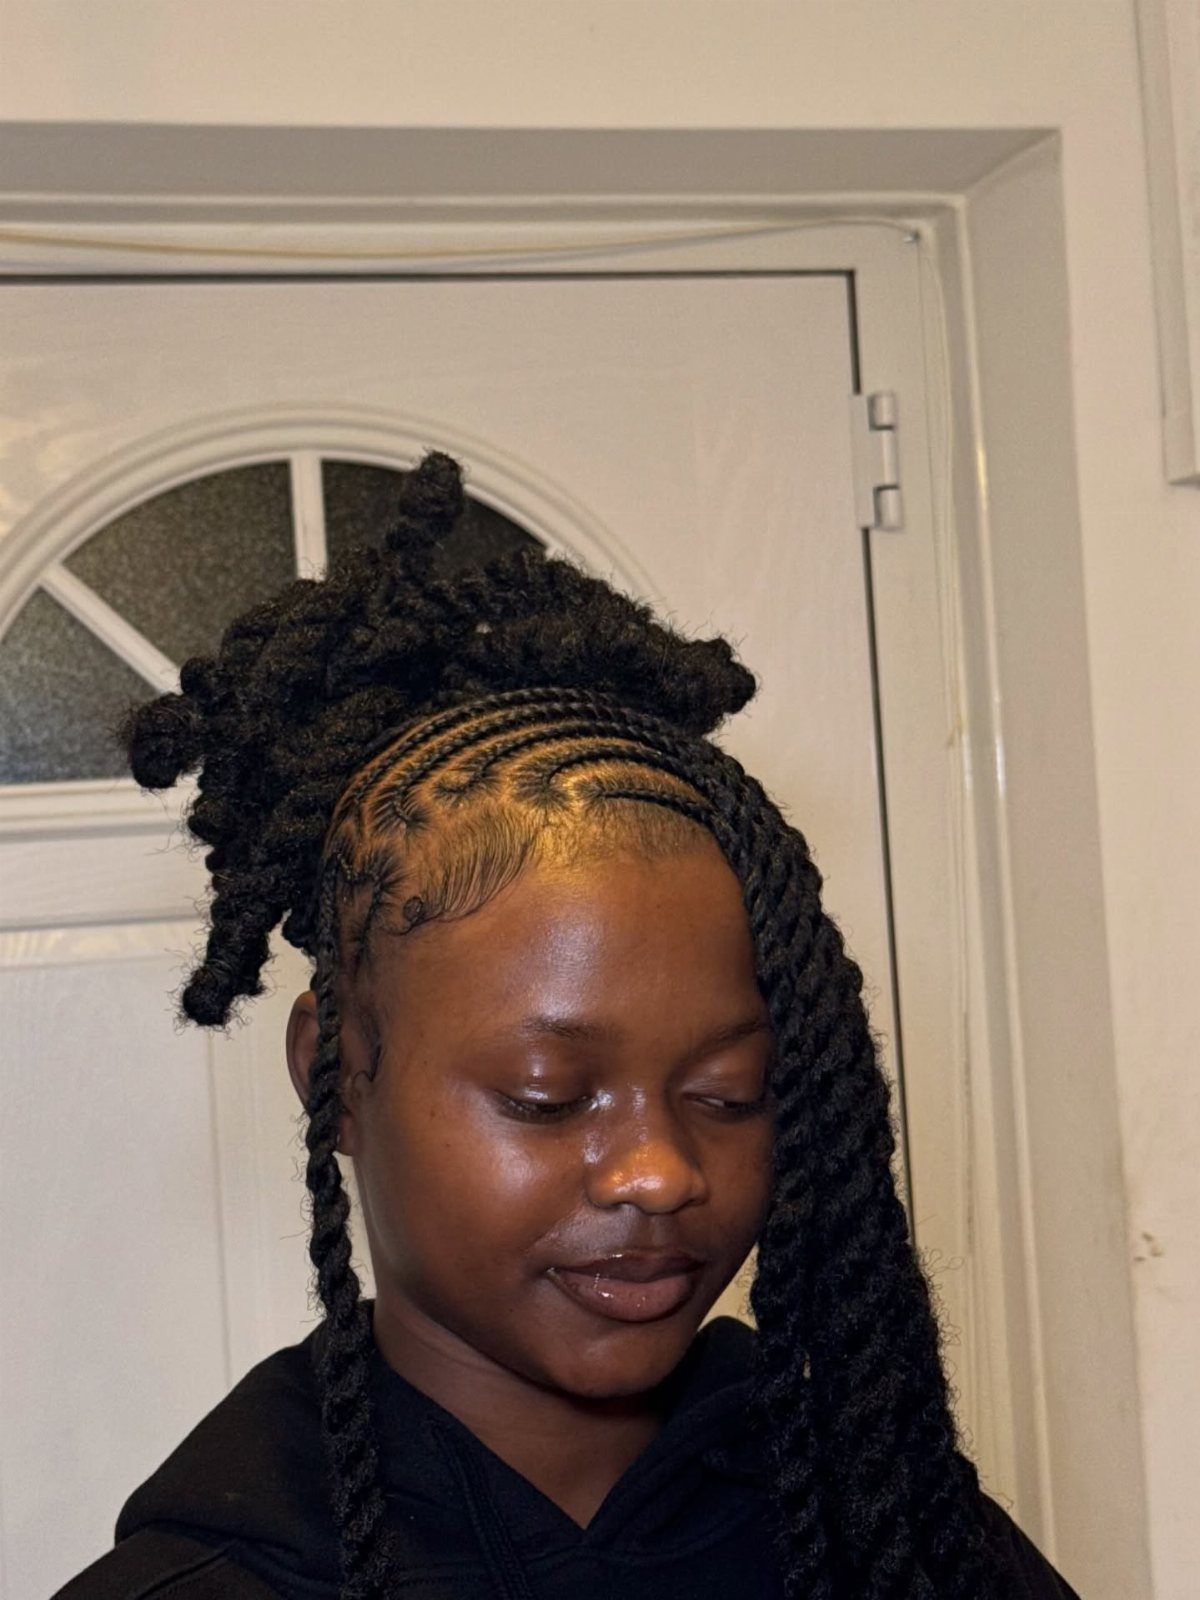
Twists brushed or combed over to one side and left to fall across the shoulder. The swept look frames one side of the face and gives the style a softer, more relaxed shape than letting the twists fall straight back.
Finger-comb or gently brush the twists toward one side, then tuck the shorter pieces behind the opposite ear or pin them if they slide forward.
The style holds through the day and flips back to center just as easily when you’re ready for a change.
17. Twist-Out
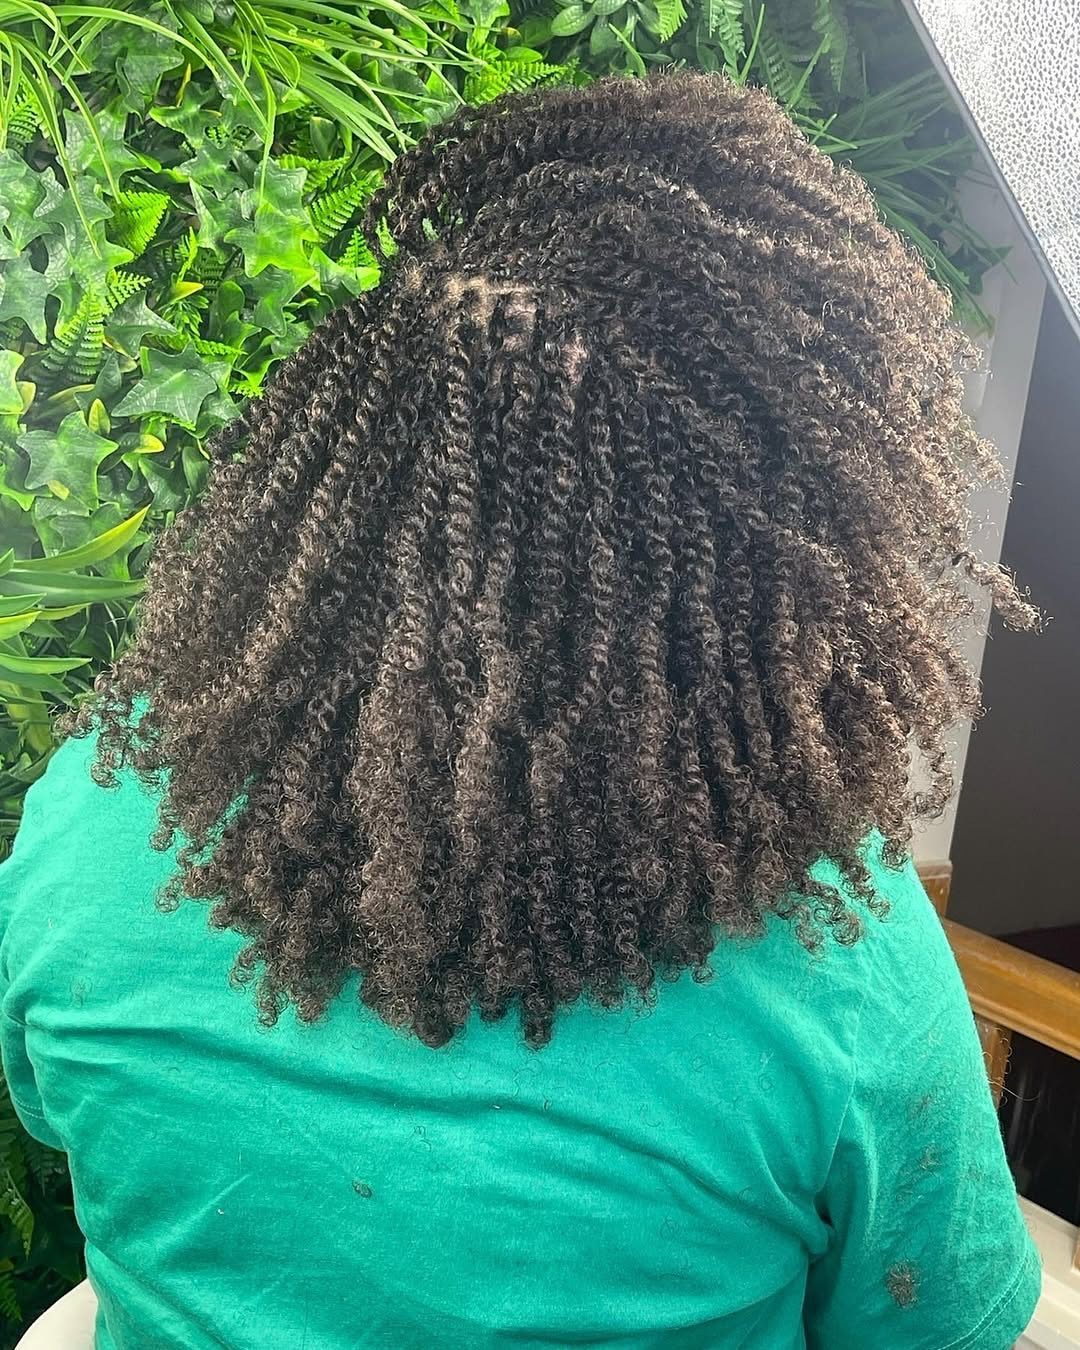
Twists unraveled after they dry, leaving behind defined, springy curls. The curl pattern follows the direction of the twist, and the finished texture sits somewhere between a wash-and-go and a braid-out.
Let the twists dry completely before unraveling them, usually overnight or longer.
Separate each twist gently with your fingers, working from the ends up to avoid frizz. The twist-out can be refreshed by misting with water and smoothing a light cream through the sections that lose definition first.
Frequently Asked Questions
Does a two-strand twist grow hair?
Twists protect hair from breakage and manipulation, which helps you retain length rather than growing it faster.
Most people wear twists for 4 to 8 weeks and moisturize regularly to keep the hair healthy underneath. If you feel tension when removing a twist or notice shedding, cut the wear time shorter to avoid damage.
How to do twists on 4c hair?
Section damp 4c hair with a rattail comb, work a twisting cream or gel through each piece, then wrap 2 strands around each other all the way down.
Smaller sections give more definition and hold through humidity, though they take longer to install.
What are the key differences between a two-strand twist and braids?
Two-strand twists use 2 sections wrapped around each other, while braids weave 3 sections over and under.
Twists put less tension on the hair and detangle more easily, making them better for fine or fragile textures. Braids grip tighter and stay in longer, but too much tension at the root can snap off hair.
What type of hair should I buy for two-strand twists?
You don’t need added hair for twists on natural hair. Twisting works on your natural length and texture, no extensions required.
If you want longer or fuller twists, use 4 bundles of extension hair that matches your texture, though most people twist their natural hair without extensions for a lighter, more flexible result.
How often can I do a two-strand twist on natural hair without causing damage?
You can wear twists for 4 to 8 weeks if you moisturize regularly and keep them wrapped at night.
Hair that breaks easily or soaks up water fast should come down at the 4 or 6 week mark to avoid damage. Never pull forcefully when removing a twist, and reduce wear time if you feel discomfort or see shedding.
Can I moisturize my hair while it’s in a two-strand twist?
A water-based leave-in or light spray hits the ends and scalp without loosening the twist.
Skip thick oils and butters that sit on top and build up. Mist from a spray bottle or press moisture in with a damp cotton ball, paying attention to the driest part at the ends.
How do I prevent my two-strand twist from unraveling at the roots?
Keep tension steady as you twist down, and finger a lightweight gel or edge control onto the root before you begin.
A small hair elastic at the base holds the twist in place without pulling, or you can twist the tail into a tight knot and leave it loose.
If hair slips right after washing, let it dry partway so the strands grip each other.
Can I sleep with a two-strand twist in my hair?
Twists hold fine overnight as long as you cover them with a silk or satin scarf or bonnet and sleep on a matching pillowcase to stop them from catching.
Styles that tug at the hairline every night can thin the edges over time. If you wake up with frizz, mist the twists lightly with water and smooth them with your fingers before starting the day.





