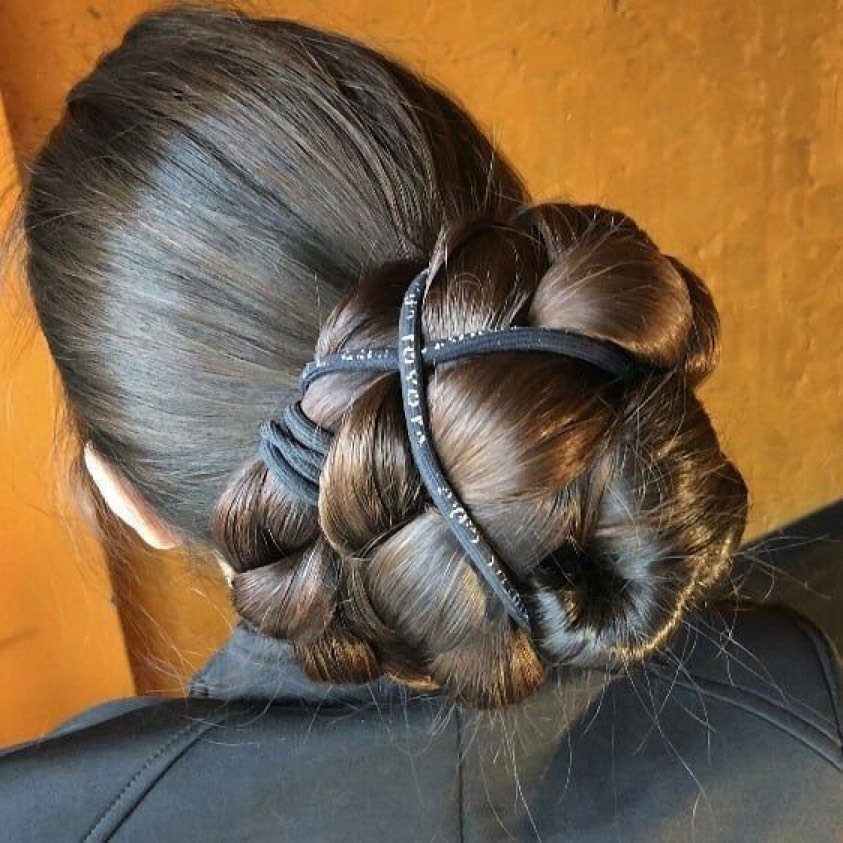
A braided bun can sit at the crown for full visibility, at the nape for all-day comfort, or off to one side for a softer finish.
Placement decides how long the style lasts and what it does for you: a Low Braided Bun sits out of the way under a hat or against a headrest, while a High Braided Bun or a Microbraid High Bun puts the braid pattern right where people look first.
1. Goddess Bun with Curls
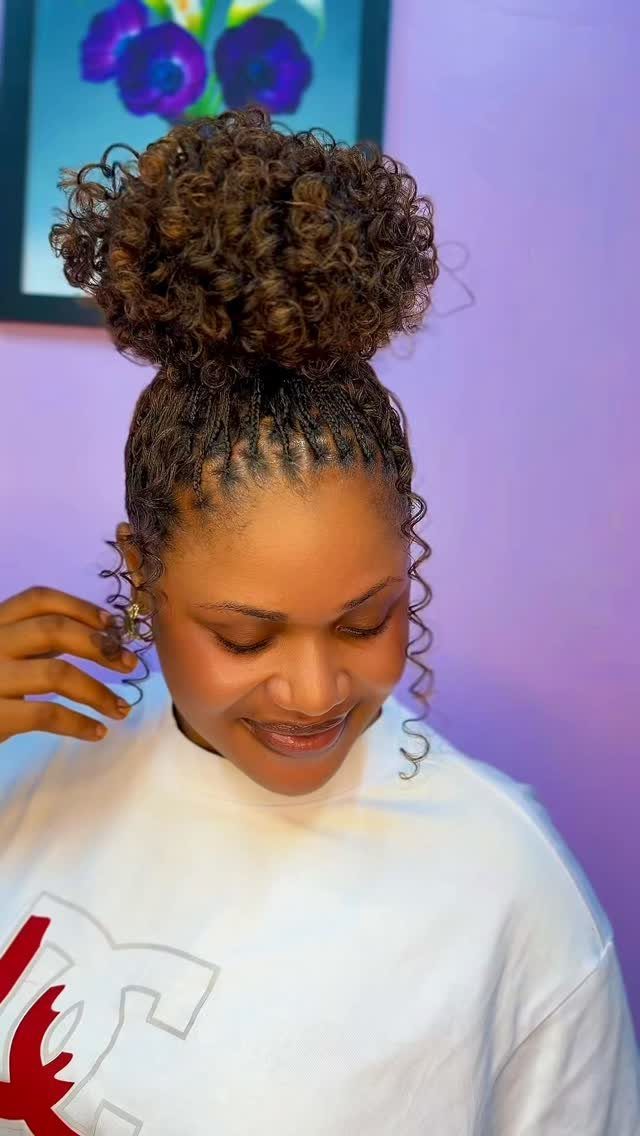
Neat scalp braids give this bun its structure, and the loose curls at the face give it softness. Braid snug along the hairline, then leave the curls loose and hanging below the bun.
Pull out only a few tendrils near the temples and ears. Pulling out too many turns a polished style into a messy one.
Curly hair makes the contrast easy, since the bun and the tendrils share the same texture. A little curl cream on the loose pieces keeps them defined and stops frizz.
2. Low Braided Bun
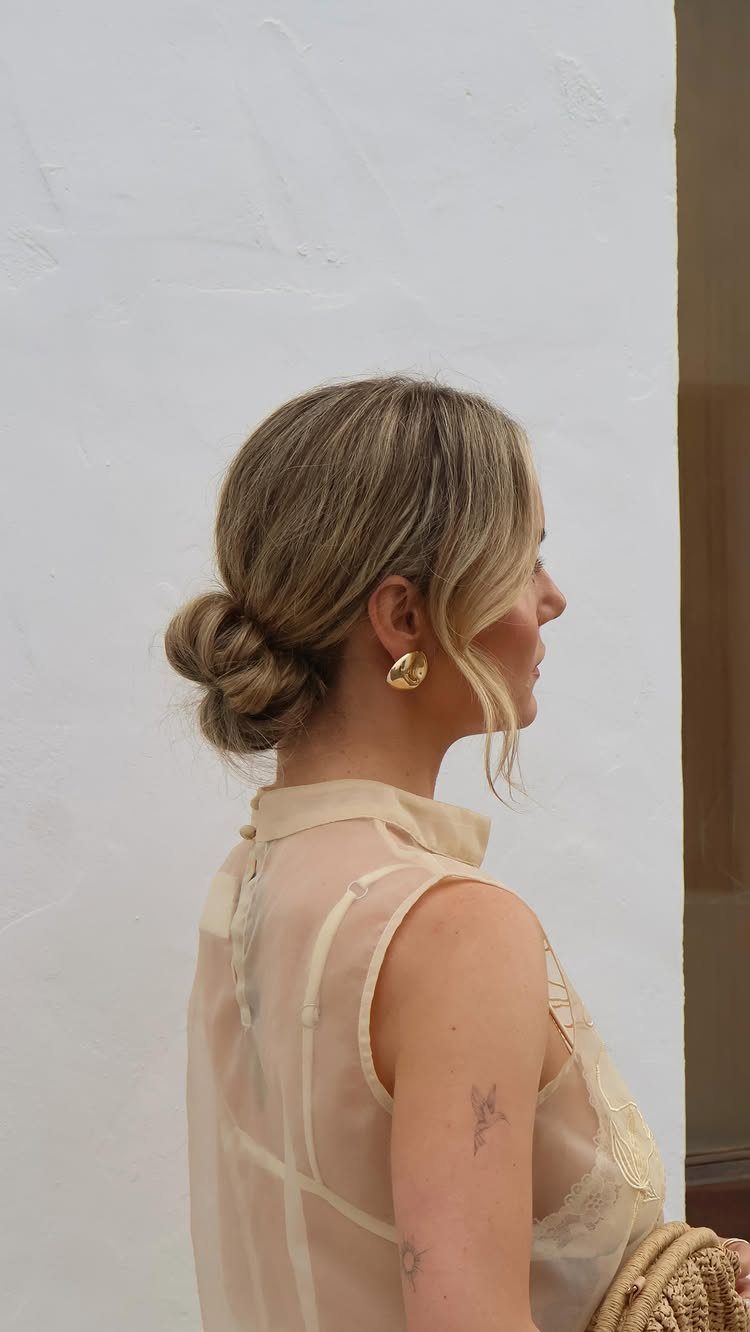
A low braided bun sits at the nape, which makes it the most comfortable version to keep in for a full day.
It stays out of the way under a hat, a collar or a seat headrest, which a high bun can’t promise.
Pull out a couple of loose strands around the face so the style doesn’t look severe. For work or an event, this is the one I’d pick: it looks finished and takes very little time.
3. Double Braided Buns
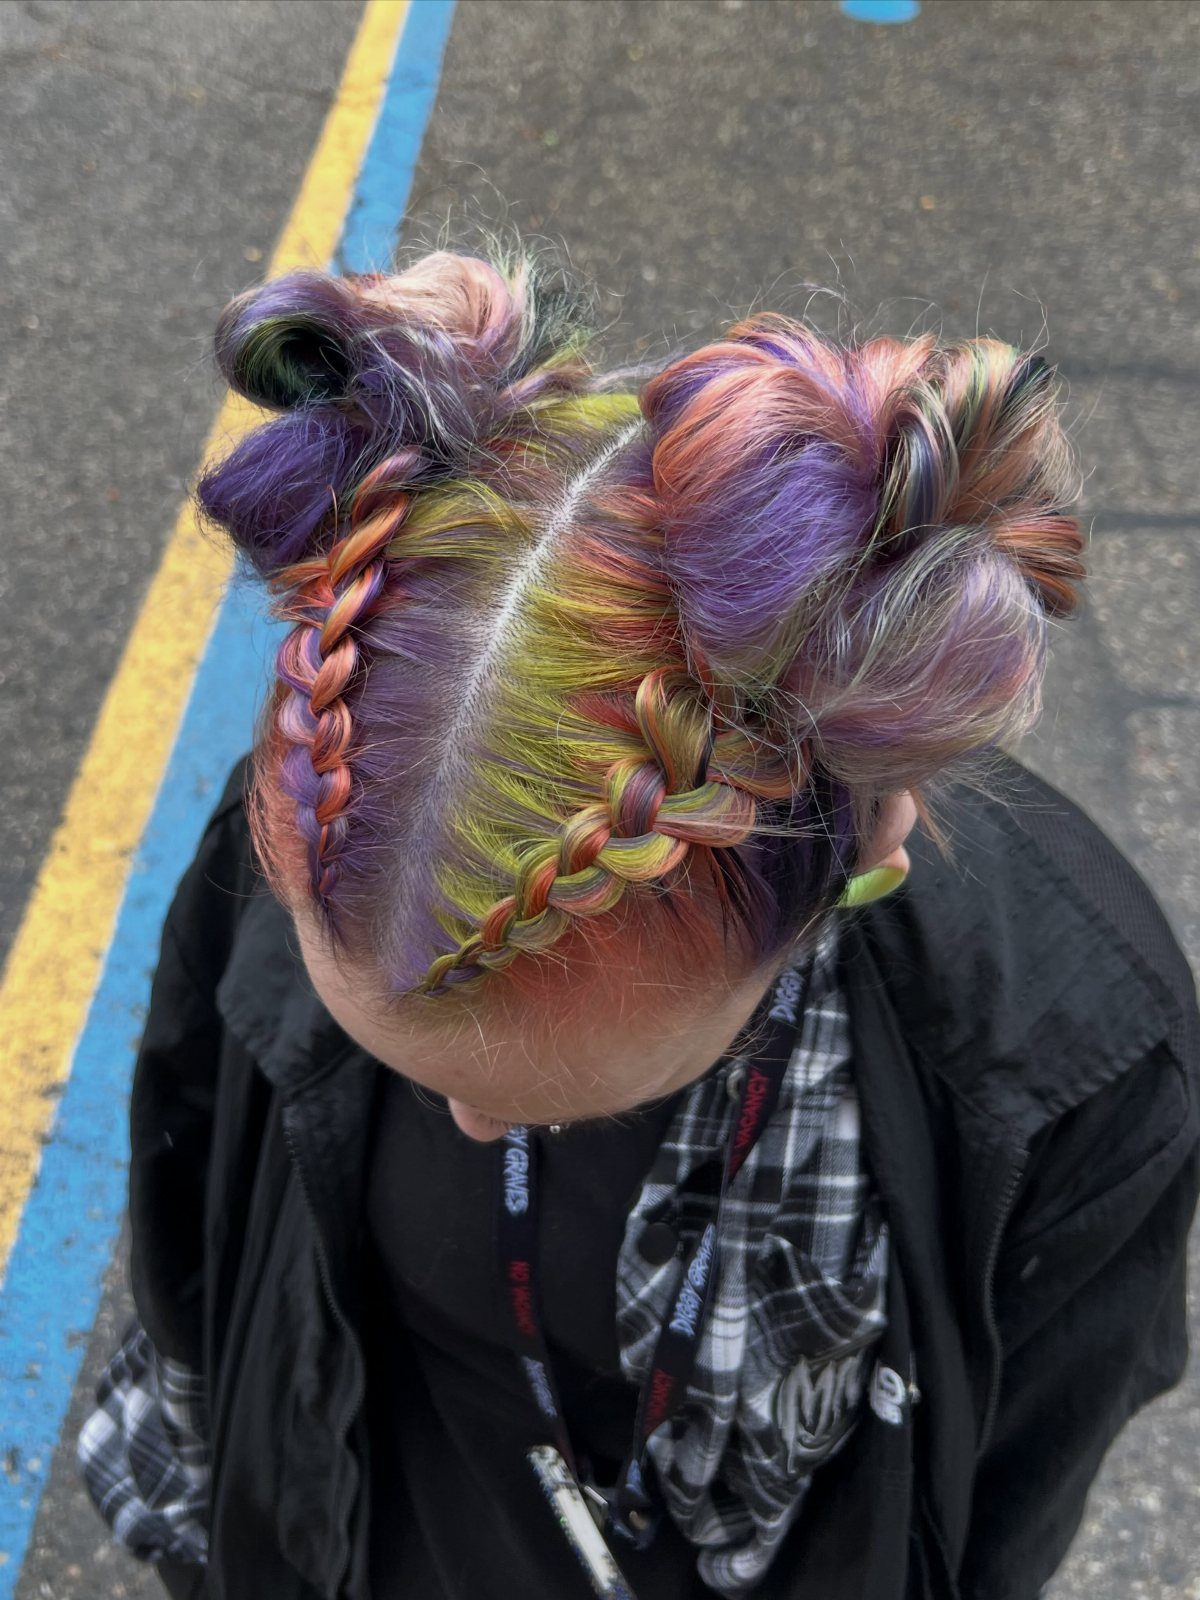
Two buns, one on each side of a center part, means two separate braids, and the part decides how the whole style looks. Draw it straight and clean before you divide the hair.
Braid each side, then coil it into its own bun and pin it firmly.
Check the buns against each other in a mirror, because uneven placement is the first thing people notice. This one reads playful, so I’d save it for casual days, festivals or workouts.
4. Braided Bun with Scarf
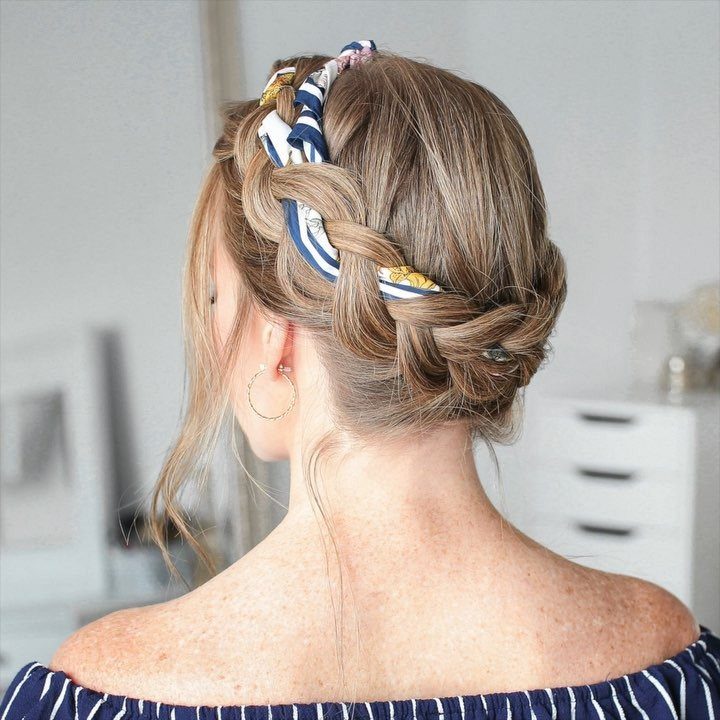
A scarf turns a plain braided bun into something with pattern and color. Weave it through the braid, or wrap it around the finished bun and tie it off.
Fold a long, narrow scarf lengthwise first so it lies flat and doesn’t bunch.
Silky fabric slips, so pin the knot or tuck its ends under the bun. For a faster version, wrap the braid around the base instead of weaving it.
5. Cornrow Braids
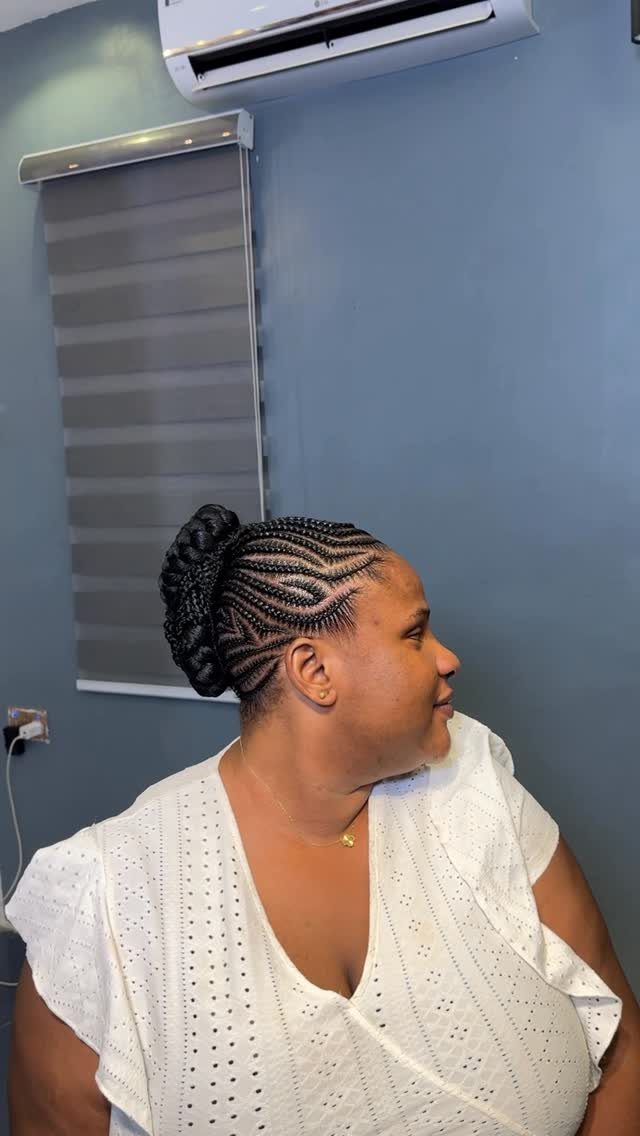
Cornrows that lead into a bun do the structural work for you: the braids lie flat to the scalp, and the bun is simply where they end.
Plan the direction first, since the pattern of the rows sets the shape of the whole style.
Gather the ends together and wrap them into the bun.
This is a style I’d have a braider install, because straight, even rows are hard to do on your own head. At home, practice the gathering and wrapping.
6. Knotless Braid Topknot
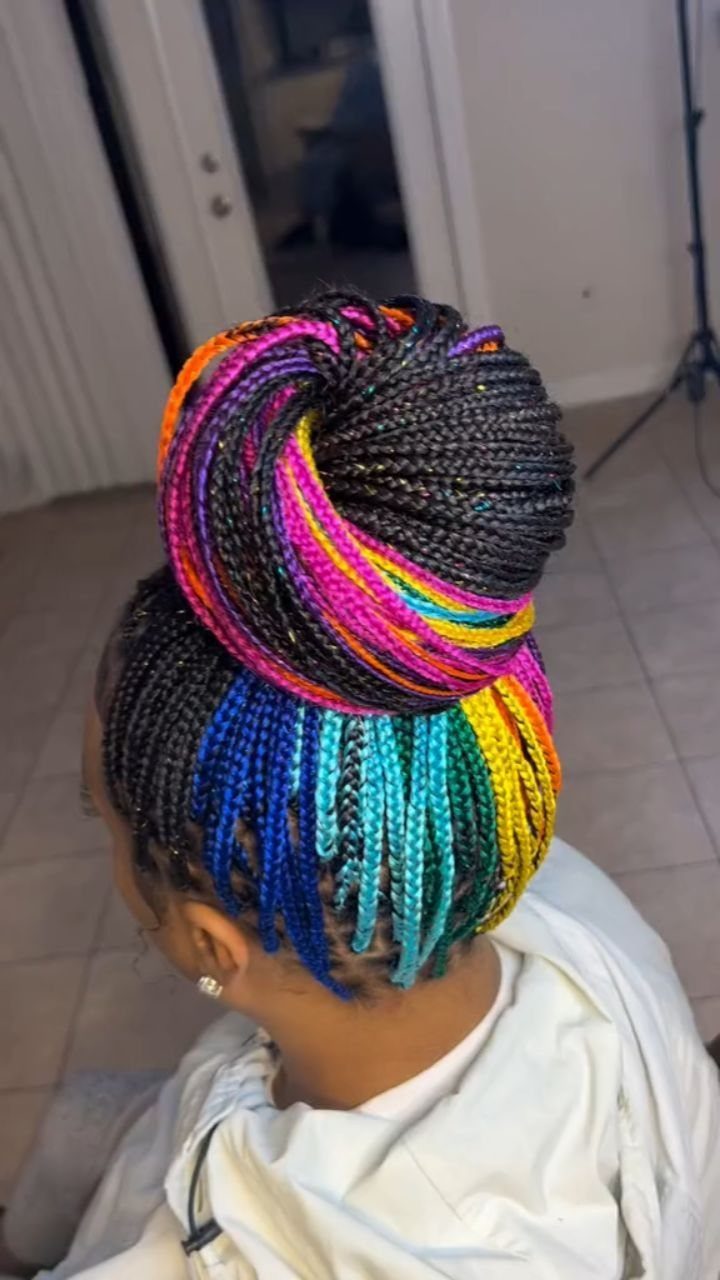
Knotless braids start with your own hair, and extension hair is fed in gradually as you go.
That’s why the base feels lighter and sits flatter than a knotted start, which matters when everything is piled on top of your head.
Thin braids make a fuller, more manageable bun than thick ones. Bright extension strands are an optional add-on, and they show most when the braids are small.
7. Bun with Braid Wrapped Around
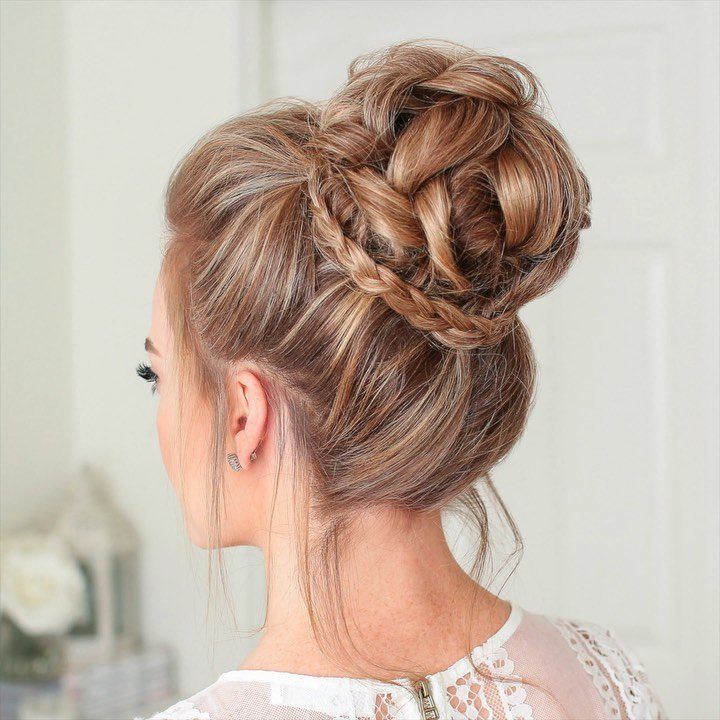
A bun with a braid wrapped around its base is the easiest way I know to make a plain high bun look finished. The braid hides the elastic and adds a second texture.
Make the bun first and pin it, then braid a separate section and circle it around the base.
Fold the end of the braid under the base of the bun, then secure it with 2 or 3 bobby pins pushed in against the grain of the braid. Highlights, like the ones here, make the wrapped braid easy to see.
8. High Braided Bun
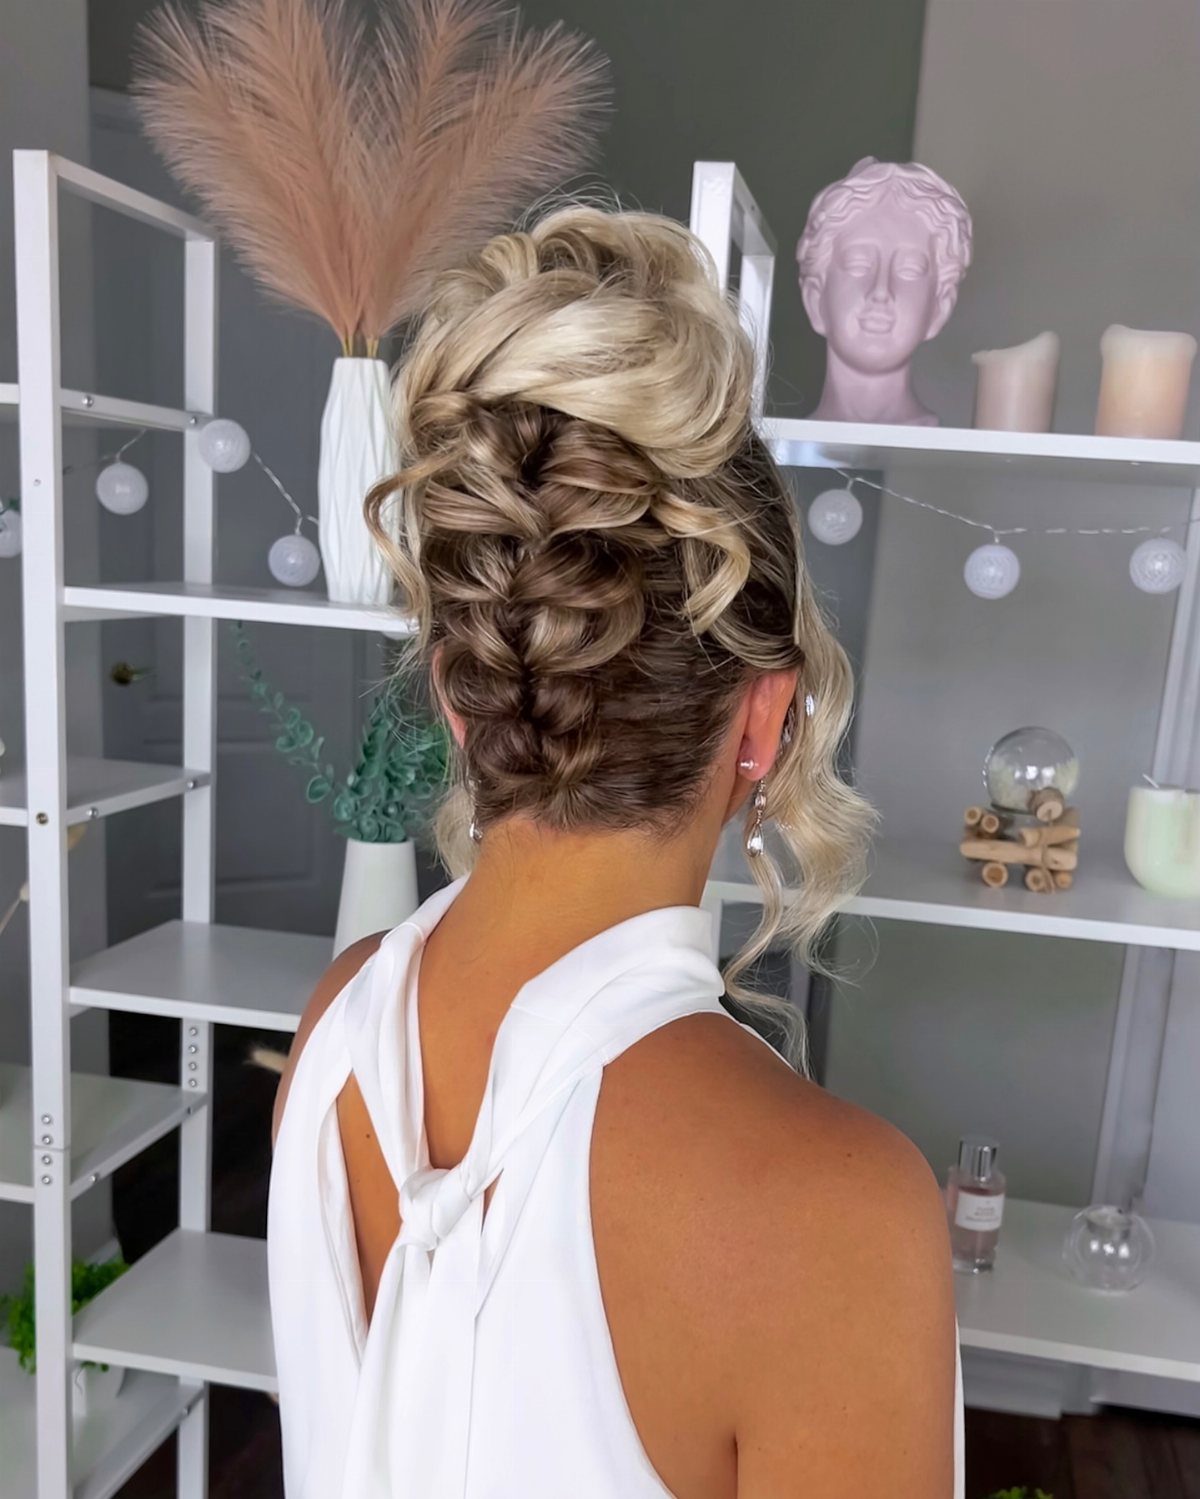
Sitting at the crown, a high braided bun puts all the detail where people see it first. I like it best with a few loose curls left out, because they keep the height from looking stiff.
Braid before you coil, then pin the bun in several spots, since a bun on top of the head carries its weight with no support underneath.
It shows off a back view well, so check the braid pattern from behind in a hand mirror.
9. Dutch Braided Bun
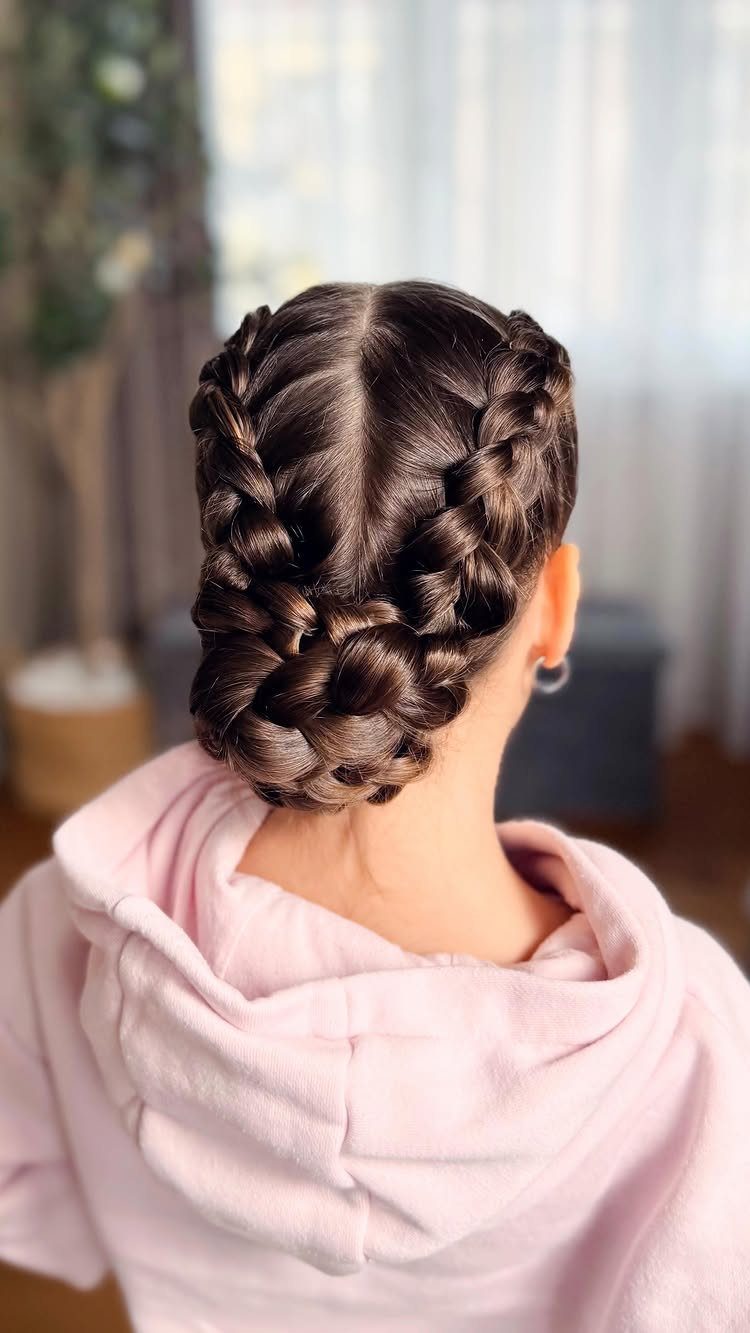
Dutch braiding crosses each strand under instead of over, so the braid sits raised on top of the hair. That raised ridge is why a Dutch braid reads so clearly once it’s coiled into a bun.
Make two Dutch braids, bring them together at the back, and coil them into one low bun.
Pin where the coils meet. This is a good beginner-friendly style if you practice the under-cross a few times first.
10. Side-Braided Bun
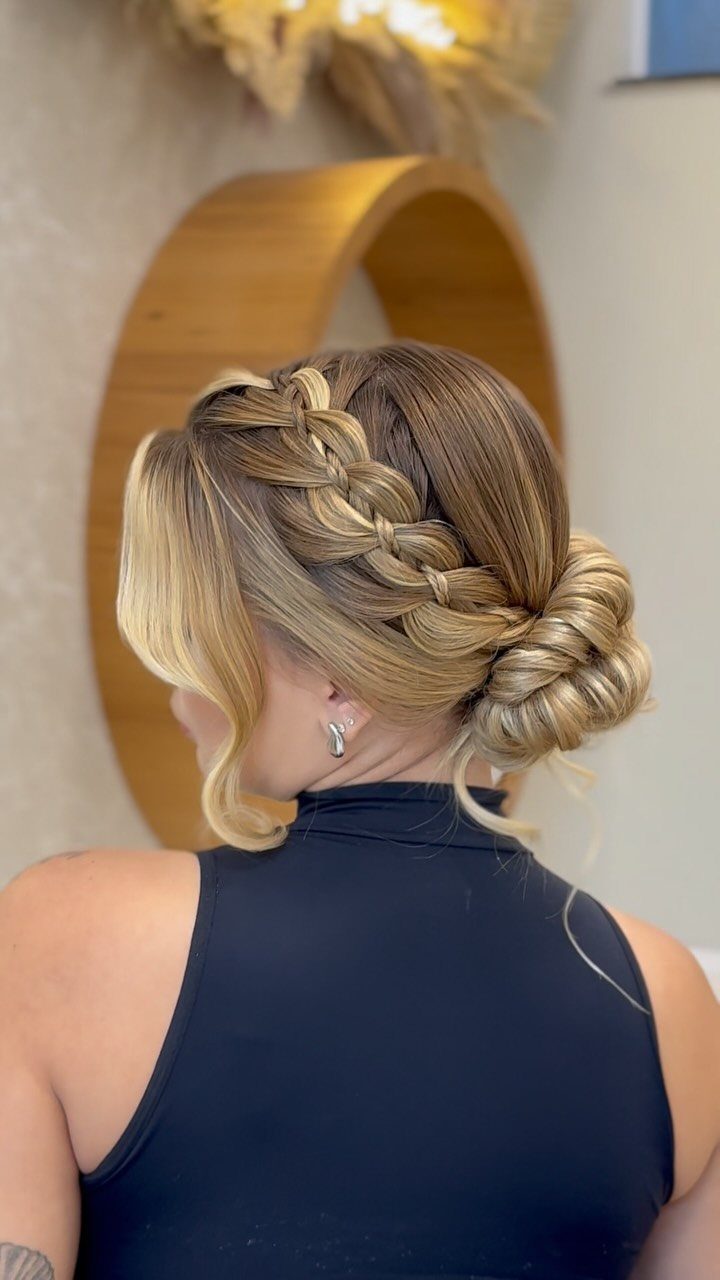
Here the braid starts at one side and ends in the bun, so the whole style leans toward one shoulder. Set the bun low and a little off center to match the braid’s path.
Wrap the braid around the bun’s base rather than just pinning it flat, which gives a fuller shape.
Pin the end underneath where it won’t show. For a softer finish than a straight-back center bun, I’d pick this one, since the braid sweeps to one side and loosens the whole shape.
11. Basket Weave Bun
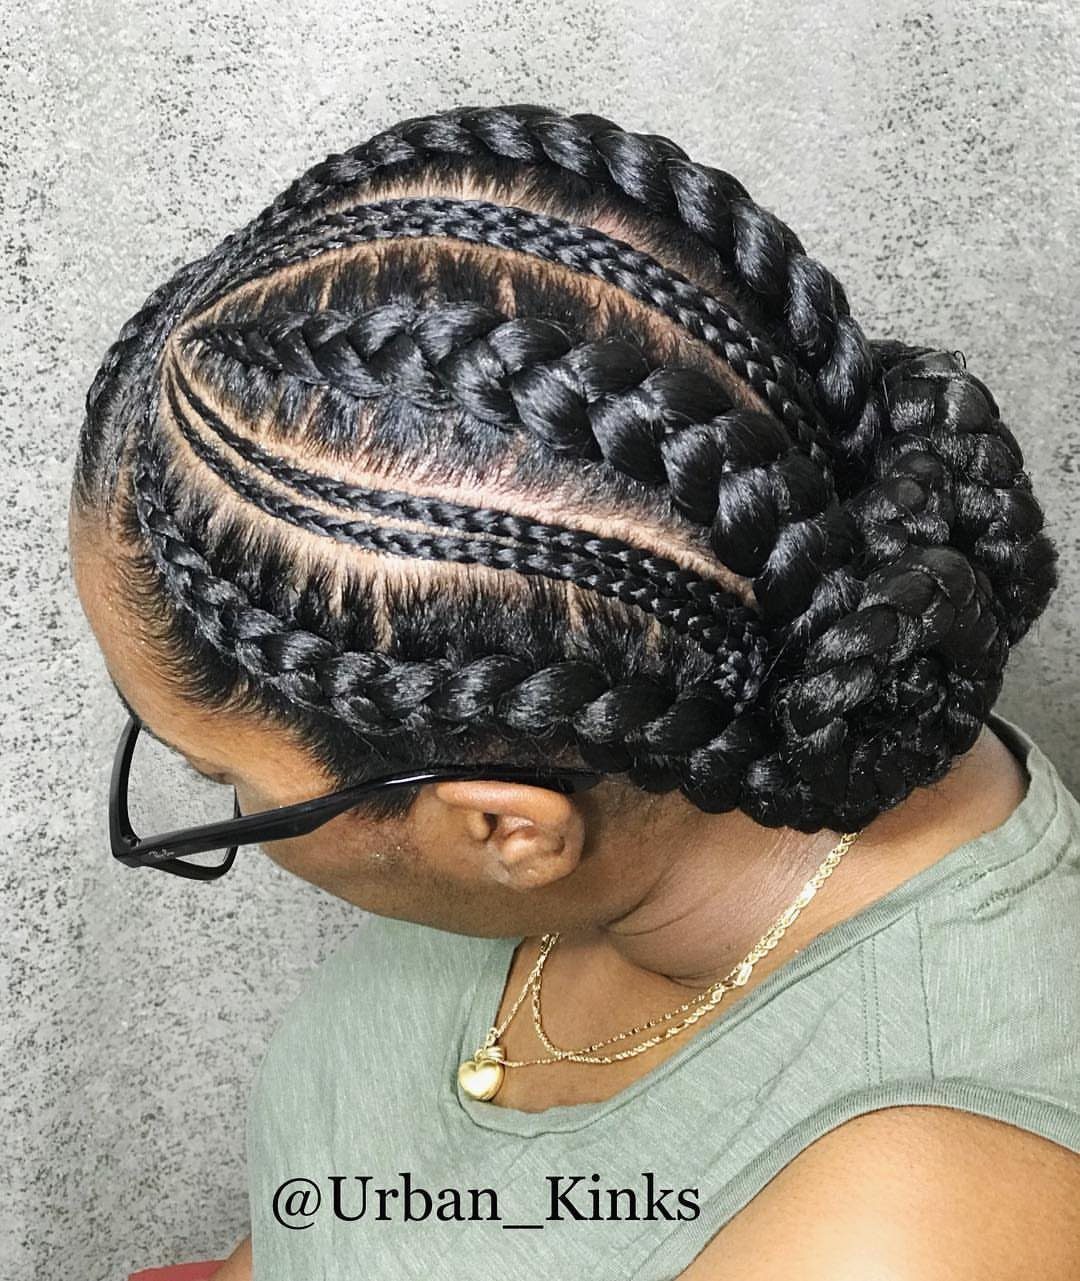
A basket-weave bun uses an interlaced braid pattern for detail, and the woven look is what sets it apart from a plain braid. The rows here are cornrow-style, so the weave sits close to the scalp.
An even basket weave is hard to see and control on your own head, so I’d hand this one to a braider.
A saved photo and the name of the pattern will get your stylist to the right place faster than a verbal description.
12. Goddess Braided Bun
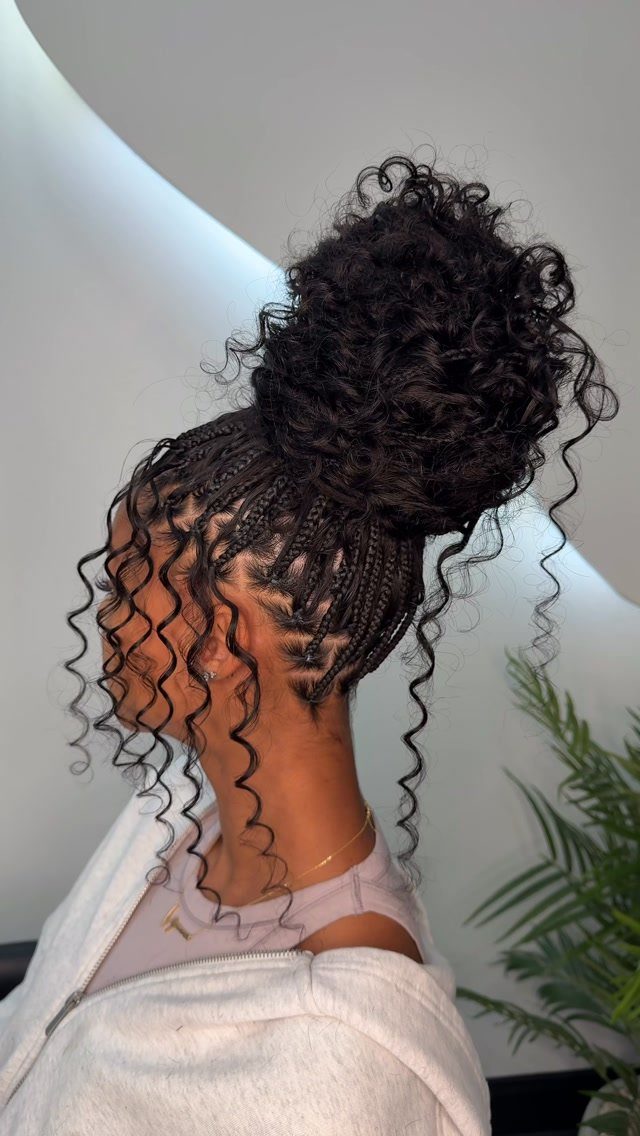
Thick cornrows and a jumbo bun belong together: the chunky rows give the oversized bun something to match. Keep the rows wide so the scale stays consistent from scalp to bun.
Gather the ends high, wrap them in a large coil, and pin generously, because a big bun is heavy.
Pull a few curly tendrils loose around the face and nape; they soften the edges of the braids and make the bun look less severe. It’s a bold choice, and I like it that way.
13. Braided Bun with Hairpiece
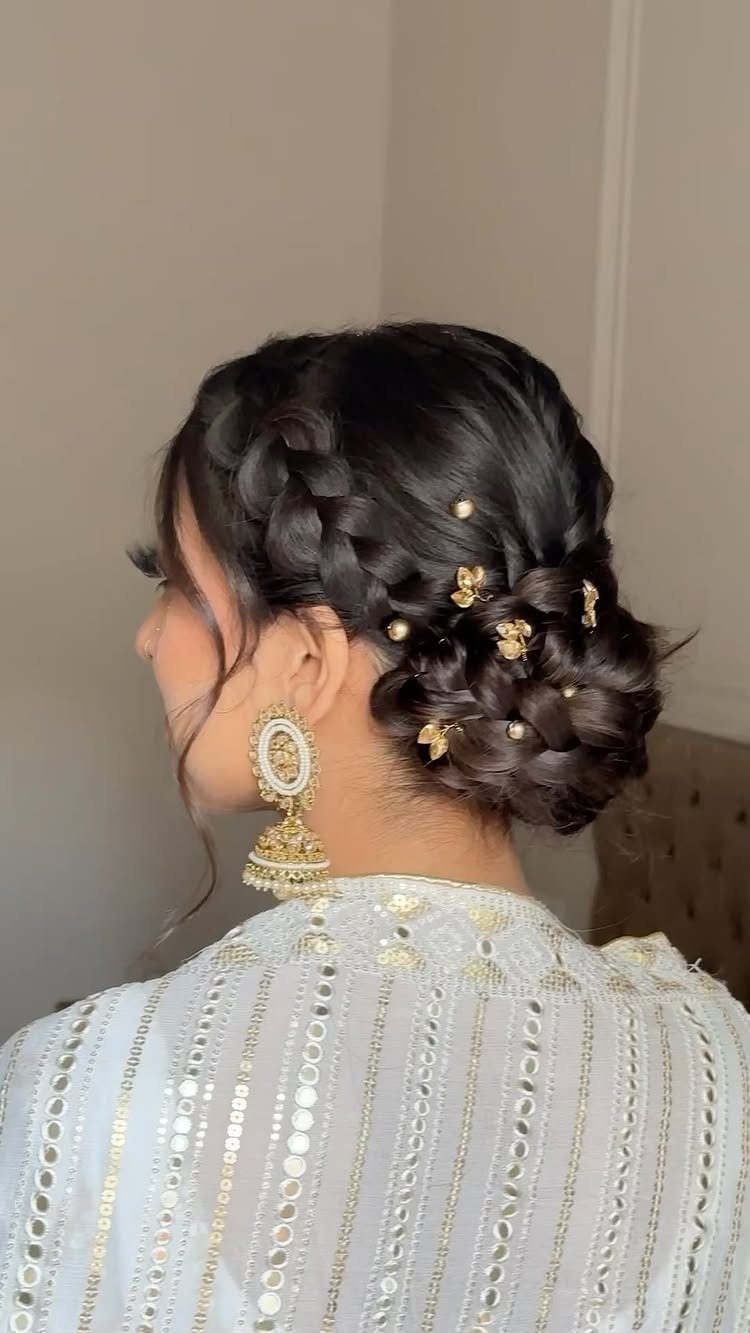
Gold pins and pearls give a braided bun the finish of a formal accessory, and the braid becomes the backdrop. Because the bun already has texture, a few decorative pieces go a long way.
Build and pin the bun first, then place the decorations last so they sit on top of the braid pattern without hiding it.
Space them out rather than clustering them. Floral gold pins read best against a plain, tidy braid, so I’d keep the bun itself simple and let the accents do the talking.
14. Curled Braided Updo
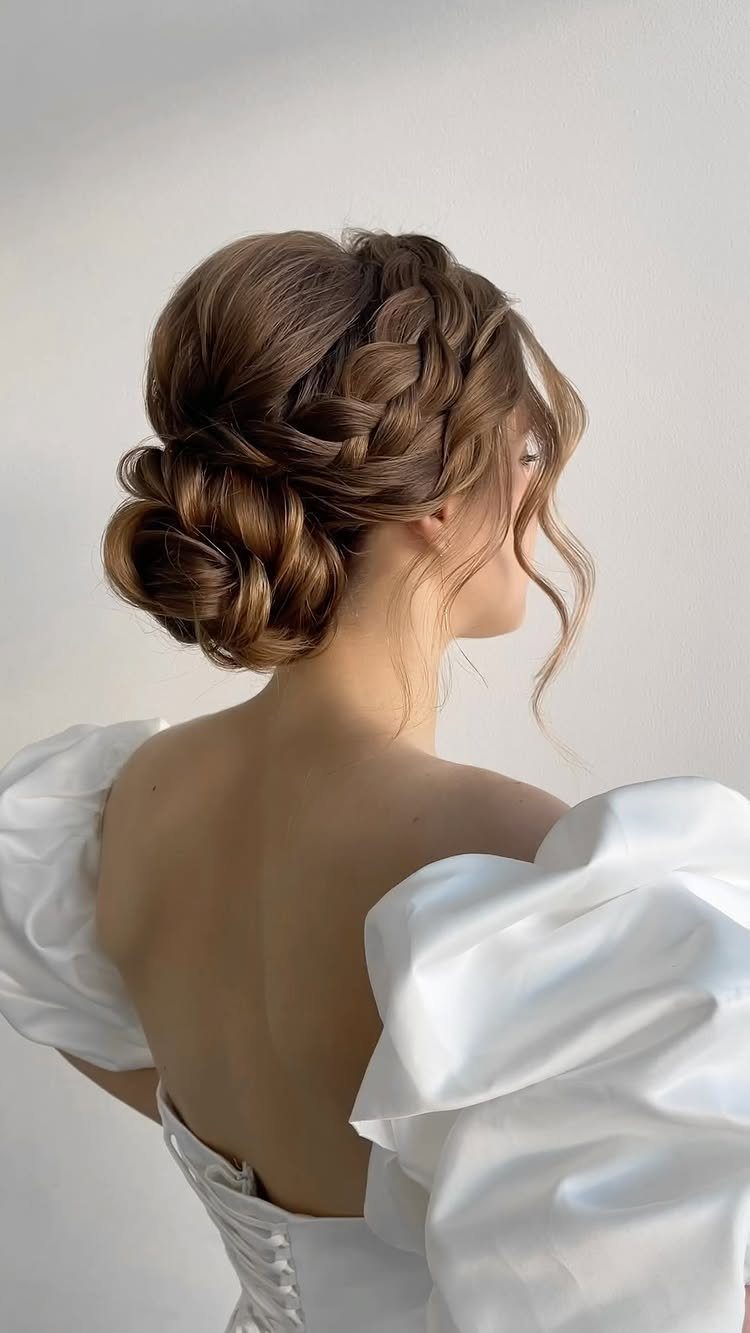
Soft curls at the neck and face are what separate this updo from a tight, formal one. The braided bun gives the shape, and the loose curls keep it relaxed.
Gather the braid into a loose bun rather than a firm coil, and pin it so it holds without pulling. Leave a few curls free at the nape and near the face.
Light brown hair like this shows the braid pattern clearly, so check the back in a mirror before you finish. For an event, I’d choose this over a sleek bun.
15. Microbraid High Bun
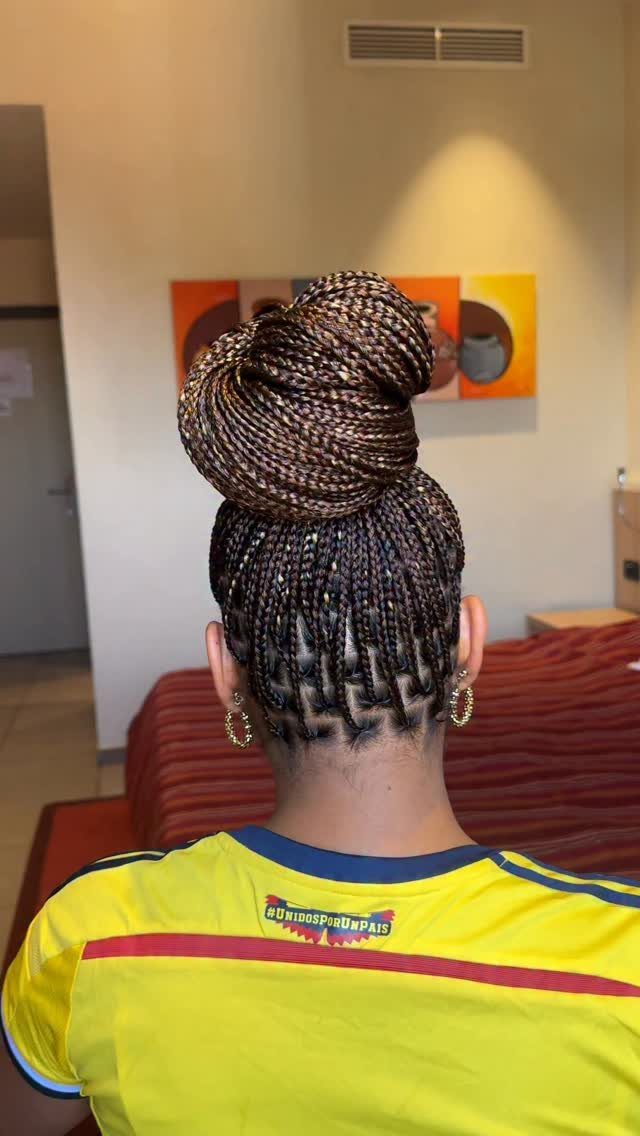
Fine braids pulled into a large bun on the high crown make a bun with real volume, since each thin braid adds to the coil.
Gather all the braids in one hand before you secure anything, so the bun lands at the height and angle you picked.
Wrap the braids around the base in one direction and pin generously, because a big bun carries a lot of weight.
Keep the hairline neat and the gathering point high above the nape. I like this one for its sheer size; just expect it to feel heavy by evening.
16. Curly Braided Bun
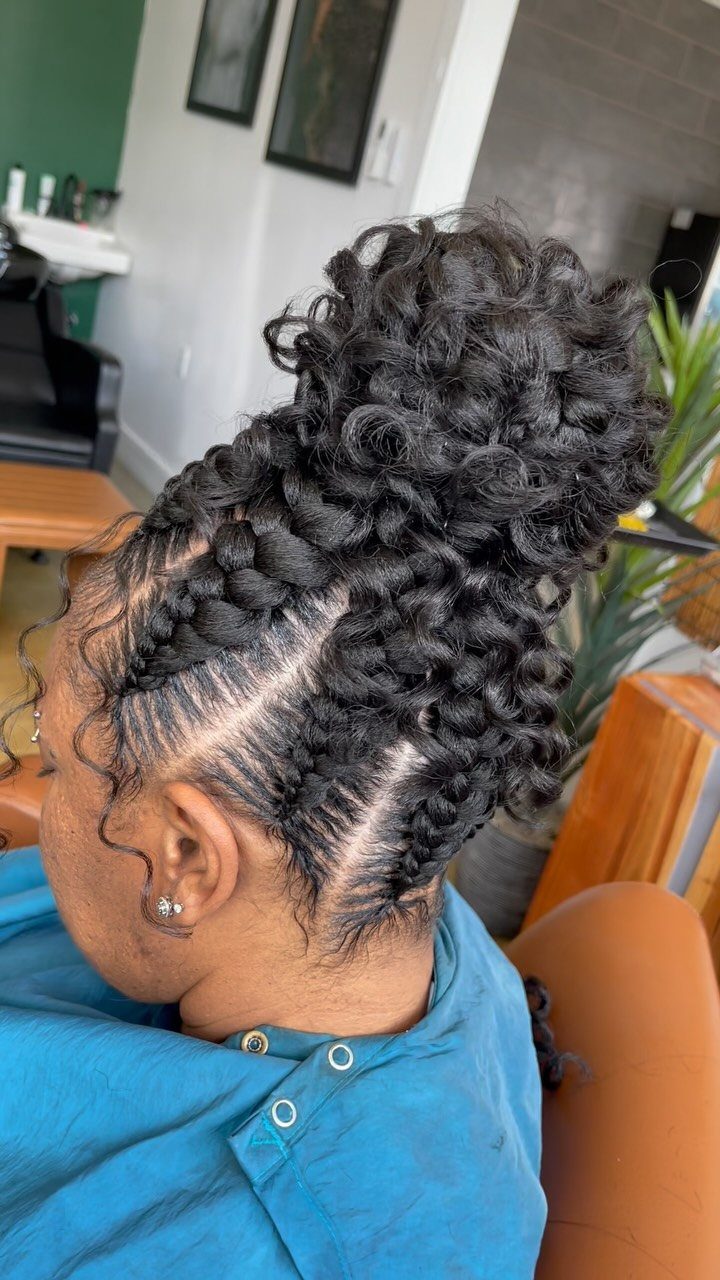
A thick braid coiled into a prominent bun lets natural curls stay the main texture. The braid adds structure, and the curls around it soften the outline so the bun never looks stiff.
Coil the braid snugly and pin it in several places so the bun holds its shape among the curls.
Neat side braids, like the ones here, keep the edges tidy while the curls stay full. I’d leave the curls loose and avoid brushing them, since that only brings frizz.
Frequently Asked Questions
Can I do a braided bun on myself without help?
Yes, and it’s easier than most updos because you can reach the whole bun and usually see it in a mirror while you coil and pin.
Any style that needs pins placed blind at the center back of your head is harder to manage solo.
How do I stop my scalp from itching under the bun?
Apply oil directly to scalp parts with a nozzle-tip applicator, and avoid heavy greases that clog pores.
If you use synthetic hair, the itch might be an allergic reaction to the alkaline coating, and switching to human hair often solves this instantly.





