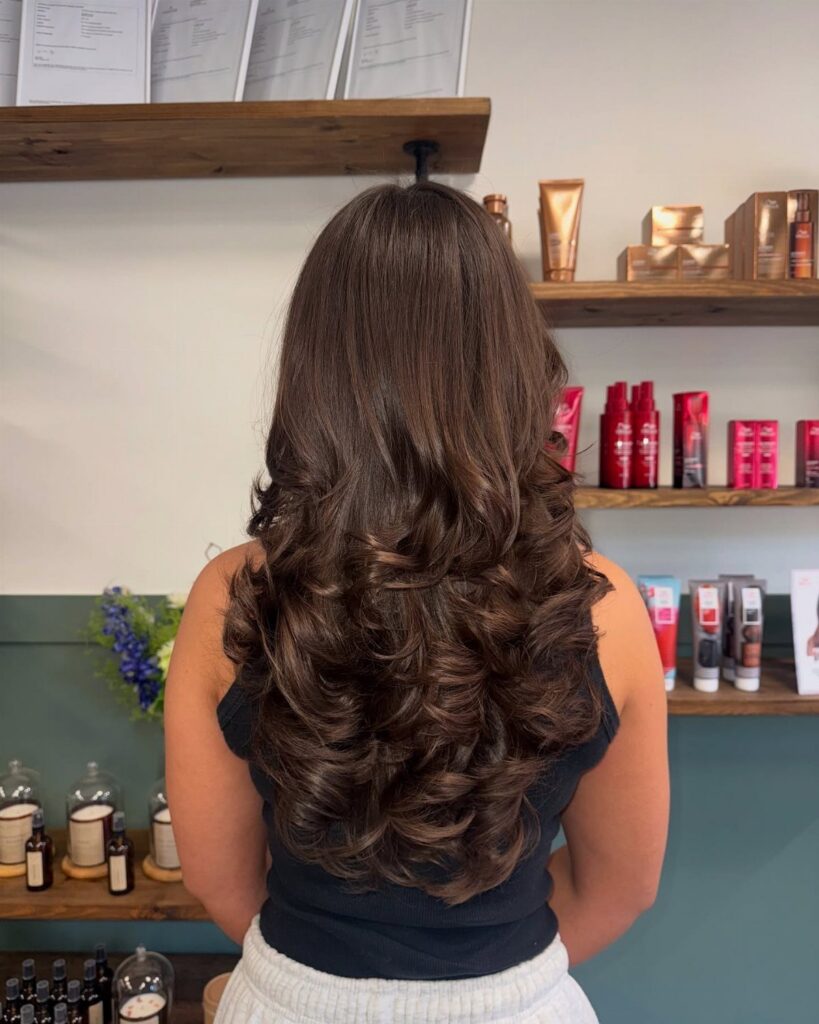
Layers only redistribute the hair you already have, so your density decides which of these cuts works: dense or coarse hair can take heavy internal layering, while fine hair needs a few soft layers to keep its weight.
The range runs from a curly pixie cut close at the sides to long layers that reach mid-back. Each one has to be planned around shrinkage, since curls dry shorter than they look wet.
1. Bob with Layers
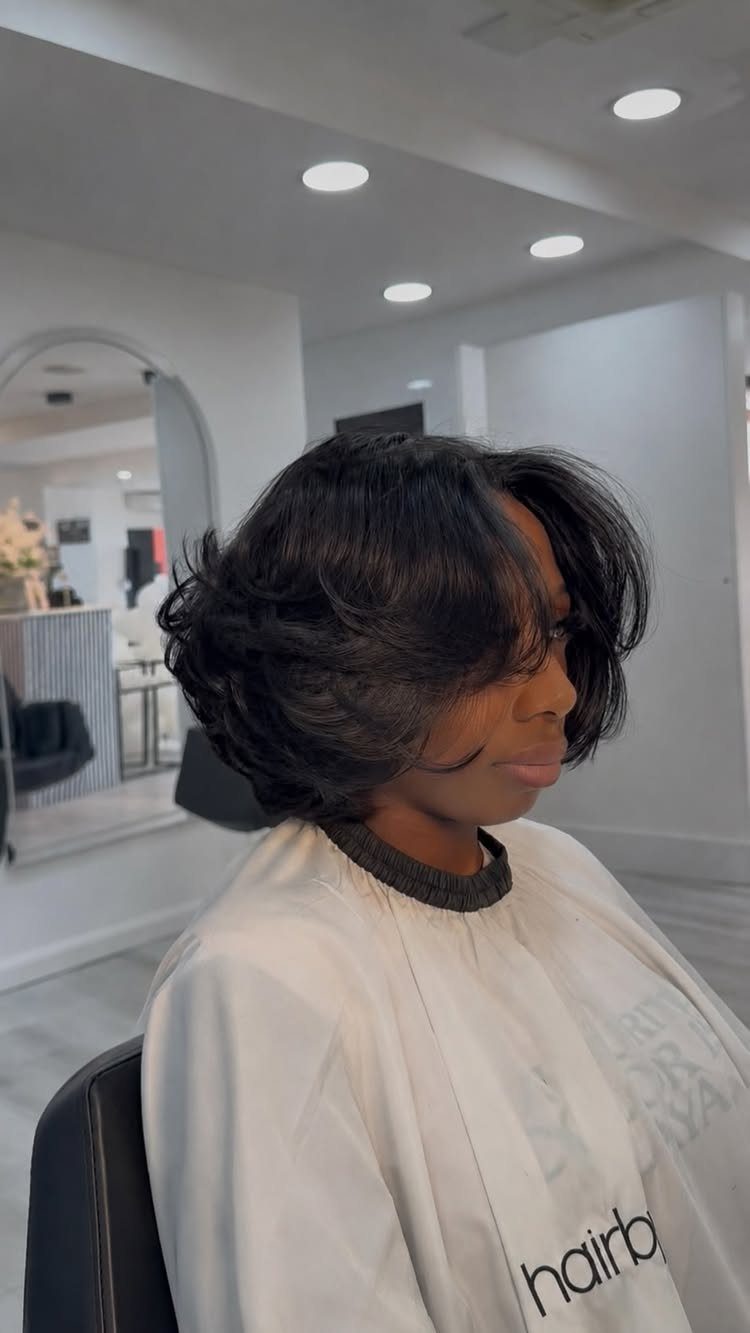
Layers cut into a bob give you lift at the crown and remove weight without losing the rounded shape a bob needs.
The shortest pieces sit near your face or part line, and the longest ones fall at or just above your jawline.
I tell the stylist to leave the perimeter clean instead of chunking it up, which keeps the shape from looking ragged.
If your hair is dense or coarse, more internal layering will help control volume. Fine hair gets better results with fewer, longer layers that add movement but keep enough weight to hold the shape.
2. Curly Pixie
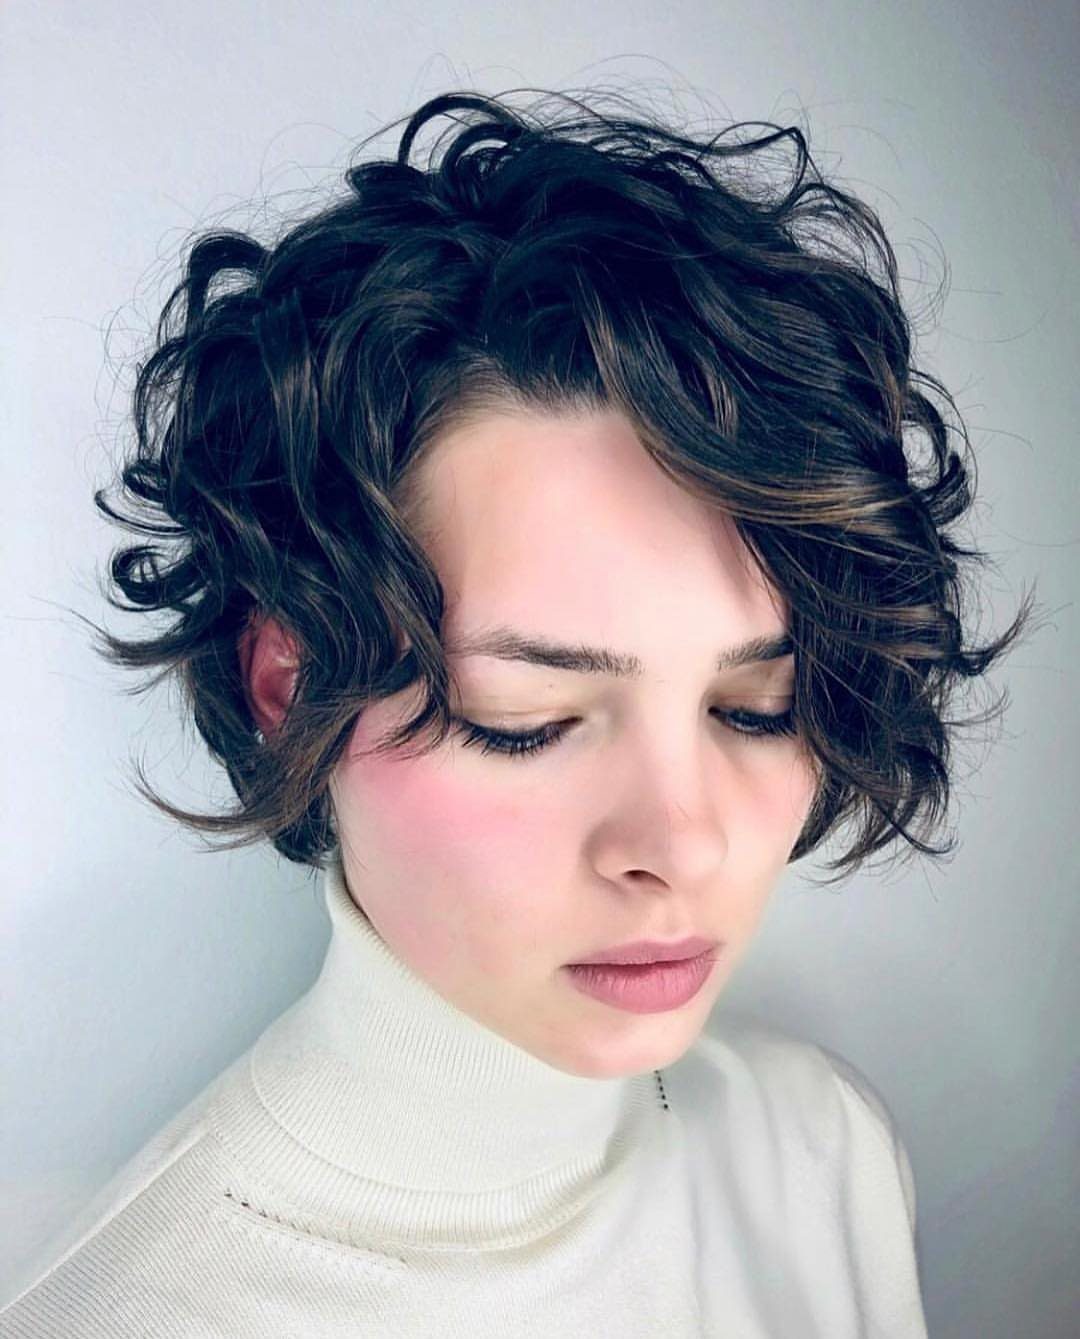
A pixie cut for curls keeps more length on top and cuts the sides and back closer to the head.
That contrast lets the crown curl freely while the shorter sections stay neat and show off your curl pattern without adding width.
The top section usually sits 2 to 3 inches long, enough to let a 3a or 3b curl form a full coil.
Tighter patterns need a bit more length to avoid shrinkage pulling the shape flat. Styling takes a leave-in conditioner and a light gel, scrunched in and air-dried or diffused for 5 minutes.
3. Curly Shag
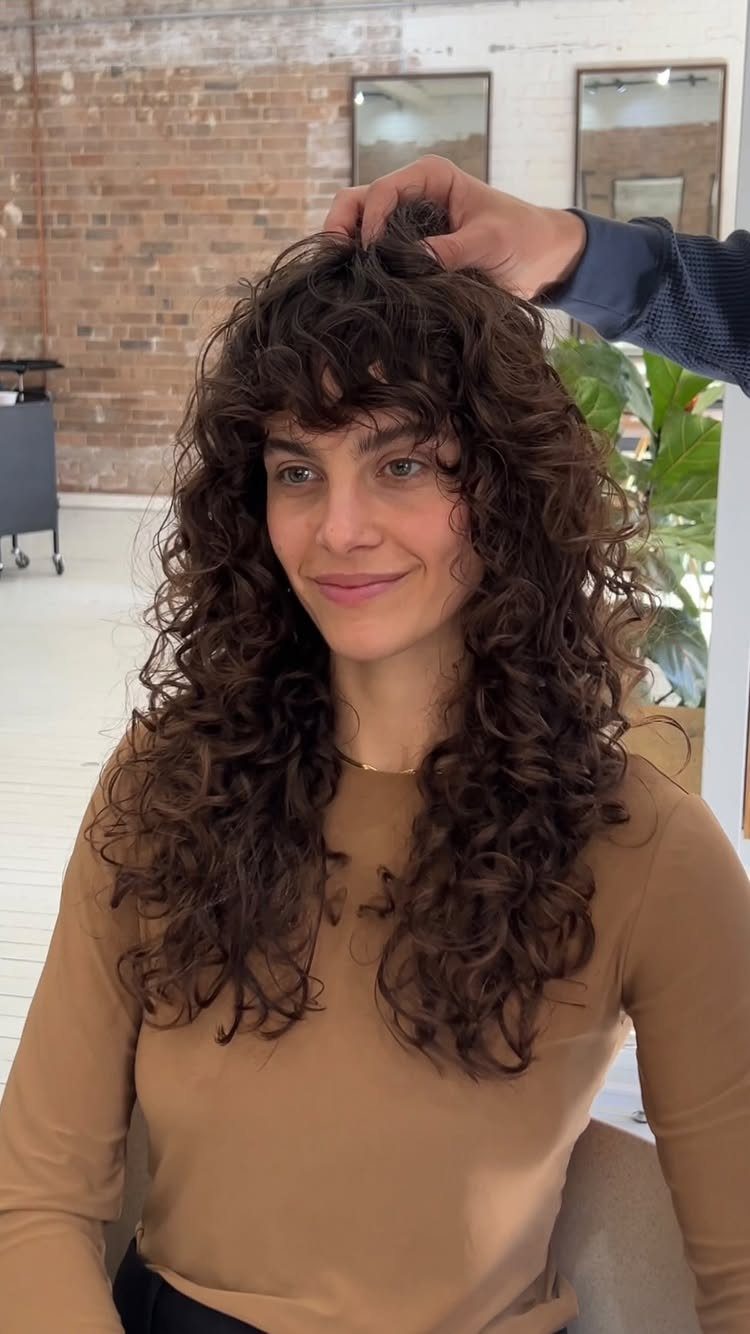
A shag spreads shorter layers through the crown, sides, and ends to create a looser, more lived-in shape.
Curls naturally separate along the layers, so you get more definition and less clumping. The cut works across curl types, but 2c through 3b patterns tend to show the most movement.
Upkeep is minimal: refresh with water and leave-in every 2 or 3 days, and plan for a trim every 10 to 12 weeks to keep the layers from blending back together.
4. High-volume Layered Curls

Layers cut to maximize lift start shorter at the crown and graduate longer toward the ends, creating a stacked effect that pushes volume outward and upward. The result is a big, full shape that emphasizes width and movement.
If your hair is fine or sparse, this much layering can look thin instead of full.
Fine hair may not have enough body to support the volume, and very coarse hair can get too much width unless the stylist thins the bulk at the same time.
Styling relies on a mousse or foam applied at the roots while your hair is soaking wet, then diffused upside down to set the lift.
5. Long Layers

Long layers take weight off without shortening your overall length. The top layers usually start around your collarbone or a few inches below, and the longest pieces reach mid-back or lower, depending on where you’re starting.
The cut reduces bulk and lets curls move separately instead of clumping into one heavy mass. If you have fine or low-density hair, ask for softer, more gradual layers so you don’t lose too much thickness at the ends.
Thicker hair can handle more dramatic layering, which helps control the shape and keeps it from looking triangular as it dries.
6. Curly Lob with Layers
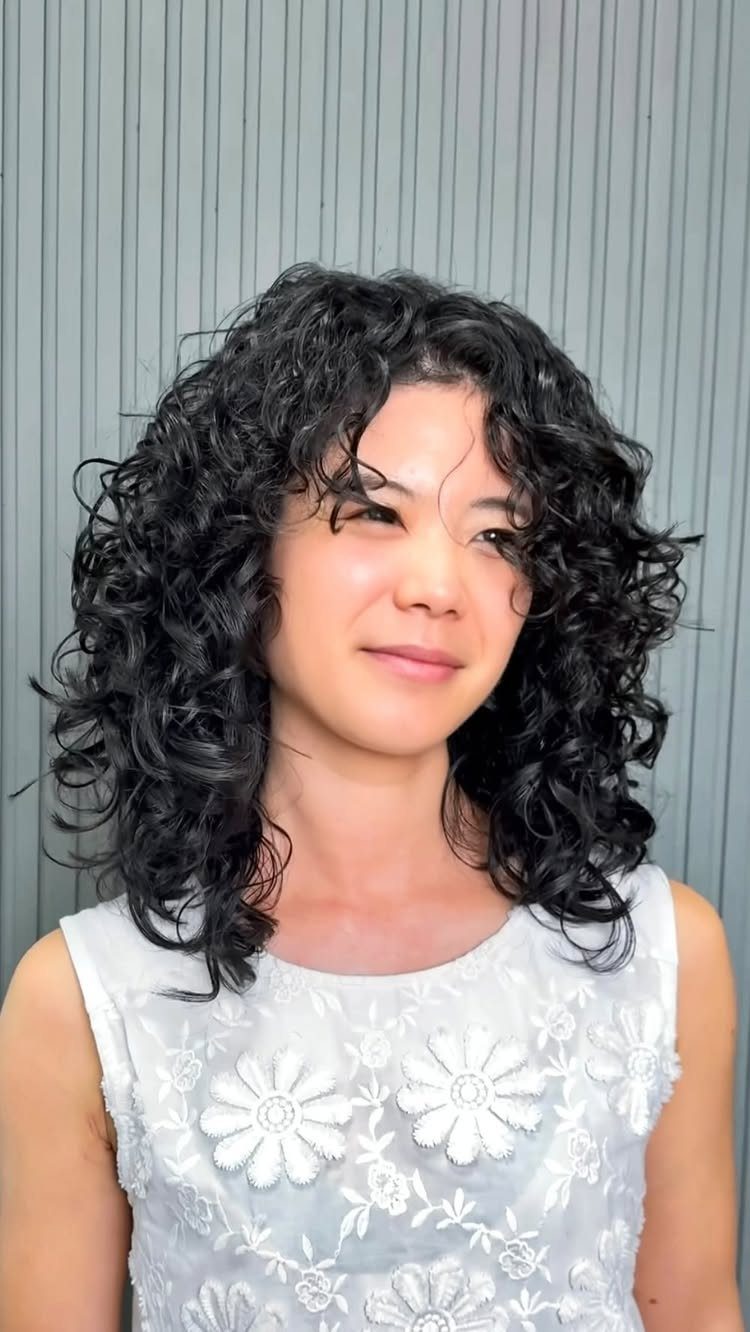
A lob falls somewhere between chin and collarbone, and adding layers gives you movement and shape without the weight of longer hair.
The layers are usually long and soft, starting a few inches from the top and blending through to the ends.
This length works well if you want a change but aren’t ready to go shorter than shoulder length. It suits most face shapes and curl types, though 3a and looser patterns tend to hold the shape best without extra styling.
Work a curl cream or gel through wet hair, scrunch it in, and let it air-dry or sit under a diffuser on low.
7. Curly Bangs
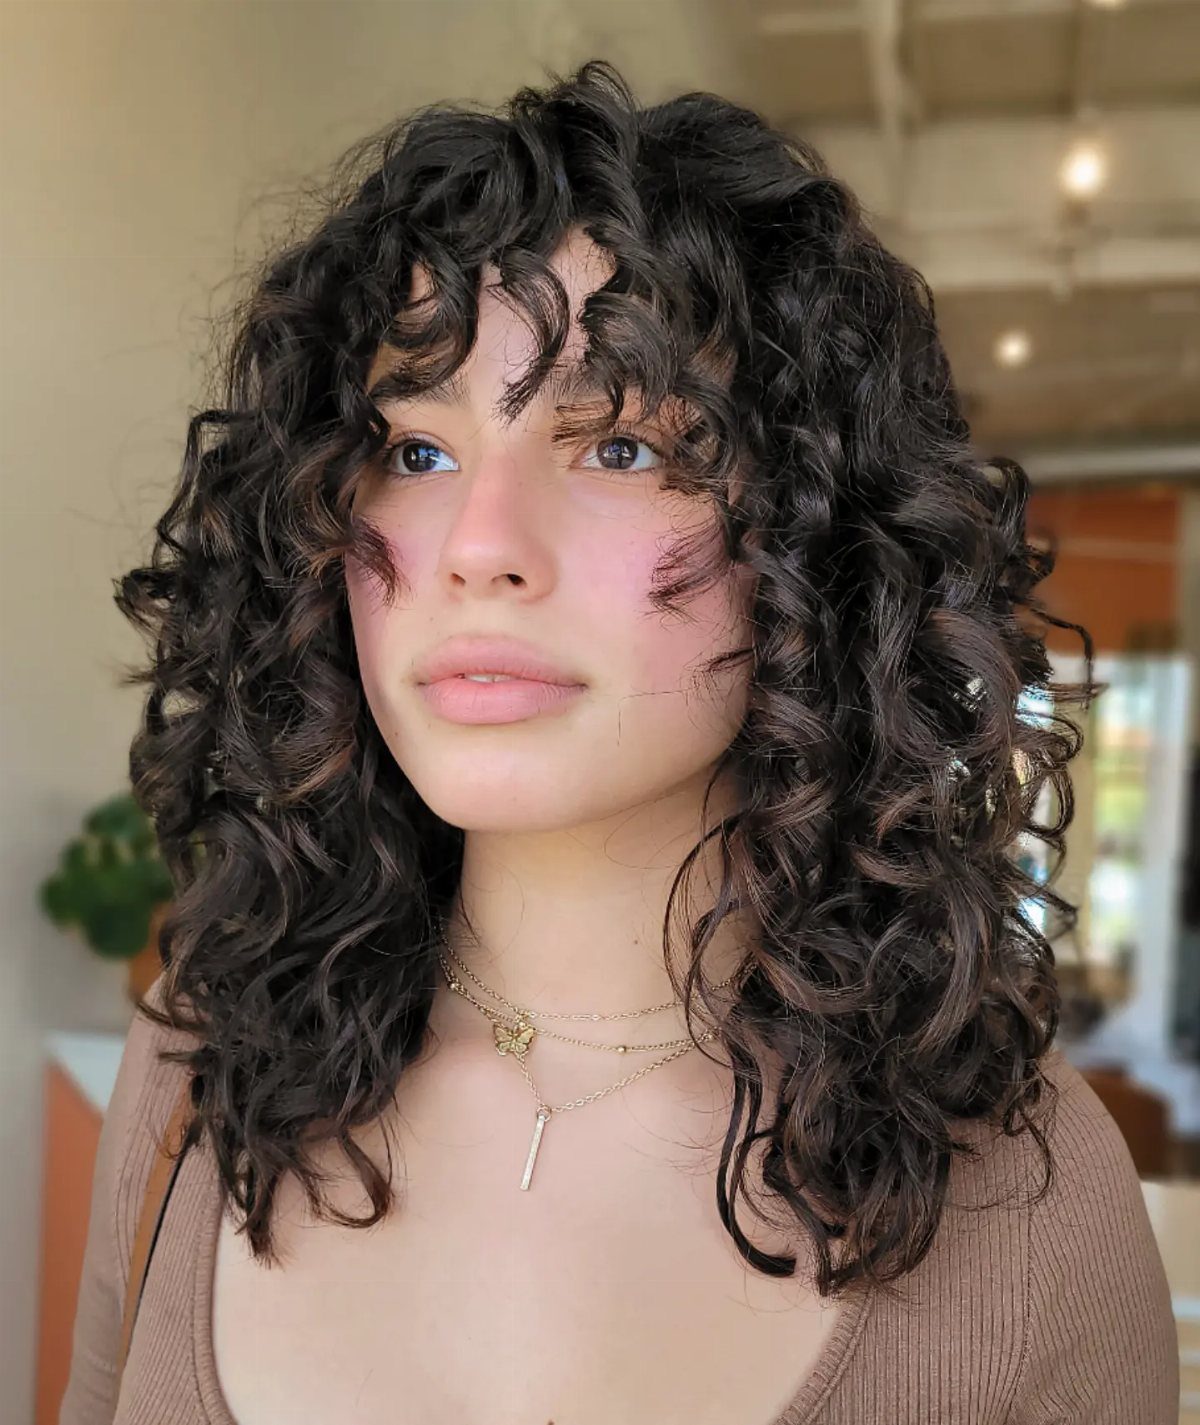
Bangs on curls work best when they’re cut as part of the layers, not added afterward.
Ask the stylist to blend the front pieces into the layers around your face so the fringe flows into the rest of the shape instead of sitting apart from it.
Cut them dry or with your curls in their natural state, since wet curls spring up and end up shorter than planned.
I’d go a little longer than feels right at first, because you can always trim more. Expect to refresh the bangs between full trims, since they lose their shape first.
8. Shaggy Bob
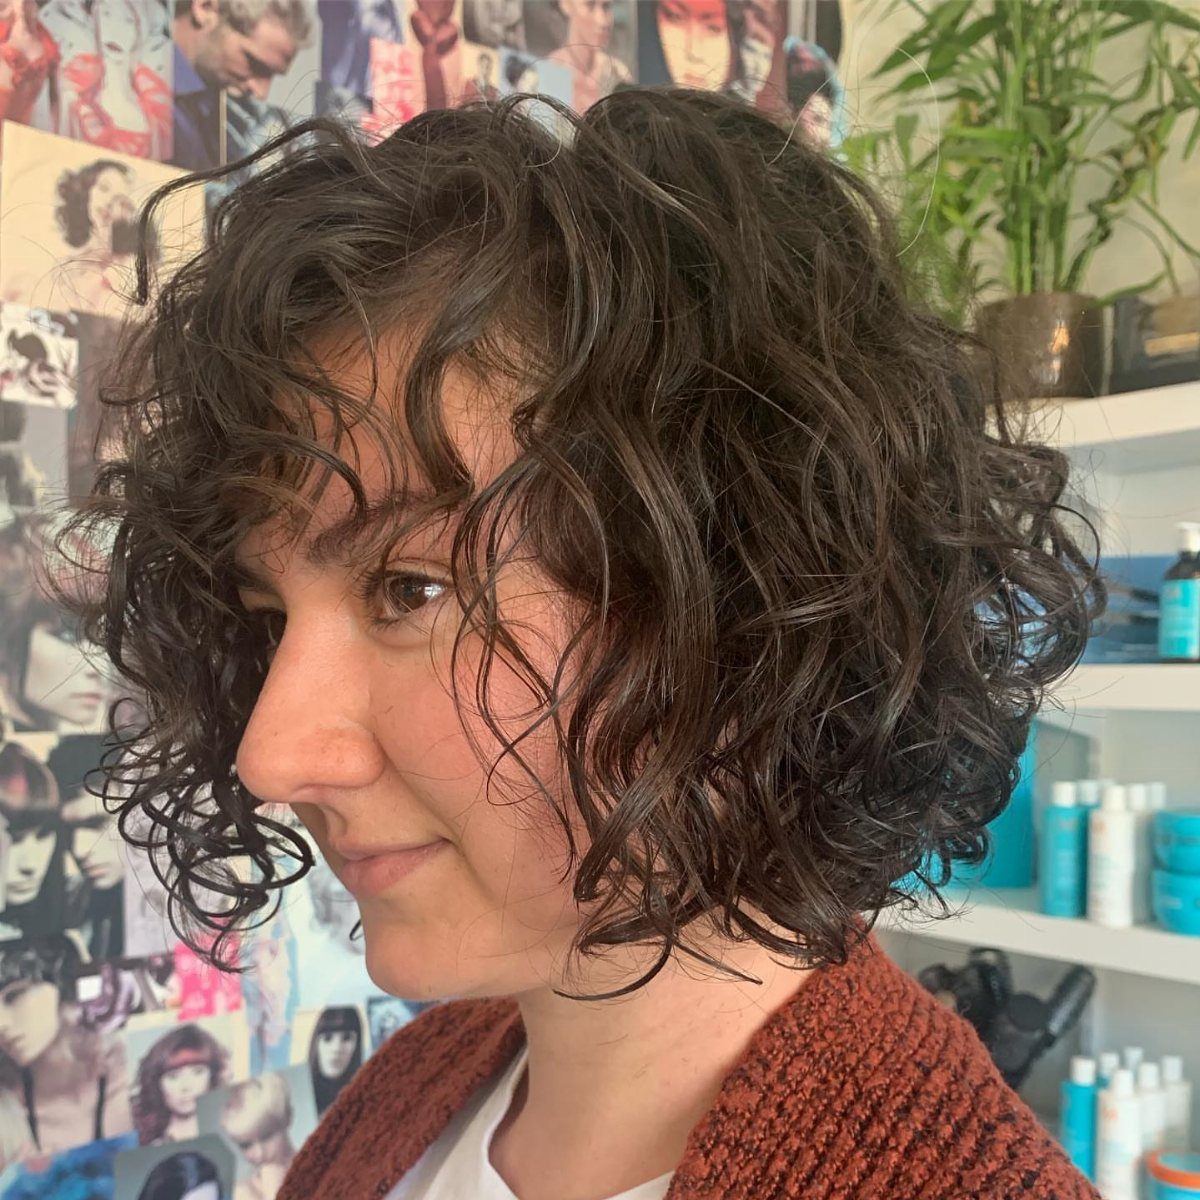
Short enough to feel light, layered enough to keep the shag’s texture: that’s what this bob-length version gives you.
Volume sits high on the head while longer pieces underneath hold the outline, so the shape reads full on top without ballooning at the ends.
Curls that grow outward more than down, like many 3b and 3c patterns, can turn wide fast at this length.
I’d ask the stylist to shape it dry so the width is controlled where it matters. Face-framing pieces help soften the front.
9. Rounded Curly Cut
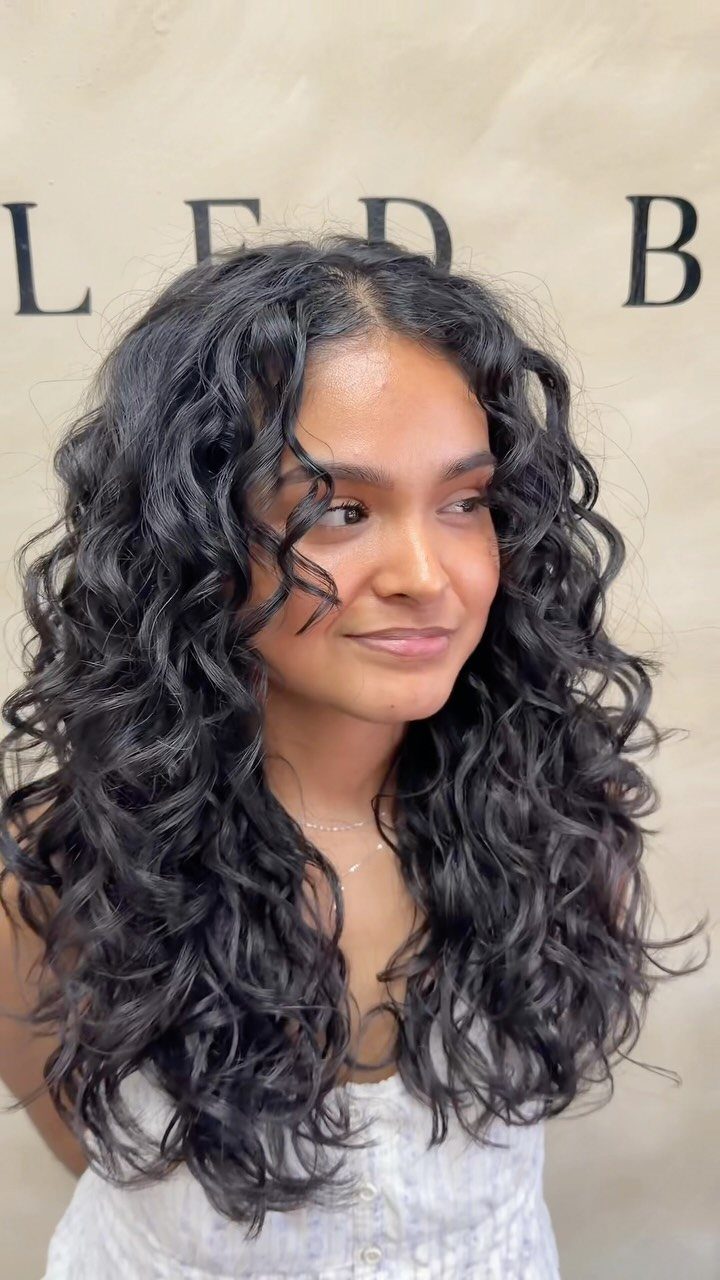
Round is the shape to name here: the stylist distributes length so no one side sticks out, and the curls form an even circle around the head.
Ask for layers that are cut with your curls dry and in their natural pattern, since the shape only works if it follows how your hair really falls.
Shrinkage is the thing to plan for, because curls dry shorter than they look wet.
Tighter patterns benefit from a bit of extra length before shaping. Diffusing with the head upright keeps the outline even instead of lopsided.
10. Light Layers for Fine Curls

Fine curls lose their fullness fast when layers get heavy-handed, so I’d keep the layering gentle and limited. A few soft layers add movement, while leaving enough length at the ends lets them keep their weight and bounce.
Tell the stylist you want to preserve density at the perimeter and avoid thinning shears, which can leave fine ends looking wispy.
Stay with a lightweight mousse or foam instead of heavy creams, which can flatten the curl pattern. The cut grows out gracefully because the layers are so subtle.
11. Curly Cut with Side Bangs
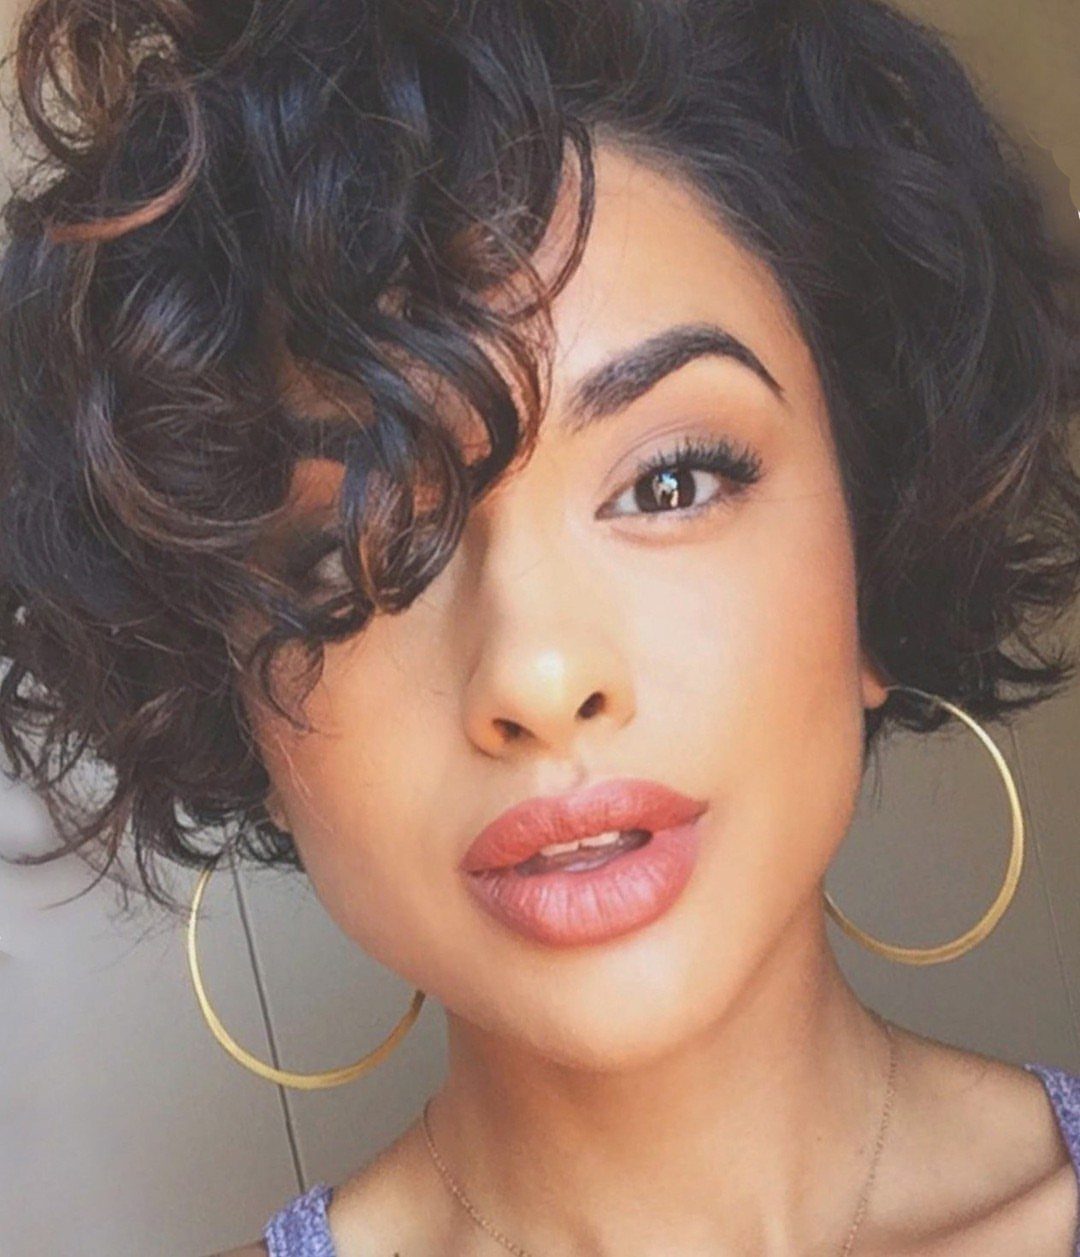
Side bangs are the easiest way to soften a curly cut without committing to a full fringe. They sweep across the forehead and blend into longer layers, which makes the shape look intentional as it grows.
Ask for them cut longer than you want to wear them, since curls spring up as they dry. Define them separately with a small amount of gel, finger-coiled or smoothed to the side, so they hold their direction.
I like this for anyone who wants a frame around the face but dislikes how a straight-across fringe reacts to humidity.
Plan the Cut Around Shrinkage
Before the stylist cuts the crown, temples or face-framing pieces, agree on the shortest point each one can reach once it’s dry.
Say it in plain terms.
Not every curly cut has to be done fully dry, because stylists work wet, dry or a mix of both.
Match Layers to Density and Shape
Layers redistribute hair; they don’t add any. A reference photo with huge styled volume can hide that fact.
If your perimeter is very dense and the bottom dominates the whole shape, go the other way. More internal weight removal or more visible layering can balance it.
Styling and Maintenance Routine
A layered cut asks for more consistent styling than a blunt one, because the shape depends on each section behaving.
Bobs and pixies sit closer to 6–8 weeks, while longer layers can stretch to 12.
Grow-out looks different depending on your style. Wash-and-gos show an uneven outline as sections spring up at different rates, and blown-out curls hide that better.
Between trims, deep condition weekly and keep heat occasional. At night, pineapple your curls under a satin or silk bonnet.
Frequently Asked Questions
Are layers good for curly hair?
Yes, as long as the stylist cuts them to suit how tight your curl is and how much hair you have.
Layers take off the bulk that drags curls flat, so they spring up, move separately and show their shape more clearly. Layers cut in the wrong spots show up as frizz, thin patches or a pyramid-shaped outline.
What’s the best layered cut for type 4 hair?
Layered tapered curls and a high-volume layered cut both work well for 4a through 4c.
On type 4 hair, layers let each coil spring up in its true shape and remove the bulk that pulls the pattern down. Tighter patterns shrink a lot, so leave some extra length before the stylist shapes the cut.
How to style really layered hair?
Match the routine to the cut. For big, lifted layers, I’d work foam or mousse into the roots while hair is dripping, then diffuse with your head flipped over so the lift sets.
How to curl big curls?
Start with a cut that has shorter layers at the crown and longer ones toward the ends, which pushes volume up and out.
From there, press foam or mousse into the roots of dripping hair and diffuse with your head upside down.
This works best on thick hair; fine or sparse hair may not have the body to hold that much volume and can look thin.
How often do layered cuts need maintenance?
Bobs and pixies sit closer to 6–8 weeks between trims, while longer layers can stretch to 12 weeks.
Shags tend to hold their shape for 10–12 weeks. Deep conditioning once a week and only occasional heat styling keep the shape looking right between cuts.
Can I do layered cuts myself at home?
It’s not recommended. Curls are cut differently from straight hair: specialists typically work dry, section by section, with point-cutting, and the technique takes plenty of practice to get right.





