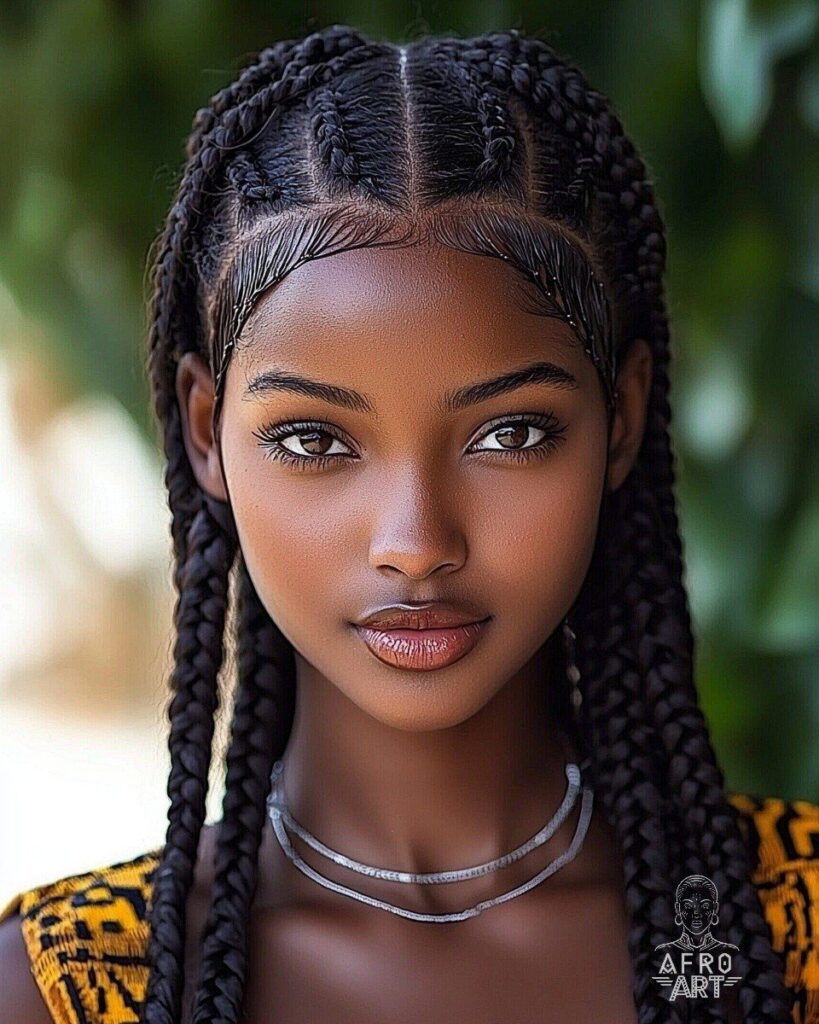
Time in the chair and weight on your scalp separate these braided styles more than looks do: jumbo box braids sit light and go in fast, while thin micro braids mean a full day of sitting and goddess braids drape longer.
Your hair’s density and scalp tenderness decide which one is yours, since braid size and the amount of extension hair should fit what your hair can hold.
1. Box Braids
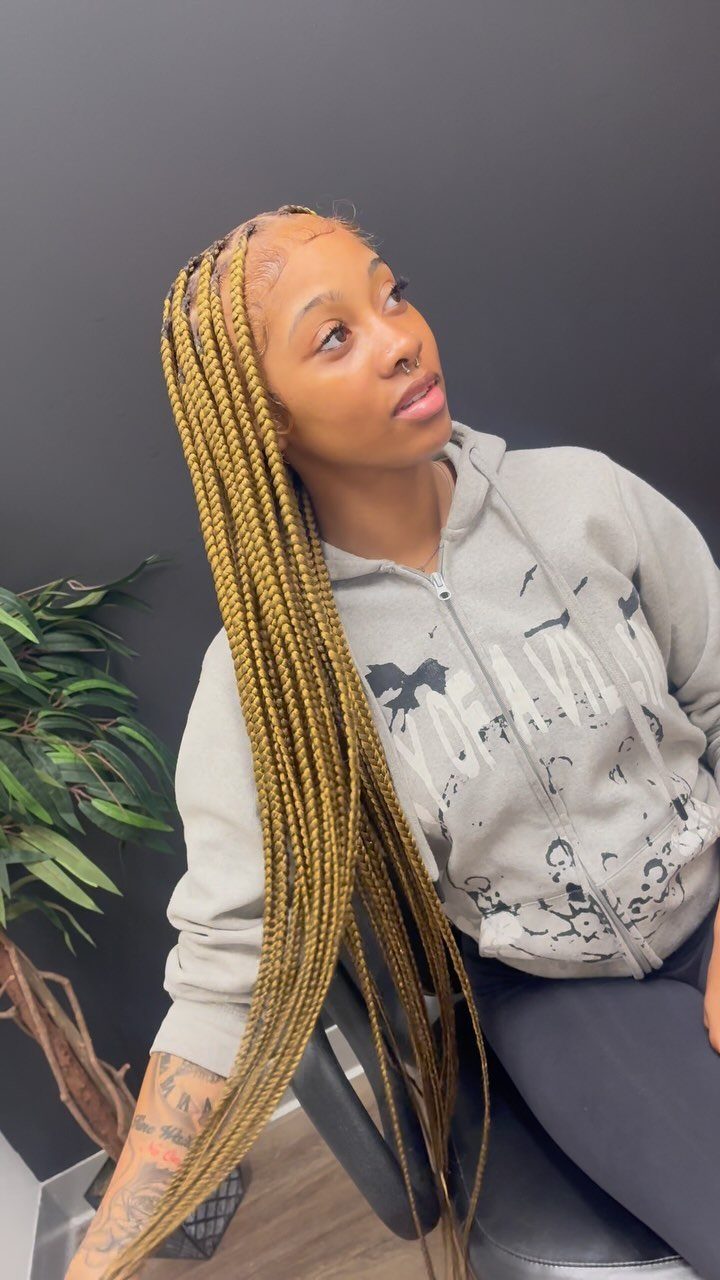
Square or checkerboard parts are what make box braids what they are, and they give each braid its own base instead of letting sections blend together.
Clean, even parting matters more than anything else here, because crooked lines show up at the scalp for the whole wear time.
Golden-blonde braids over darker roots add color with no bleach on the hair underneath, since the shade comes from the extension hair. Ask for the parts to be sized the same all over, or the look turns patchy.
2. Fulani Braids
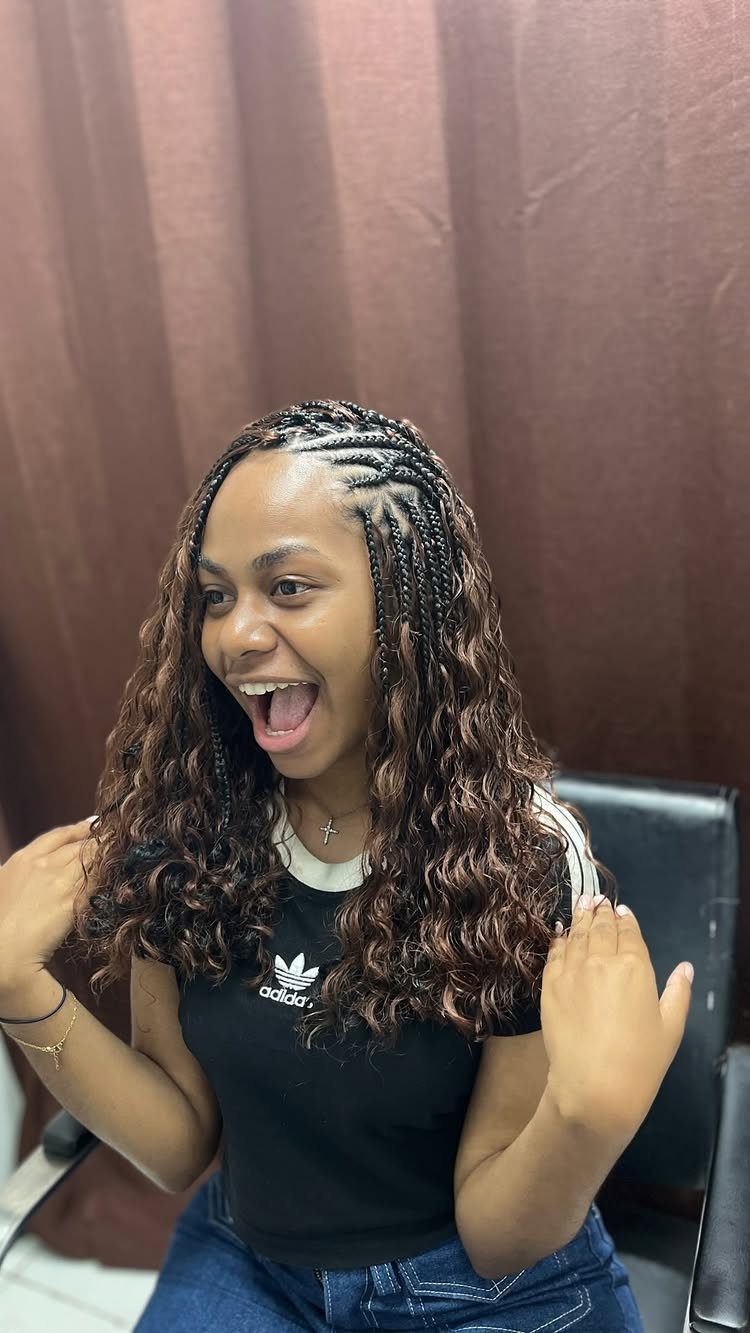
The Fulani layout has 3 parts: one cornrow down the center from front to back, smaller cornrows on either side, and loose braids hanging free.
Curly pieces at the ends soften the hard lines of the cornrows and give the style a lighter finish.
For a salon visit, ask for the center braid first, then say how many side cornrows you want. Photos help, since stylists vary the pattern a lot.
My pick is to keep the hanging braids long enough to move, because short ones lose the whole point of the style.
3. Knotless Braids
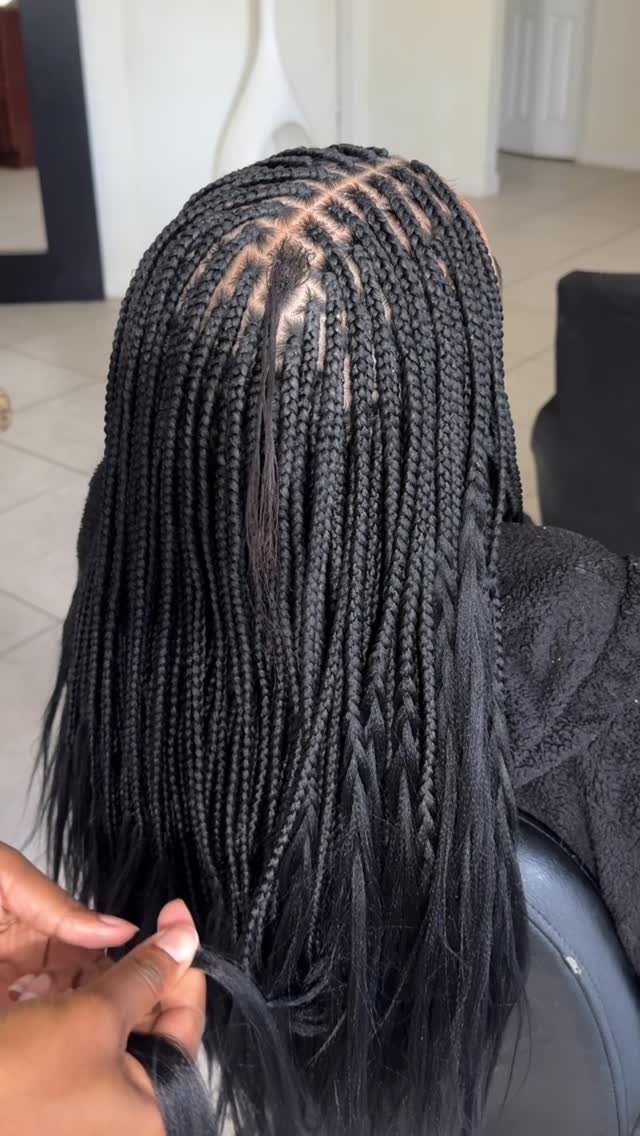
Knotless braids begin with only a section of natural hair, and the extension hair is fed in a little at a time as the braid goes down.
That means no bulky knot sitting at the root, so the base looks flat and natural.
Ask for this by name when you book, since it is a different technique from standard box braids. If a knotted base pulls at your scalp, I would choose knotless every time.
4. Cornrow Ponytail
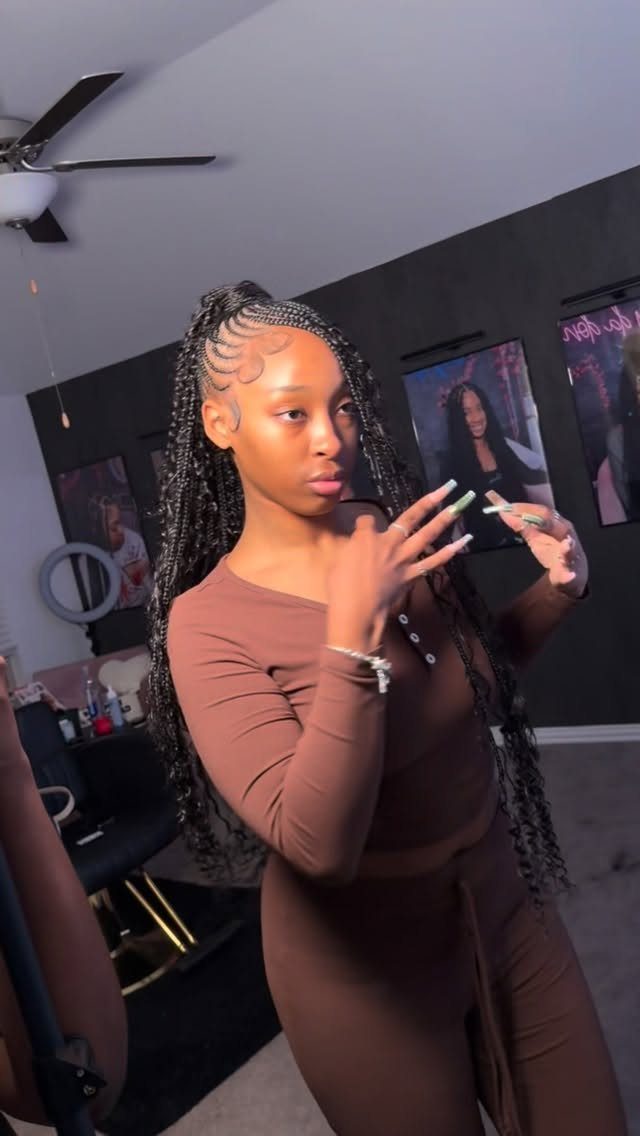
Pulling cornrows from the front hairline toward the back and gathering them into one long braided ponytail gives a clean, lifted shape with no loose hair to manage.
Curved front rows add shape along the forehead without changing the basic build of the style.
Mornings are easy: the ponytail is already set, so you only need to smooth the edges. Decide ahead of time where the ponytail should sit, high or low, because the rows are braided toward that point.
The pull-through effect is actually an illusion achieved by ponytails. Secure your hair into separate ponytails first to keep everything under control.
5. Jumbo Box Braids
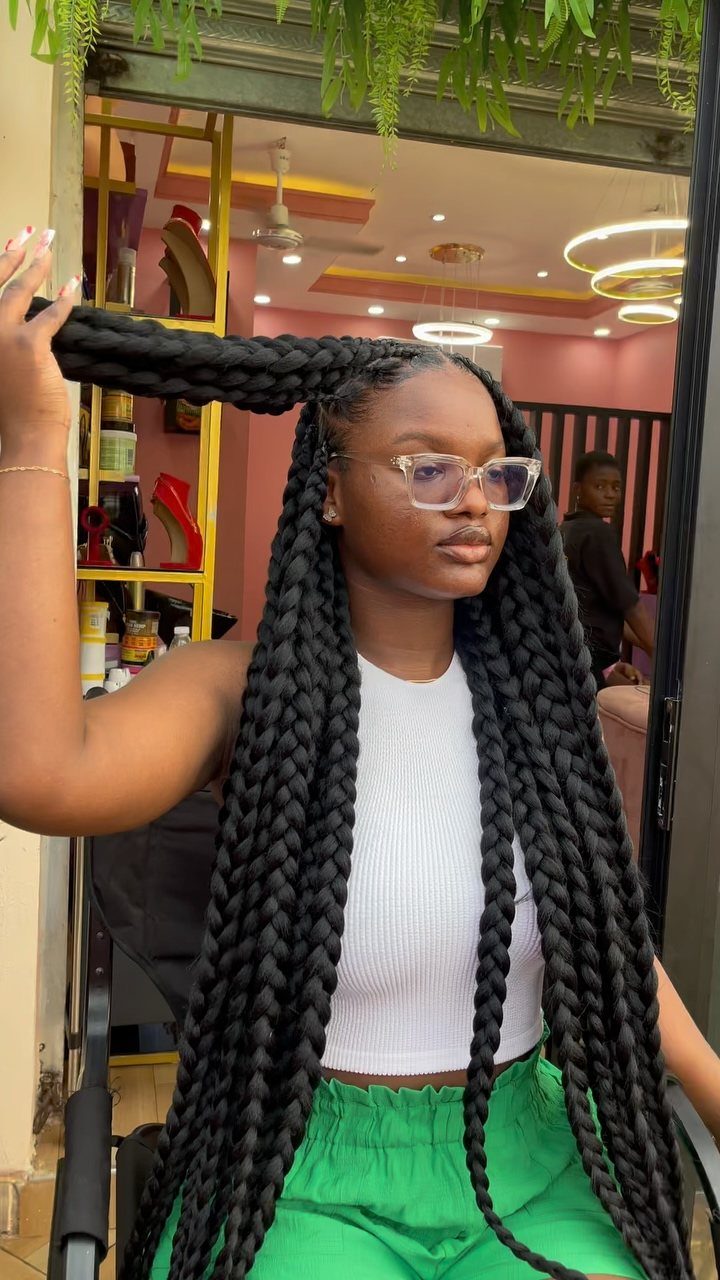
Large, chunky sections are what make jumbo box braids jumbo. Fewer braids means fewer parts, so the install goes faster than with smaller sizes, and the look is bold.
Thick braids carry real weight, so ask your stylist about the tension at the root, especially if your scalp is tender. I like them on someone who wants a big look without a long sit in the chair.
The cost is less styling variety, since chunky braids do not twist into elaborate updos as easily.
6. Boho Braids
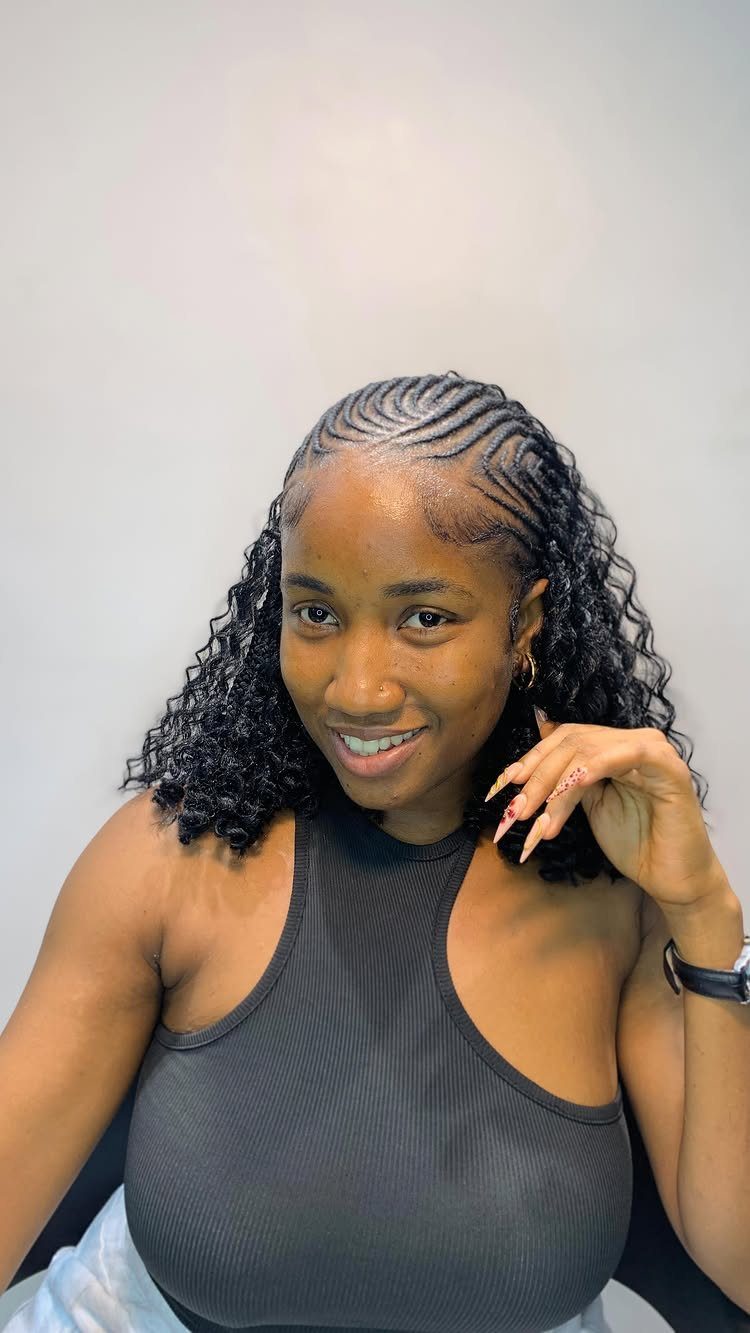
Cornrows flowing into long braids, with loose curls left out or added through the braids, give boho braids their soft finish. The cornrows give structure at the top, and the curls take away the stiff, polished feel.
Ask your stylist whether the curls will be natural hair or added curly pieces, because that changes both the look and the care.
My preference is curls added to the braid ends, which keeps the style consistent from root to tip.
Loose curls tangle more easily than smooth braids, so plan on gentle upkeep.
7. Varied-Sized Braided Ponytail
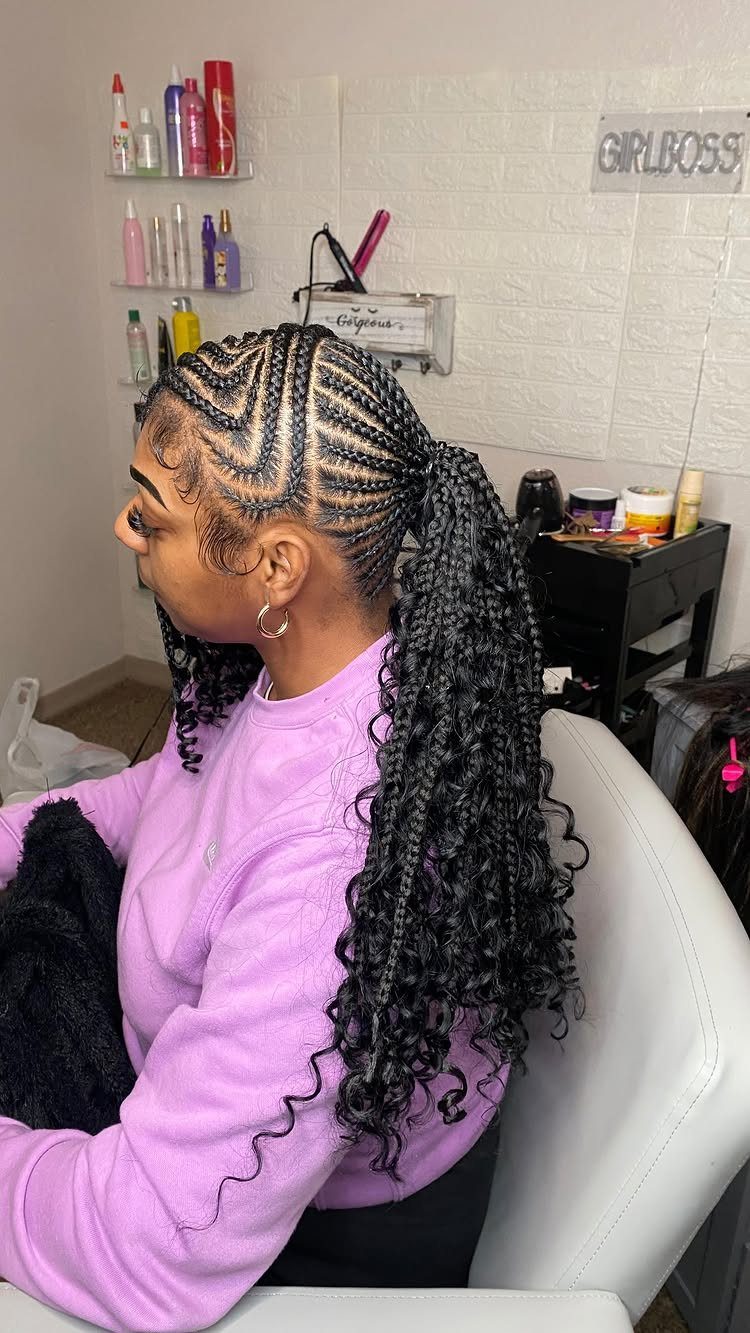
Mixing a few large braids with smaller cornrows gives this ponytail contrast that a single braid size can’t. The cornrows hold the shape at the front, and the long curly extensions at the ends add movement.
Ask your stylist where the big braids should land, since the size change is what makes the design read clearly. I like the thick sections placed toward the center so the smaller rows frame them.
8. Braided Bun
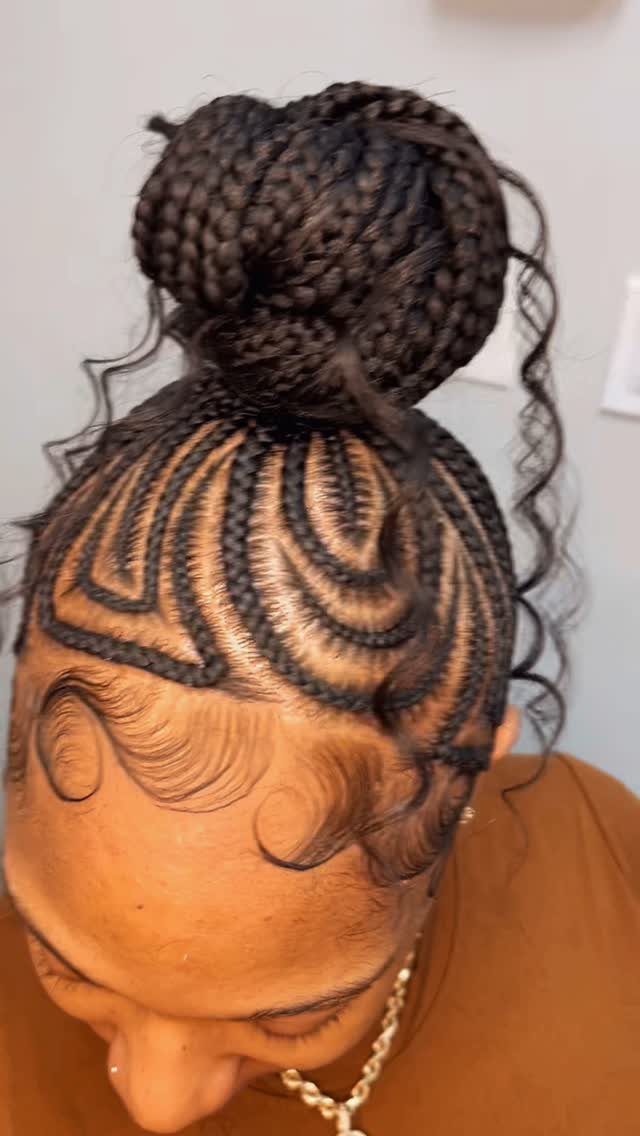
Curved cornrows that gather into one large braided bun on top of the head make a tidy, high shape with nothing hanging down the back.
A few loose curls left out at the sides soften the look and sit along the cheeks and temples.
For a salon visit, say where the bun should sit and how the rows should curve toward it, because the braiding direction is set from the start. Edges styled neatly finish it off.
My pick is a bun placed high, which shows off the cornrow pattern best.
9. Stitch Braids
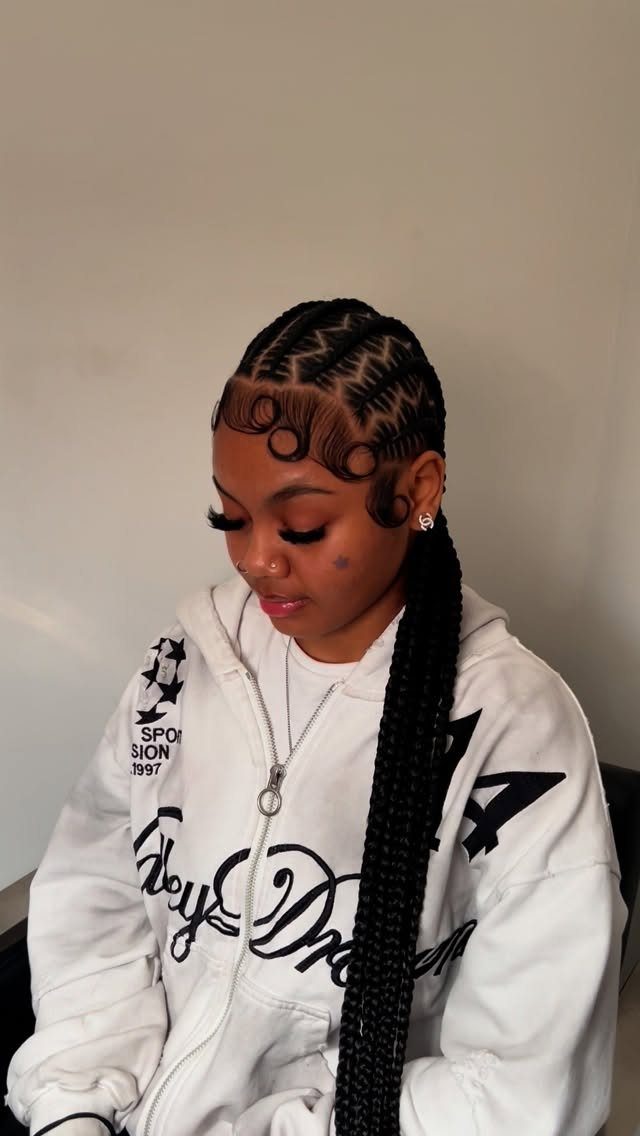
Stitch braids get their name from the neat, visible lines that separate each cornrow, like stitching along the scalp. Alternating thick and thin rows adds even more pattern.
Show your stylist a photo and say whether you want the rows all one width or mixed, since the spacing is the whole look. Straight, clean parting matters here, because every line stays on display.
Long braids can sweep over one shoulder, as here, or hang straight back. I would pick the mixed widths for more detail.
10. Side-Swept Braids
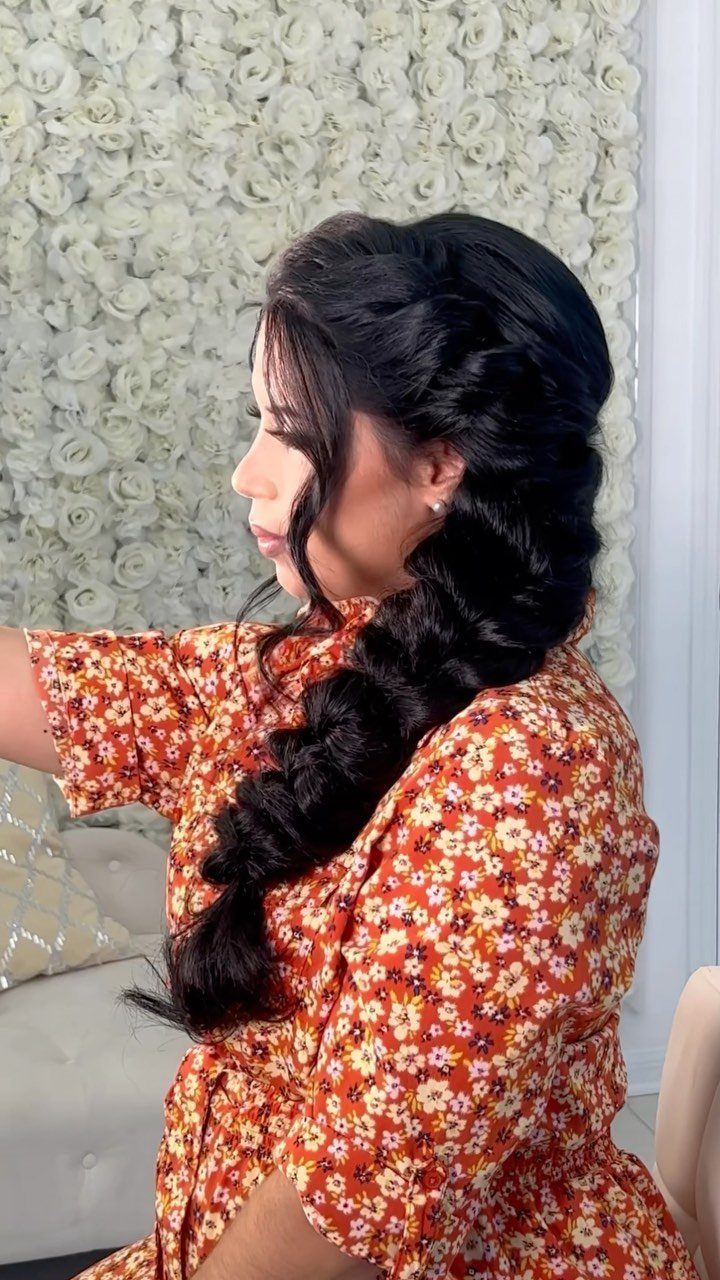
A single thick braid pulled over one shoulder is about as simple as a braided look gets. Because everything falls to one side, the style shows off length and keeps hair off the back of the neck.
Decide which shoulder you want before you start, then braid toward it so the weight sits naturally. Mornings go fast: gather, braid, and smooth the top.
Wear it with a neckline that leaves the shoulder visible, and the braid becomes the focal point. For me, a fuller, thicker braid always looks better than a thin one.
11. French Braid
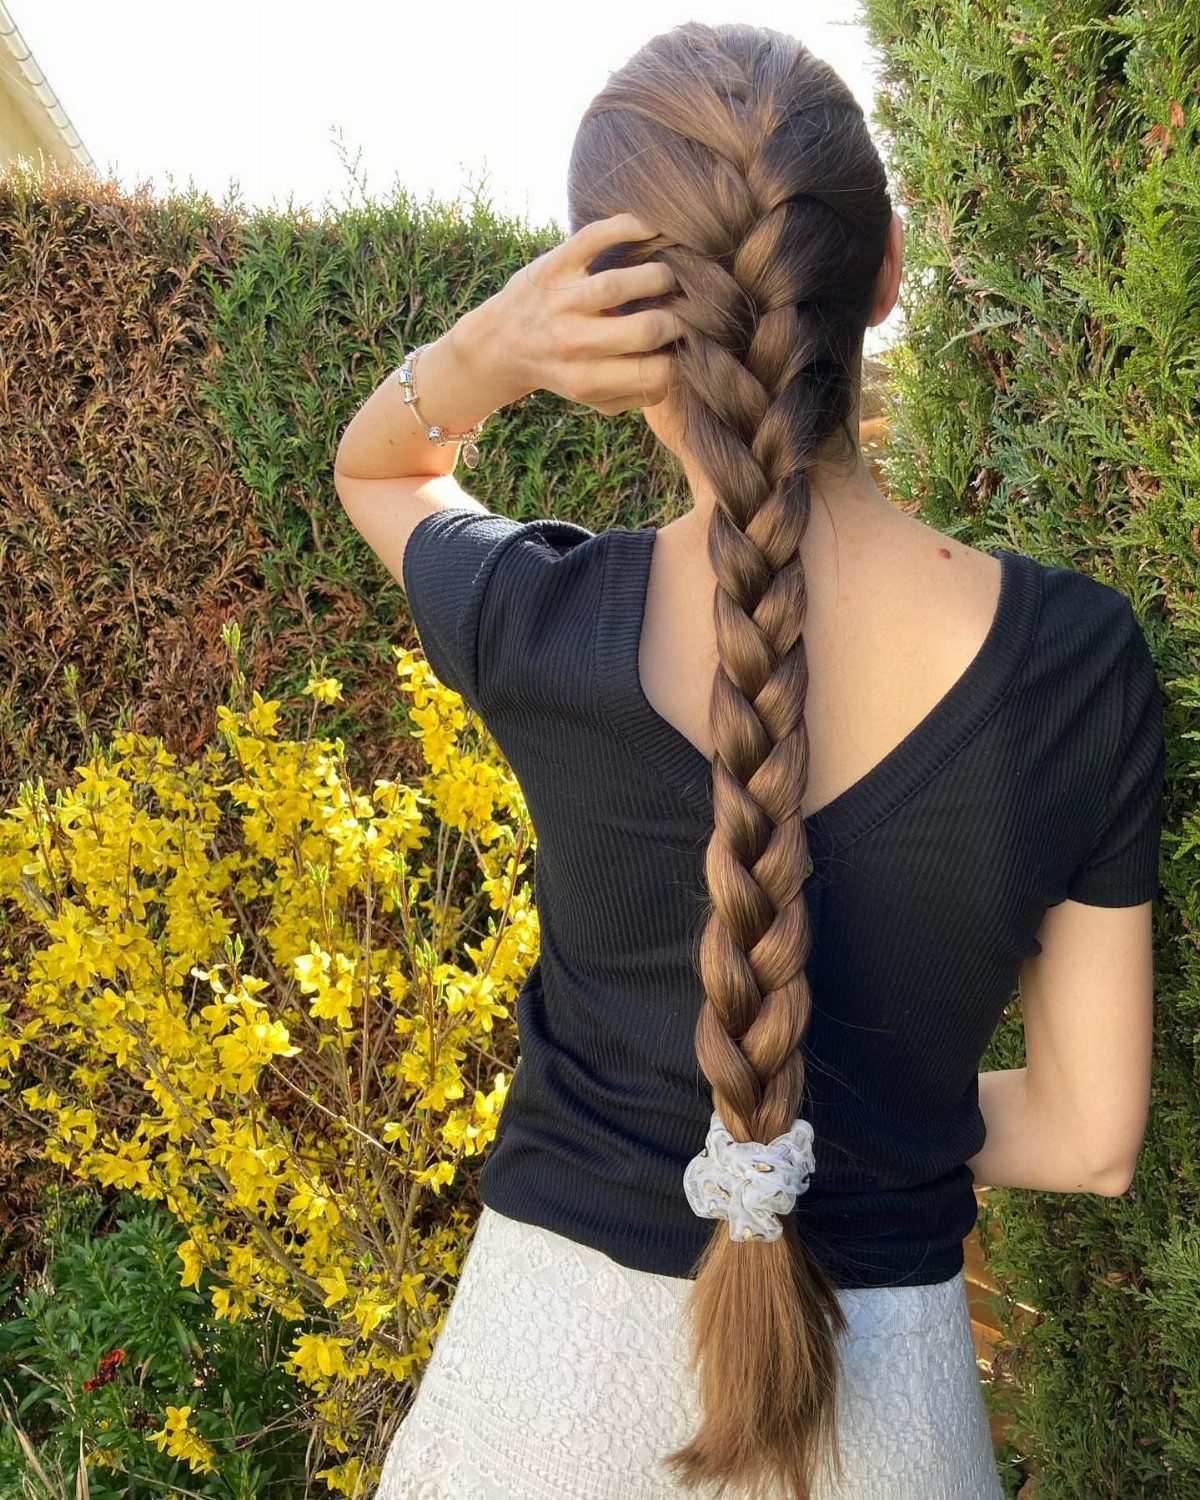
Starting at the crown and adding hair from both sides as you go, a French braid stays flat against the head and finishes as a standard three-strand braid down the back.
A scrunchie at the end holds it without a harsh elastic.
Keep each added piece about the same size, or the braid turns lumpy. Pull gently, especially near the temples, so your scalp isn’t strained.
It suits hair with enough length to braid cleanly. Braiding on slightly stretched hair makes the pattern easier to see.
12. Dynamic Side-Swept Cornrows
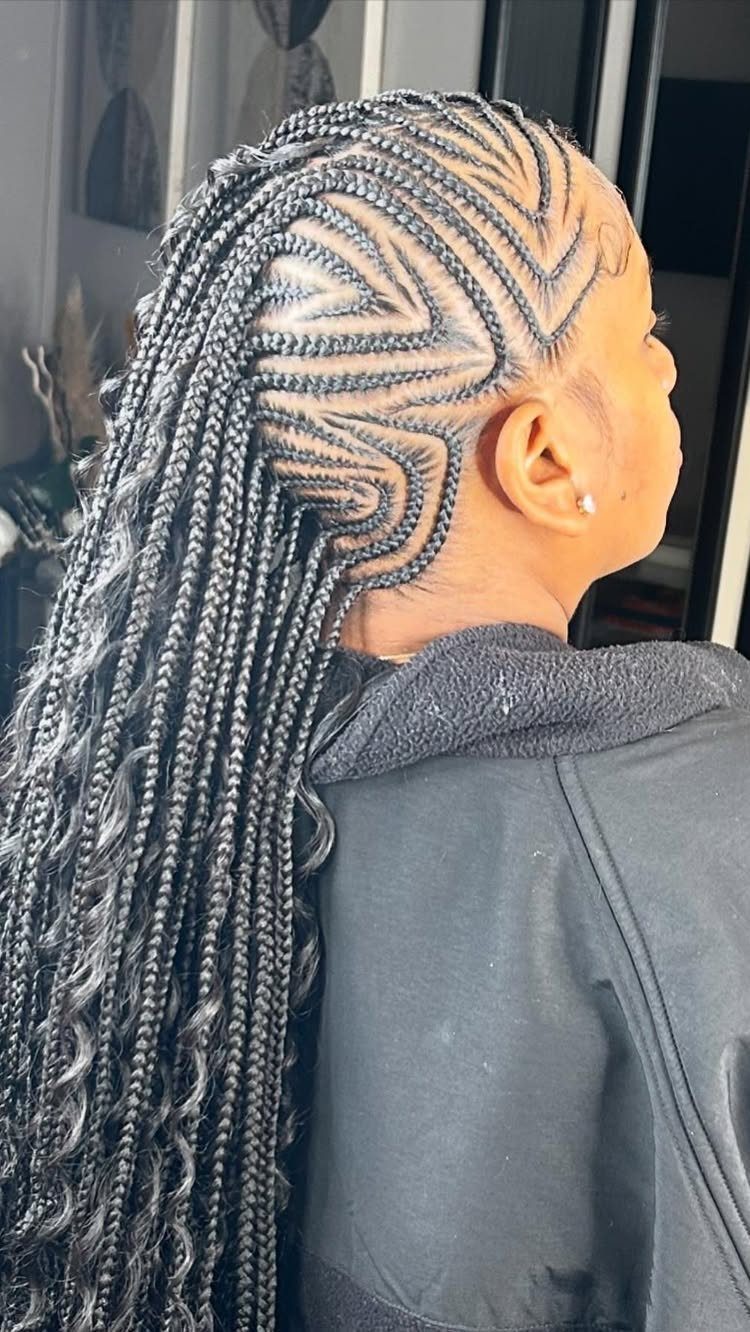
Cornrows that curve and sweep toward one side before turning into long, thin braids make a design that is personal to each head. No 2 layouts match, so the pattern is what you are really booking.
Bring a photo and tell your stylist which side the rows should flow to, since that decides the whole direction. Expect a longer sit than with simple straight-back rows, because curves take more care.
I like the contrast between smooth cornrows at the top and thin braids falling below.
13. Two-Strand Twist Half-Updo
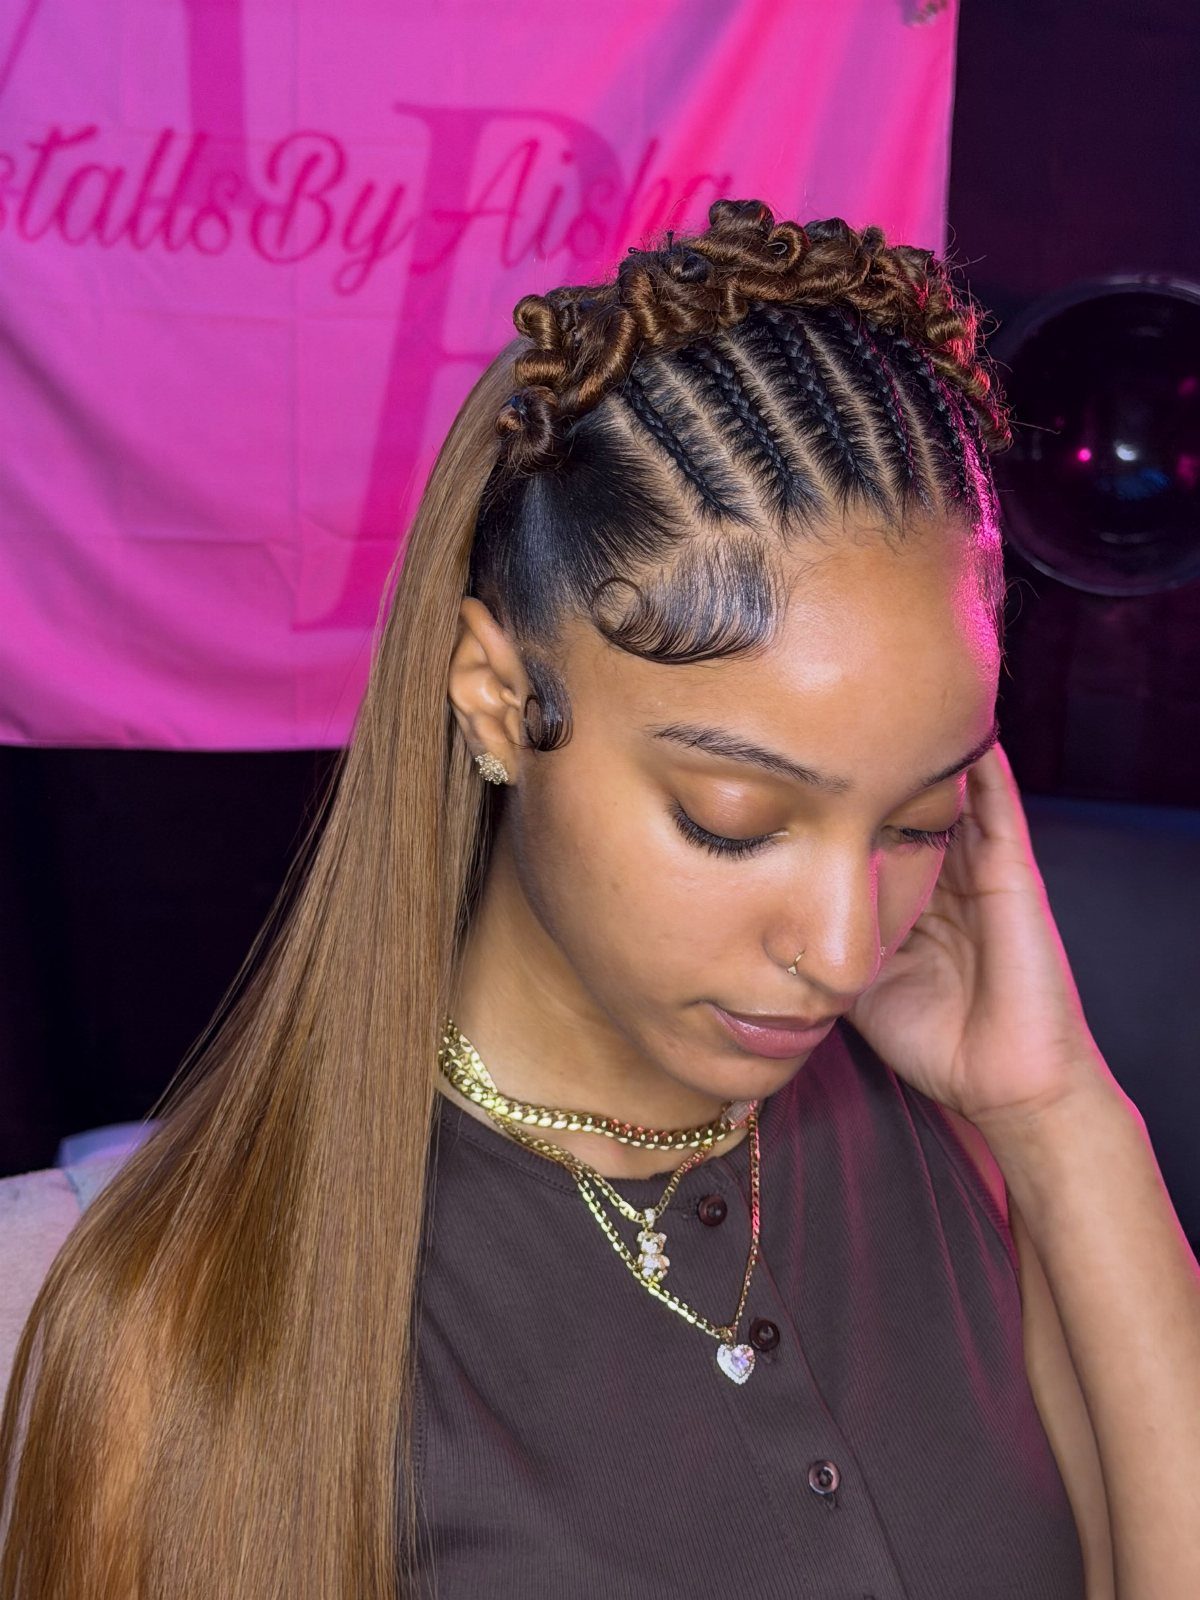
Side cornrows that run into a plush two-strand twist at the top make a half-up mohawk shape, with the rest of the hair left long and loose below. The twist adds volume where cornrows alone lie flat.
Ask your stylist how tall the twist should stand and where the cornrows should end, since those 2 choices set the shape. I like the contrast of tight rows against a full, soft center.
A photo of the exact height you want saves guessing.
14. Braided Bob
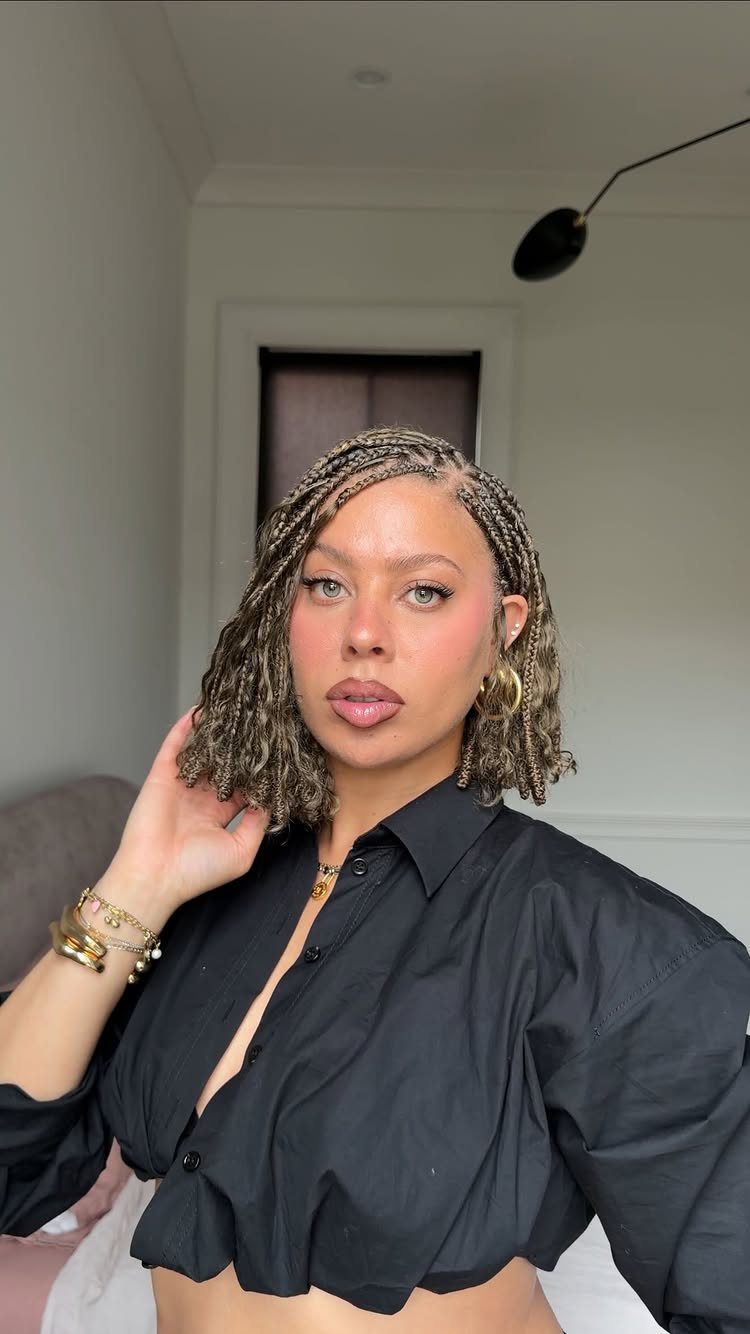
Thin braids cut or styled to bob or lob length frame the face and stop at the shoulder, so there is far less weight than with waist-length braids.
Shorter braids also stay out of the way when you work out or sleep.
Tell your stylist which length you want before the install, because trimming the ends afterward is how the shape gets set. Blunt ends look sharpest.
For me, a lob that just grazes the shoulders is the easiest length to wear.
15. Ghana Braids
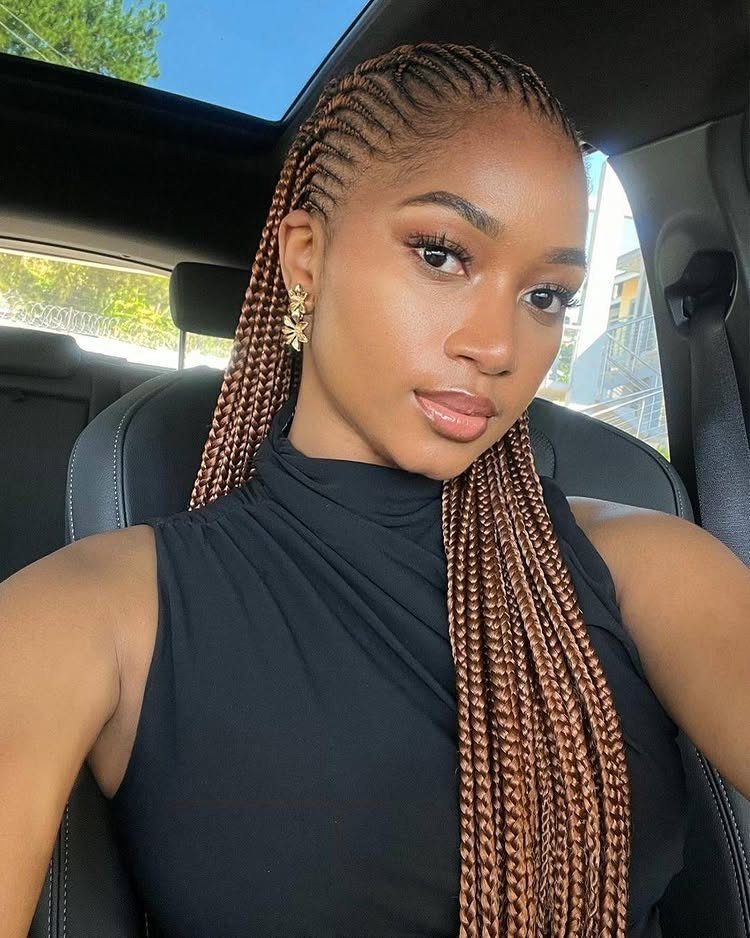
Ghana braids are feed-in cornrows: extension hair is added over the top of each braid in small pieces, so the rows start thin at the hairline and build up as they go back.
That gradual build gives a smooth, natural-looking front.
Ask for feed-in cornrows by name, and say whether you want straight-back rows or a curved pattern. Straight-back is the simplest to wear and to explain.
I would pick longer rows, since the length shows the raised shape of each braid.
16. Senegalese Twists
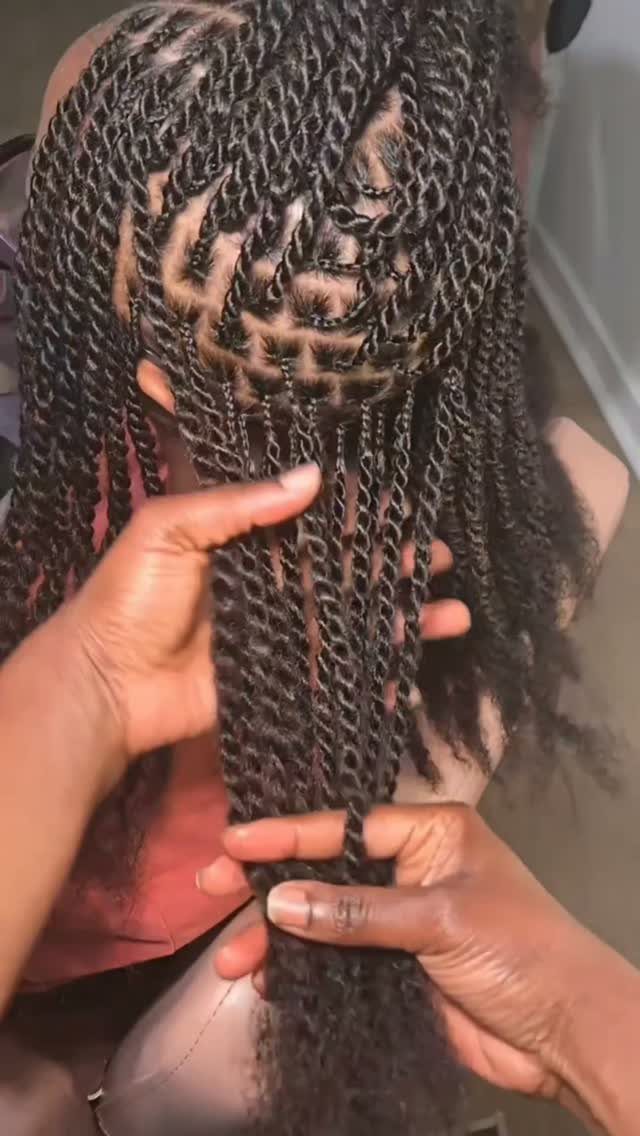
Senegalese twists use two strands twisted around each other, not the three-strand pattern of a braid, so each twist looks rope-like and smooth. Part cleanly at the scalp, since each section shows through the finished style.
Name the style as twists when you book, so the stylist doesn’t default to braiding. Ask for the same section size all over, which keeps the finish uniform.
I prefer long, slim twists; they hang with more movement than thick ones.
17. Braided Cornrow Updo
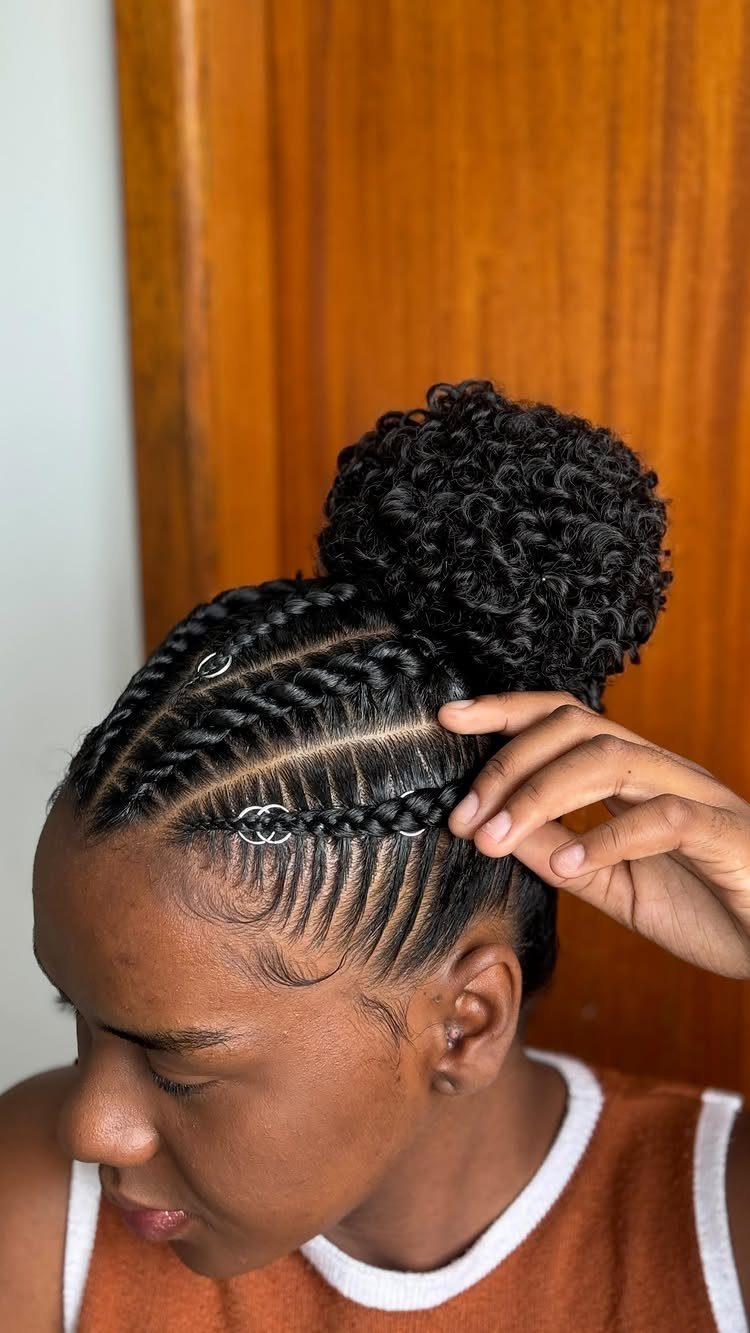
Large cornrows swept up and gathered into one high bun give a bold, raised shape, and hair cuffs wrapped around the bun add a metallic finish with no extra braiding.
Larger rows mean fewer of them, so the sit is shorter than with small ones.
I like silver cuffs against dark hair; cuffs slide on at home, so you can swap them whenever you want a different look.
18. Box Braids Cornrow Mohawk
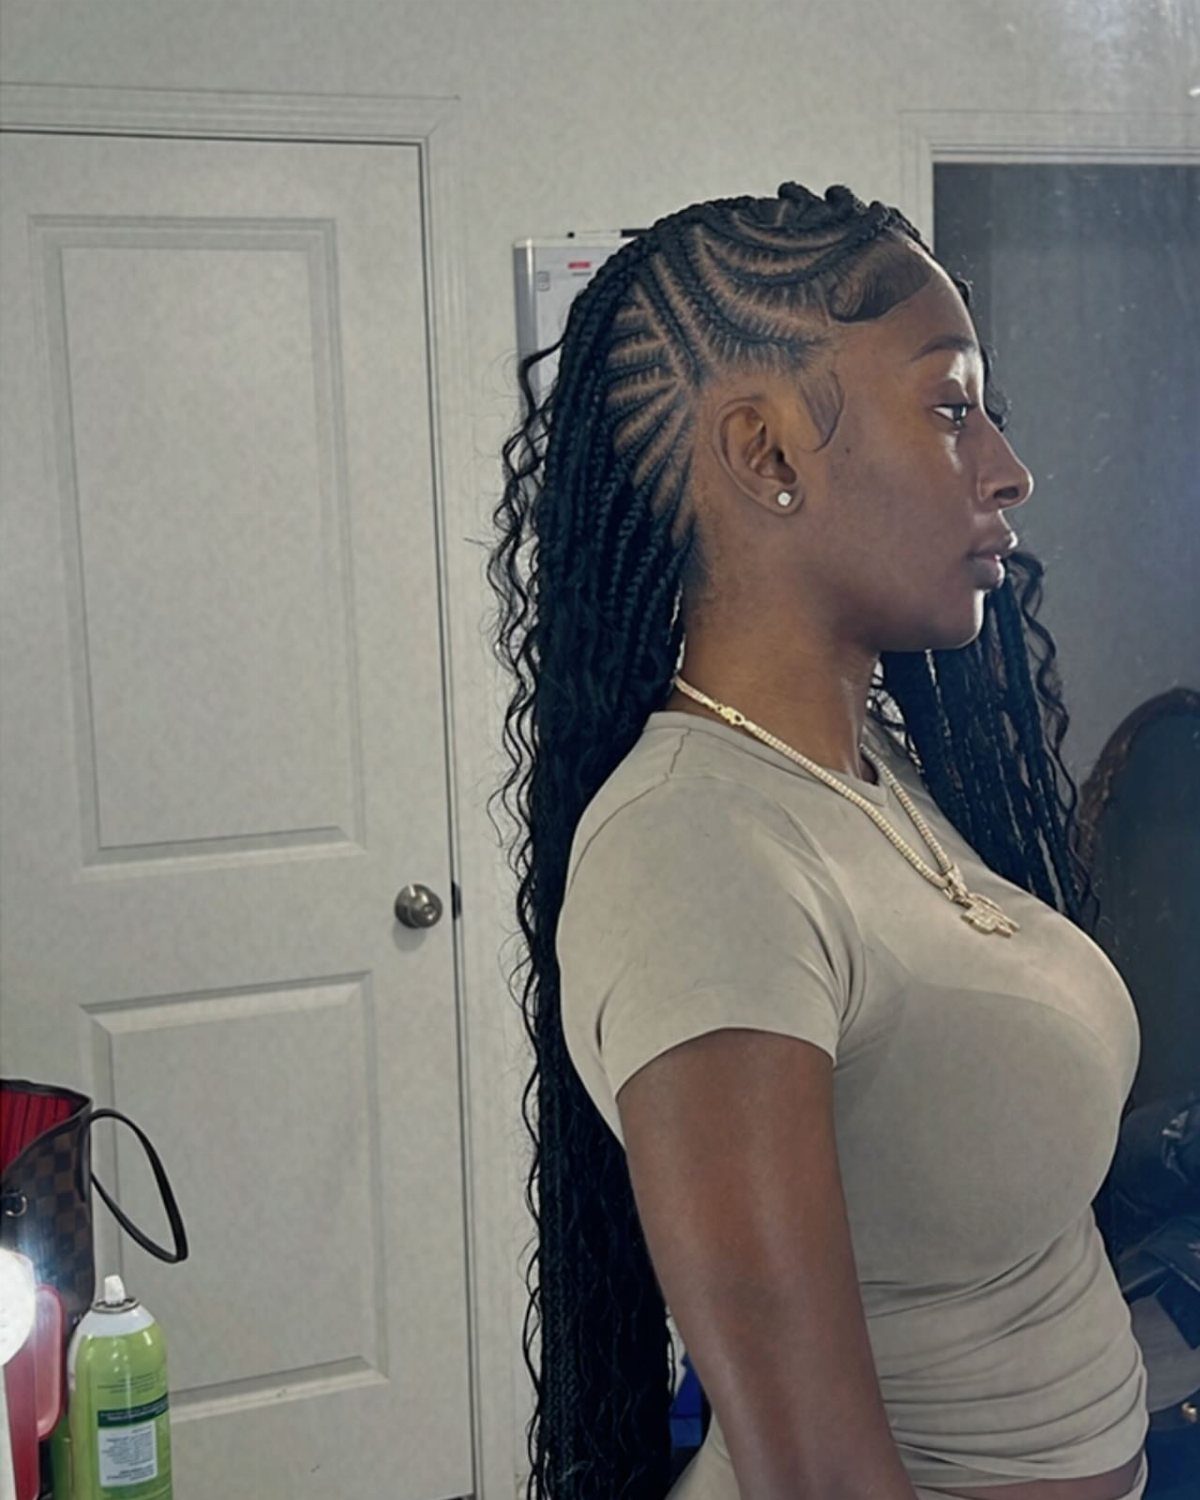
Curved cornrows lift up and back into a pompadour-inspired mohawk, while long box braids hang from the center and sides. The shape comes from the cornrows, and the box braids give the length.
Bring a photo and tell your stylist how high the front should rise, since that sets how the rows curve. This is a longer sit than plain box braids because it combines 2 techniques.
My pick is a tall front with the box braids left long, which keeps the contrast strong.
19. Thick Pulled-Back Cornrows
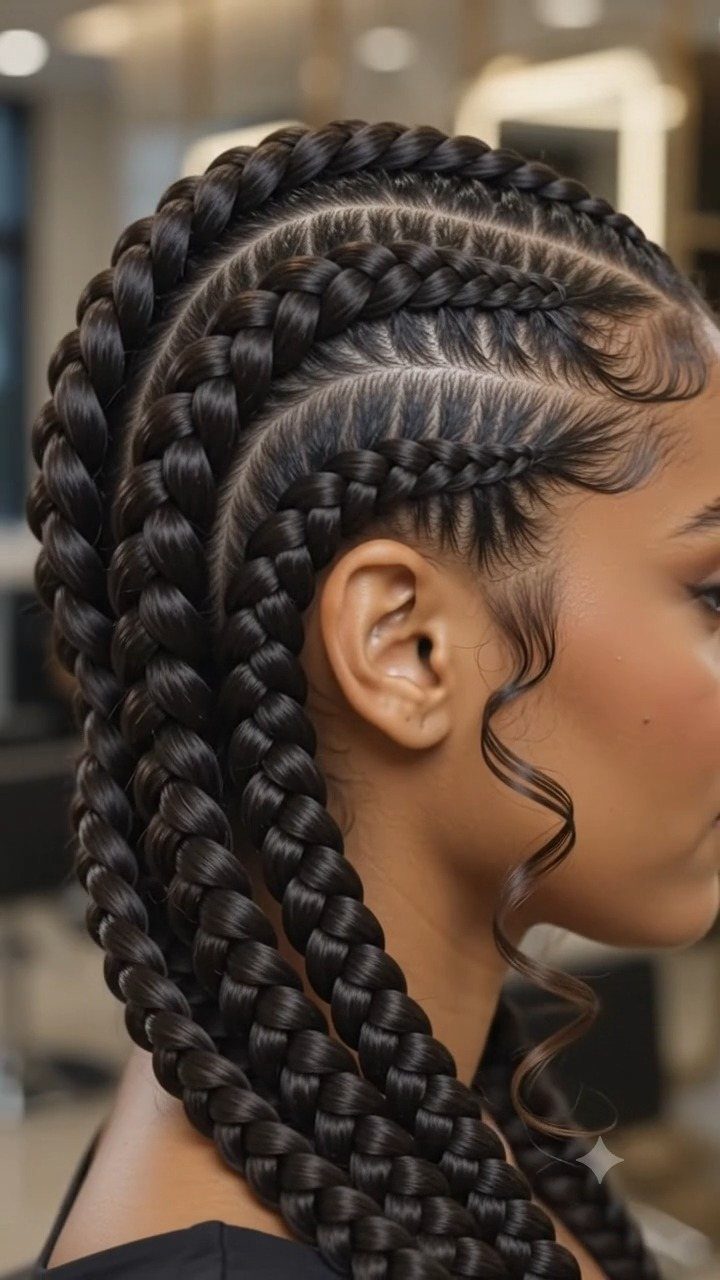
Thick cornrows swept straight back and curving into long braids behind the head give a mohawk-style shape without a raised center. The rows stay flat, so the look is bold but easy to wear.
Ask your stylist for thick rows and tell her how far back they should run before the braids begin. A photo of the curve you want settles it faster than describing it.
I like the thick sections here more than thin ones. They make the pattern readable from the side, and a few styled edges finish it.
20. Long Goddess Braids
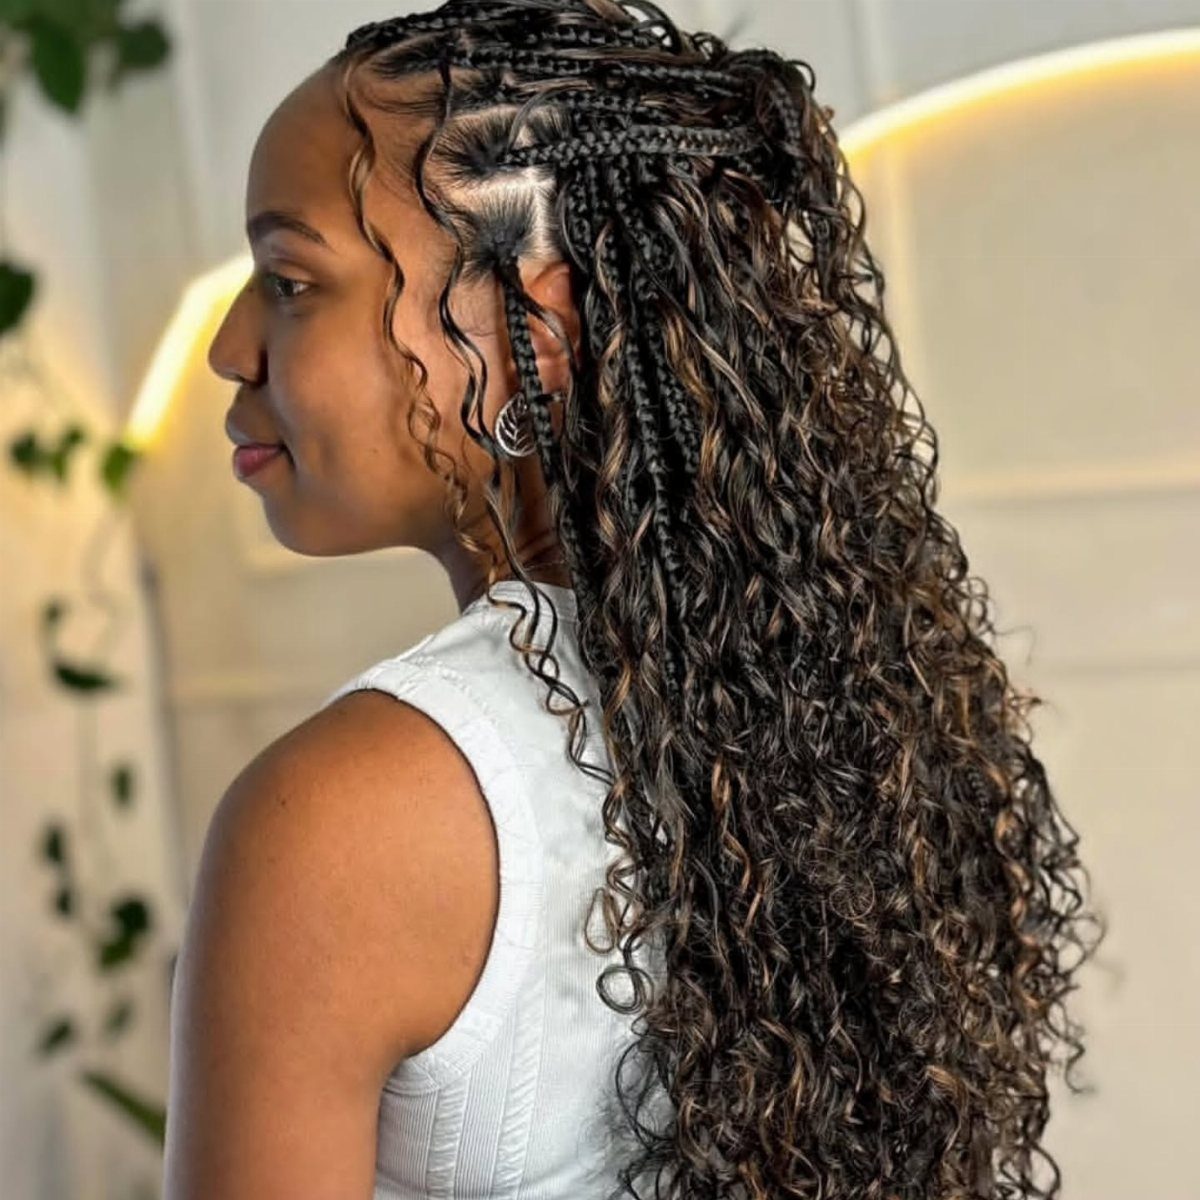
Waist-length braids ending in curly tendrils, started from cornrows at the top, make one of the longest versions of goddess braids. The length is the statement.
Decide how far down your back you want them to fall before you book, since that sets how much extension hair the stylist needs. Long braids carry weight, so mention any scalp tenderness at the start.
My pick is to keep the curls at the ends loose and full, because they give all that length some movement.
21. Cornrows
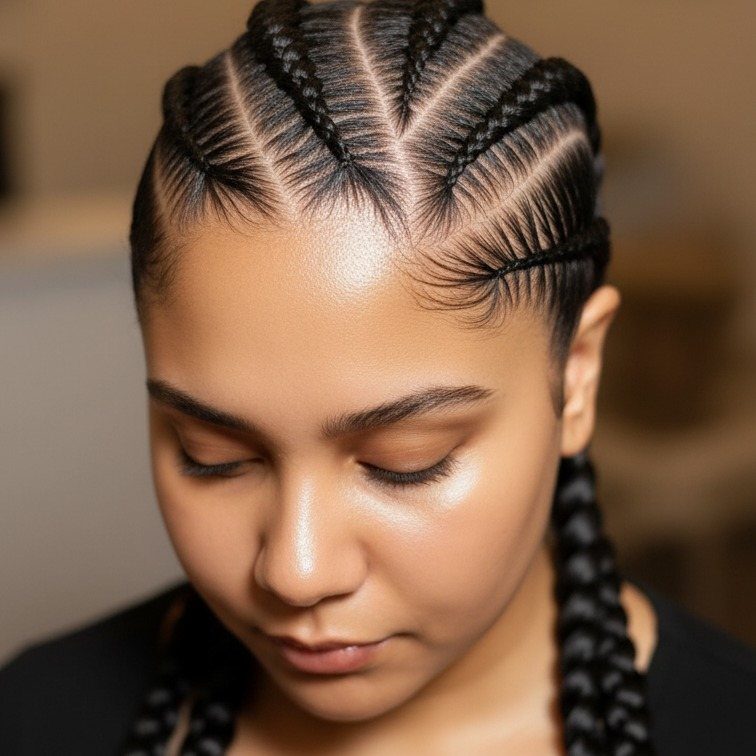
Cornrows lie close to the scalp, and the shape is up to you: straight back, curved, wavy, or in a pattern. Thick rows like these read clearly and look neat.
Before you sit down, decide whether the rows stay braided to the ends or turn into long free braids, and bring a photo so your stylist sees the finish you mean. Clean, even parting decides how polished it looks.
Mornings are simple, since there is little to style. I would pick curved rows over straight ones for the extra shape.
22. Goddess Braids
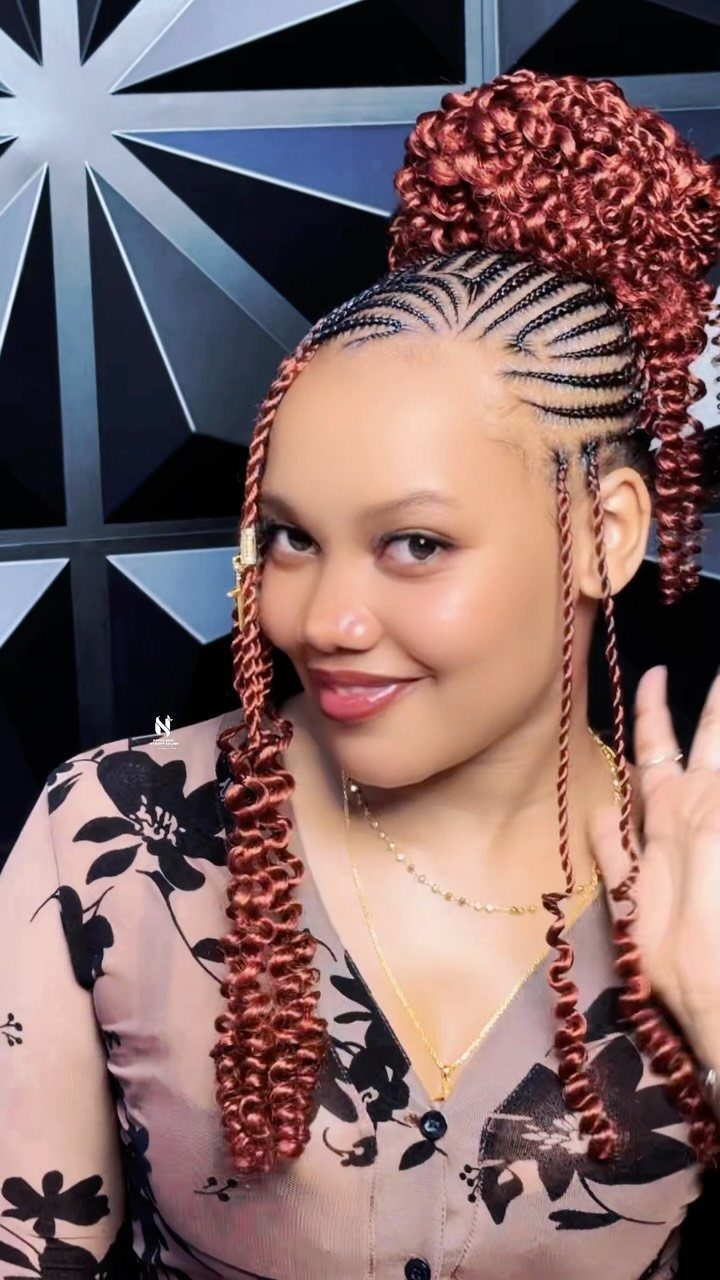
Large inverted cornrows, braided so each row stands raised on the scalp, can curve around the head and gather into a high bun with curly ends. The size of the rows makes the pattern easy to see.
Pattern direction gets locked in during the first few rows, so say early where the bun should sit and which way the rows should curve to reach it.
I like a reddish-brown shade against a bold pattern, and curly ends keep the bun soft.
23. Braided Crown Updo
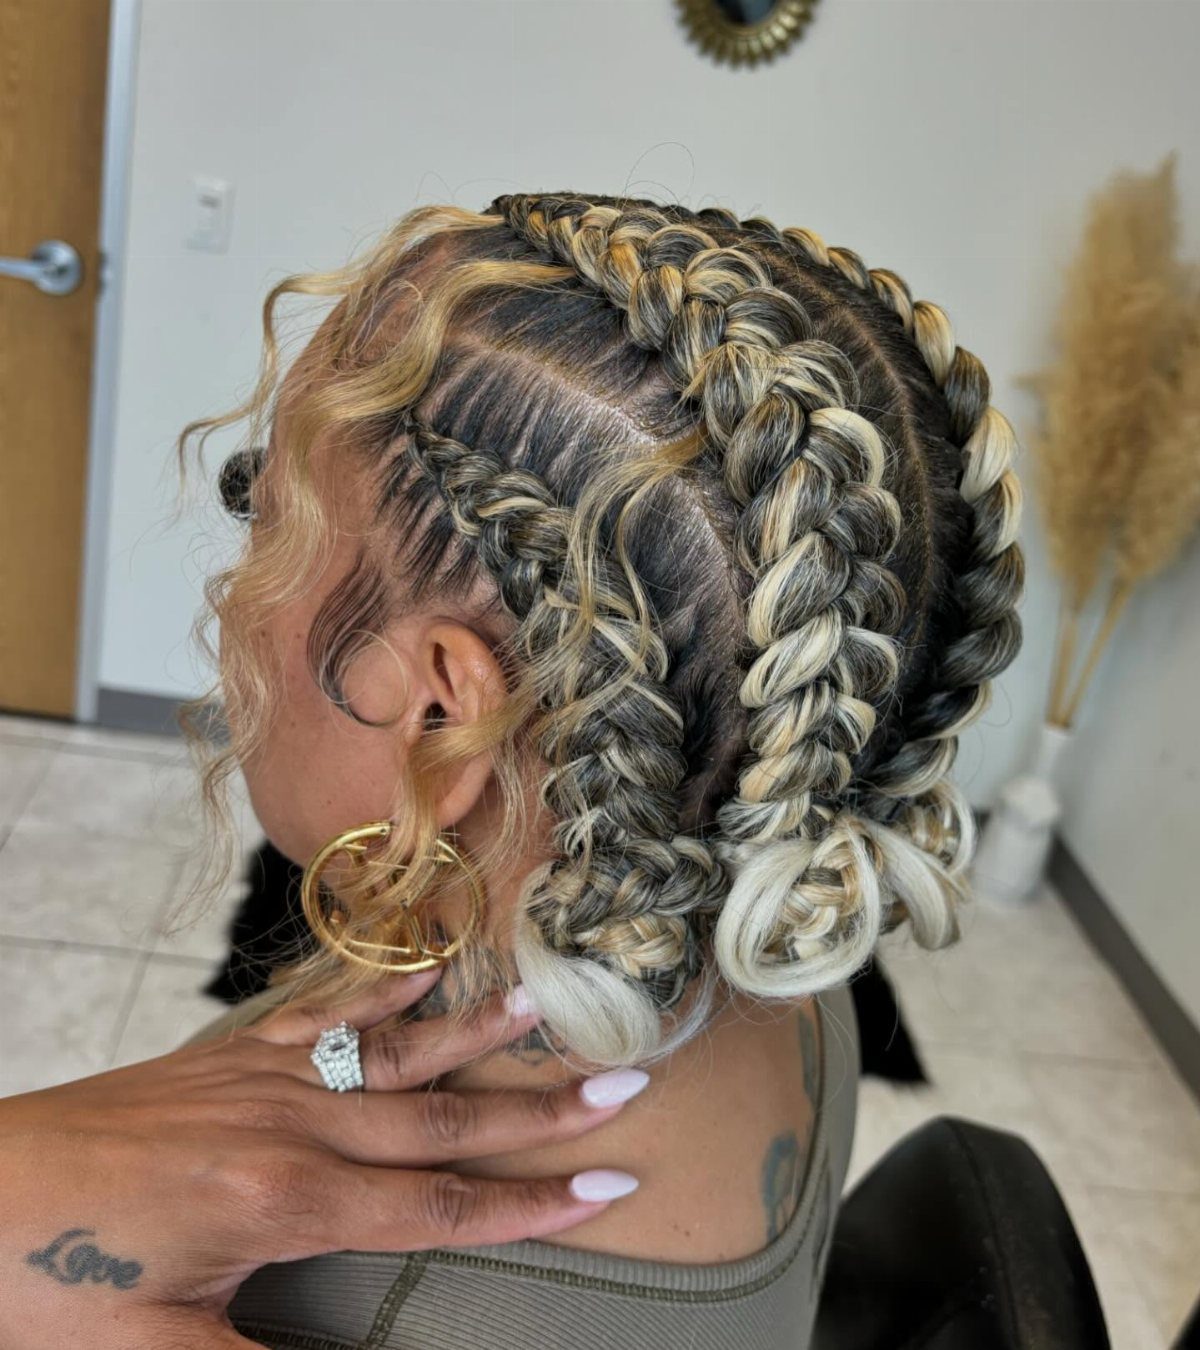
Thick braids that loop around the head like a crown, with curled ends left out, make an updo that looks formal without much fuss. Mixing blonde and dark brown adds dimension that a single shade lacks.
Ask your stylist how many loops you want and where the curled ends should fall. Thick braids mean fewer sections, so the install should go faster than with thin ones.
My preference is the two-tone mix, since the lighter braids stand out against the dark ones and show every loop.
24. Snake-Shaped Braided Updo
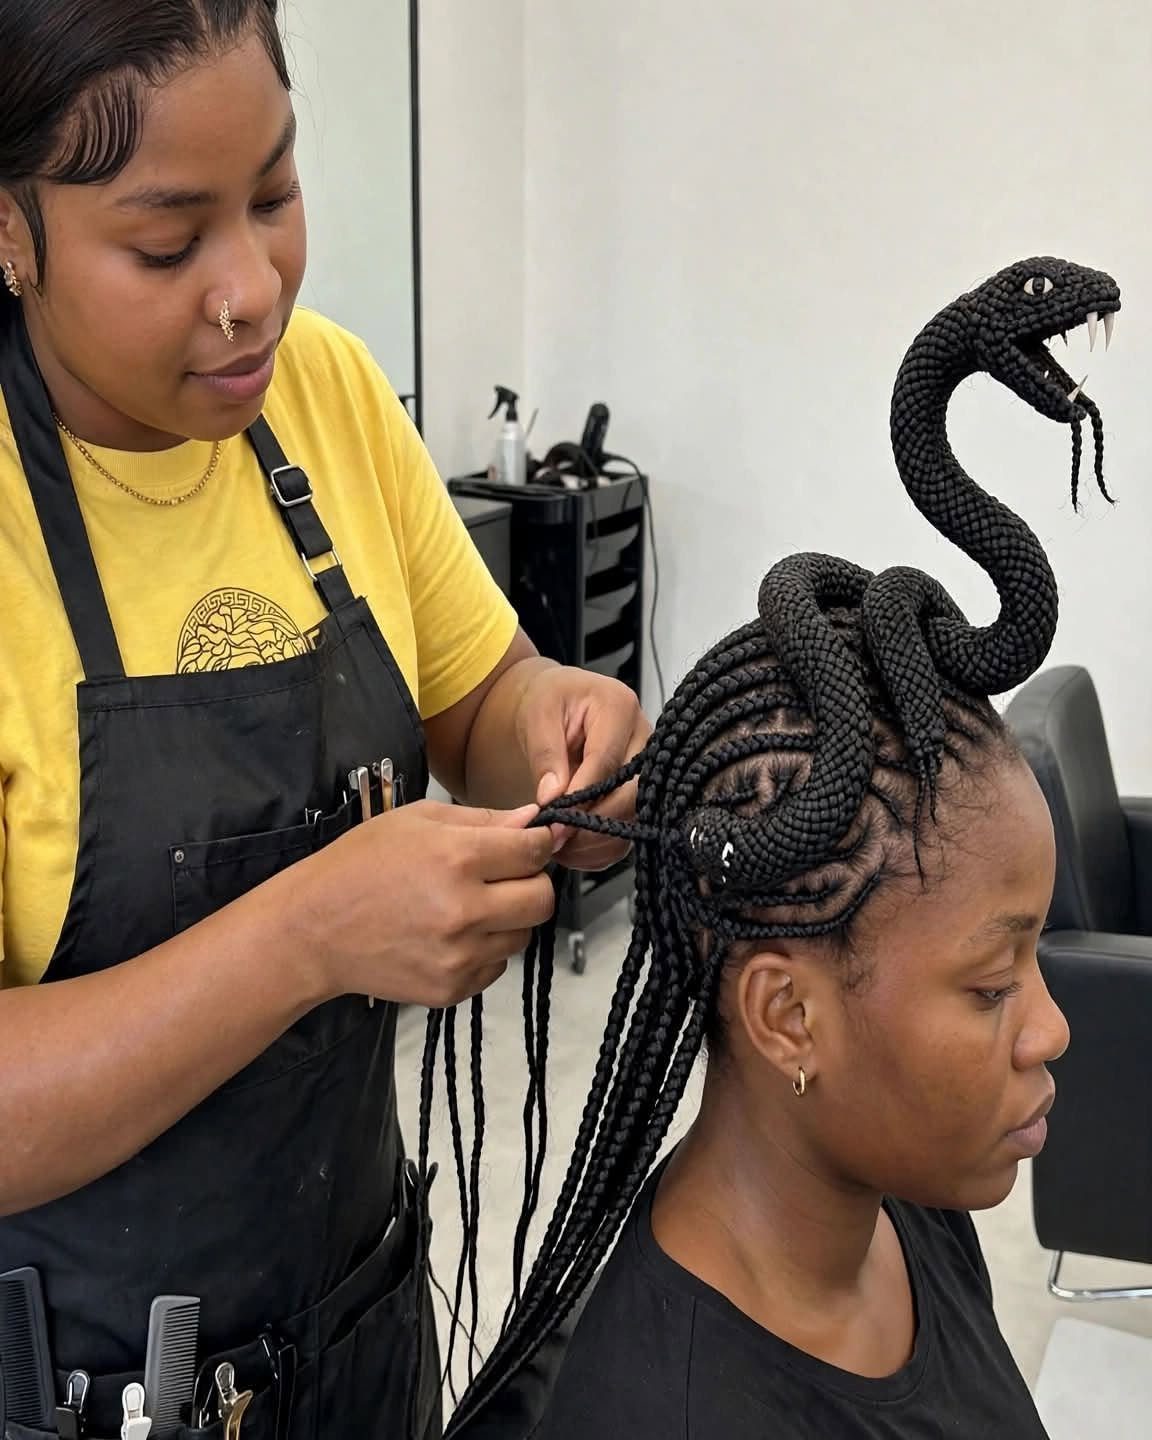
Curved cornrows run into long braids, and those braids are then arranged into a raised, snake-shaped design on top of the head. It is a sculptural style, so the shape is what you are booking.
Bring a photo and ask how the braids will be coiled and held, because that arrangement is the hardest part. Expect a longer sit than with plain cornrows, since it combines 2 steps: the rows first, then the shaping.
Flat rows along the sides set off the tall design on top, and that contrast keeps the style looking deliberate instead of bulky.
25. Thin Micro Braids
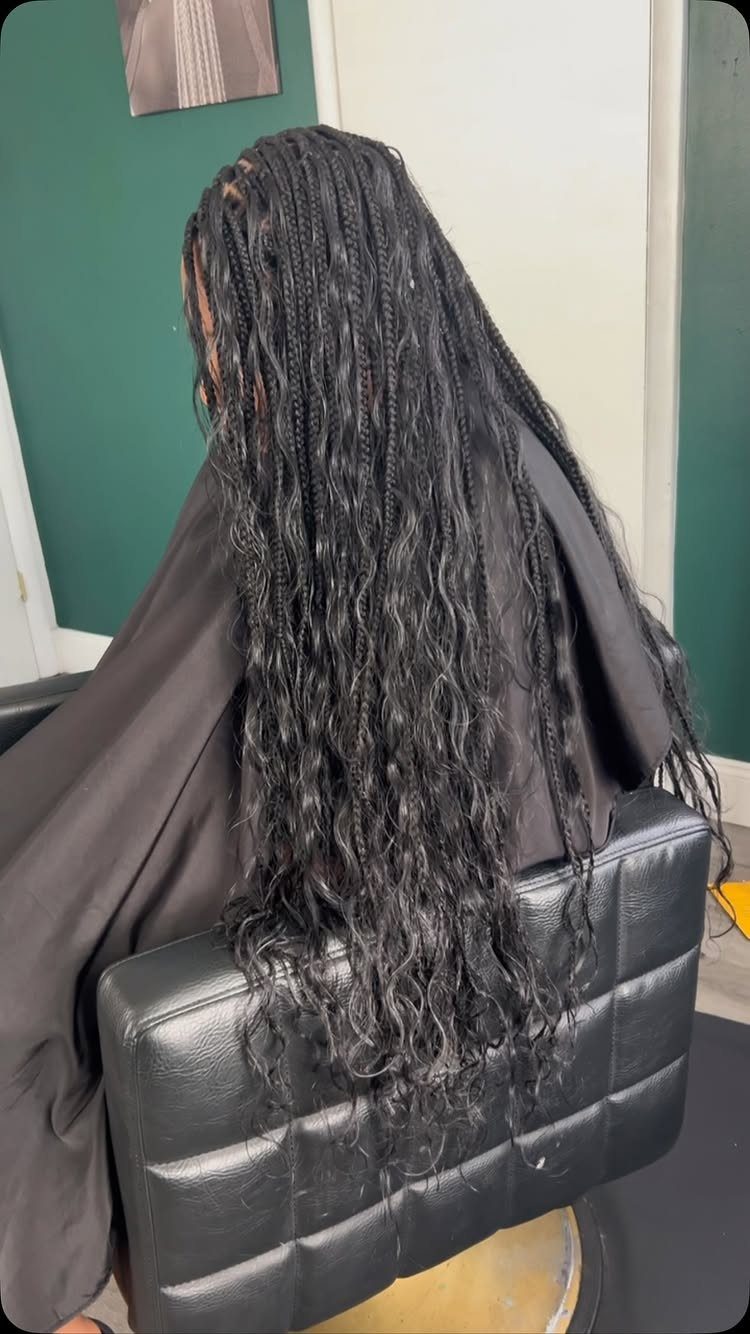
Micro braids mean many sections, each one narrow and braided full-length, so the install takes hours but the length hangs smooth and moves like loose hair.
Thinner sections mean a lot more braids on your head, and every extra braid adds to the hours you spend in the chair.
Tell your stylist how far down you want them and how thin, since both affect how long you will be in the chair.
With good care, micro braids hold up well, though how long they stay neat depends on your growth and how much you handle them.
Mornings are easy once they are in. I would budget a full day for the install and bring snacks.
26. Curly Half-Up Braids
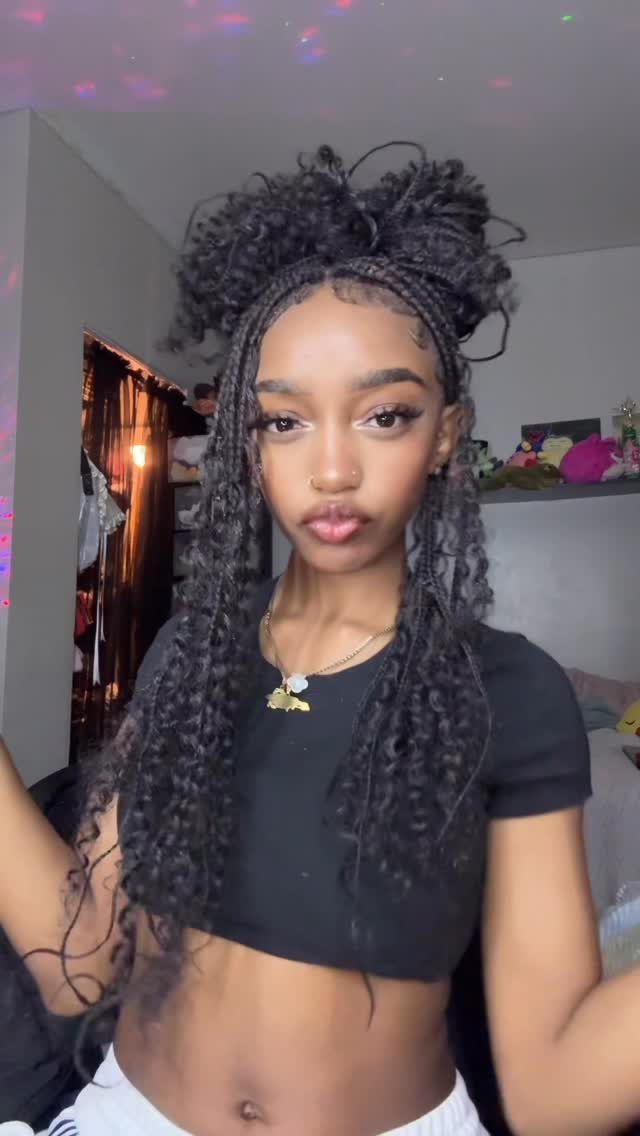
Long braids styled half-up with curly extensions left out at the ends give a softer finish than straight tips, and pulling half up keeps hair off the face without gathering all of it.
Clip or tie the top section wherever you want it to sit, then let the curls fall around your temples and shoulders. The curly ends can be styled looser or tighter depending on the extension texture you pick at install.
I like leaving a few tendrils out at the sides to frame the face.
Healthy Installation and Upkeep
Braids protect hair from daily combing and styling only when they sit without pulling. Tension at the root causes breakage instead of preventing it, so if the first few rows feel tight, say so before your stylist finishes the install.
Extension weight adds up fast with long or thick braids.
Before the first section gets parted, tell your braider how thick your hair is, because the size of each braid and the amount of hair in it should fit your density, even when that means they won’t match the photo exactly.
Cleanse your scalp while the braids are in, and wrap them at night so the edges do not fray. Remove the style on time, since overgrown roots pull harder the longer you wait.
If synthetic hair irritates your skin, rinse it with diluted apple cider vinegar before the appointment or test a strand on your wrist the day before.
Prepare Natural Hair Before Braiding
Wash your hair thoroughly before you sit down for braids, since you will not shampoo the length again until the style comes out.
Deep condition after washing, then detangle completely so your stylist does not have to pull through knots while parting.
Stretch the hair before the appointment so each section braids smoothly and the finished style looks uniform. Blow-drying on low or banding overnight both work.
If you are booking box braids, condition weekly in the month before the install so the hair underneath is strong enough to carry the weight.
Frequently Asked Questions
What is the best braid style for natural hair?
Knotless braids are my pick if you want the gentlest start, since extension hair is fed in a little at a time and there is no bulky knot pulling at the root.
Cornrows are a good second choice because they lie flat and need almost no styling in the morning.
Your choice depends on hair length, how many weeks you plan to keep the style in, and how much scalp tension you can wear comfortably.
Can a 50 year old woman wear braids?
Yes, nothing in braiding depends on age. The braids need to sit without pulling at the root, since constant tension breaks hair rather than protecting it.
A softer shape like a braided bob or a half-up style with curly ends is easy to wear and light on the scalp.
What kind of hair should I buy for braids?
X-Pression and Latched & Hooked non-toxic fibers are 2 brands stylists often use. X-Pression feels softer against the scalp than standard Kanekalon and typically gives you more length per pack, but either one holds the style.
How long should I wear braids?
Most box braids, traditional cornrows and twists last 4–6 weeks. Knotless braids can stay in for 6–8 weeks.





