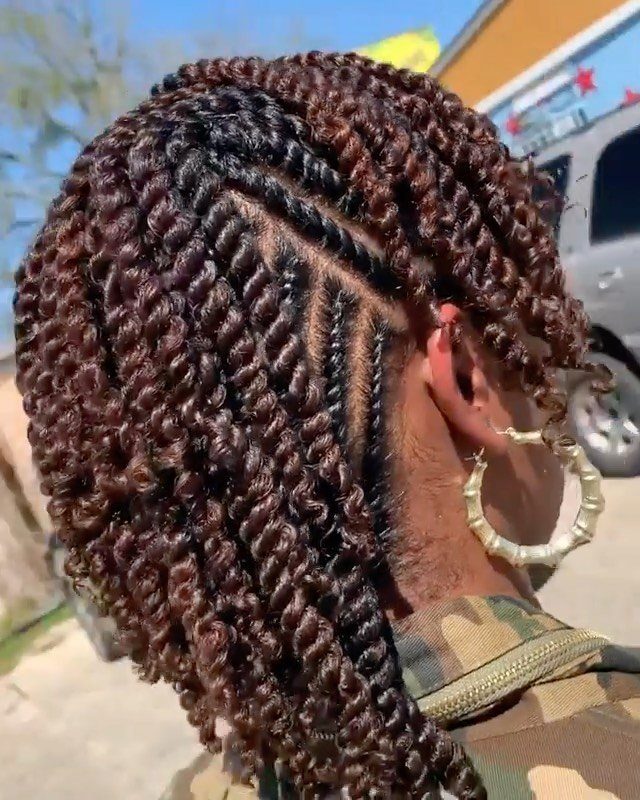
Mini twists can take a full day to install, jumbo twists finish in under 2 hours, and styles like Senegalese or Havana twists hold for weeks with a scarf at night.
The choice comes down to how long you want it to last and how much time you have for the install.
Styles with flat twists or cornrows at the scalp add structure at the front, while all-over twists give movement and can be pulled into a bun or ponytail when you need them off your neck.
1. Flat-Twist Updo
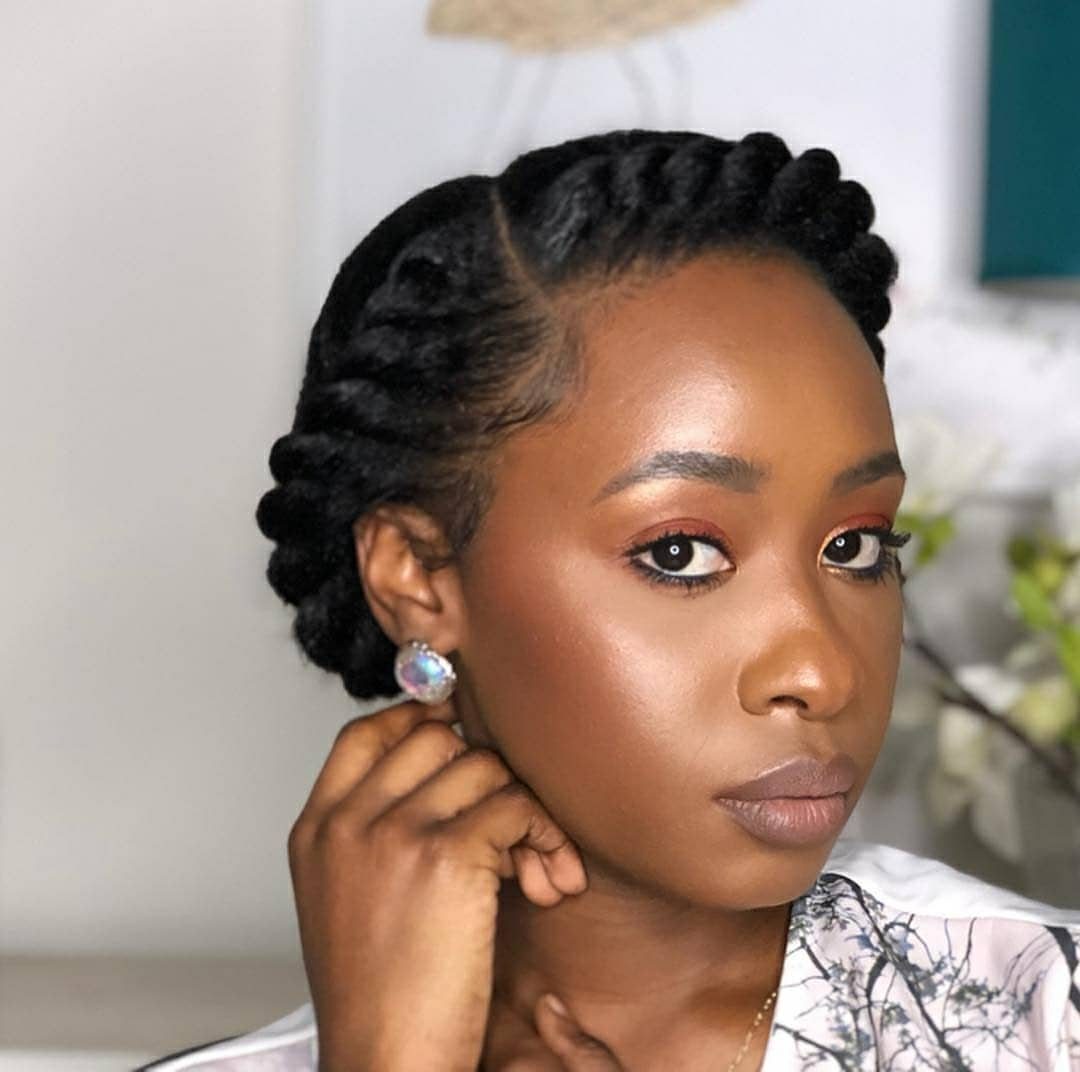
2 sections are twisted flat along the head, then gathered and pinned into an updo at the crown or back. The flat sections give a polished front, and the updo keeps length tucked away.
This works well if you need a protective style that looks formal enough for work or an event. The flat twists lie smooth, so they read neat even when the updo itself has texture.
Start with stretched or damp hair, part down the middle or along one side, and twist each section tight to the head before securing the ends up with pins or a hair tie.
2. Twist Updo
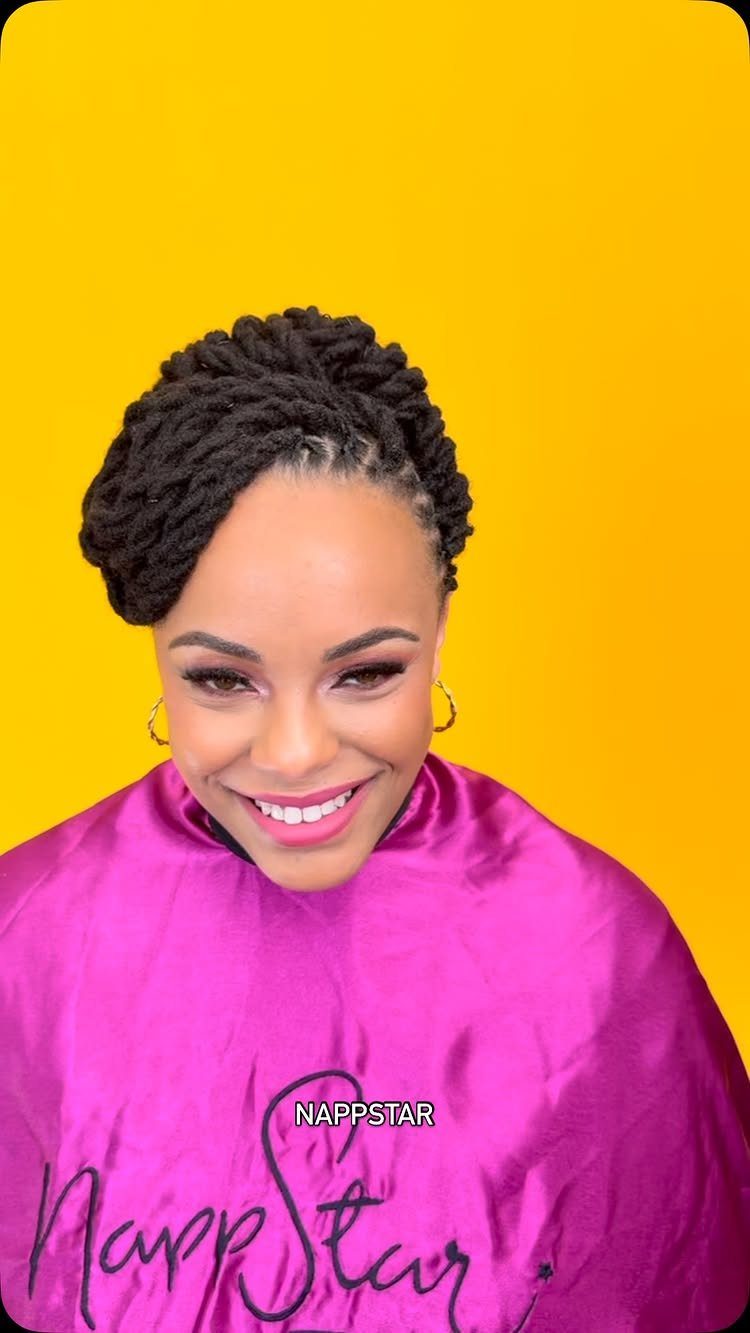
Twists are gathered and pinned or wrapped into a bun or topknot instead of worn down. The result sits high and keeps your neck clear, which helps in heat or if you need the style off your shoulders.
I like this for second- or third-day twists that have loosened a bit. Pulling them up hides any frizz at the ends and gives the look another few days.
Pin the twists in sections rather than forcing them all through one elastic, which can strain the roots. A few bobby pins placed at the base hold better than one tight band.
3. Jumbo Twists
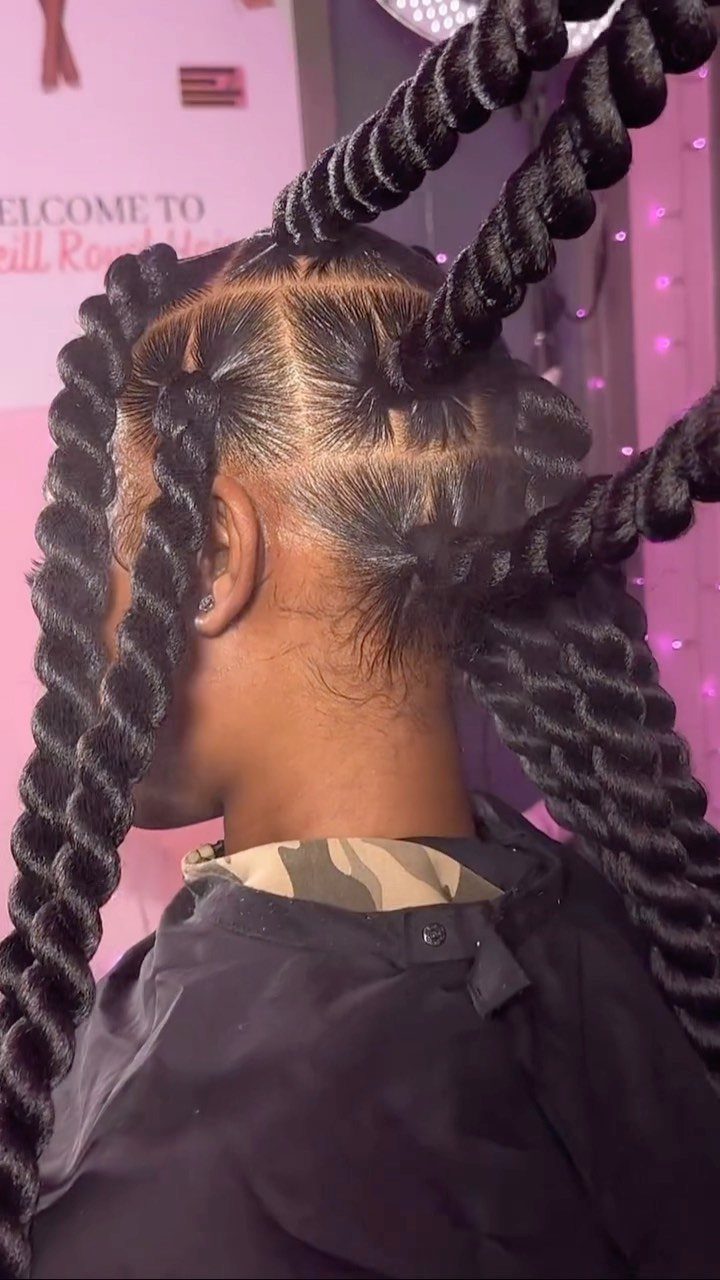
Large, chunky twists made with fewer sections than a standard twist set. Each one is thick enough to see from across a room, and the install finishes fast because there are so few twists.
The size makes this beginner-friendly. You can finish in under 2 hours at home, and the style lasts 1 to 2 weeks with a satin scarf at night.
Section hair into large squares or rectangles, then twist from root to tip. If your hair is shorter than shoulder length, the twists will stand out rather than hang, which gives volume without added length.
4. Front-Twist High Ponytail
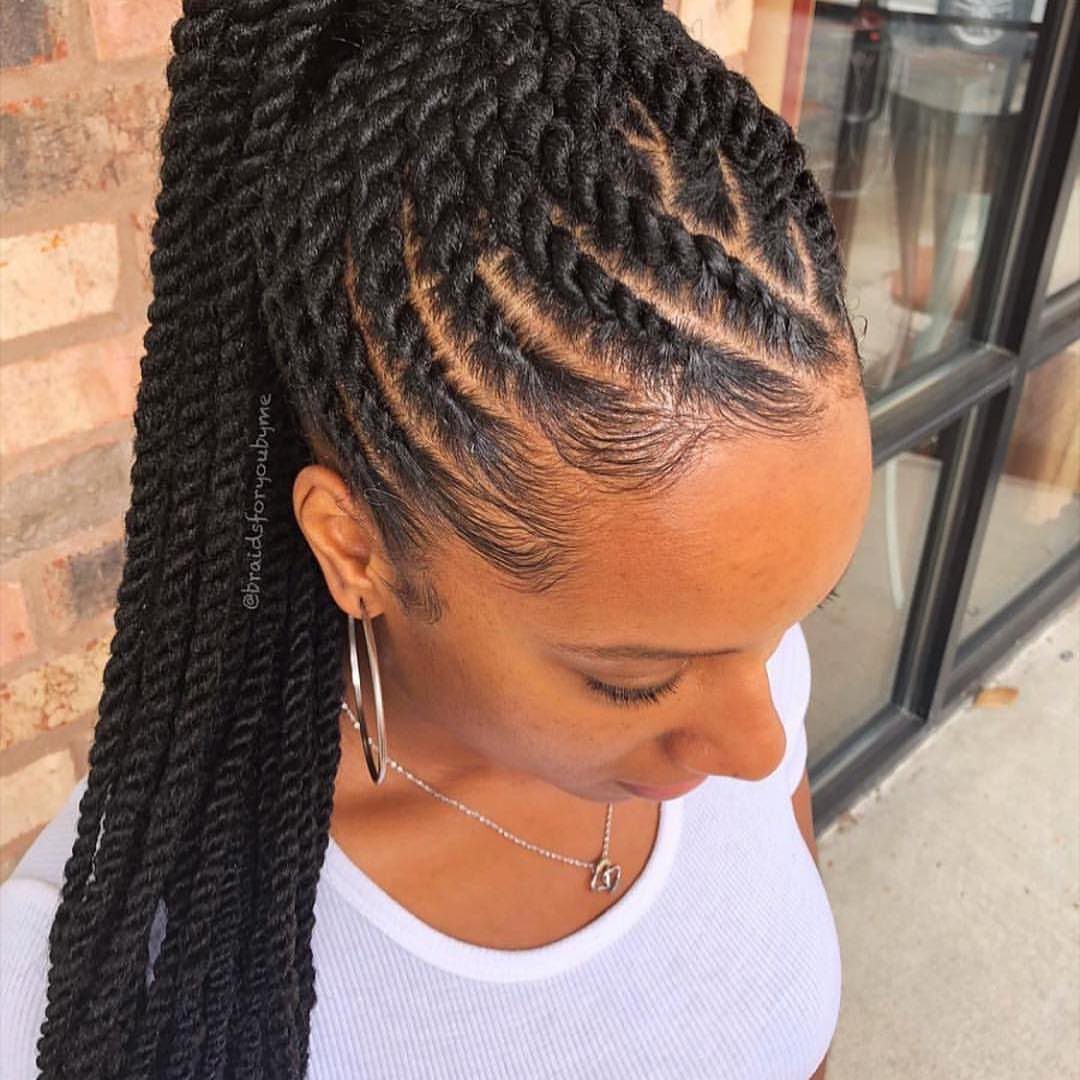
Twists are gathered into a high ponytail, and the front sections are twisted in a pattern that frames the face or sweeps across the hairline.
The ponytail sits at the crown or higher, so it moves when you turn your head.
The front twists give the style a finished edge, and the height makes it practical for workouts or hot days if you need hair completely off your neck.
Twist the front sections first, then gather all the twists into a ponytail with a covered elastic. Secure tightly enough that the ponytail stays put but not so tight that it pulls at the hairline.
5. Juicy Flat Twists
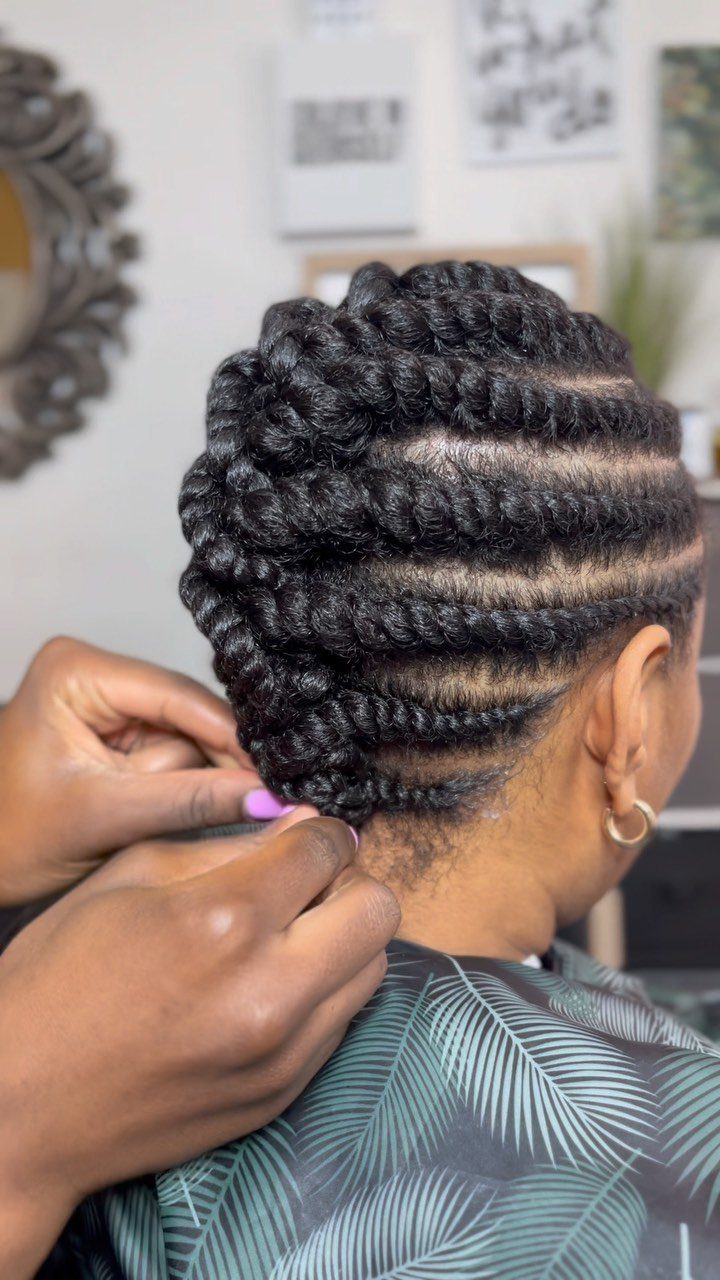
Flat twists that look fuller than the standard version, either from larger sections or from twist technique that leaves more texture. The twists curve over the head and gather at the nape, giving coverage without being slicked down.
This reads as a protective style that still has movement. The thickness makes it more casual than tight, fine flat twists, so it suits everyday wear better than formal events.
Work on stretched hair and use a light cream or butter to smooth each section before twisting. Larger partings give the full look, but keep them even so the twists line up.
6. Senegalese Twists
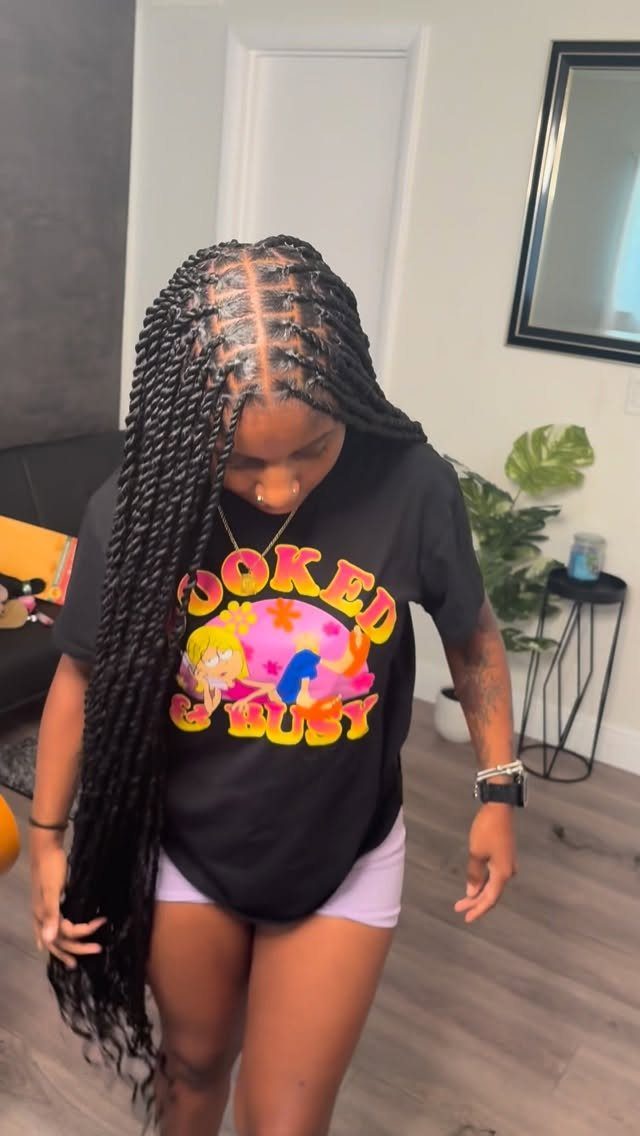
An extension-based twist style with a smooth, polished finish. Each twist is made by wrapping synthetic hair around small sections of natural hair, which gives a uniform diameter from root to tip.
The clean look makes this popular if you need a protective style that reads formal. The twists hold their shape in humidity because they are synthetic.
Expect a long appointment, depending on length and the number of twists. To keep the style fresh, wrap it at night and dip the ends in hot water once if they start to frizz.
7. Twist Bun
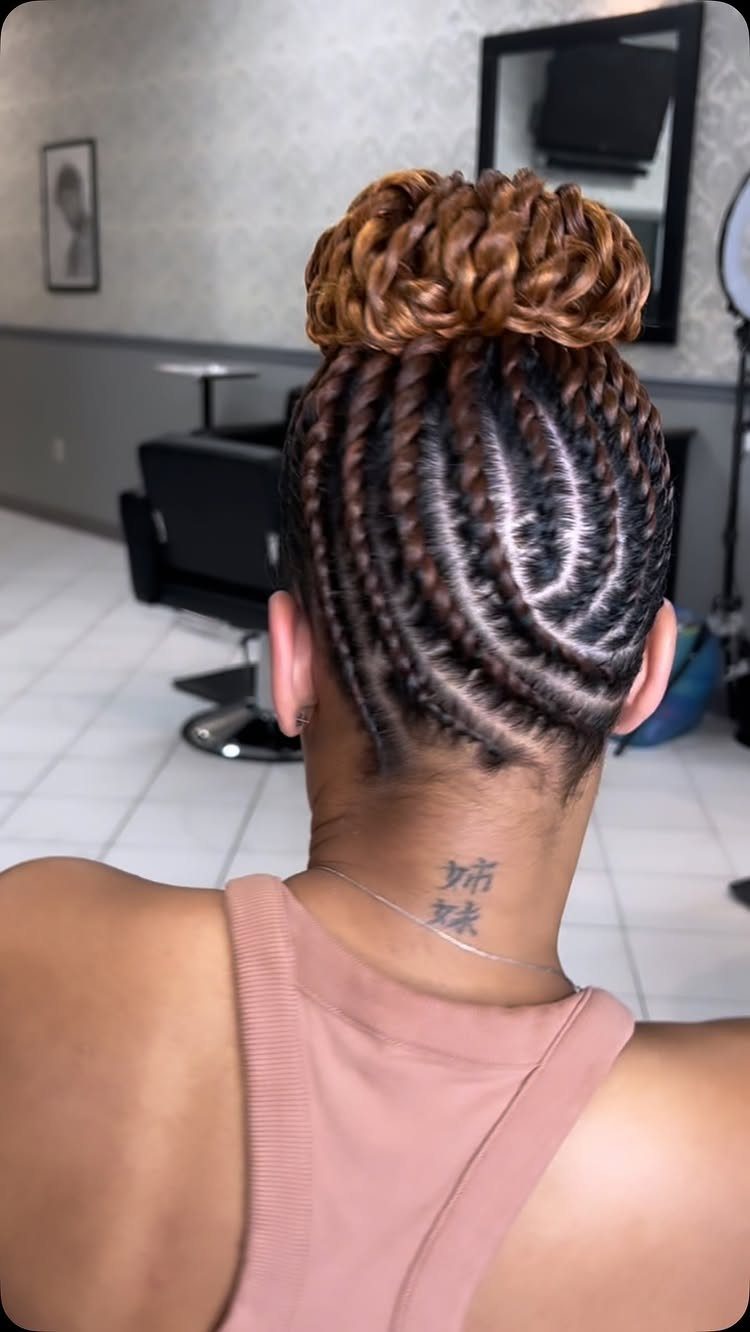
Twists are gathered and wrapped into a bun shape, sometimes pinned in a coil or arranged to sit full and rounded. The bun can sit at the crown, mid-head or low at the nape.
This works if you want the structure of an updo without losing the texture of the twists. The bun keeps everything secure, so it holds through a full day without needing adjustment.
Twist hair first, then gather the twists at the desired height and wrap them around the base, pinning as you go. If the twists are thick, pin each section individually rather than trying to wrap them all at once.
8. Passion Twists
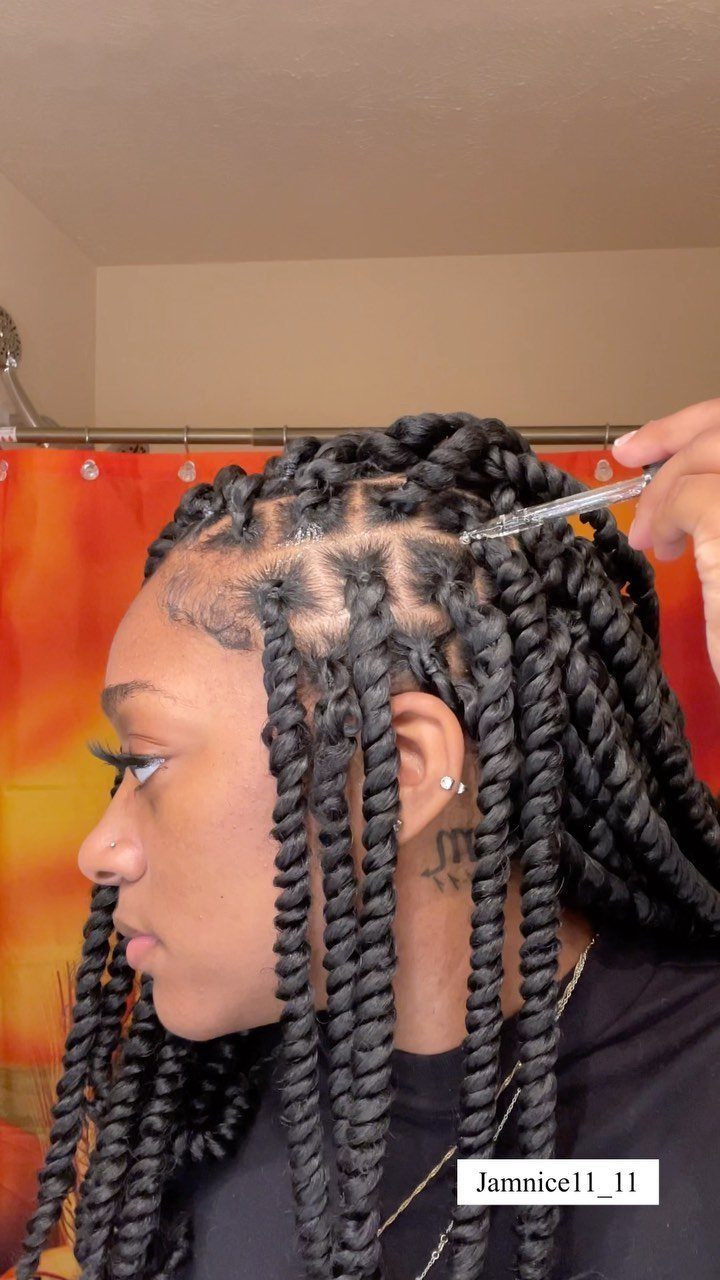
A softer, textured twist style that uses a specific curly or wavy hair extension, giving a more relaxed finish than Senegalese or Havana twists. The twists have visible texture from root to end.
The lighter weight makes this easier on the scalp if you plan to keep the style in for several weeks. The texture also hides frizz better than smooth twists, so the style looks fresh longer.
Wrap at night to keep the texture from matting.
9. Senegalese Twists with Curly Ends
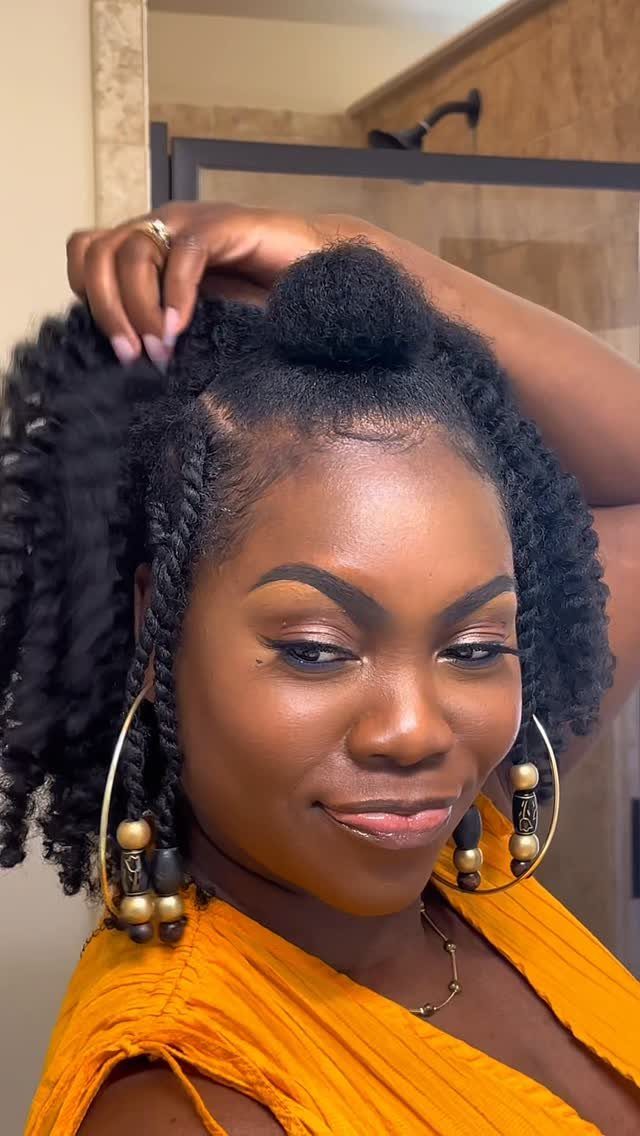
Senegalese twists that finish with loose, curly ends instead of a blunt or sealed tip. The smooth twist runs most of the length, and the curl starts at the last few inches.
The curly ends soften the look and add movement, which makes the style feel less formal than standard Senegalese twists.
The curl also hides worn ends if you keep the twists in past the point where the tips start to fray.
Ask your stylist to leave the ends untwisted and set them on rods, or dip them in hot water while curled around a rod to set the shape.
10. Twisted Crown
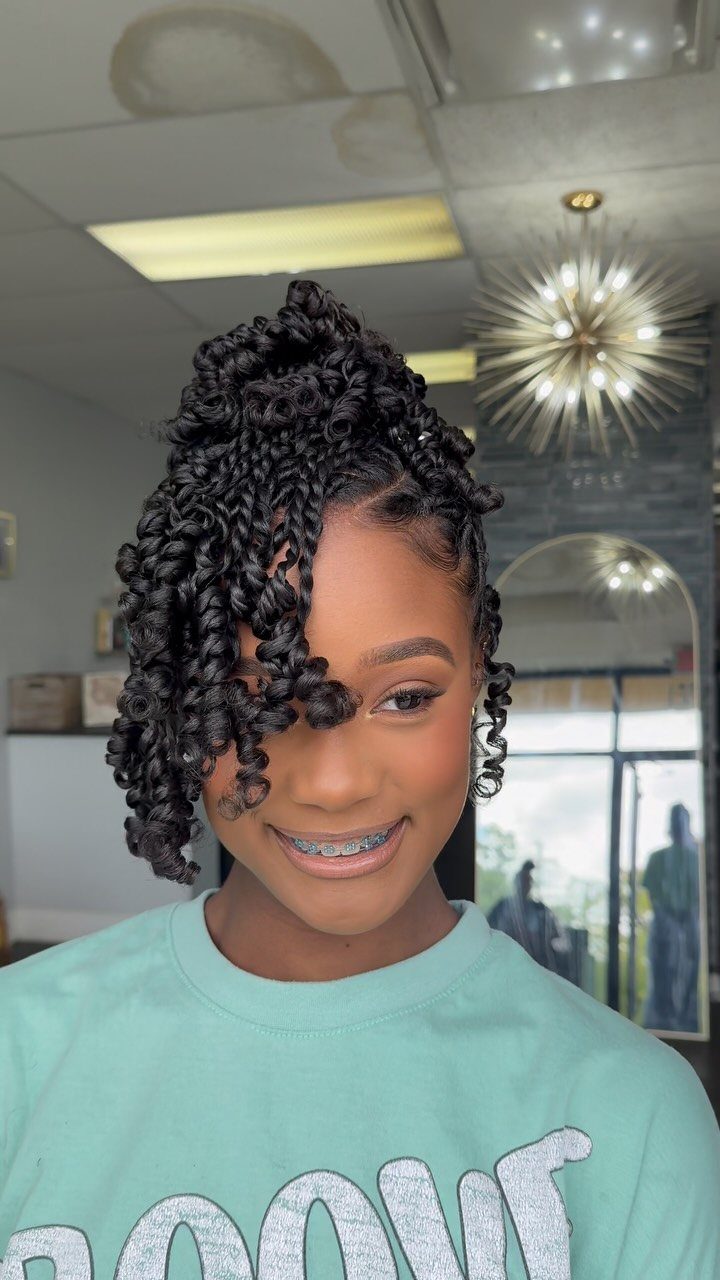
Twists are arranged in a circular pattern around the crown, with the rest of the twists left loose or pulled back. The crown section can be flat-twisted or pinned in a raised ring.
This frames the face and gives the style a focal point at the top, which suits round or heart-shaped faces by adding height at the crown.
Twist the crown section first, curving the twists along the hairline, then twist the remaining hair separately. Pin the crown twists in place, then leave the rest down or gather them into a ponytail or bun.
11. Natural Chunky Twists
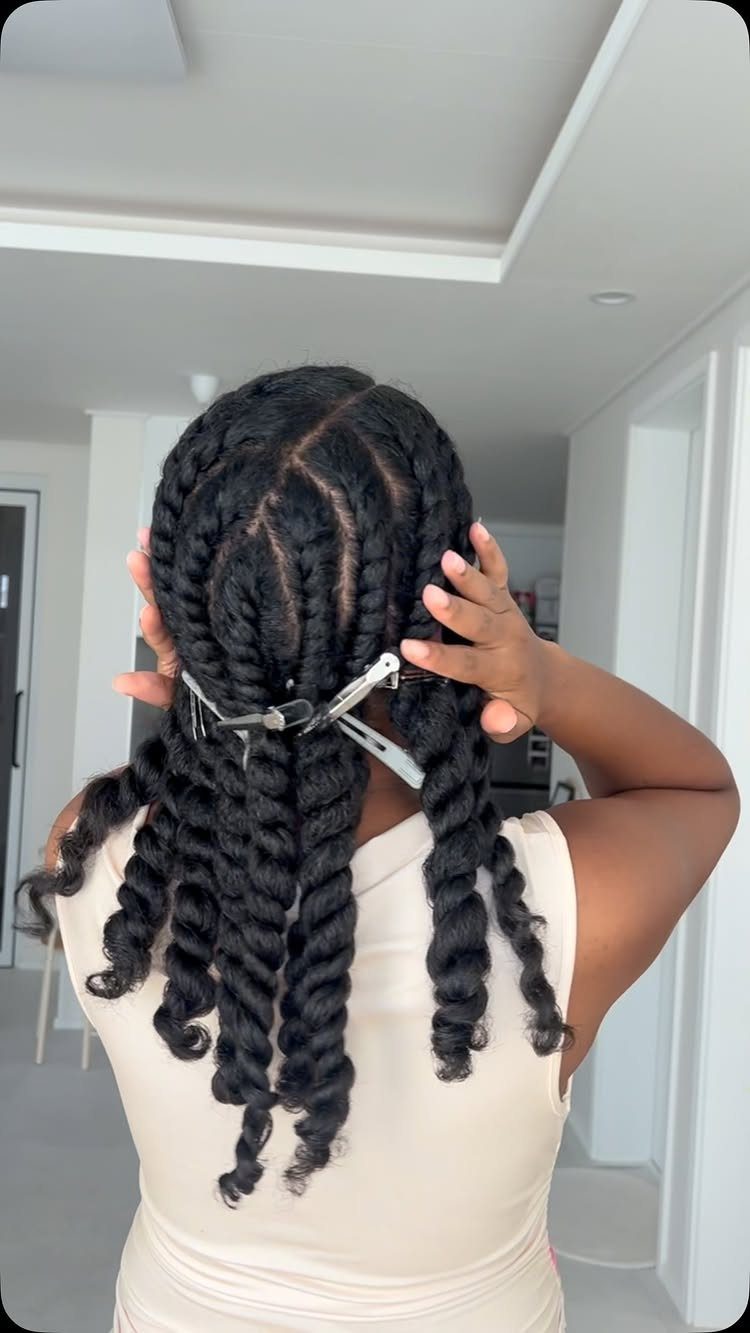
Thick twists made from natural hair without extensions, sectioned large enough that each twist is visible on its own.
The weight and size give volume, but the tension can strain the hairline if the twists are too heavy or left in too long.
I would keep this style short term, 1 to 2 days, especially if your hair is fine or processed. The weight pulls at the roots, and brittle hair can break where the twist begins.
Moisturize before twisting to reduce friction, and avoid tight parting at the hairline. If the twists feel heavy, take them down and restyle into something that distributes the weight more evenly.
12. Mini Twists
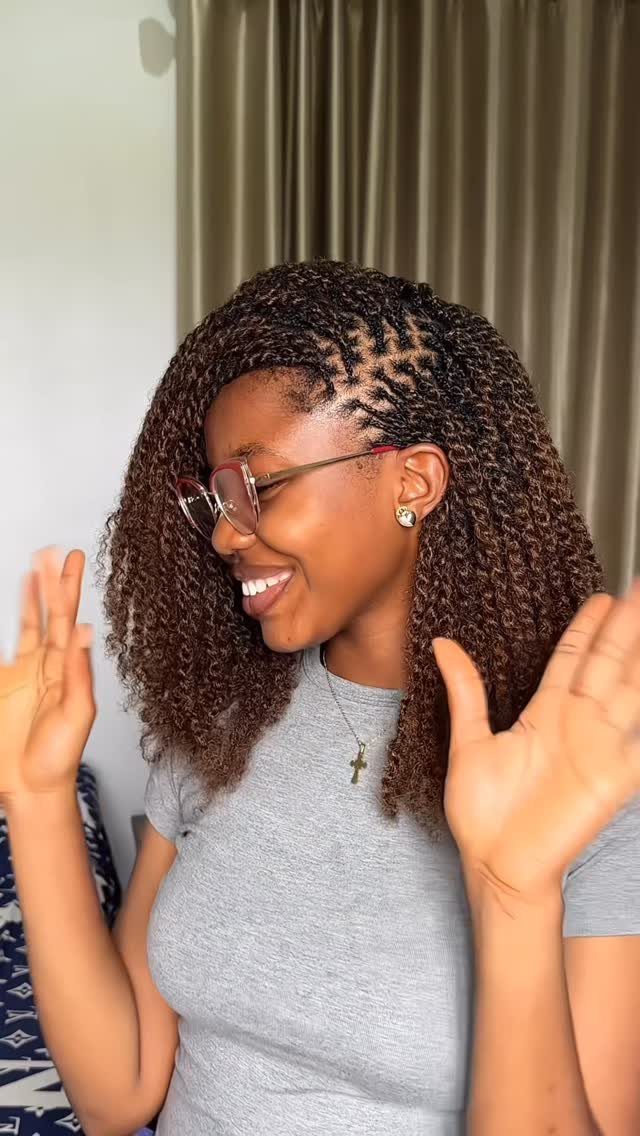
Small, thin twists that create a detailed, uniform look across the head. Each twist is narrow enough that hundreds of them are needed to cover a full head, so the install takes time.
What you get in return is longevity. Mini twists hold their shape through washing and retwisting at the roots, and they last longer than chunkier styles.
The install is long, so plan for a full day or split it across 2 sessions.
13. Coiled Twists
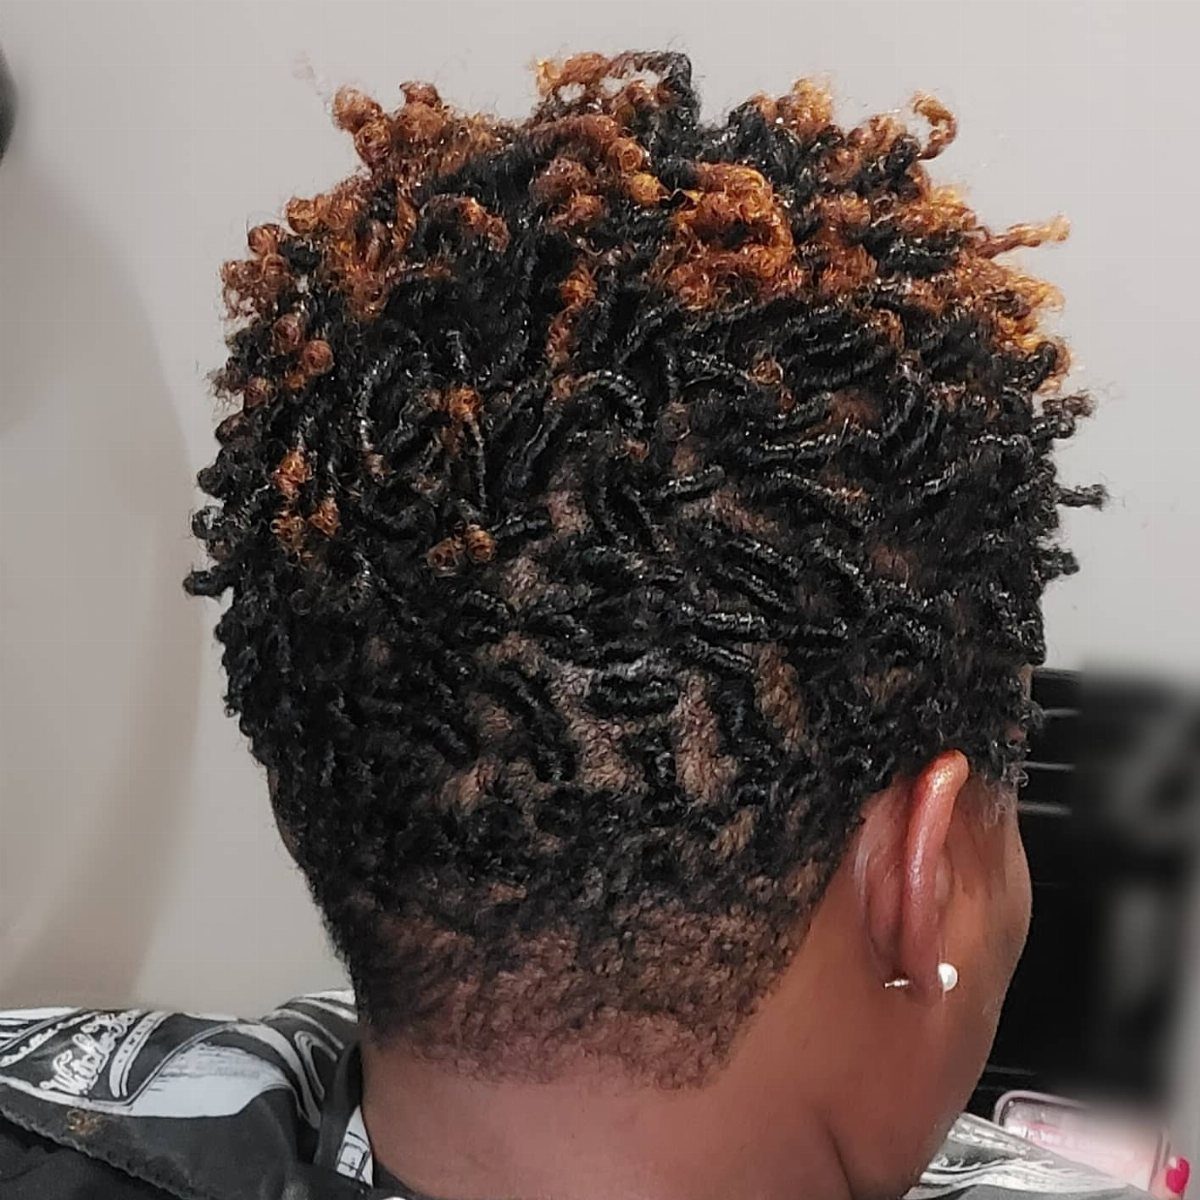
Each twist is wrapped tight around a comb or finger to form a springy coil that stands out from the head. The coils hold their shape rather than hanging, which gives short natural hair definition without adding length.
Copper tips pop on coiled texture. If your twists loosen after a few days, recoiling them takes minutes and brings the shape back without starting over.
Work on damp hair with a curl cream, twist each section, then wrap it around a comb or your finger and hold for a few seconds before releasing.
14. Criss-Cross Twists
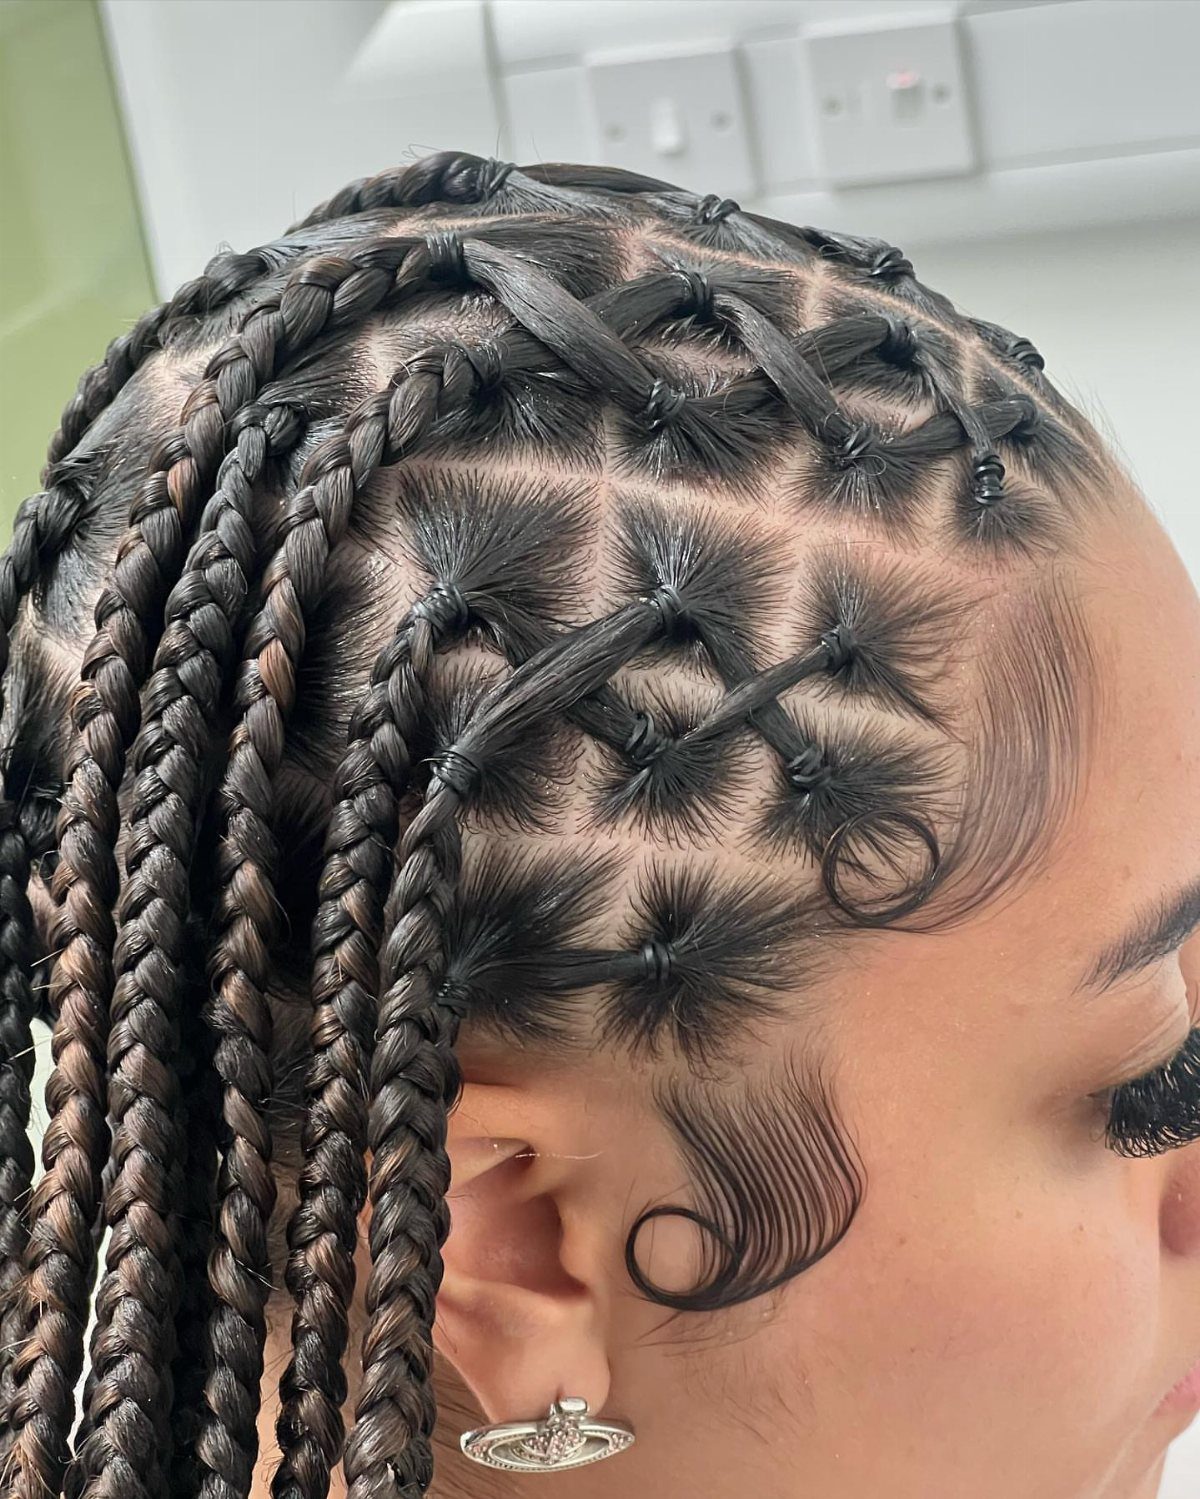
The scalp braids cross over each other in a geometric pattern before transitioning into hanging twists. The criss-cross detail takes extra time but gives the style a finished front that holds attention.
This suits you if you want a protective style that looks intricate but still lets the twists move. The pattern sits flat, so it works under a headband or scarf if you need to switch up the look midweek.
Part the front sections at angles, braid them in the criss-cross pattern, then continue into regular twists once you pass the crown.
15. Faux Hawk Twists
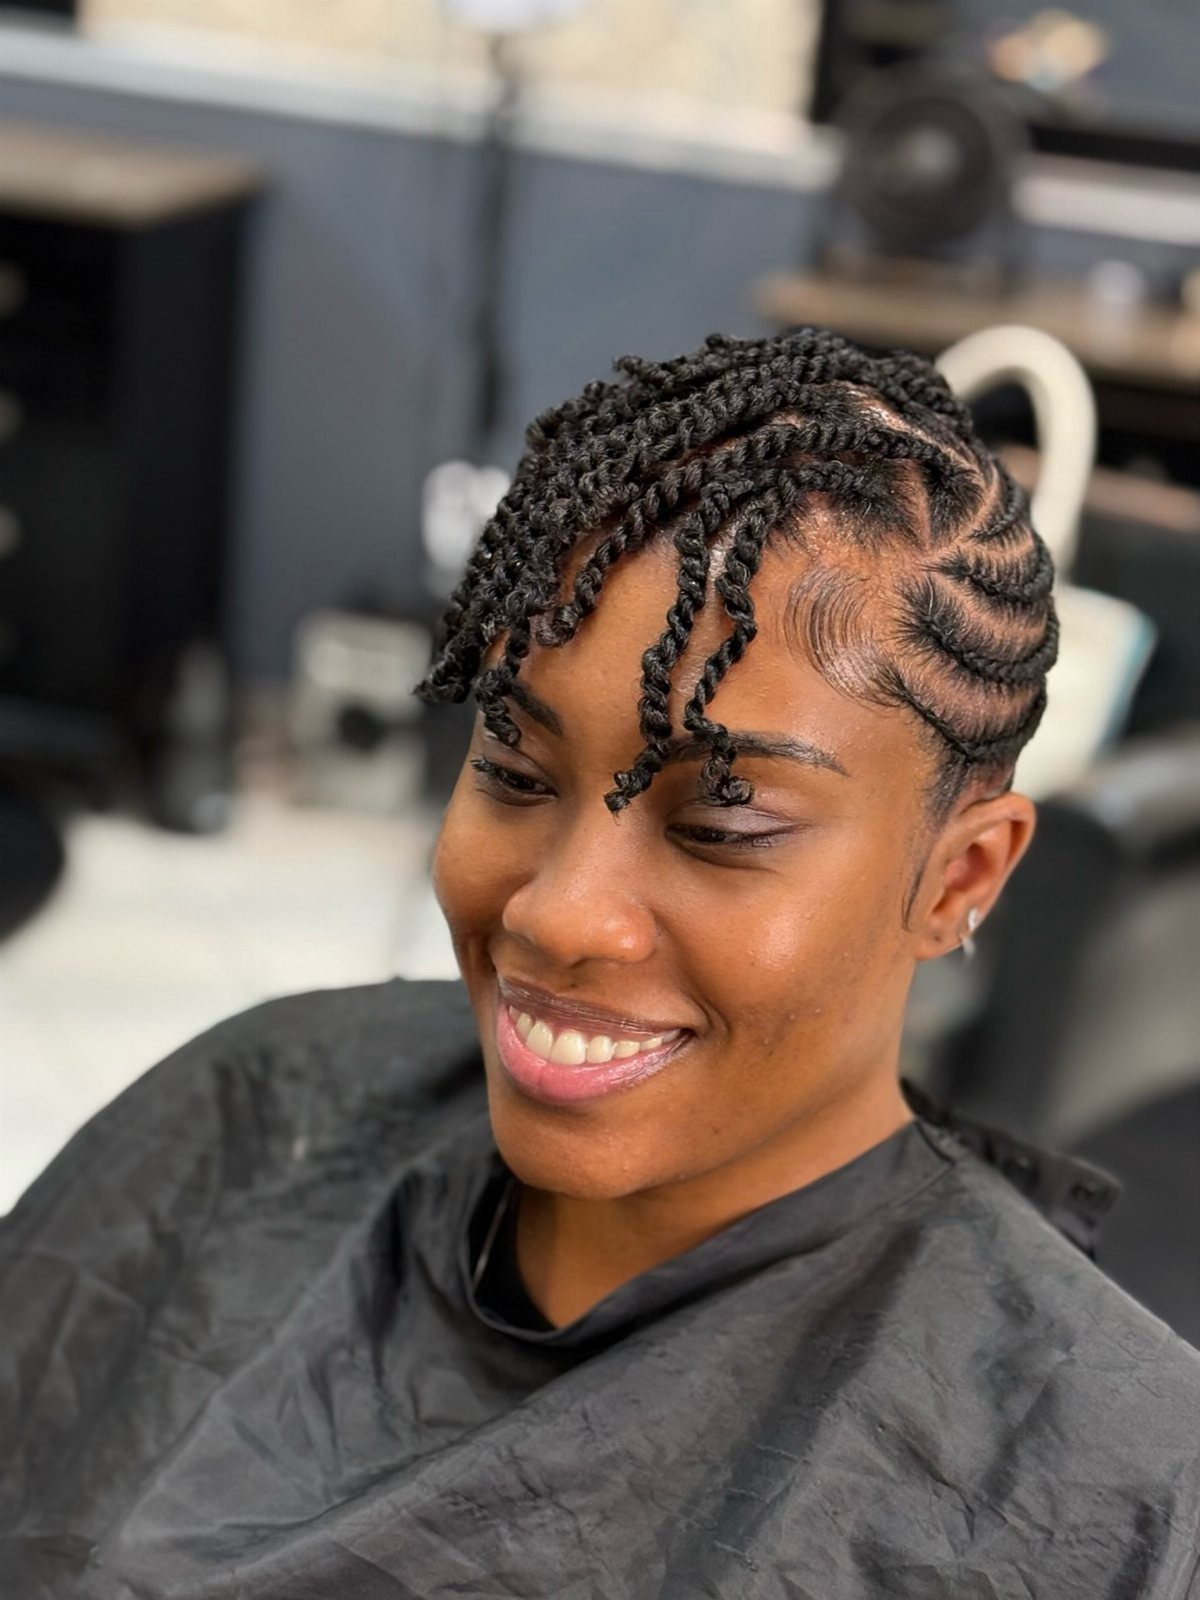
Flat twists run along the sides of the head and meet at the center, where they are pinned or twisted upward to form a raised ridge. The shape mimics a mohawk without shaving or slicking the sides completely flat.
The height at the center balances a round face, and the structure keeps hair off your ears and neck.
The flat sides stay smooth, so the contrast between the sides and the center makes the ridge look taller than it is.
Twist the sides first, then pin the center twists upward, layering them to build height.
16. Heart Cornrow Twists
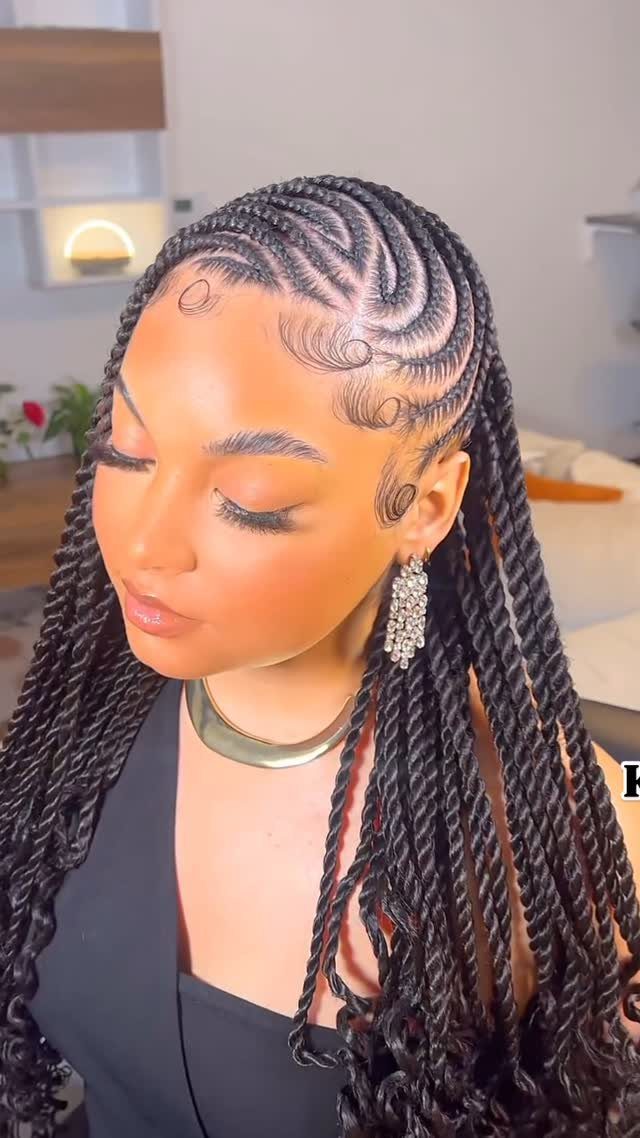
The heart pattern sits at the front hairline, formed by cornrows that curve and meet at the center, then long twists hang from the rest of the head.
The heart reads as a detail, not the whole style, so it adds a playful touch without looking costume-like.
This works if you want a protective style with a pattern that shows when you wear your hair down or pulled back. The heart stays visible either way, and the twists give length and movement.
Cornrow the heart shape first, securing the ends where the pattern meets, then twist the remaining sections.
17. Bohemian Marley Twists
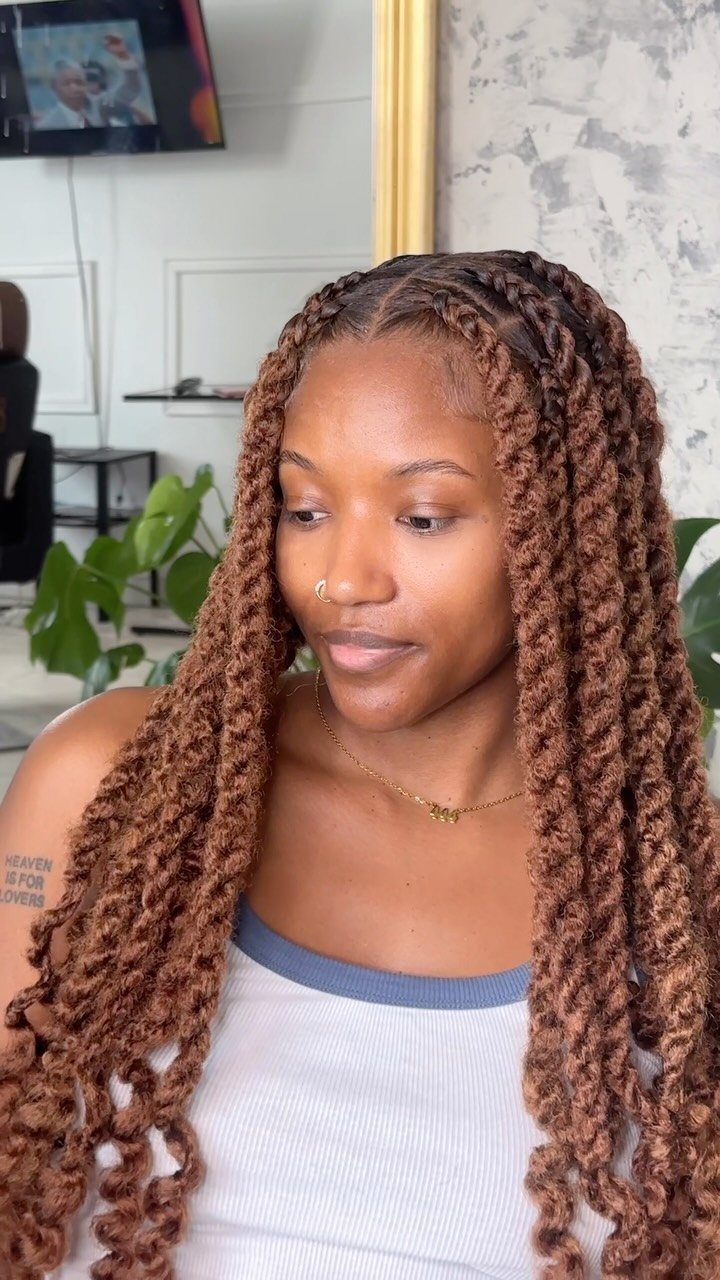
The twists run smooth for most of their length, then loose curls are left or added at the ends. The contrast between the structured twist and the free curl gives the style a softer, less uniform finish.
The curls lighten the look and hide any frizz that develops at the tips, so the style stays wearable longer. If the curls flatten, mist them with water and scrunch to bring the texture back.
Twist with Marley hair, leaving the last few inches untwisted, then set the ends on rods or braid them out to form the curls.
18. Havana Twists
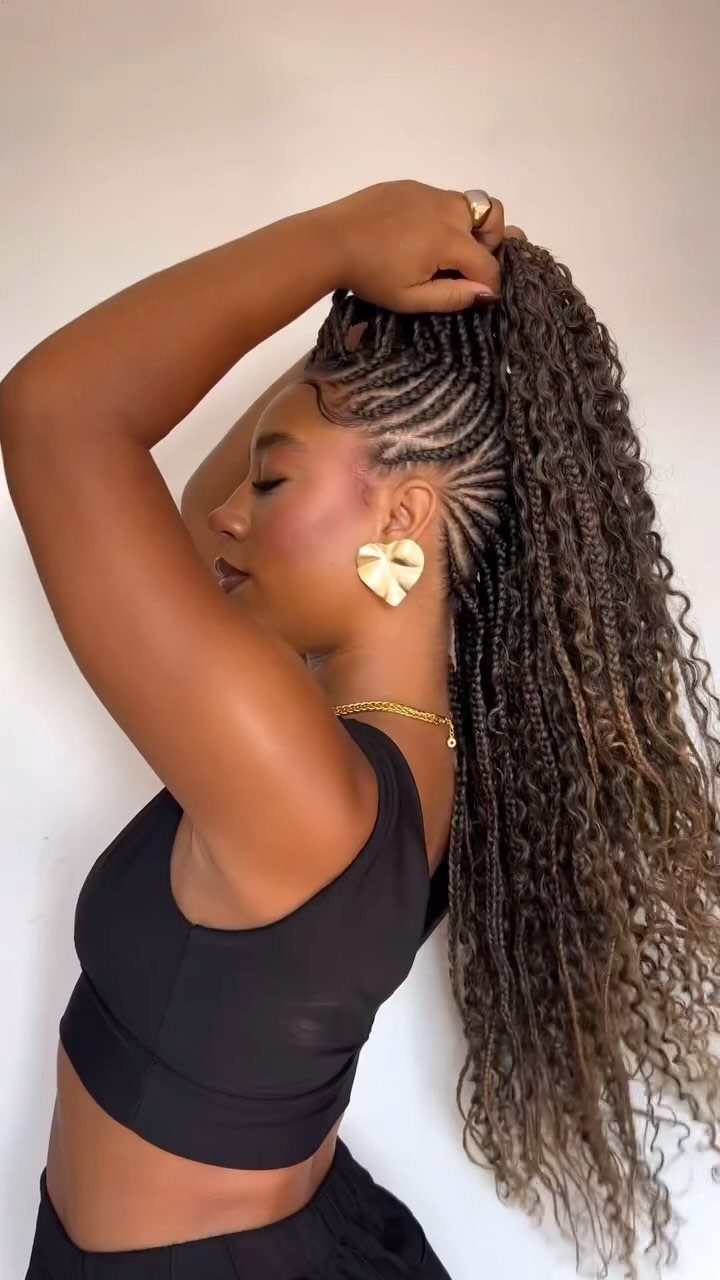
Havana hair extensions are wrapped into twists that sit thick but light, with a matte finish that looks close to natural texture.
The weight is less than you would expect from the size, which makes this easier on the scalp than other chunky twist styles.
The texture holds up in humidity, and a scarf at night keeps them looking fresh. If you want a protective style that reads relaxed rather than polished, the Havana finish gives that without looking messy.
Wrap at night and refresh the hairline with edge control if the front starts to lift.
19. Knotless Curly-End Twists
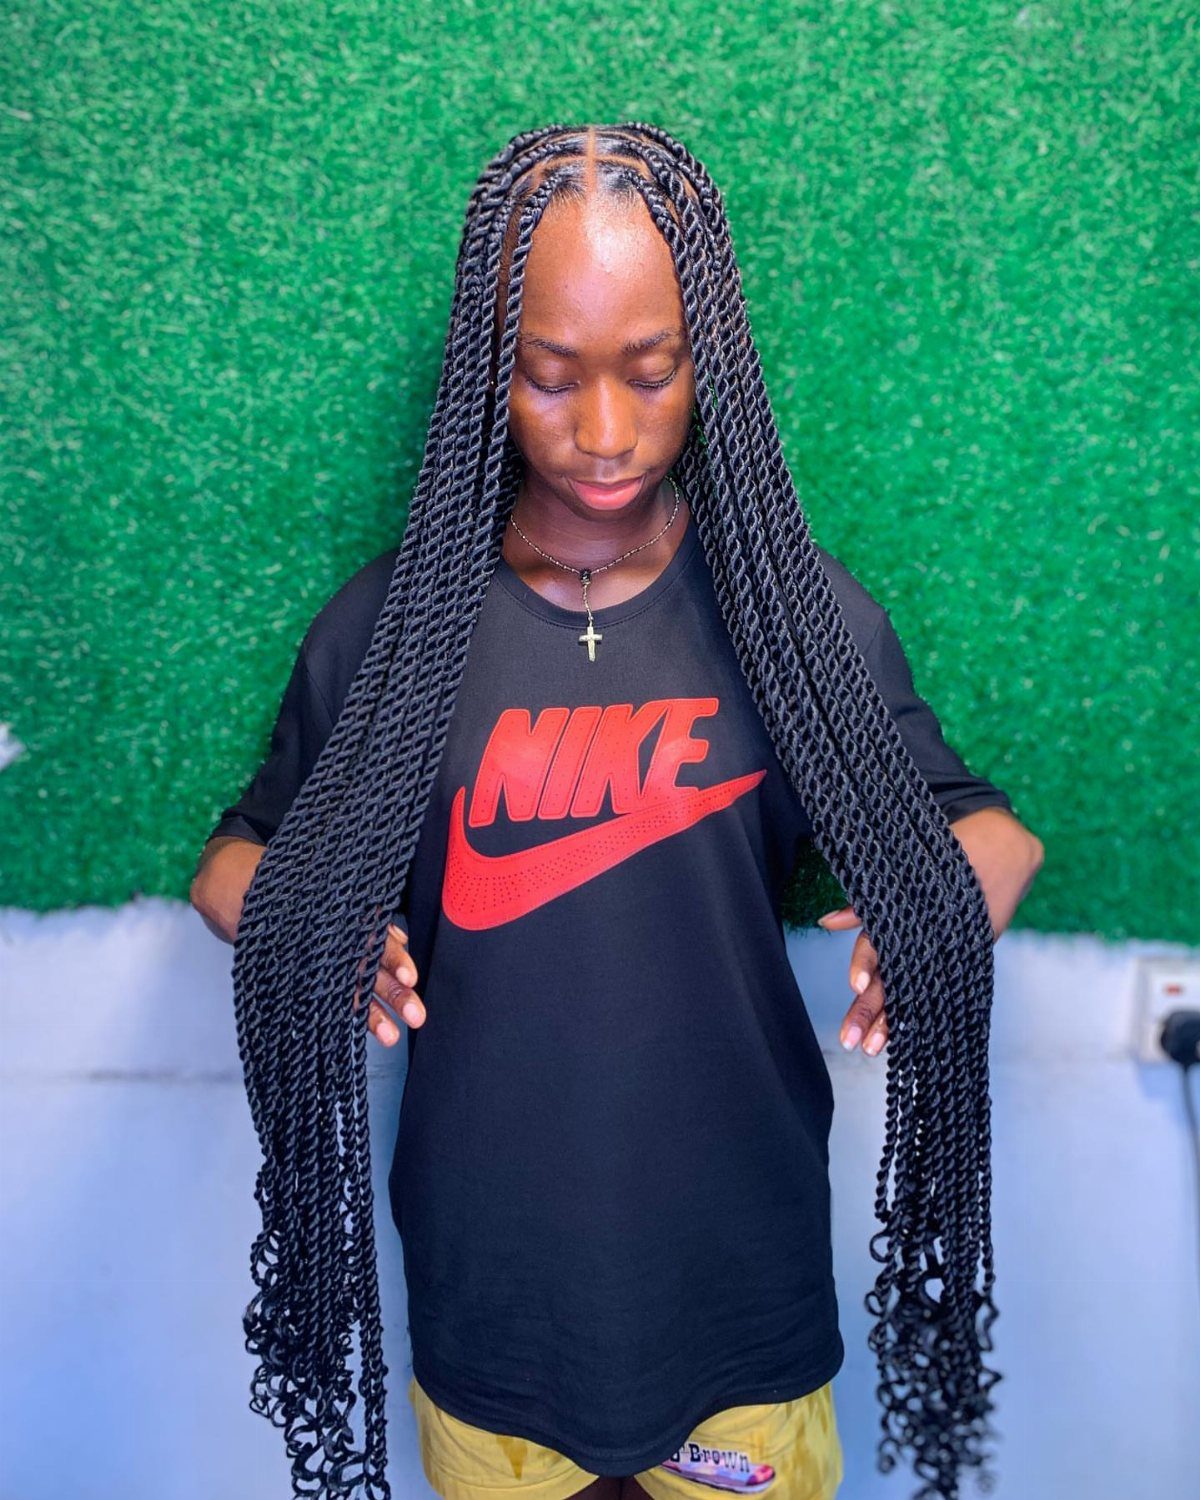
The twist starts gradual at the root, with extension hair fed in slowly so there is no bulky knot where the twist begins. The length stays smooth, and the last few inches are left loose and curly.
The gradual start puts less tension on the scalp than traditional box braids, which makes this easier to wear for weeks at a time. The textured tips add bounce and keep the style from looking too rigid.
Use a silk or satin scarf at night so the ends stay separated. A light mist and a quick scrunch will revive flat ends between washes.
Twists are quicker to complete than braids (and easier to take out), and they’re a fantastic option for protecting your natural hair with minimum tension while maintaining moisture.
20. Scalp Braids and Twisted Bob
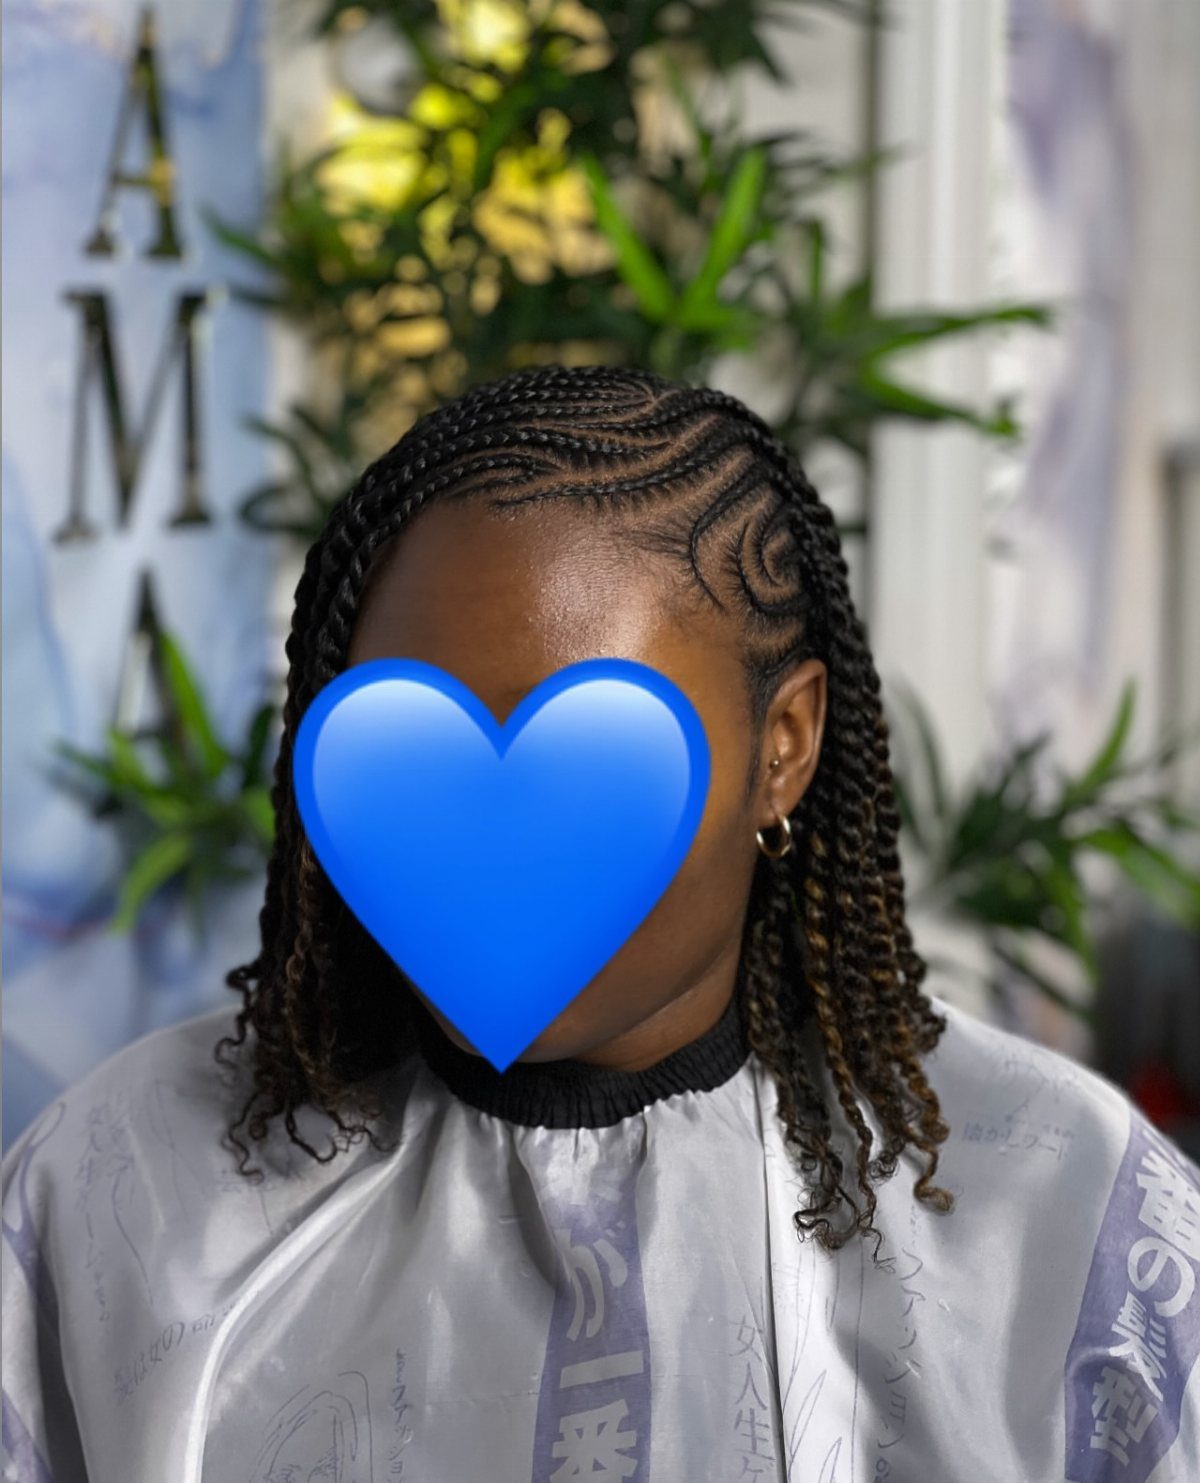
Cornrows or mini braids sit flat along the front and sides of the head, then transition into short, hanging twists that form a bob shape at chin or shoulder length.
The braided section keeps the front smooth and off the face, while the bob gives volume and movement where the twists hang. This reads as polished at the scalp but relaxed at the ends.
Braid the top and sides first, then twist the remaining sections to the desired length and trim if needed to even out the bob line.
21. Half-Pony Spring Twists
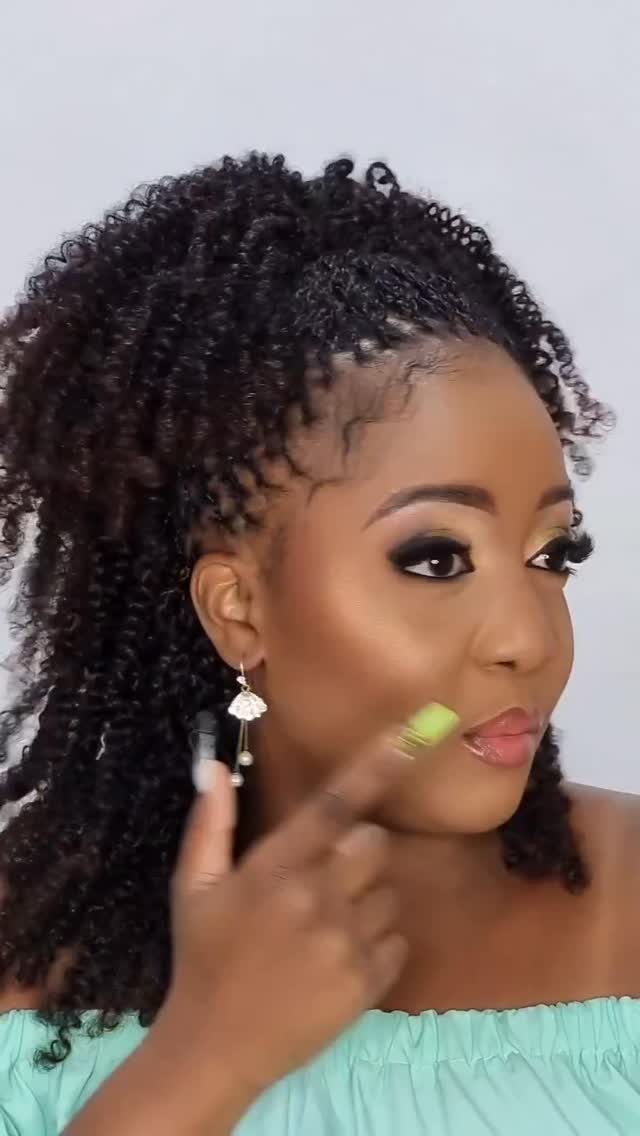
Spring twists are gathered into a ponytail at the crown, with the rest left down. The twists have a bouncy, coiled texture that holds its shape without heat.
The half-up style keeps the front off your face and shows the curl definition at the crown, while the loose twists still move. Spring twists are light, so the ponytail sits without pulling.
Gather the top section and secure with a covered elastic. If the ponytail flattens overnight, fluff the coils with your fingers to restore the shape.
22. Mohawk with Cornrows and Twists
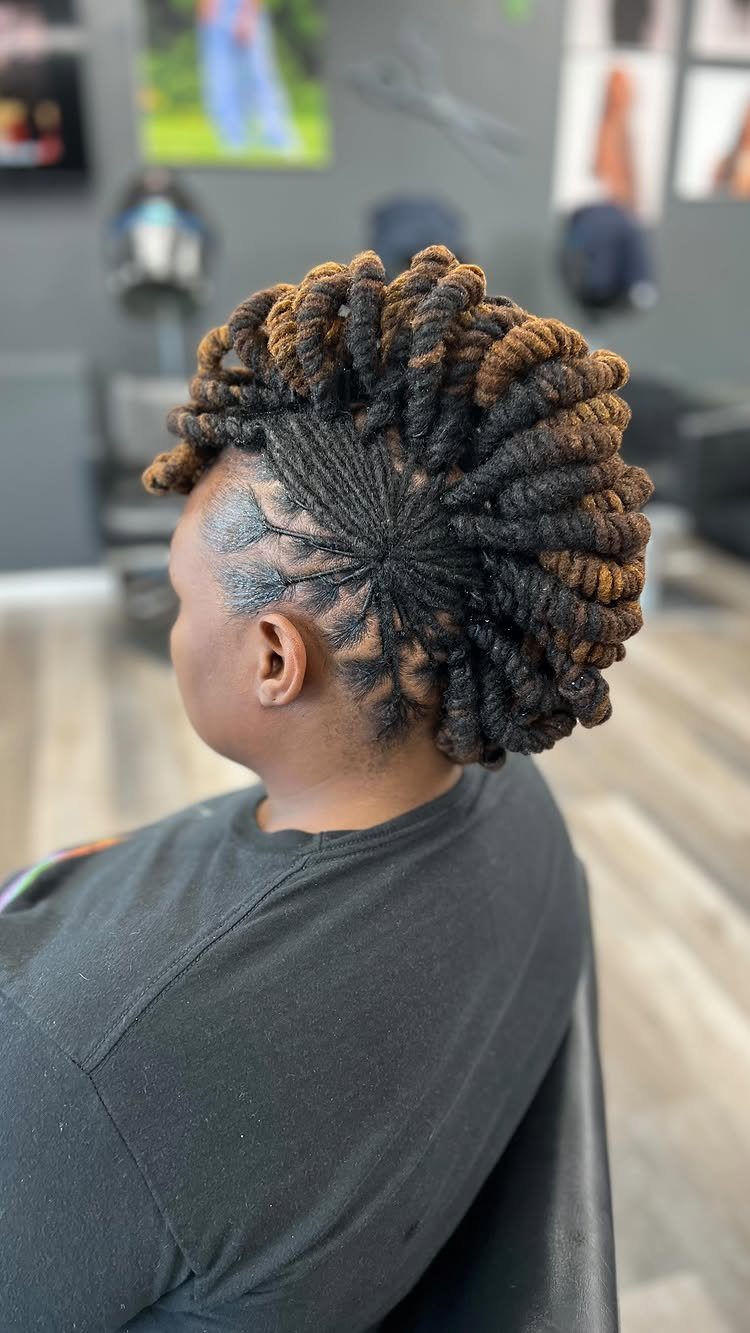
Cornrows run flat along both sides of the head, and the center section is twisted into thicker, raised twists that form a ridge from front to back.
The contrast between the flat sides and the raised center gives the mohawk shape without cutting or shaving.
The cornrows keep the sides smooth and tight, so the center twists stand out. It delivers drama and dimension when you need more than flat braids alone.
Cornrow the sides first, then twist the center sections and pin or leave them free standing, depending on how much height you want.
23. Flat Twist Headband
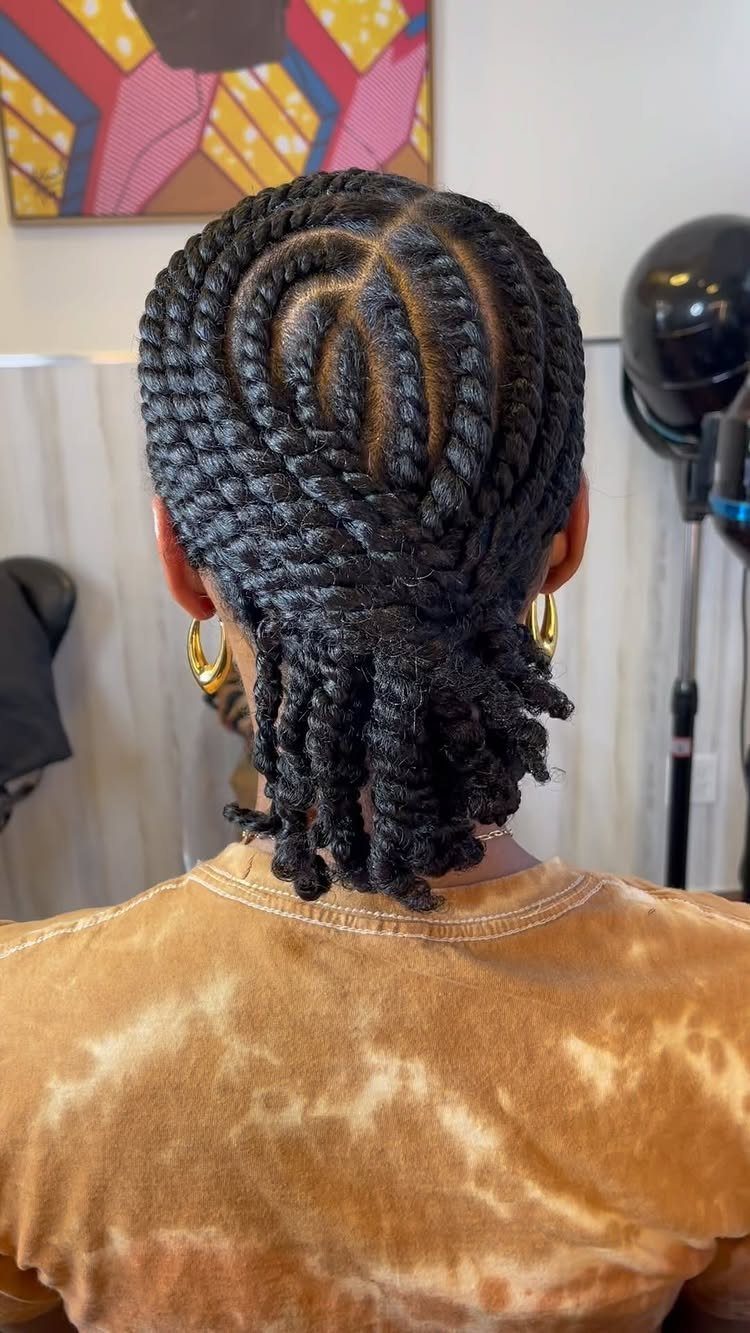
A row of flat twists runs along the hairline from ear to ear, forming a headband across the front. The rest of the hair is gathered into an updo or left down.
The twist headband frames the face and adds a finished edge to the style without using an actual accessory. The headband placement frames your face while the rest of your hair stays tucked and protected.
Twist the front section along the hairline first, curving it from one side to the other, then gather the remaining hair into a bun or twist the rest separately.
24. Half-Up Jumbo Twist Bun
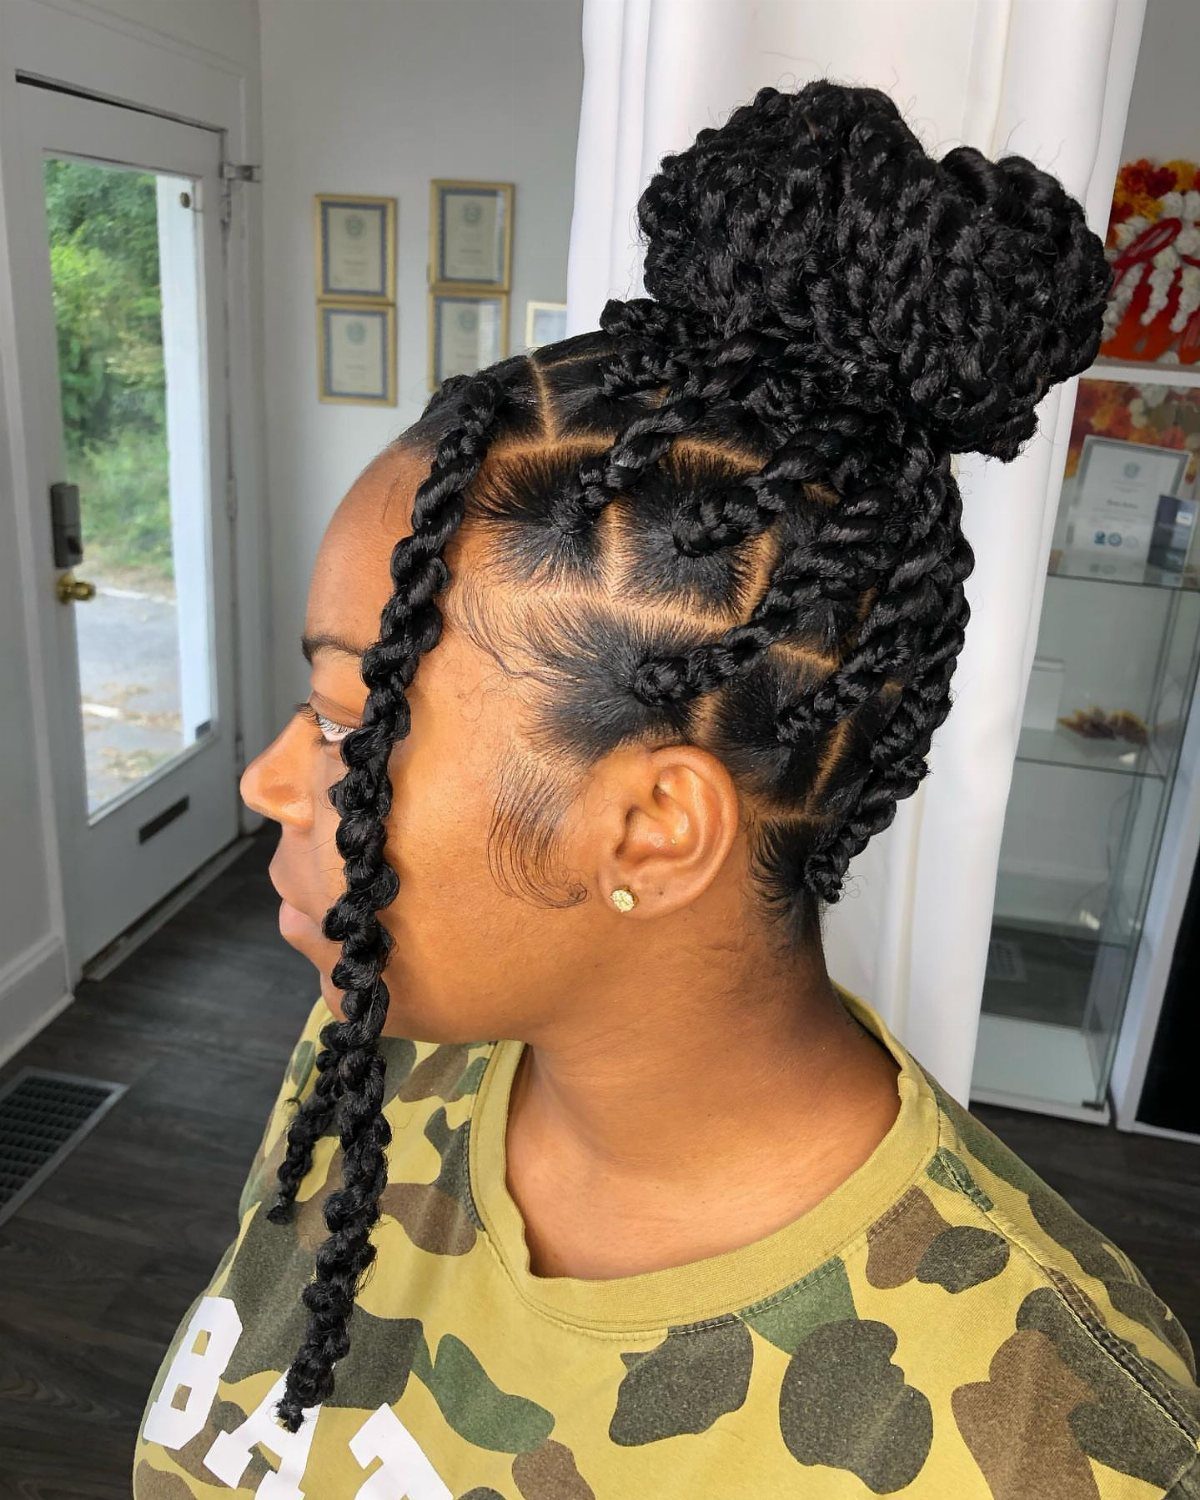
The top section of jumbo twists is gathered and wrapped into a bun, and the rest of the twists hang loose. The bun sits at the crown or higher, so it stays visible from the front and side.
You get length in the back and a clear face without cutting off all the volume. Jumbo twists are thick, so the bun looks full without needing much height.
Pull the front section up to your crown, coil it around itself and secure with bobby pins. If the twists are heavy, secure them with a second elastic before pinning.
25. Side-Swept Thick Twists
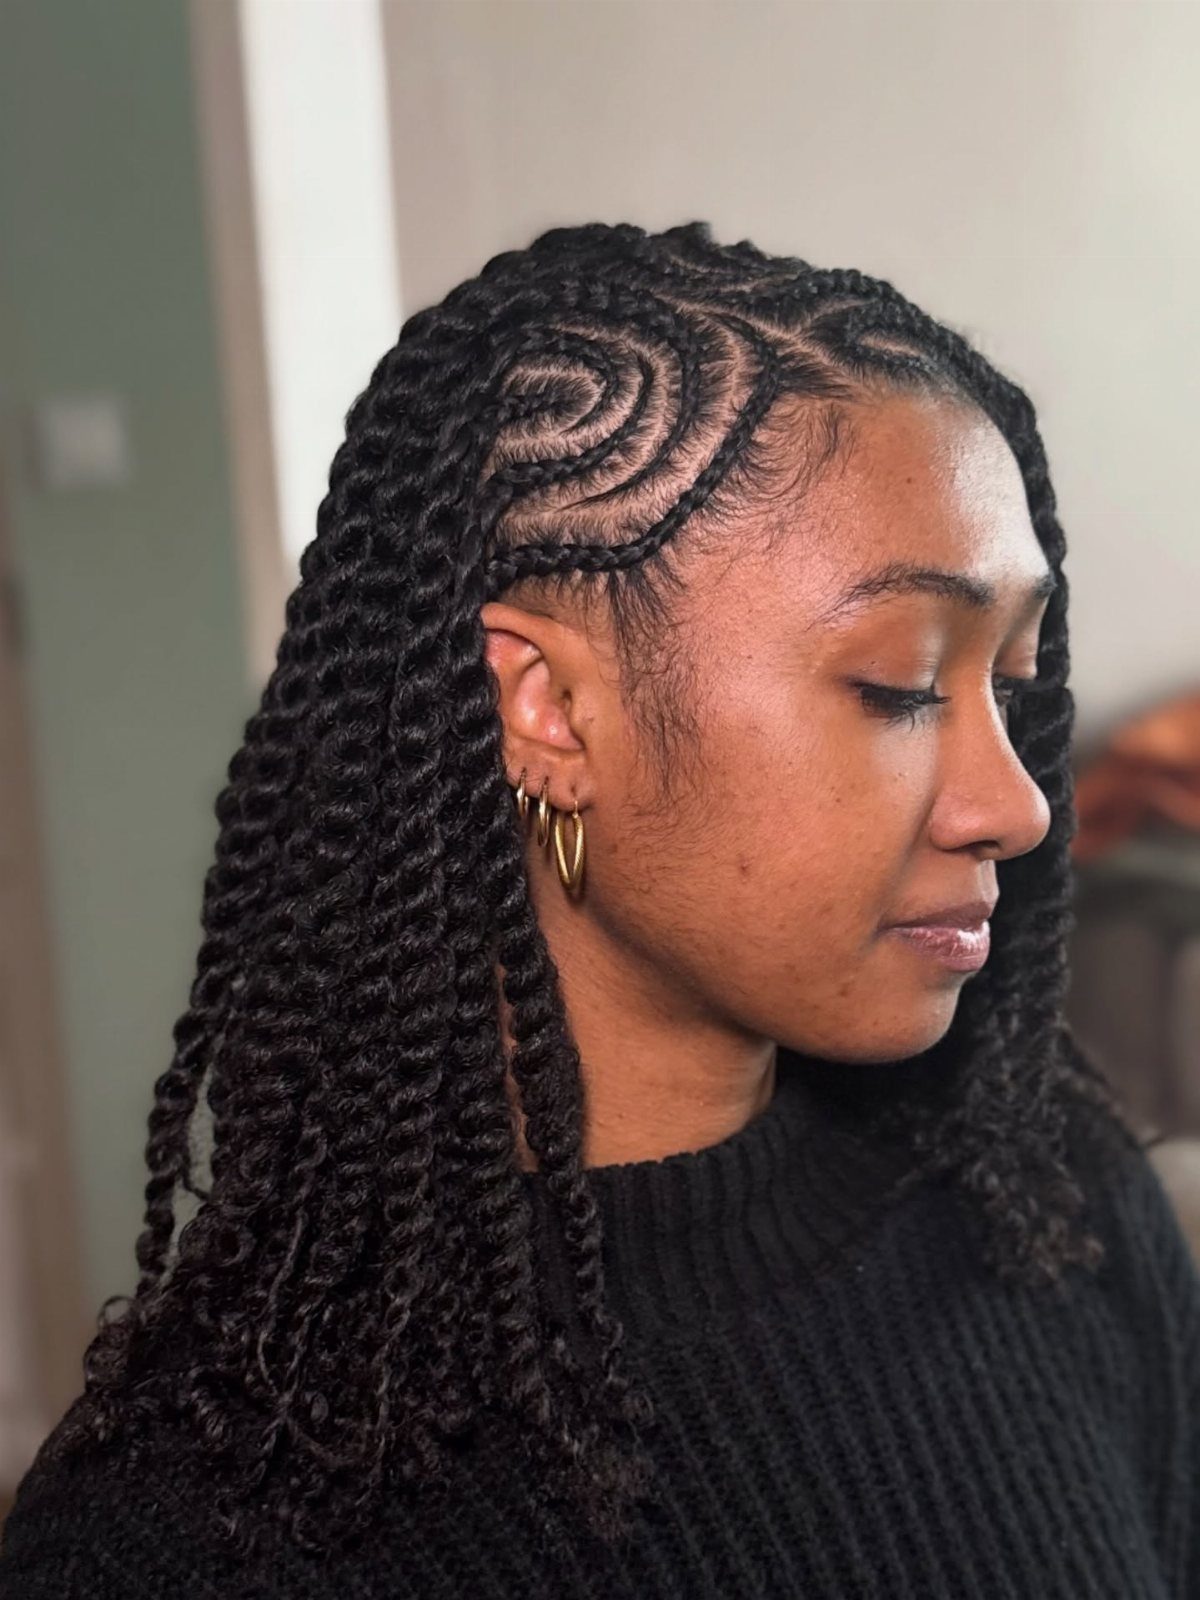
All the twists fall to one shoulder, leaving the opposite side of the neck and face clear. The weight gathers on one side, which shows off the scalp detail and gives an asymmetric silhouette.
A side sweep keeps your hair off one ear and shoulder, so earrings and necklines read clearly. If you wear the style this way often, alternate which side carries the weight so the roots do not strain in one direction.
Sweep after the twists are installed, not before. Pin the twists behind one ear or let gravity hold them in place.
26. Long Classic Twists
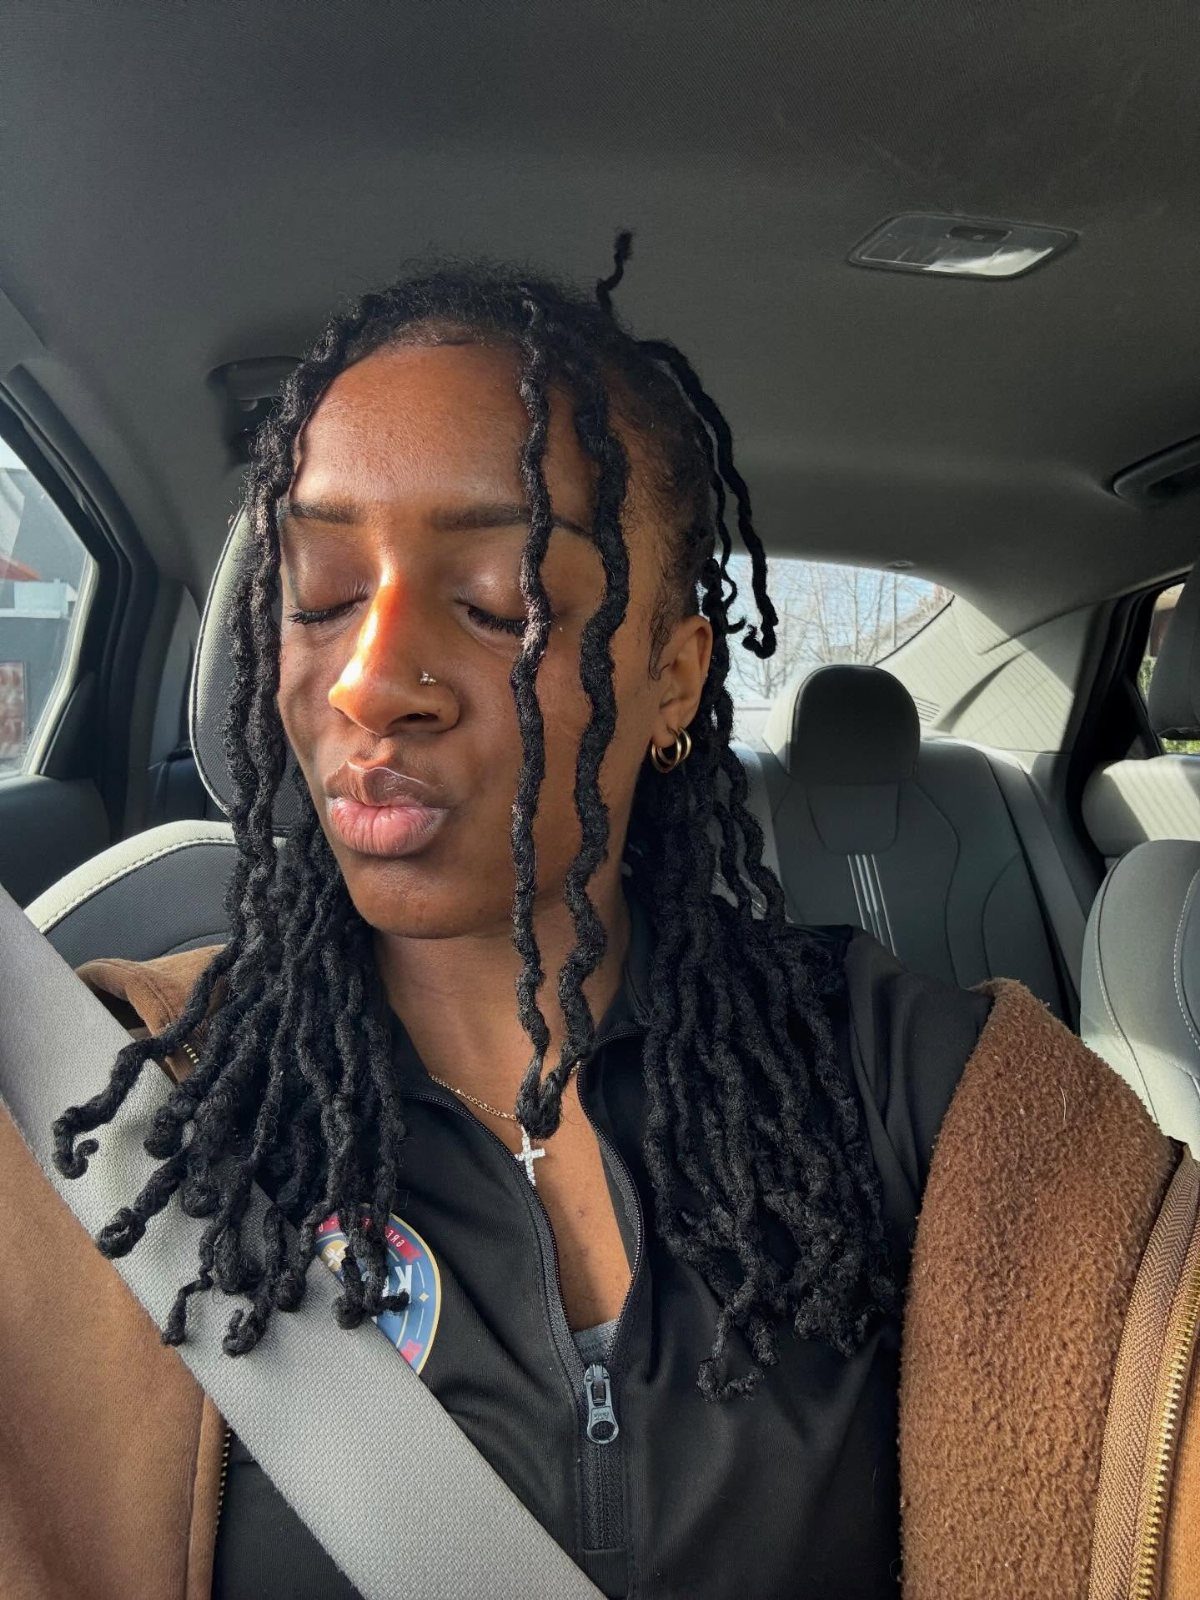
Two-strand twists hang past the shoulders with minimal styling. The length and thickness come from extension hair or from natural hair with enough density to support long twists.
Length gives options.
Wear them down, pull them into a ponytail, or drape them over one shoulder. The thickness reads as intentional rather than fine or wispy, and the weight helps the twists hang straight.
Moisturize the length every few days to keep the twists from drying out, and wrap at night to preserve the smooth finish.
27. Spring Twists
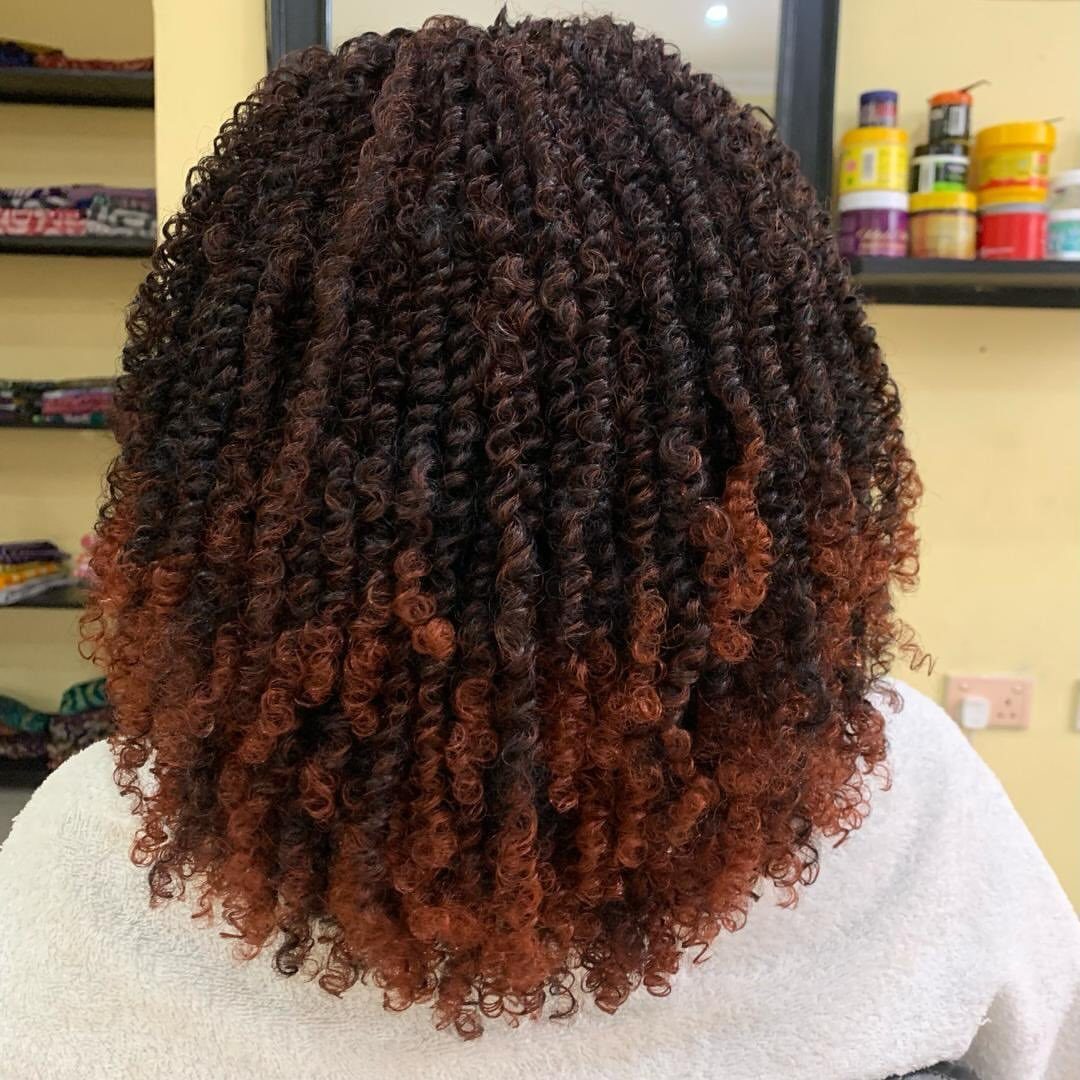
Coiled extension hair creates twists that spiral and stand out from the head rather than hanging flat. The texture gives volume without length, and the rounded shape fills out around the crown and sides.
The coils bounce when you move, and the texture holds up through sleep and humidity. A light spray and finger lift will restore any coils that lose definition.
Install takes longer than straight twists because each section is twisted and then coiled, but the style lasts weeks without needing daily restyling.
28. Curly Twists with Bangs
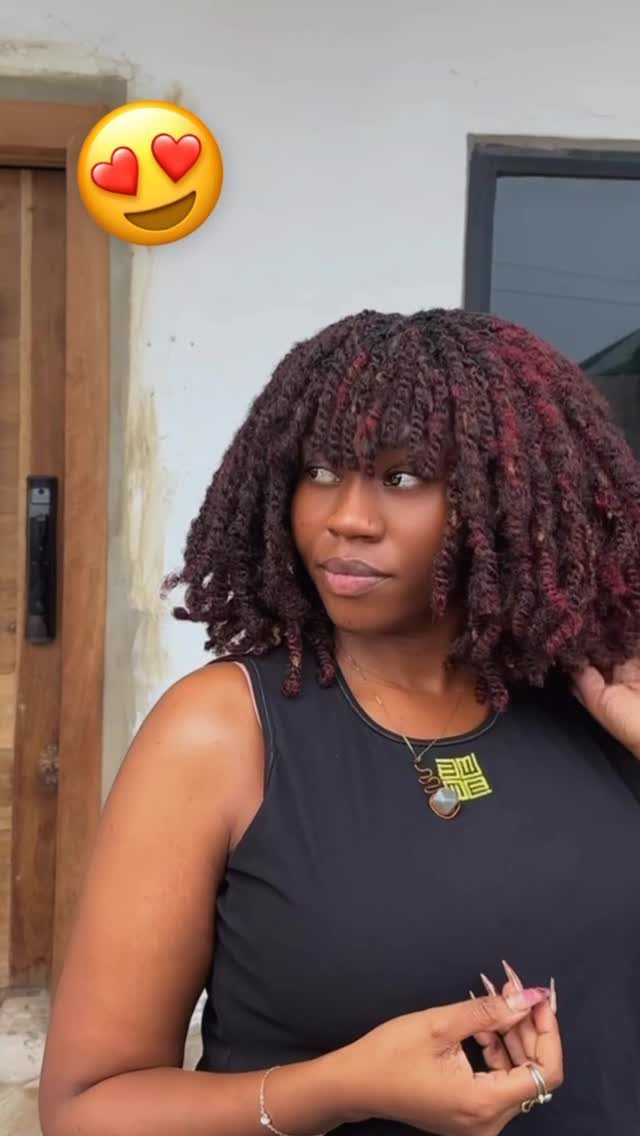
Twists stop at shoulder length, with a few sections left short across the forehead to form bangs. The bangs soften the hairline and frame the eyes.
If your forehead is high or you want to change the face shape without cutting, bangs shift the proportions. The twist texture keeps them from sitting flat, so they stay visible rather than disappearing into the rest of the style.
Cut the bangs after the twists are installed so you can see the finished length and adjust to match your face.
29. Twists with Scalp Braids
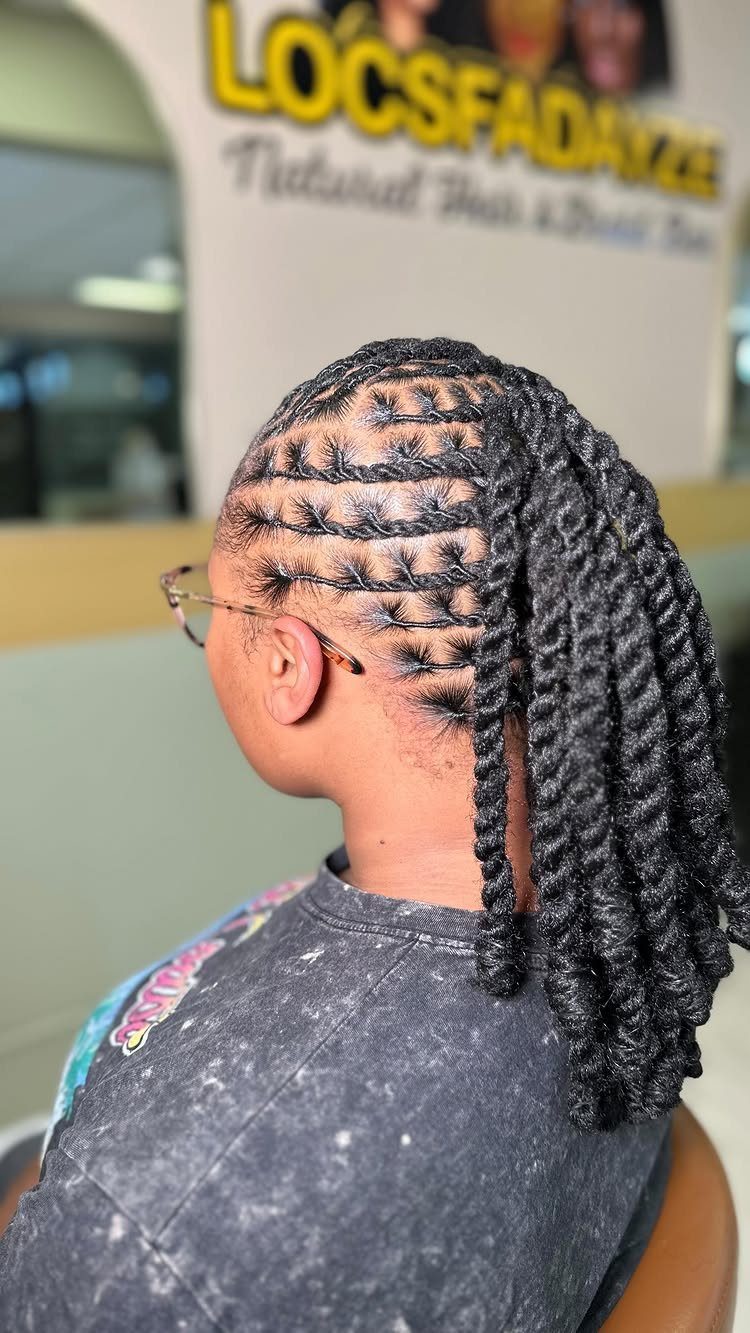
Cornrows sit flat along the scalp in a curved or straight pattern, then transition into long twists that hang free. The braided section gives structure at the top, and the hanging twists add length and movement.
The contrast between the flat scalp and the loose twists gives dimension, and the braided detail stays visible when the twists are worn down or pulled back.
The scalp braids also anchor the twists so they hold longer without needing touch-ups at the roots.
The braid runs close to the scalp, and the twist picks up where it ends.
30. Beaded Twists
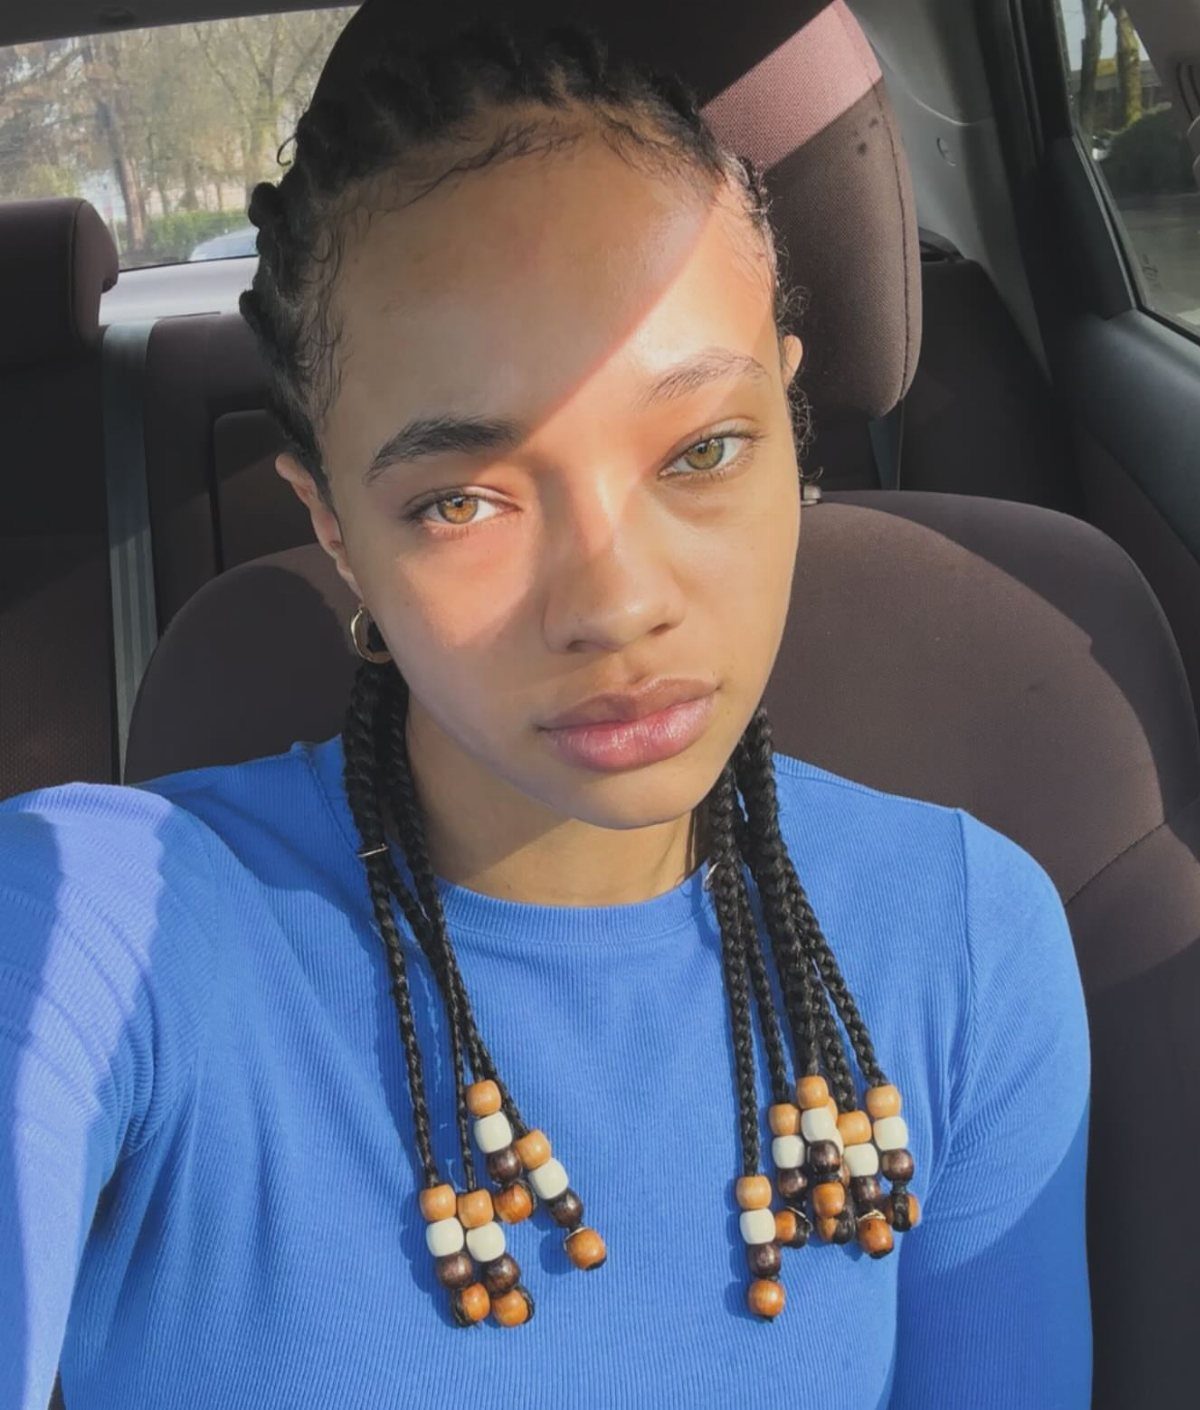
Beads slide onto the ends of the twists, adding weight, color and sound. The beads can match the hair or contrast, and they keep the ends sealed so the twists do not unravel.
Beads are functional and decorative.
They hold the twist closed at the tip, which extends the life of the style. Metal beads click when you move, plastic or wood beads stay quiet.
Thread the beads before you seal the twist, or slide them on afterward and crimp the end to hold them in place.
31. Twists with Butterfly Clip
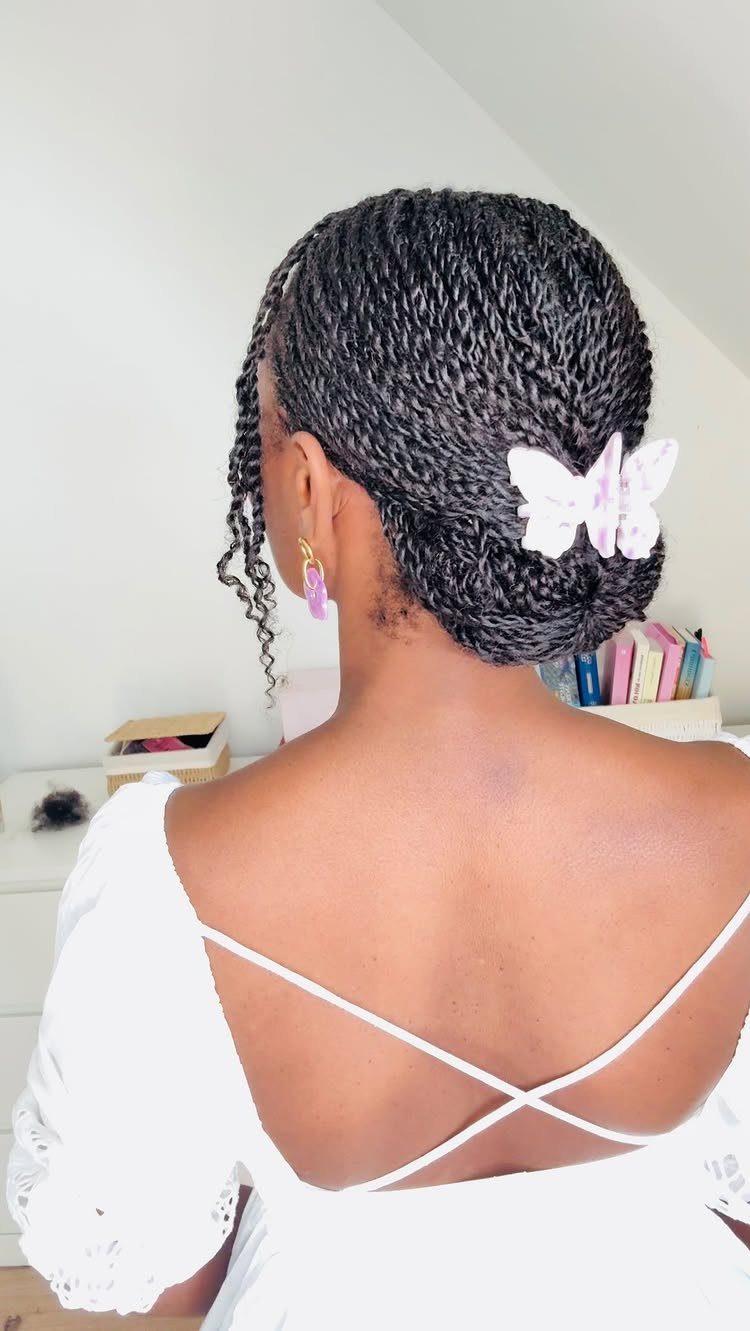
The butterfly clip gathers the twists into a low bun at the nape, holding them in place without heat or pins. The clip does the work, so the style takes seconds to set up and pull apart.
A large claw clip works the same way if the twists are thick or long. The pale color here softens the look, but a dark or metallic clip reads more polished.
Gather the twists at the base of the neck, twist them loosely if you want, then clip them in place. If the clip slips, try one with deeper teeth or position it slightly higher where the twists have more grip.
32. Twists Gathered on Top
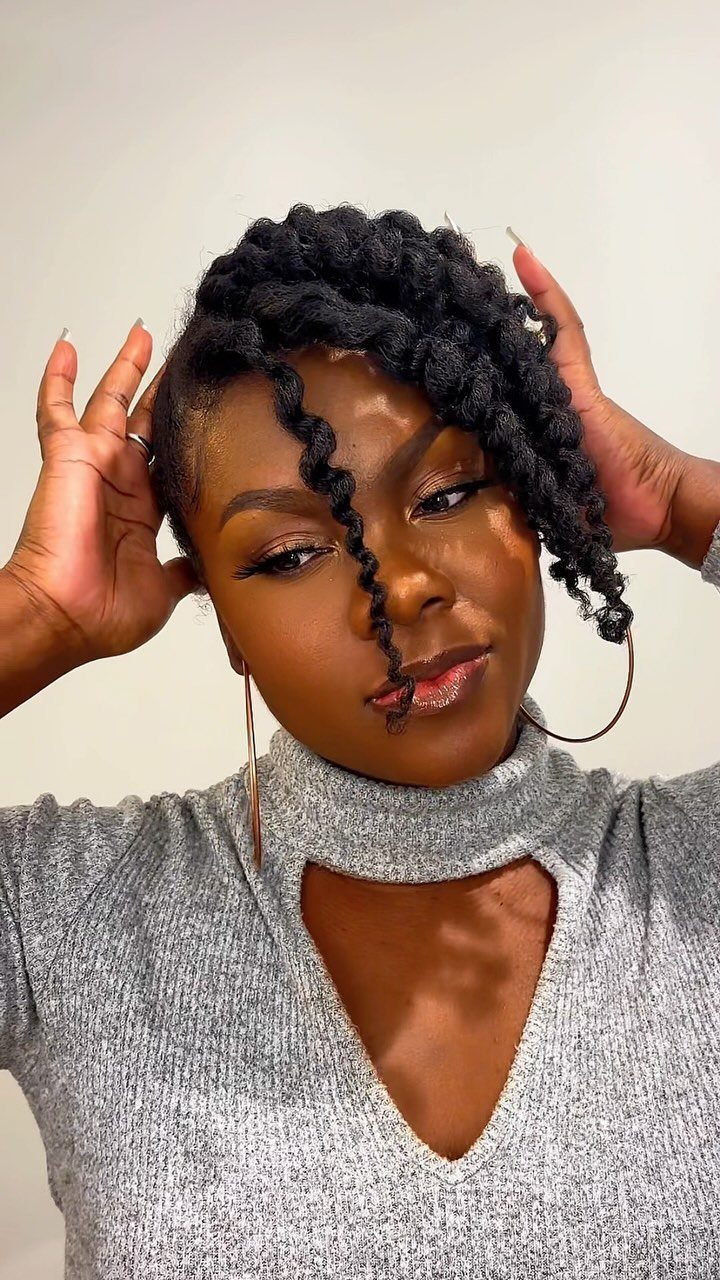
Twists are gathered high on the head, pinned or tied in place, with a few left loose to fall over the forehead and ears.
The height opens up the neck and shows earrings, and the loose strands keep the style from looking too severe.
The loose pieces frame the face without covering it, so the balance between structure and softness stays visible. If you want more definition at the hairline, pull out one or two additional twists on each side after securing the top.
Gather the bulk of the twists at the crown, leaving a few out in front, then secure with an elastic or pins. The loose twists can be shorter or longer depending on what you left out.
Twist-out Upkeep and Duration
A twist-out can hold for about a week if you keep moisture in and retwist large sections as they loosen.
Extension-based twists last longer. Senegalese, Havana and Marley twists can stay in for several weeks if you wrap them at night and keep the scalp clean.
The shorter the wear time, the less you need to fuss with it. If you plan to unravel after 3 days, a light cream at the start is enough.
For styles that stay in past 2 weeks, add a spray bottle and edge control to your routine so the hairline stays smooth and the twists don’t mat.
Protective Styling and Tension
Twists qualify as protective because they tuck the ends away and cut down on daily combing, which reduces breakage from manipulation. The style holds moisture better than loose hair left out in dry air.
Tension matters more than size.
Medium twists spread the weight without sitting heavy on the scalp, which keeps tension low enough that you can wear the style for weeks without damage.
If a twist feels tight when you move your eyebrows or smile, it is too tight. Take it down and redo it looser, or switch to a style that distributes the pull across more of the scalp.
Preparing and Drying Twists
Twisting soaking-wet hair takes longer and the sections slip, so towel off and let your hair air-dry partway if it’s dense.
Part hair the way you want it to fall after the twists come out, because the part sets the direction. A side part during the twist gives you a side part in the twist-out.
Keep the twists in until the hair dries all the way through.
If you sleep on damp twists, the texture flattens and the curl pattern loosens before it sets. Twisting during the day instead of at night gives the hair time to dry before bed.
Frequently Asked Questions
What are some good natural hair braid styles for ladies?
Flat-twist updos, criss-cross twists, and heart cornrow twists blend braided sections with hanging twists for a finished look that protects your hair.
The braids lie smooth against the scalp while the twists hang free and swing when you move. Tie it down with a satin scarf before bed and the style holds through the week.
What are some protective hair twist styles for natural hair?
Senegalese twists, Havana twists, and mini twists protect natural hair by keeping it tucked and reducing manipulation for weeks at a time.
The extensions or tight twisting technique shield your hair from breakage and environmental stress. Cover it at night and touch up your edges in the morning to keep the style crisp.
How to twist your hair with fake hair?
Section your hair evenly, then feed synthetic extension hair into each section as you twist from root to tip, adding small amounts as you go to keep the twist uniform.
The extensions wrap around your natural hair and give extra length and thickness. Use Marley, Havana, or kanekalon hair depending on the texture you want.
What are twists and twist braids?
Twists refer to any style where 2 strands of hair are wrapped around each other, either hanging loose or styled into updos and buns.
Twist braids specifically use braiding techniques like flat twisting or rope twisting, often with extensions added for length. Both protect natural hair and last longer than loose curls.
How to twist hair using different techniques?
Two-strand twists loop 2 pieces of hair around each other all the way down, flat twists pick up new hair from the scalp with each turn, and rope twists wind extensions tight for a sleek rope effect.
The technique you pick changes how the style sits and how long it lasts. Flat twists lie smooth against the scalp, while two-strand twists hang loose and give volume.
How to do two-strand twists on natural hair by yourself?
Divide a section of clean, moisturized hair into 2 equal parts, then twist them around each other from the root down to the ends, keeping tension even as you go.
Twisting on damp hair gives tighter definition, while dry hair produces a softer, wavier result. Work in small sections if you want fine twists, or larger sections for a quicker install and chunkier look.





